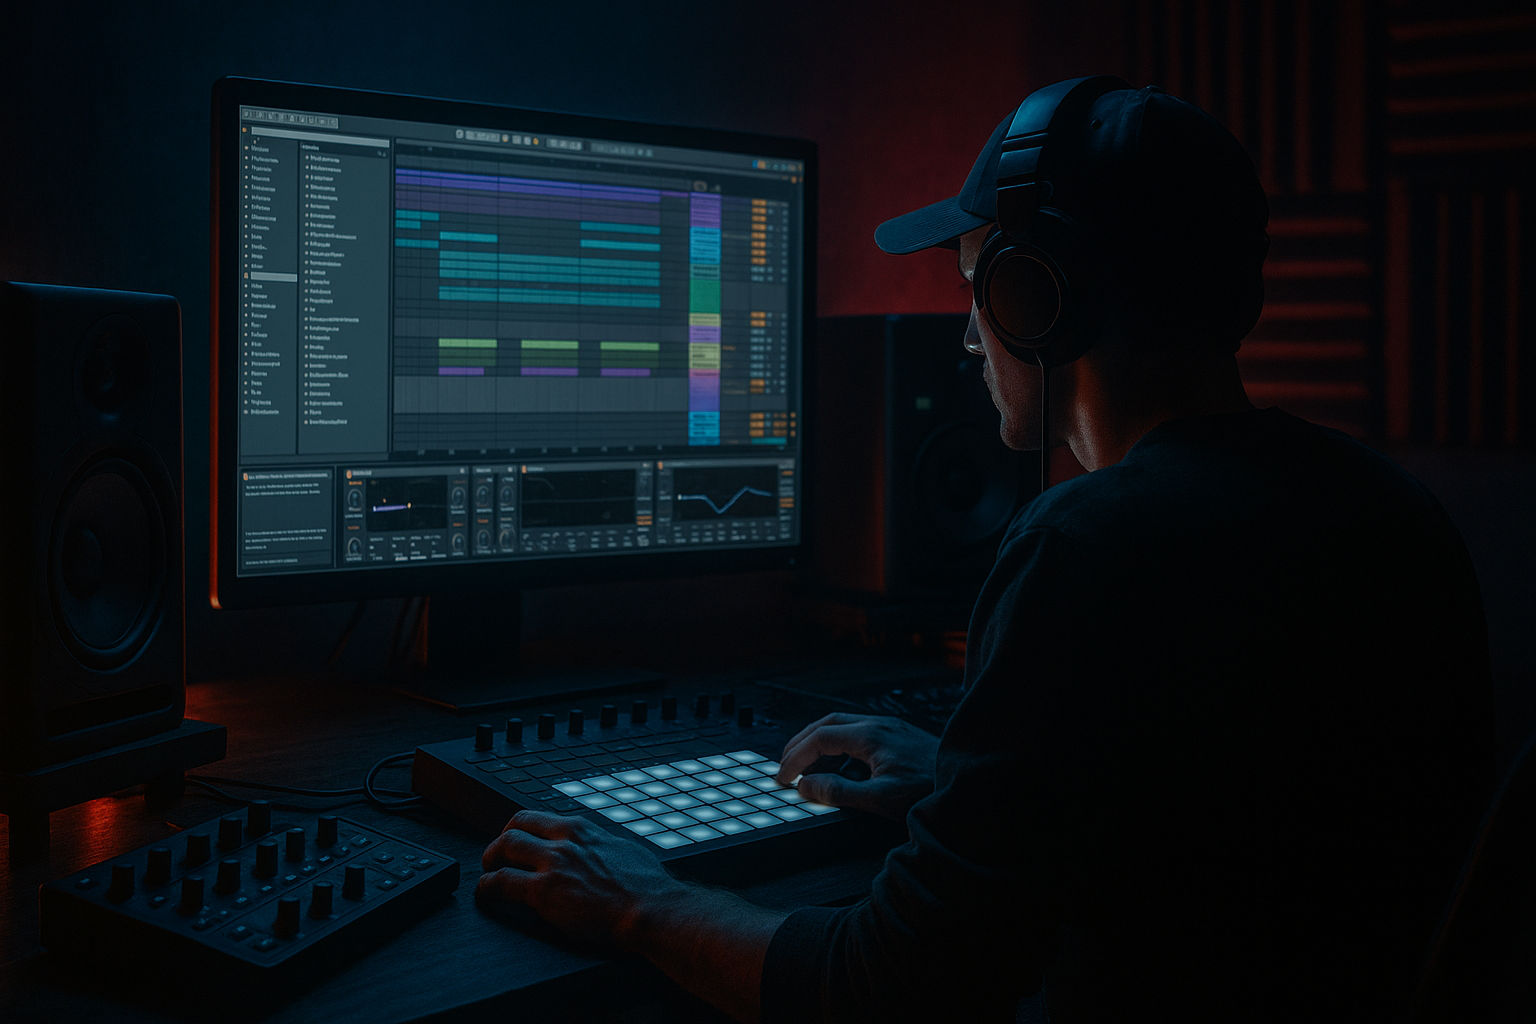
Main tutorial
Lesson Overview
This lesson is about building a rewind moment that feels DJ-aware, oldskool, and dangerous — the kind of pause, sucked-back energy, or fake-out turn that makes a jungle/DnB room lean in before the next hit lands. In Ableton Live 12, the goal is not just to “reverse something”; it’s to shape a rewind as a structural event with enough rhythm, tone, and space to work in a real track.
This lives best in intros, pre-drop tension, breakdown-to-drop transitions, and first-to-second drop switch-ups. For jungle, oldskool DnB, ragga-influenced rollers, and darker atmospheric cuts, a rewind moment does two jobs at once: it gives dancers a recognisable cue, and it gives the DJ a clean, musical signal that the next phrase is about to hit. Technically, it also creates contrast by temporarily stripping forward momentum, which makes the re-entry feel harder.
By the end, you should be able to create a rewind that sounds intentional, rhythmic, and mix-ready, not like a random reverse effect pasted over your arrangement. A successful result should feel like: the track briefly gets sucked into a controlled backspin, the groove survives the stop-start tension, and the return lands with real authority without collapsing the low end or the phrasing.
What You Will Build
You’re going to build a DJ-friendly rewind moment using stock Ableton Live tools: a reverse/re-sampled drum-and-fx phrase, a tension tail, and a phrase-aware return that fits jungle/oldskool DnB structure.
The finished result should have:
- Sonic character: dusty, tape-worn, slightly damaged, with break fragments, filtered ambience, and a short rewind smear rather than a glossy EDM riser
- Rhythmic feel: bar-aware, with a clear pullback into the turn and a landing that still respects the grid
- Role in the track: a transition device that either resets the groove, fakes a dropout, or announces the next section
- Mix readiness: clean enough to sit before a drop without masking the kick/snare/bass re-entry
- Success criteria: if you mute the bass and drums around it, the rewind still reads as a deliberate musical event; if you unmute the full arrangement, it helps the section change feel bigger, not cluttered
- Let the rewind imply the sub, don’t actually carry it. If the transition needs weight, give it low-mid attitude and transient detail, but keep the actual sub lane clean for the drop. That creates more perceived impact when the bass returns.
- Use a break fragment as the memory of the groove. A tiny reversed snare, ghost kick, or top loop slice makes the rewind feel like it belongs to the rhythm section, not like an isolated effect.
- Make the filter movement slightly asymmetrical. A perfectly smooth sweep can feel too polished. A subtle step or pause in the automation can give it that hand-spun, dubplate-ish tension.
- Print one version with more grime and one version cleaner. The grime-heavy pass can work for an intro or breakdown; the cleaner pass may be better for a busy drop transition. Keep both and choose based on arrangement density.
- Use the rewind to foreshadow the next bass character. If the second drop introduces a harsher reese or more distorted bassline, let the rewind carry a little of that tonal attitude in its mids so the change feels linked.
- Resample the transition if you want authenticity. A printed rewind often feels more like a performance than a stack of automation curves. In oldskool/jungle, that slightly committed feel can be the difference between “effect” and “moment.”
- Preserve kick/snare contrast. If the rewind sits too close to the snare brightness, pull some 2–5 kHz out of the transition layer so the drop snare keeps its bite.
- Use only stock Ableton devices
- Use one printed audio source and no more than three processing devices on the rewind track
- Make the rewind fit an 8-bar phrase boundary
- No sub frequencies below the low bass region in the rewind layer
- A single rewind phrase that leads into a drop or groove return, printed or bounced to audio
- One alternate version: either cleaner or dirtier than the first
- Does the rewind feel rhythmic, not random?
- Can you still hear the downbeat of the return clearly?
- Does the transition sound better with drums and bass than in solo?
- Does it feel like a jungle/oldskool DnB phrase cue rather than a generic reverse effect?
Step-by-Step Walkthrough
1. Pick the exact musical moment the rewind will serve
Start by deciding whether this rewind is for:
- a 32-bar intro transition
- an 8-bar pre-drop fake-out
- a 16-bar breakdown reset
- a last-bar turn into the second drop
For jungle and oldskool DnB, the best rewind moments usually happen at the end of an 8- or 16-bar phrase, where the listener already expects a structural shift. In Ableton, place a locator on the bar where the rewind starts and another where the next section lands. The rewind should feel like it belongs to the arrangement, not like an effect pasted after the fact.
Why this works in DnB: DJs and club listeners are tuned to phrase changes. A rewind that lands on the edge of an 8, 16, or 32 bar boundary feels “mix-aware,” which makes it more usable and more believable in a system.
What to listen for: the section should feel like it is about to turn a page. If the rewind happens too early, it sounds nervous. Too late, and it feels like a late edit rather than a structural cue.
2. Build a source phrase with something worth rewinding
Don’t rewind silence alone. Create a short source phrase from material that already has character: a break fill, a snare pickup, a vocal stab, a ghosted reese stab, or a texture hit. In jungle, the most effective source is often a 1-bar or half-bar drum/break fragment with a little top-end movement.
Two strong source options:
- Option A: break-led rewind — a chopped Amen-style phrase, snare drag, or tops fill
- Option B: atmosphere-led rewind — a filtered pad stab, vinyl noise burst, or vocal shard
If the track is more percussive and oldskool, choose A. If it’s darker and more atmospheric, choose B. You can also combine them, but only if each layer has a clear job.
Ableton move: duplicate the source to a new audio track and commit the phrase to audio before editing. Use the Consolidate workflow on the selected region so you’re editing a clean clip. If the source is MIDI, bounce it first so the rewind becomes a printed performance rather than a live synth liability.
Stop here if the source has no identity. If the phrase sounds generic before you reverse it, the rewind will just become a generic reverse.
3. Create the rewind by reversing the printed audio, not by over-processing the original
Take the printed clip and reverse it. In Ableton’s clip view, reverse the audio so the phrase plays into the turn. Keep the original forward version muted or duplicated on another track for comparison.
Then shape the reversed clip with Clip Gain and Fade so the beginning is not too abrupt. You want the rewind to pull backward, not to pop backwards.
Good starting points:
- Clip fade-in/out: short, just enough to soften the first transient edge
- Clip gain trim: usually -3 to -6 dB before further processing, so the reverse tail doesn’t spike unexpectedly
- If the source is very percussive, slightly shorten the clip so the reverse lands before the next downbeat
What to listen for: the reversed sound should have a clear “sucked-back” motion. If it feels like a random reversed file, the rhythm is too vague. If it clicks or snaps at the start, the clip is too tight or too hot.
4. Shape the rewind with a DJ-style filter and motion chain
Now build a simple stock-device chain on the rewind return track or on the rewind clip’s track. A reliable starting chain is:
Auto Filter → Saturator → Echo or Reverb
Practical settings:
- Auto Filter: high-pass or band-pass depending on the source; sweep from around 200 Hz upward if you want the rewind to thin out before the drop, or use a band-pass around the mids if you want a more “radio scan” oldskool flavour
- Saturator: gentle Drive, roughly 1–4 dB, with Soft Clip engaged if needed
- Echo: very short feedback, around 10–25%, filtered to avoid muddy repeats
- Reverb: short decay, roughly 0.6–1.5 s, with low cut engaged so the tail doesn’t flood the low mids
Automate the filter so it narrows as the rewind approaches the turn. For oldskool jungle energy, a descending band-pass sweep can feel more authentic than a big polished riser. For darker modern rollers, a high-pass sweep with more sub control can feel tighter.
Why this works in DnB: the rewind moment needs spectral motion, but DnB can’t afford low-end smear. Filtering removes mass as the turn happens, which creates tension without fighting the kick and bass re-entry.
What can go wrong: if you leave too much low-mid in the rewind, the drop loses impact. If you high-pass too aggressively, the rewind loses body and sounds thin instead of deliberate. Aim for a controlled strip-back, not a total disappearance.
5. Add a rhythmic “pull” so the rewind feels like part of the groove
A rewind in DnB works best when it still references the drum pocket. Don’t make it a free-floating FX cloud. Add a short rhythmic pattern using either:
- chopped break fragments from the same source, or
- a duplicate track with a gated echo of the rewind
If you want a more jungle feel, use the Clip Envelope or simple audio slicing to create two or three short hits before the turn: a snare ghost, a hat tick, and a reversed tail. Place them across the last beat or half-bar before the drop.
If you want a more modern darker flavor, keep it sparse: one reverse phrase, one short echo throw, and a clean stop.
Decision point — A versus B:
- A: “Break rewind” — more groove, more heritage, more swagger. Best when the track is built around chopped drums and rolling energy.
- B: “Atmospheric rewind” — cleaner, more ominous, more space. Best when the drop is bass-heavy and you need the transition to set up menace rather than dancefloor shuffle.
What to listen for: the rewind should not fight the snare. If the snare backbeat is still active, the reversed elements should sit around it, not smear across it.
6. Use automation to make the turn feel engineered, not accidental
Create an automation lane for at least two parameters on the rewind track. Good choices:
- filter cutoff
- reverb dry/wet
- echo feedback
- saturator drive
- track volume
A solid rewind movement often looks like this:
- Start the phrase with moderate level and a wider tonal range
- As the rewind approaches the turn, reduce level by 2–5 dB
- Narrow the filter and increase the sense of distance with reverb
- Cut the last hit sharply or drag it into a tiny tail that stops just before the downbeat
If the track is heavily arranged, automate the drum bus or music bus down very slightly around the rewind moment too, but keep it subtle. You want the rewind to be the focal point, not a full mix collapse.
Workflow efficiency tip: if you know you’ll reuse this move later in the track, print the automation-heavy rewind to audio once the timing is right. That lets you edit the exact tail shape without juggling multiple automation curves.
7. Check the rewind against drums and bass before you celebrate
Bring the full drum and bass arrangement back in and check the rewind in context. This is where the idea either becomes usable or falls apart.
Ask:
- Does the rewind leave enough room for the kick/snare return?
- Does the bass re-entry feel heavier because of the rewind, or does the rewind steal attention?
- Does the drum groove still read through the transition?
- Is there a clean pocket at the turn, or is there too much activity in the last beat?
If the bass is a reese or layered low-mid bassline, keep the rewind out of the sub region. Use high-pass filtering and mono discipline so the transition doesn’t spread across the low end. A rewind that occupies above roughly 150–200 Hz will usually preserve the drop impact better than one that tries to sound huge in the bass area.
What to listen for: when the drop returns, the snare should hit with conviction, and the bass should feel like it steps into an open lane. If the rewind makes the drop feel smaller, the transition is too long, too dense, or too wide.
8. Give the rewind a DJ-friendly shape with a clear entrance and exit
A good rewind is not just an effect; it’s a phrase tool a DJ can understand. Shape it so there’s a clear start, a peak, and a release.
Use a 1-bar or 2-bar rewind window most of the time. In oldskool/jungle contexts, a short rewind with a quick return often feels better than a long cinematic pause. If you want more drama, extend it to 2 bars, but only if the next section has enough energy to justify the delay.
A practical arrangement example:
- Bars 1–8: main groove
- Bar 9: drum fill and vocal stab
- Bar 10: rewind begins, reverse phrase swells
- Bar 11: near-silence or stripped percussion
- Bar 12: drop return with full kick/snare/bass
This is especially effective when the rewind lands just before the first snare of the next phrase, because the return feels locked to the grid while still sounding like a live DJ turn.
Why this works in DnB: DJs often cue around phrase edges. A rewind that respects phrase structure makes the track easier to blend, more memorable, and more likely to work in a set.
9. Add one controlled layer of grime, then stop
If the rewind feels too clean, add one dirt layer — but only one. Good options:
- a very low-level Vinyl Distortion or Saturator pass
- a filtered noise burst
- a tiny reversed cymbal or break top
- a short Drum Buss punch adjustment if the source includes percussive transients
Keep the treatment restrained:
- Saturator Drive: around 1–3 dB
- Drum Buss Drive: light, only enough to thicken the bite
- High-pass noise layer: often above 300–500 Hz if it is only for texture
If you overdo this stage, the rewind becomes noisy and generic instead of menacing. The best jungle rewinds often feel a little battered, but they still leave space for the drop to speak.
Commit this to audio if you’re happy with the timing and the rough tone. Printing the rewind at this stage makes later arrangement edits faster and keeps the effect from spiralling into endless tweak land.
10. Finish with mono and translation checks
Rewinds often sound exciting in stereo and then smear the moment they hit a club system. Check the transition in mono, or at least collapse the track enough to judge whether the event still reads. Keep anything below the most important presence range out of wide stereo treatment.
Practical rules:
- Keep the sub and low bass mono
- Don’t widen the rewind if it includes important rhythmic transients
- If you use Echo or Reverb, filter the return so the low end doesn’t bloom
- If the rewind contains a stereo texture, make sure its width disappears by the time the drop lands
Mix-clarity note: the rewind should feel like it opens a door, not like it blocks the doorway. If it sounds wide and impressive soloed but weakens the punch of the return, it needs trimming.
Common Mistakes
1. Making the rewind too long
- Why it hurts: the groove loses urgency, and the listener stops feeling the turn as a phrase event
- Fix in Ableton: shorten the clip to 1 bar or even half a bar, then automate the tail rather than extending the audio
2. Using a source phrase with no rhythmic identity
- Why it hurts: a random pad or noise hit reversed into the drop can sound generic and doesn’t connect to the drums
- Fix in Ableton: rebuild the source from a break fill, snare pickup, vocal stab, or rhythmic hit before reversing it
3. Leaving too much low-mid in the transition
- Why it hurts: the rewind masks the kick/snare return and muddies the bass entrance
- Fix in Ableton: use Auto Filter to remove clutter around the rewind, and cut low frequencies from Echo/Reverb returns
4. Over-widening the rewind
- Why it hurts: stereo motion can sound exciting in headphones but collapse or blur on club systems
- Fix in Ableton: keep the core transient material narrower, and make any width happen in the upper texture only
5. Not checking the rewind against the drop
- Why it hurts: a transition that sounds good alone may steal impact from the next bar
- Fix in Ableton: always audition the rewind with drums and bass returning immediately after it; adjust the tail so the downbeat still punches
6. Using too much feedback or reverb
- Why it hurts: the rewind becomes a wash instead of a cue
- Fix in Ableton: reduce Echo feedback to a short throw and keep reverb decay controlled, usually under 1.5 seconds for this use case
7. Forgetting DJ phrasing
- Why it hurts: a rewind that lands off-phrase can feel awkward in a mix
- Fix in Ableton: align the rewind start and release to 8-, 16-, or 32-bar structure, and keep the final stop close to a downbeat or clear pickup
Pro Tips for Darker / Heavier DnB
Mini Practice Exercise
Goal: Build one 1-bar rewind moment that works before a drop without masking the drum return.
Time box: 15 minutes
Constraints:
Deliverable:
Quick self-check:
Recap
A strong DnB rewind is a structural move, not a novelty. Build it from a rhythmic source, reverse and shape it in Ableton, filter it so it clears space, and place it on a phrase boundary so it feels DJ-friendly. Keep the low end clean, check it against the full drop, and commit the moment once the timing and tone are right. If the result sounds like the track briefly got sucked backwards before slamming forward again, you’ve got it.

