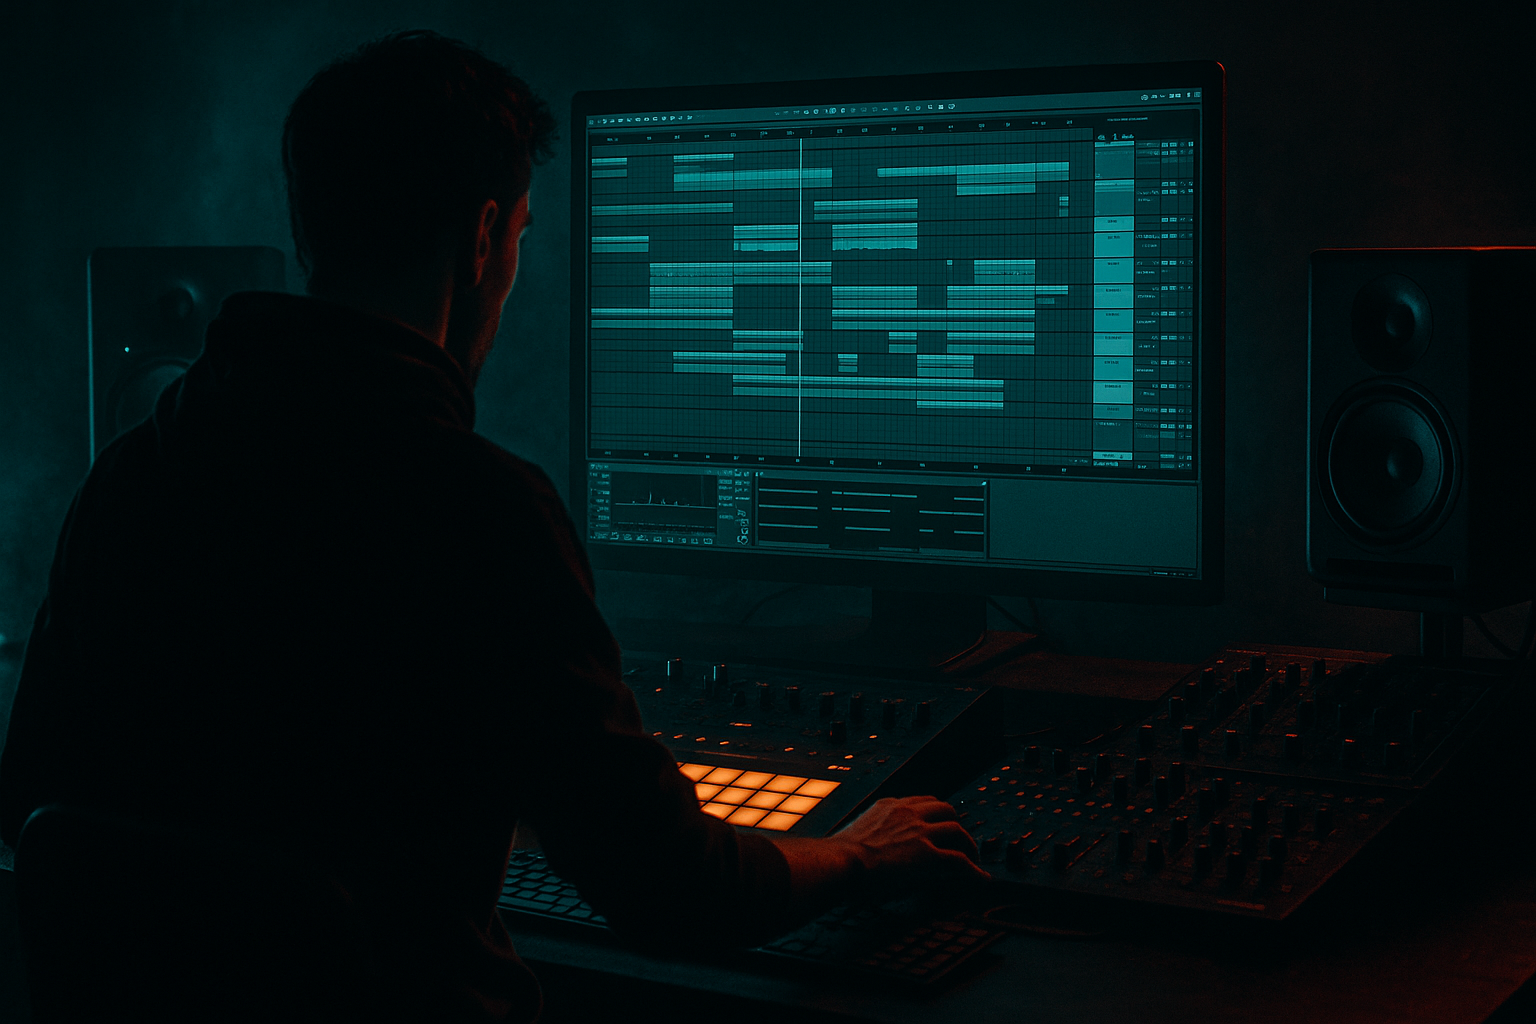
DNB COLLEGE

Drum & Bass Ableton Live 12 Tutorials

LESSON DETAIL

Warehouse sampler rack flip guide with minimal CPU load in Ableton Live 12 for jungle oldskool DnB vibes (Intermediate)

An AI-generated intermediate Ableton lesson focused on Warehouse sampler rack flip guide with minimal CPU load in Ableton Live 12 for jungle oldskool DnB vibes in the Breakbeats area of drum and bass production.

Back to lessons
Warehouse sampler rack flip guide with minimal CPU load in Ableton Live 12 for jungle oldskool DnB vibes (Intermediate) cover image

Narrated lesson audio

The voice track includes the tutorial plus extra teacher commentary.

Open audio file

Main tutorial

Warehouse Sampler Rack Flip Guide (Minimal CPU) — Ableton Live 12 🏭🥁

Style: Jungle / oldskool DnB breakbeats

Level: Intermediate

Goal: Flip a “warehouse” of break slices inside a single Rack that’s fast, playable, and light on CPU.

---

1. Lesson overview 🎛️

You’re going to build a Break Warehouse Rack: one MIDI track that holds multiple classic breaks (Amen, Think, Hot Pants, etc.), sliced and mapped so you can:

  • Jam new patterns from pads/keys
  • Randomize + resample quickly
  • Keep CPU low by using one Simpler per break (not 32), smart macro control, and freeze/flatten workflows
  • Get that tight-but-raw oldskool bounce with Live 12 stock devices
  • This is the “quick flip” method: choose break → slice → play → resample → arrange.

    ---

    2. What you will build 🧱

    A single Instrument Rack containing:

  • Chain Selector to switch between breaks (“Amen / Think / Funky Drummer / etc.”)
  • Each chain has:
  • - Simpler (Slice mode) with your break

    - EQ Eight (cleanup + tone)

    - Drum Buss (weight + smack)

    - Optional Auto Filter (movement)

  • Rack Macros for:
  • - Break select (Chain)

    - Pitch

    - Slice decay/gate feel

    - Transient/drive

    - HP/LP tone

    - “Warehouse Dirt” (saturation + noise vibe)

    And a workflow that ends with resampling to audio for nearly zero CPU in the arrangement.

    ---

    3. Step-by-step walkthrough ✅

    Step 0 — Session prep (DnB-friendly defaults)

    1. Set tempo to 165–172 BPM (start at 170).

    2. Create a MIDI track: `Break Warehouse`.

    3. Set global quantize to 1/16 (helps when recording break chops).

    CPU mindset: We’ll get creative in MIDI, then commit to audio.

    ---

    Step 1 — Build the Warehouse Rack (Instrument Rack + chains)

    1. On `Break Warehouse`, drop an Instrument Rack.

    2. Show Chain List (little button with 3 lines).

    3. Create 4 chains to start (you can expand later):

    - `Amen`

    - `Think`

    - `HotPants`

    - `ShuffledPerc` (could be a percussion loop, rides, tops, etc.)

    Tip: Keep it to 4–8 breaks per rack. Huge racks feel cool but cost time and organization (and can creep CPU via extra devices).

    ---

    Step 2 — Load breaks in Simpler (Slice mode, minimal overhead)

    For each chain:

    1. Drop Simpler.

    2. Drag your break sample into Simpler.

    3. Set Mode: Slice.

    4. Slicing settings (solid jungle defaults):

    - Slice By: `Transient`

    - Sensitivity: ~70–85% (raise until it catches kicks/snares cleanly)

    - Playback: `Trigger` (classic chop behavior)

    - Voices: 6–10 (keep it low to reduce CPU and tighten overlap)

    - Warp: Off (for authenticity + less CPU)

    - If the break timing is messy, you can Warp the audio clip before putting it into Simpler, then Flatten and drag the flattened audio into Simpler.

    Oldskool feel trick:

  • If the break is too clean, leave slight timing imperfections. Don’t over-warp.
  • ---

    Step 3 — Map slice layout to a playable range (consistent across breaks)

    Goal: no matter which break you select, your MIDI notes trigger the same “positions.”

    1. In Simpler, check where slices start.

    2. Make sure Slice Playback Range maps across a consistent MIDI region (typically starting around C1).

    3. If a break slices “weird,” adjust:

    - Transient sensitivity

    - Manually add/remove slices (right-click in the slice ruler area)

    Practical approach: Aim for 16–32 slices for classic 1–2 bar breaks.

    ---

    Step 4 — Add a light processing chain per break (stock devices)

    On each chain after Simpler, add:

    #### A) EQ Eight (cleanup)

  • HP filter: 24 dB/oct at 25–35 Hz (remove sub-rumble)
  • If boxy: dip 250–400 Hz by -2 to -4 dB
  • If harsh: dip 5–8 kHz slightly (depends on break)
  • #### B) Drum Buss (punch + glue)

  • Drive: 5–15%
  • Transient: +10 to +30 (more snap)
  • Boom: optional, subtle (0–15%) at 50–70 Hz (careful; your bass will live here)
  • Soft Clip: On (often yes for jungle grit)
  • #### C) Optional Auto Filter (movement / tame top)

  • Mode: LP 12 dB
  • Freq: map to macro (so you can darken on drops)
  • Add subtle Envelope if you want dynamic opening on hits
  • Keep it light—avoid heavy reverbs/convolutions on every chain.

    ---

    Step 5 — Chain Selector: instantly switch breaks (Warehouse switch) 🎚️

    1. In the Instrument Rack, open Chain view.

    2. Show Chain Selector.

    3. Set each chain’s selector zone:

    - Amen: 0–15

    - Think: 16–31

    - HotPants: 32–47

    - ShuffledPerc: 48–63

    4. Right-click Chain SelectorMap to Macro 1.

    5. Rename Macro 1: `Break Select`.

    Now you can automate break changes per section without duplicating tracks.

    ---

    Step 6 — Create performance macros (fast flips)

    Map these across the rack (where relevant):

    Macro 2: Pitch (Semitones)

  • Map Simpler Transposition
  • Range: -3 to +3 (classic jungle: pitch down for weight, up for hype)
  • Macro 3: Slice Decay / Gate

  • In Simpler, reduce tail for staccato chops:
  • - If using Filter/AMP controls, map Decay/Release (depending on your Simpler settings)

  • Goal: tight 16ths without messy overlap
  • Macro 4: Transient / Smack

  • Map Drum Buss Transient (+0 to +40)
  • Macro 5: Dirt / Drive

  • Map Drum Buss Drive (0–25)
  • Optional: add Saturator after Drum Buss and map Drive lightly (0–6 dB)
  • Macro 6: Tone (LP filter)

  • Map Auto Filter Frequency (e.g., 1.5k–18k) for “dark drop” control
  • Macro 7: Break HP

  • Map EQ Eight HP cutoff (20–80 Hz) to quickly clear bass space
  • Macro 8: Width / Room (subtle)

  • Add Utility at the end:
  • - Width: map 70–120%

    - Or keep Width fixed and instead map Gain for quick level trim

    ---

    Step 7 — Write jungle patterns the warehouse way (MIDI jam → resample)

    1. Create a MIDI clip (1–2 bars).

    2. Use classic chop language:

    - Put snare accents on 2 and 4 (or implied)

    - Pepper ghost snares and kick re-triggers

    3. Add quick “Amenisms”:

    - 1/32 snare drags before main snare

    - Kick-to-snare stutters

    4. Use Note Velocity to make it breathe:

    - Main hits: 95–120

    - Ghosts: 40–70

    Arrangement idea (oldskool energy):

  • Intro: Think break filtered + hats
  • Drop: Amen for 8–16 bars
  • Switch: Hot Pants fills every 4 bars
  • Breakdown: Half-time chopped bits + reverb throws
  • Drop 2: Pitch Amen down -2 semitones, darker LP tone
  • ---

    Step 8 — Minimal CPU commit: resampling workflow 🧊➡️🎧

    This is where you keep your session fast.

    Option A: Freeze & Flatten

    1. When you like your clip: right-click the track → Freeze Track.

    2. Right-click again → Flatten.

    Now you’ve got audio, and you can disable the heavy rack.

    Option B: Resample to a new audio track

    1. Create an audio track called `Break Print`.

    2. Set its input to Resampling.

    3. Arm it and record 8–32 bars of your performance.

    4. Now:

    - Consolidate (`Cmd/Ctrl+J`)

    - Slice the recorded audio again if you want even more edits

    CPU win: After printing, disable the original rack track.

    ---

    Step 9 — Tighten the groove like proper DnB (timing + swing)

    Use Groove Pool intelligently:

    1. Add a groove like MPC 16 Swing (subtle) or any shuffled 16th.

    2. Apply to MIDI clip:

    - Timing: 10–25%

    - Velocity: 0–10%

    - Random: 2–8%

    3. Commit groove only if needed (you can keep it live for flexibility).

    DnB rule: swing is seasoning, not soup. Too much and you lose drive.

    ---

    4. Common mistakes ⚠️

  • Warping everything inside Simpler: adds complexity + sometimes smear. Warp once, flatten, then slice.
  • Too many voices in Simpler: breaks get washy + CPU climbs. Keep voices tight.
  • Over-processing per chain: 8 chains × 6 devices = death by a thousand cuts. Keep it lean and commit to audio.
  • No gain staging: Drum Buss + Saturator can silently clip. Use Utility or keep chain levels controlled.
  • Ignoring phase/low-end: breaks often have low junk. High-pass and leave sub space for the bass.
  • ---

    5. Pro tips for darker/heavier DnB 🌑🔩

  • Parallel smash (cheap + effective):
  • Create a Return track with Drum Buss (Drive high, Transient up) + EQ Eight (HP at 120). Send breaks lightly (5–20%).

  • Make breaks feel “metal” without harshness:
  • Use Saturator in Soft Clip mode, Drive 2–5 dB, then EQ dip around 3–5 kHz if it bites.

  • Mid/Side control with EQ Eight:
  • In EQ Eight, switch to M/S:

    - Cut low end in Sides below 150 Hz (tightens mono punch)

  • Pitch automation for menace:
  • Automate Macro Pitch down -1 to -3 in the second drop.

  • Riser via filter + resonance:
  • Auto Filter LP with resonance 20–35%, automate cutoff upward over 8 bars, print to audio.

    ---

    6. Mini practice exercise 🧪

    Goal: 32-bar oldskool roller with two break swaps and one printed fill.

    1. Build the rack with Amen + Think (2 chains only).

    2. Record a 2-bar MIDI clip using slices (aim for a classic rolling pattern).

    3. Duplicate it to 32 bars.

    4. Automation:

    - Bars 1–16: Think

    - Bars 17–32: Amen

    - Add a Macro 6 (LP tone) dark sweep in bars 15–17

    5. Print to audio (Freeze/Flatten or Resample).

    6. Chop one 1-bar fill near bar 32 and reverse a small slice for spice.

    Deliverable: a single audio track that’s tight, rolling, and ready for bass.

    ---

    7. Recap 🔁

  • You built a Warehouse Sampler Rack using Instrument Rack + Chain Selector + Simpler (Slice).
  • You kept CPU low by:
  • - Using one Simpler per break chain

    - Keeping devices minimal per chain

    - Printing to audio once you like the flip

  • You now have a fast DnB workflow: select break → chop → jam → automate → resample → arrange.

If you want, tell me which breaks you’re using and your target vibe (early jungle, techstep, modern rollers), and I’ll suggest exact macro ranges + a couple of go-to 2-bar MIDI patterns.

Ask GPT about this lesson

Chat with the lesson tutor, get follow-up help, or use quick actions.

Bigup 👽 Ask me anything about this lesson and I’ll answer in context.

Narration script

Show spoken script
Welcome in. In this lesson we’re building what I like to call a Break Warehouse Rack in Ableton Live 12: a single MIDI track that can hold multiple classic jungle breaks, slice them up, make them instantly playable, and let you flip patterns fast without your CPU melting down.

The vibe is oldskool jungle, early DnB, breakbeat-driven. The goal is simple: choose a break, slice it, play it like an instrument, automate quick changes, then commit it to audio so the rest of your project stays light and responsive.

Before we touch anything: set your tempo somewhere DnB-friendly. I like 170 BPM as a starting point. Set Global Quantize to 1/16 so when you record chops they land tight. Now create one MIDI track and name it “Break Warehouse.” This is important: one rack, many clips. We’re not going to duplicate devices all over the set. That’s the CPU strategy.

Now let’s build the warehouse.

Drop an Instrument Rack on the Break Warehouse track. Open the Chain List. Create four chains to start. Name them something obvious like Amen, Think, Hot Pants, and Shuffled Perc. Don’t go crazy with 20 chains right away. Four to eight is the sweet spot for speed and clarity. You can always expand later once the system is working.

Now we load breaks into Simpler, but we’re going to do it in a way that makes slicing stable and predictable.

Here’s a coach move that saves headaches: pre-trim your breaks before they ever hit Simpler. Take your Amen break, drop it onto an audio track first. If it needs warp, warp it there. Crop it to exactly one or two bars. Consolidate it so you’ve got a clean file. Then turn Warp off on that consolidated clip. Now drag that cleaned audio file into Simpler.

Do that because messy, random-length files lead to weird slice offsets and inconsistent slice counts. The cleaner the file going in, the more “muscle memory friendly” the rack becomes.

Alright. On the Amen chain, drop a Simpler. Drag in your cleaned Amen file. Set Simpler Mode to Slice. Slice By should be Transient, and set Sensitivity around 70 to 85 percent. Raise it until the kicks and snares are being caught cleanly, but you’re not getting a million tiny slices from hi-hat fizz.

Set Playback to Trigger for classic chop behavior. Then set Voices to something like 6 to 10. This is a big part of staying tight and keeping CPU reasonable. Too many voices and your break turns into a washy overlapping mess, plus it costs more processing.

And here’s an authenticity and CPU win: turn Warp off inside Simpler. If the break timing is messy, do the warping on an audio track first, flatten it, then slice the flattened file. Warp-on everywhere is how you get smeared transients and unnecessary complexity.

Repeat that same Simpler setup on the Think chain, the Hot Pants chain, and your Shuffled Perc chain.

Now let’s make the rack playable in a consistent way.

The whole point of a warehouse is that when you hit the same MIDI notes, you get the same “positions” in whatever break you’re currently on. So check where your slices are and make sure the playable slice range is consistent across all chains. Typically you’ll start around C1 and go up from there.

One practical rule: try to keep slice counts consistent. If Amen gives you 28 slices and Think gives you 19, your fingers and your programming instincts get confused because the same notes now trigger totally different moments. For warehouse flipping, playability beats perfection. It’s okay to manually add or delete a few slice markers so both breaks behave more like 16 or 32 slices. You’re building an instrument, not doing an archaeological restoration of the original drummer.

Next: light processing per chain. Light. This is where people accidentally build a CPU bonfire.

After Simpler on each chain, add EQ Eight. Do a high-pass around 25 to 35 Hz, 24 dB slope, just to remove sub-rumble that’ll fight your bass later. If the break feels boxy, dip around 250 to 400 Hz by a couple dB. If it’s harsh, a tiny dip in the 5 to 8 k range can calm it down. Keep it subtle; you’re shaping, not rewriting.

Then add Drum Buss. Drive somewhere around 5 to 15 percent. Transient plus 10 to plus 30 to bring the snap forward. Soft Clip often on, because oldskool breaks like a little edge. Boom is optional and usually subtle, and honestly in DnB you want to be careful because your sub and Reese need that space. If you do use Boom, keep it low and consider tuning it around 50 to 70 Hz, but don’t let it dominate.

Optional: Auto Filter for movement. Use a 12 dB low-pass, and we’ll map the cutoff so you can do that classic “darken the loop then open it into the drop” move without inserting reverbs on every chain.

Now we set up the actual warehouse switching.

Go back to the Instrument Rack and open Chain view so you can see the Chain Selector. Give each chain its own selector zone. A simple layout is:
Amen from 0 to 15
Think from 16 to 31
Hot Pants from 32 to 47
Shuffled Perc from 48 to 63

Then right-click the Chain Selector and map it to Macro 1. Rename Macro 1 to Break Select. Now you can switch breaks instantly and automate it per section without duplicating tracks.

Quick teaching note: automate Break Select at bar boundaries. That “phrase-locked switch” keeps the groove identity intact. If you switch mid-bar, it can be cool, but it often just sounds like a mistake unless you do it intentionally.

Now let’s make this rack performable with macros that matter.

Macro 2: Pitch. Map Simpler Transposition for each chain to the same macro. Set the range around minus 3 to plus 3 semitones. Pitching down one or two semitones is a classic move to make the break feel heavier in Drop 2. Pitching up is instant hype, but go easy because it can get chipmunky fast.

Macro 3: Gate or slice tail control. The exact parameter depends on your Simpler settings, but the goal is the same: tighten the decay or release so your 16ths don’t smear together. This is how you go from “loop playing” to “chops speaking.”

Macro 4: Smack. Map Drum Buss Transient from about 0 up to 40. Use it like energy automation: more transient in the drop, less in the breakdown.

Macro 5: Dirt. Map Drum Buss Drive, maybe from 0 up to 25. If you want extra grit without heavy plugins, add a Saturator after Drum Buss set to Soft Clip, and map its Drive lightly, like 0 to 6 dB. Also, if you want that old vinyl warehouse crunch, you can add Redux very subtly, post-EQ and pre-Drum Buss, then low-pass a touch to tame fizz. The trick is subtle. If you hear “digital sand,” you went too far.

Macro 6: Tone. Map Auto Filter Frequency, something like 1.5k up to 18k. This becomes your “dark drop” and “open the air” control.

Macro 7: Break HP. Map the EQ Eight high-pass cutoff from maybe 20 up to 80 Hz. That gives you a fast way to clear space for bass during busy sections.

Macro 8: Utility at the end of the rack. Two options: map Width from 70 to 120 percent for subtle stereo control, or just map Gain for quick level trim. Personally, I love using Utility as a safety: aim for peaks around minus 6 dBFS while you jam. Break samples lie. Some are quiet, some are insanely hot, and Drum Buss plus saturation can clip before you realize it.

One more coach note: if macro automation is clicking or sounding steppy, draw tiny ramps. Even 10 to 30 milliseconds makes a difference. For pitch moves, quick ramps often sound more musical than instant jumps, unless you specifically want glitch.

Now we write jungle patterns the warehouse way: MIDI jam first, then print.

Create a 1 or 2 bar MIDI clip. Start with the genre anchor: snare accents on 2 and 4, or at least the implication of that backbeat. Then pepper in ghost notes and kick retriggers. Think in phrases: rolls that answer the snare, little stutters that lead into the next bar.

Classic “Amenisms” you can program fast:
A short 1/32 snare drag leading into the main snare
Kick-to-snare stutters for momentum
Little ghost snare taps at low velocity to make it feel played, not looped

Use velocity like a drummer. Main hits around 95 to 120. Ghosts around 40 to 70. If you want more human dynamics without writing more notes, push Simpler’s Velocity to Volume response a bit stronger than you normally would. Then your MIDI becomes expressive just from velocity.

Now add groove, but don’t drown it.

Open Groove Pool. Pick something like an MPC 16 Swing, subtle. Apply it to the MIDI clip with Timing around 10 to 25 percent, Random around 2 to 8 percent, and keep Velocity influence low, like 0 to 10. The DnB rule is swing is seasoning, not soup. Too much swing and you lose that forward drive at 170.

At this point you can arrange with clips instead of duplicating racks. Make multiple MIDI clips on the same Break Warehouse track:
one clip for your main groove
one clip that’s just fills, a 1 bar “micro-fill launcher”
one clip for a variation groove with different ghosts

Then perform your arrangement by launching clips and tweaking macros. Record into Arrangement view. This is a very jungle way to work: perform the breaks like an instrument, then edit the best moments.

Now the key to minimal CPU: commit to audio.

Option one is Freeze and Flatten. Once you like a section, right-click the Break Warehouse track, Freeze Track, then Flatten. Now it becomes audio and the devices are gone from playback.

Option two is Resampling, which is my favorite for performance takes. Create an audio track called Break Print. Set its input to Resampling. Arm it, record 8, 16, or 32 bars of your performance. Then consolidate the best take. If you want even more control, you can slice that printed audio again, or just do surgical edits: mute a kick, duplicate a snare drag, reverse a tiny slice for spice.

And here’s how you keep the track evolving without overcomplicating it: the every-4-bars rule. Every four bars, do one thing. A one beat stutter. A half-bar fill. A tiny pitch dip on the last snare. A quick low-pass choke then release. One move. Not ten.

If you want a darker, heavier DnB edge without wrecking CPU, do parallel smash on a return track. Make one return with Drum Buss pushed harder, Transient up, then an EQ high-passed around 120 Hz so you’re smashing mids and tops, not mud. Send your break into it lightly, like 5 to 20 percent. You’ll get aggression and density without stacking distortion on every chain.

Also, keep low-end discipline. Breaks often have junk down low. Use Utility or EQ Eight in Mid/Side mode and cut the sides below around 150 Hz. That keeps punch centered and makes room for bass. It’s a small move that makes the whole mix feel more professional.

Common mistakes to avoid while you’re building this:
Don’t warp everything inside Simpler. Warp once on an audio track if needed, flatten, then slice.
Don’t set Simpler voices too high. You’ll lose punch and waste CPU.
Don’t over-process each chain. Four chains with a few stock devices is plenty.
Don’t ignore gain staging. Breaks plus Drum Buss plus saturation can clip fast.
And don’t forget that you’re allowed to leave some imperfection. Oldskool breaks feel good because they’re human.

Let’s finish with a quick practice plan you can actually do today.

Build just two chains: Amen and Think. Record a 2 bar main groove. Duplicate it out to 32 bars. Automate Break Select so bars 1 to 16 are Think, bars 17 to 32 are Amen. Do a dark low-pass sweep with your Tone macro around the transition, like bars 15 to 17, so the switch feels like a drop moment. Then print it to audio, and do one 1 bar fill near bar 32: chop, reverse a tiny hit, and make it snap back into the downbeat.

When you’re done, you should have one audio track that rolls at 170, peaks around minus 6, low end cleaned up, and you’ve still got CPU headroom for bass, pads, and effects.

That’s the warehouse workflow: select break, chop, jam, automate, resample, arrange. Fast, playable, and built for real jungle energy. If you tell me which breaks you’re using and whether you’re aiming for early jungle, techstep, or modern rollers, I can suggest exact macro ranges and a couple go-to two-bar MIDI patterns that fit that substyle.

mickeybeam

Go to drumbasscd.com for +100 drum and bass YouTube channels all in one place - tune in!

Generating PDF preview…