Main tutorial
Lesson Overview
In this lesson you’re building a warehouse-code bassline turn: a small but deadly automation move that makes a loop feel like it’s inhaling smoke, glancing over its shoulder, and then stepping back into the tunnel. In Drum & Bass, this kind of turn lives right at the edge of the drop loop, 4- or 8-bar phrase endings, and transitions into the next section. It’s not a random effect — it’s a controlled shift in tone, filter, movement, and tension that tells the listener, “the bass is changing shape now.”
This matters because dark DnB and oldskool/jungle-influenced tracks rely on movement with discipline. You want the bassline to feel alive, but if you automate too many things too aggressively, the low-end falls apart, the groove stops reading, and the DJ loses a clean mix point. The goal here is to create a bassline turn that works in a smoky warehouse context: tense, moody, rugged, slightly dubby, and rooted in the physical energy of the room.
By the end, you should be able to hear a bassline that:
- starts with a clear, weighty groove
- turns into a darker, more pressured variation at the phrase end
- keeps the sub solid while the midrange evolves
- sounds intentional with the drums, not pasted on top
- feels ready to use in a real intro, drop, or second-drop switch-up
- Use automation contrast, not constant motion. A dark bassline gets heavier when most of the bar stays controlled and the turn only opens at the phrase end.
- Try making the midrange layer slightly more distorted than you think you need, then pull it back with EQ Eight. That often gives you the warehouse grit without wrecking the sub.
- If the bass feels polite, automate a tiny increase in Saturator Drive only on the final half-bar. Even a small lift can make the phrase feel more dangerous.
- For a more oldskool/jungle feel, let the bassline answer the break rather than sitting perfectly grid-locked. Small note timing shifts can make the groove feel more human and more urgent.
- Keep the sub almost boring on purpose. The darker the track, the more valuable a calm, centered foundation becomes.
- For a second-drop evolution, change only one or two turn elements: maybe the filter opens a bit further, or the mid layer becomes grittier. If everything changes, the section loses identity.
- If you want a more oppressive mood, automate the filter so it opens into a slightly nasal mid push rather than a bright lift. That keeps the vibe smoky instead of shiny.
- Always compare the bass turn against the kick-snare backbone and a looping break. A great bass turn that weakens the drum hierarchy is the wrong bass turn.
- use only stock Ableton devices
- use one bass instrument and one automation move
- keep the bass to 3–5 notes across 2 bars
- the sub must stay centered and mono-compatible
- automate only one main parameter first: Auto Filter cutoff, Saturator drive, or both very subtly
- can you clearly hear the turn without losing the snare?
- does the sub still feel solid in mono?
- does the loop sound like a real DnB phrase, not just a synth change?
This suits oldskool jungle, dark rollers, smoky warehouse DnB, stripped-back club pressure, and deep rave-influenced tracks especially well.
What You Will Build
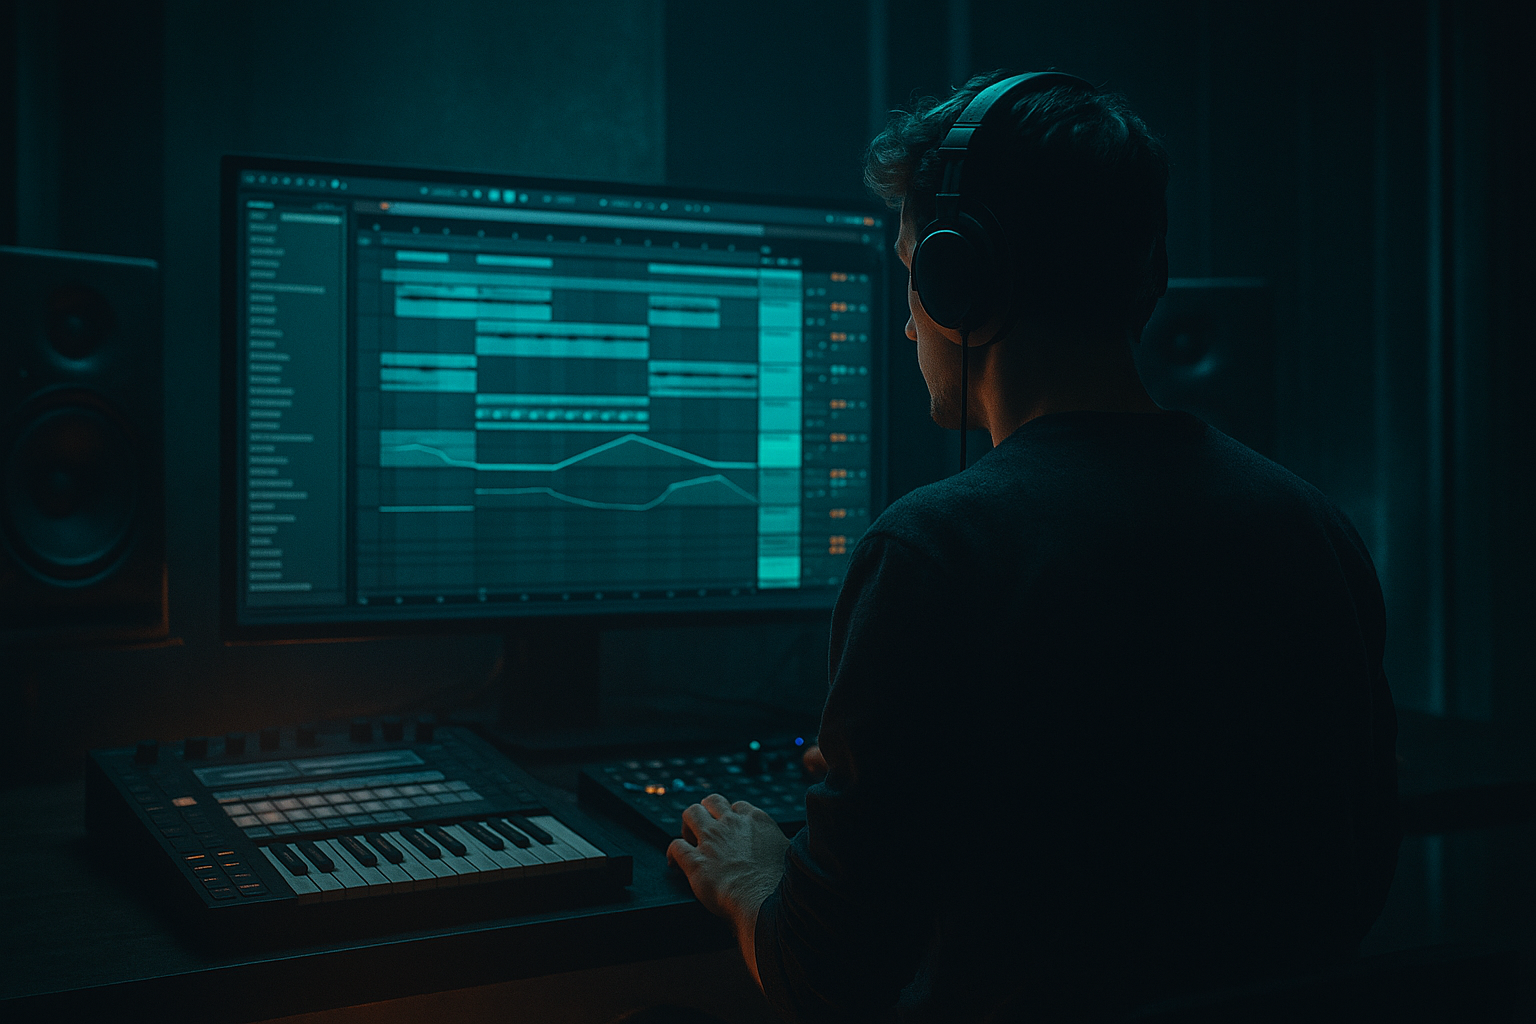
You’ll build a 2-bar bass motif with a 4-bar automation turn in Ableton Live 12 using stock devices only. The finished result will sound like a low, rude bass phrase that starts restrained and ends with a filtered, saturated, slightly more urgent turn before resetting. The rhythm should feel like it’s pushing against the kick and snare pocket without muddying the sub.
The role in the track is simple but powerful: this bassline turn is your phrase punctuation. It can lead into a fill, a drop repeat, a new drum variation, or a breakdown. It should be mix-ready enough that the low end stays centered and the movement stays readable on small speakers and big systems.
Success sounds like this: the bass feels heavier and more dangerous at the turn, but the kick and snare still punch through, the sub doesn’t wobble off-centre, and the listener feels a clear change without losing the groove.
Step-by-Step Walkthrough
1. Start with a simple bass instrument and keep the low end focused
Create a new MIDI track and load Operator or Wavetable. For this lesson, keep the core tone simple so the automation does the heavy lifting.
A good beginner-safe starting point:
- one sine or saw-based sound
- low octave notes only
- short note lengths with occasional longer holds
- no chorus or wide stereo on the sub layer
If using Operator, build a clean low bass first: a sine-style foundation with a second oscillator if you want a little edge. If using Wavetable, keep the wavetable position fairly simple and avoid wild movement for now.
Why this works in DnB: the turn will feel stronger if the base tone is stable. In drum & bass, especially in darker styles, the automation has more impact when it’s changing a solid bass rather than trying to rescue an unfocused one.
What to listen for:
- the bass should sit underneath the drums, not compete with them
- each note should feel like one clear body, not a smeared rumble
A useful starting note choice is a 1-bar or 2-bar loop with only 3–5 notes, leaving space for the snare and ghost drum movement.
2. Program a rude but controlled phrase in the MIDI clip
Write a bassline that lives in the call-and-response zone with the drums. A very usable beginner pattern is:
- one note landing after the kick
- one note answering before the snare
- a longer note or hold at the end of the bar to give the automation something to transform
Keep it in a low register, often around C1–G1 range, depending on the key. If the note is too high, the “warehouse” weight disappears fast.
Try this phrasing logic:
- bar 1: more space, simple movement
- bar 2: a little more pressure or a syncopated answer
- bar 3–4: repeat with one small change so the automation turn feels like a reveal, not a mistake
If you’re working with a breakbeat, leave tiny gaps where the snare or hat detail can breathe. Jungle and oldskool DnB need this. The bass should make the break feel bigger, not bury it.
What to listen for:
- does the bass create a pocket around the snare?
- does the groove still feel like it could make a dancer nod without the automation?
3. Shape the bass into two layers of function: sub and attitude
Now give the bass two jobs, even if it’s on one instrument:
- sub weight
- midrange attitude
If you’re using one synth patch, keep the bottom stable and add movement mostly to the upper harmonics. A practical stock-device chain could be:
Instrument → EQ Eight → Saturator → Auto Filter
Or, if you prefer a more aggressive route:
Instrument → Saturator → Overdrive → EQ Eight
Practical starting points:
- Saturator Drive: around 2–6 dB for controlled grit
- Auto Filter cutoff: start low, around 80–200 Hz for a dark start
- EQ Eight: high-pass nothing on the actual sub unless you know exactly why; instead, tame harshness above 2–5 kHz if needed
If the sound has too much weight in the wrong place, the kick and bass will fight. The fix is not “more EQ.” It’s usually a cleaner tone and less unnecessary stereo or high-mid smear.
Decision point — choose one flavour:
- A: Clean warehouse pressure
Keep the bass mostly round and let automation open the filter only at the turn. This gives you a more restrained, hypnotic result.
- B: Dirtier oldskool bite
Use a touch more Saturator or Overdrive so the bass spits more in the mids. This feels rougher and more jungle-flavoured, but you must keep the low end disciplined.
4. Draw the automation turn across 4 bars
This is the core of the lesson. In Ableton, show automation and draw a controlled turn over the last 2 bars of your loop, or over a dedicated 4-bar phrase if your section is longer.
Useful parameters to automate:
- Auto Filter cutoff
- Auto Filter resonance
- Saturator drive
- Instrument filter movement or wavetable position
- Utility gain if you need a tiny lift or drop for phrase emphasis
A very workable turn shape:
- bars 1–2: bass stays dark and locked
- bar 3: cutoff rises gradually
- bar 4: cutoff opens more, resonance rises slightly, drive increases a touch, then resets at the loop point
Realistic ranges:
- cutoff sweep from roughly 100 Hz up to 400–900 Hz depending on patch
- resonance kept modest, often low to mid values, so it rings without whistling
- drive rise of just 1–3 dB during the turn is often enough
Why this works in DnB: a small automation arc at the end of the phrase creates forward motion without forcing a huge fill. That keeps the drop usable for DJ mixing and lets the drums stay in charge.
What to listen for:
- the bass should feel like it’s opening its mouth, not exploding into white noise
- the groove should remain stable even as the tone changes
5. Use the drums as your reality check
Loop the bass with kick, snare, and your main break or top loop. This is where the idea either becomes a track element or stays a cool solo loop.
In oldskool and jungle contexts, the bass turn should sit around the snare backbeat without clouding the transient. If your snare is on 2 and 4, the bass turn often feels strongest when it leaves space just before or just after the snare hit.
Listen for two things:
- does the kick still punch through the first half of the phrase?
- does the snare still sound like the anchor when the bass opens up?
If the bass turn steals the snare’s authority, reduce resonance first, then reduce drive, then shorten note lengths. Don’t start by making the bass quieter if the problem is really too much midrange buildup.
Workflow efficiency tip: once the loop works, duplicate the clip and commit the automation shape into a second version called something like “Bass Turn A” and “Bass Turn B.” That way you can test variations without constantly overwriting the original idea.
6. Add a second motion layer with a stock effect, but keep the sub protected
To make the turn feel more alive, add a subtle effect that only affects the upper body of the bass. Two practical stock-device chains:
Chain 1: Auto Filter → Saturator → EQ Eight
Best for a smoky, pressure-building turn.
- Auto Filter cutoff opens slowly
- Saturator adds density during the turn
- EQ Eight trims harshness if the mids get sharp
Chain 2: Chorus-Ensemble lightly on a duplicate mid layer → EQ Eight → Utility
Best for a slightly wider, more haunted upper texture.
Important: do not widen the actual sub. Keep the low end mono and let only the upper layer move.
A beginner-friendly way to do this in Ableton is to duplicate the bass track and make one version the sub and the other the character layer:
- Sub layer: clean, centered, minimal processing
- Character layer: filtered, saturated, more automation
Then balance them quietly. The character layer should be felt more than heard as a separate sound.
Mix-clarity note: check the bass in mono. If the character layer vanishes or the bottom gets weird, reduce stereo effect, narrow the layer, or lower the effect amount. DnB bass has to survive club playback and mono collapse.
7. Build a turn phrase that answers the drums, not just the synth
The strongest warehouse bass turns feel like they react to the drum phrase. For example, let the bass open up just after a snare fill or as the break rolls into a new bar.
A simple arrangement example:
- Bars 1–4: main drop loop
- Bars 5–8: repeat, but automate the bass turn in bars 7–8
- Bar 9: small drum fill or snare pickup
- Bar 10: bass resets darker and more closed
You can also use the bass turn as a fake-out before a drop repeat:
- bass opens at the end of bar 8
- drums cut for half a bar
- re-entry hits harder because the listener expected more movement and got a reset instead
This is a key DnB idea: tension is not just noise, it’s phrasing. If the bass turn leads naturally into the next section, the track feels bigger without needing extra layers.
8. Print the result if the turn is doing its job
Stop here if the bass turn already feels strong with the drums and you’re tempted to keep tweaking forever. At that point, commit this to audio or at least freeze/bounce the track so you can work the arrangement, fills, and mix with a stable result.
This is especially useful if:
- the automation shape is good
- the groove is right
- the sub is behaving
- you keep second-guessing tiny tone changes
Committing forces decisions. In DnB, that often leads to better final tracks because you stop treating the bass as an endless design problem and start using it as arrangement material.
9. Do a final context pass with the drums, then make one deliberate choice
Now compare two final directions:
- Option A: darker, more disciplined turn
Keep the automation subtle, let the filter open only a little, and preserve the mystery. This is better for deep rollers and tight DJ tools.
- Option B: more obvious warehouse shout
Push the cutoff higher, add slightly more saturation, and let the turn announce itself harder. This is better if the section needs a clear lift into a drop repeat or switch-up.
Choose only one for the current version. The beginner trap is trying to keep both, which usually makes the turn feel indecisive.
The finished turn should sound like a controlled shift in pressure: the bass gets more dangerous at the right moment, but the groove stays locked and the low end remains usable.
Common Mistakes
1. Making the automation too extreme
- Why it hurts: the bass loses its foundation and the drop stops feeling heavy.
- Fix in Ableton: reduce the Auto Filter sweep range and keep Saturator drive changes small; if the movement still feels big, automate slightly less over a longer time.
2. Opening the low end too much with stereo effects
- Why it hurts: the sub becomes unstable and the track folds in mono.
- Fix in Ableton: keep the sub layer clean, move width only to the upper layer, and check the result with Utility on mono.
3. Letting the bass overlap every drum hit
- Why it hurts: the groove turns to mud and the snare loses authority.
- Fix in Ableton: shorten MIDI note lengths, move certain notes slightly earlier or later, and leave more space around the backbeat.
4. Using too much resonance on the filter
- Why it hurts: the bass starts to whistle or dominate the mix in a narrow, annoying band.
- Fix in Ableton: lower resonance first, then adjust cutoff; if needed, use EQ Eight to tame the specific harsh area.
5. Automating the whole sound instead of just the useful part
- Why it hurts: the sub, midrange, and harmonics all shift at once, so the bass loses focus.
- Fix in Ableton: split the bass into sub and character roles, or automate only the filter and drive on the character layer.
6. Ignoring the snare when drawing the turn
- Why it hurts: the bass change fights the most important anchor in DnB.
- Fix in Ableton: line up the turn so the snare still reads clearly; test the loop with drums before you judge the bass alone.
7. Overworking the loop and forgetting arrangement
- Why it hurts: the turn sounds cool in 2 bars but goes nowhere in a full track.
- Fix in Ableton: duplicate the phrase into an 8-bar section and plan what happens after the turn — reset, fill, drop variation, or breakdown.
Pro Tips for Darker / Heavier DnB
Mini Practice Exercise
Goal: build one 4-bar warehouse bass turn that works with drums and feels ready for a drop or switch-up.
Time box: 15 minutes
Constraints:
Deliverable: a 4-bar loop with a darker first half and a more open, pressurised final bar
Quick self-check:
Recap
A strong warehouse-code bassline turn is about controlled automation, not chaos. Keep the sub solid, let the midrange change shape, and make the turn answer the drums. Use Ableton’s stock tools to automate filter, drive, and subtle movement over the end of a phrase, then check the result in context. If the groove stays heavy, the snare stays clear, and the bass feels more dangerous without collapsing the low end, you’ve got the right result.

