Main tutorial
Lesson Overview
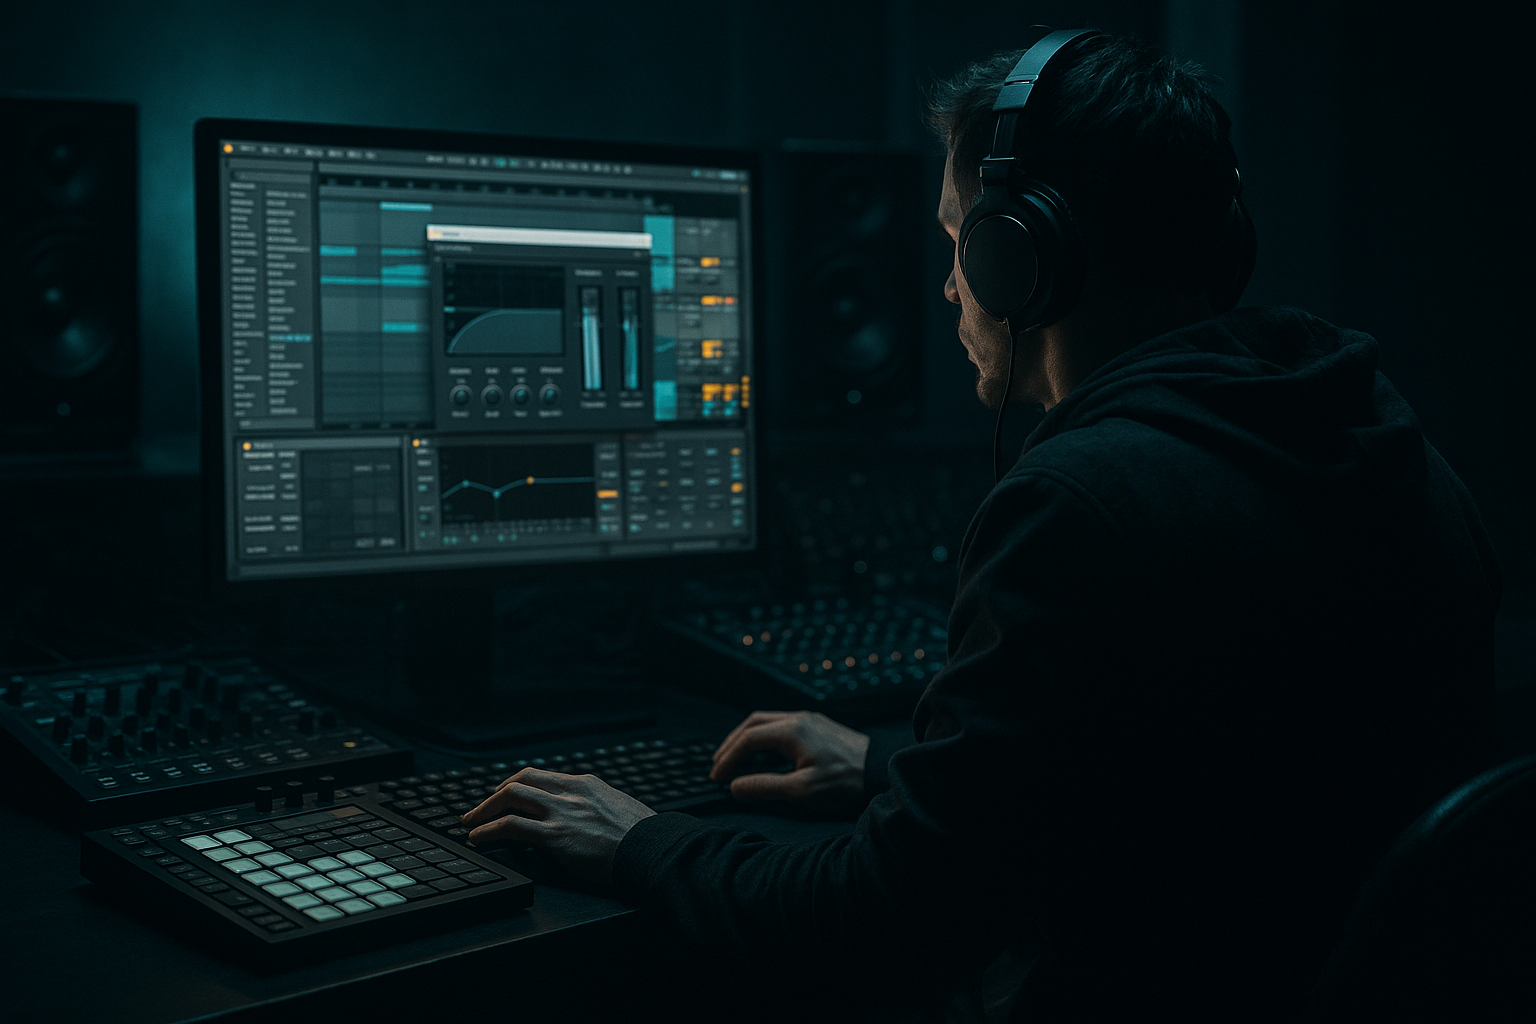
This lesson is about building a darkside intro that feels like a warehouse transmission, then resampling it into arrangement-ready audio inside Ableton Live 12. The goal is to take a small set of musical ingredients — a bass phrase, a break slice, a texture, and a tension FX — and turn them into an intro that has mystery, weight, and DJ functionality.
This technique lives right at the start of a DnB track: the section before the drop, or the intro that hints at the drop’s personality without giving away the full impact. In darker Drum & Bass, especially darkstep, neuro-leaning, halftime-tinged intro design, and warehouse rollers, this matters because the intro has to do three jobs at once:
1. Establish atmosphere and identity.
2. Create tension without cluttering the low end.
3. Leave enough space for the drop to hit harder when it arrives.
Technically, resampling is the bridge between “cool loop” and “finished record.” Instead of endlessly stacking MIDI clips and effects, you print audio, edit it, and arrange it like a real record. That gives you tighter control over phrasing, impact, and density — which is exactly what dark DnB needs.
By the end, you should be able to hear a short intro loop and immediately feel: “This sounds like a warehouse opening scene, and it can lead cleanly into a brutal drop.”
What You Will Build
You will build a 4- to 8-bar dark intro bed that sounds like a serious DnB tune rather than a vague cinematic loop. It will feature:
- a subtle, menacing bass motif
- a cut-up break or ghosted drum layer
- a filtered atmosphere or noise texture
- a resampled and re-edited audio structure
- a clear final shape that can be dropped into a track intro
- Use controlled instability, not constant movement. A filtered bass note that shifts once per bar often sounds heavier than one that wobbles continuously. In dark DnB, restraint reads as confidence.
- Print the ugly version first, then refine. The first resample should be slightly rough. If it already feels polished, you may have over-sanitized the energy. The next pass can remove harshness while keeping character.
- Let the break or ghost drum carry nervous energy. A tiny off-beat snare slice or shuffled hat can make a restrained bassline feel much more alive without adding more notes.
- Keep the lowest octave disciplined. If your intro bass has a sub note, let it be steady and clear. Put the chaos above it. The sub should behave like infrastructure, not decoration.
- Use short, repeatable edits to suggest machinery. A 1-beat stutter, a 2-beat bass answer, or a sliced metallic hit can create the “warehouse code” feel far more effectively than a long cinematic build.
- Think like a DJ. If an intro is going to be mixed in, it needs readable sections and a clear entry point. Leave enough empty space for a transition, and make the final bar easy to phrase-match.
- If the intro is too polite, darken it with subtraction, not just distortion. Removing bright clutter and leaving one rough textural element often makes a track feel heavier than pushing the saturator harder.
- Use only 3 tracks
- Use at most 2 stock devices on the bass track
- Print the full idea to audio once before arranging
- Include at least one 1-beat or half-bar edit
- a short intro with:
- Can you hear the final bar making space for the drop?
- Does the bass still feel solid when played quietly?
- Does the resampled edit sound intentional rather than random?
- If you mute the texture, does the intro still feel like DnB and not generic ambience?
- Build the intro with a small, controlled palette.
- Design the bass for resampling, not perfection.
- Print audio early so you can edit like an arranger, not just a loop-maker.
- Keep the low end mono-stable and the width in the texture layer.
- Use phrase-based edits to create tension and DJ usability.
- Always check the intro against the drop context so it increases impact instead of stealing it.
The sonic character should be dark, metallic, tense, and spacious, with enough movement to stay alive but not so much detail that it competes with the later drop. The rhythmic feel should hint at DnB momentum through syncopation, push/pull, and off-grid edits, not through full drum barrage.
Role-wise, this is an intro and tension builder. It should set the room, not peak the room. The polished target is demo-to-arrangement ready: clean enough to sit in a track, rough enough to feel underground, and controlled enough that the bass and kick/snare space remain intact.
Success sounds like this: a cold, uneasy intro that rolls forward with intent, where the resampled edits feel deliberate and the eventual drop arrives with more force because the intro withheld information properly.
Step-by-Step Walkthrough
1. Start with a 4-bar sketch that has only three moving parts
Build a new Ableton Live set and keep the opening idea extremely narrow. Use:
- one bass MIDI track
- one drum or break track
- one texture or atmos track
For the bass, create a short phrase in the lower register, ideally around F, F#, G, or A minor territory if that suits your tune. Keep the rhythm sparse: think 1-2 notes per bar, not a full bassline yet. The intro should feel like it’s hinting at pressure, not delivering the whole system.
For the drums, use a chopped break or a stripped kick/snare pattern. If you’re using a break, slice it so the groove has ghost notes and small gaps, not a loop that just runs unchanged. If you’re using programmed drums, keep the kick simple and the snare slightly late or laid-back so the intro breathes.
For the texture, load something like filtered noise, vinyl-like atmosphere, a metallic hit tail, or a field recording. Keep it low in the mix.
Why this works in DnB: dark intros often fail when they try to sound big too early. A restrained starting palette gives you room to build pressure through arrangement and resampling later.
What to listen for:
- does the bass phrase feel ominous even at low volume?
- does the drum layer create movement without sounding like the drop already started?
2. Design the bass idea for resampling, not final playback
Shape the bass with stock Ableton tools so it has a resample-friendly character. A strong starting chain is:
- Wavetable or Operator for the core tone
- Saturator for edge
- Auto Filter for movement
- EQ Eight to control low-end and bite
Keep the bass envelope short and focused. If you’re using Wavetable, choose a harmonically rich wavetable and avoid overcomplicating modulation. If you’re using Operator, try a simple sine or triangle-based sub with a mid layer created by FM or filter drive.
Practical starting points:
- Saturator Drive: around 2 to 6 dB
- Auto Filter cutoff: sweep roughly between 150 Hz and 1.5 kHz for motion
- EQ Eight: high-pass any non-sub layer around 80–120 Hz if needed
- Amp envelope decay: short to medium, often around 150–400 ms for a note that speaks and leaves
Don’t try to make the bass “finished” yet. Make it printable. You want a tone that will turn interesting when captured and cut.
Decision point — A versus B:
- A: Hollow menace — use a narrower, more restrained tone with a band-pass or low-pass focus. This suits bleak, minimal intros.
- B: Grimy pressure — use wider harmonics and more drive so the resample has more teeth. This suits neuro-leaning or more aggressive warehouse material.
Choose A if the track needs space and dread. Choose B if the intro needs to feel like the system is already straining.
3. Lock the groove against the drums before adding any more layers
Put the bass phrase against the break or kick/snare pattern and listen only for pocket. Do not add fills yet. The bass should either:
- sit slightly behind the drum hit for weight, or
- answer the drum hit with a small rhythmic gap
In dark DnB, the intro groove often works best when the bass and drum are not always speaking at the same time. Let the kick or snare have a moment, then let the bass reply. That creates a warehouse-style call-and-response feel.
Useful timing move: if the bass feels too eager, nudge it a tiny amount later — a few milliseconds can matter. If it feels sluggish, pull it slightly earlier so the phrase feels intentional.
What to listen for:
- does the bass phrase land with the snare or fight it?
- does the groove still feel forward-moving when the bass is reduced to a low monitoring volume?
If the bass and drums blur together, reduce bass note lengths first before touching EQ. In DnB, rhythm is often a note-length problem before it is a tone problem.
4. Build a tension layer that can survive resampling
Add a separate audio or MIDI track for tension detail. Good choices inside Ableton stock workflows include:
- Analog for a thin detuned tone
- Operator for a metallic partial or sine-tuned tension beep
- recorded noise processed with Auto Filter, Redux, or Corpus
- a short hit or stab looped and filtered
Keep this layer higher than the bass and below aggressive top-end clutter. The role is not melody; it is unease. Automate the filter cutoff or the device dry/wet over 4 or 8 bars so the intro evolves.
Stock-device chain example 1:
- Analog or Operator
- Auto Filter
- Corpus
- Reverb on a send or as a light insert
- EQ Eight
This can create a warehouse-metal tone with resonance and space without needing external processing.
Suggested ranges:
- Auto Filter resonance: moderate, not screaming
- Corpus decay: short to medium if you want percussion-like metal; longer if you want eerie bloom
- Reverb decay: keep it controlled, often under 3 seconds for an intro that still needs punch later
Keep this layer out of the sub region. It should support the bass, not dilute it.
5. Record a resample pass of the full loop into audio
This is the turning point. Set up resampling in Ableton Live by capturing the loop performance into a new audio track. Print the 4-bar idea once it’s feeling close, rather than endlessly perfecting the MIDI.
Why this works in DnB: dark intros often become stronger when they are treated like edited material rather than live synth programming. Once audio is printed, you can shape the phrase like a record producer: cut, mute, flip, repeat, and leave air in the right places.
What to do while recording:
- perform filter sweeps manually
- slightly vary drum hits or break accents
- let one or two texture events ring longer than the rest
- capture a version with a little movement, not one that is over-automated
Stop here if the loop already has:
- a clear low-end statement
- one memorable tension movement
- enough negative space to feel moody
If you keep adding parts before resampling, you usually end up with a crowded intro that sounds like an unfinished drop.
6. Edit the resample into a proper intro phrase
Once the audio is printed, cut it into a stronger arrangement shape. This is where the intro becomes a record instead of a loop.
A very usable 8-bar dark intro shape could be:
- Bars 1–2: filtered texture and sparse drum ghosts
- Bars 3–4: bass motif enters with more weight
- Bars 5–6: edit stutter or reversed fragment hints at the drop
- Bars 7–8: tension rises, then clears space for the drop entry
Another common DnB phrasing move is a 2-bar call, 2-bar reply:
- first 2 bars establish the mood
- next 2 bars introduce a bass answer
- next 2 bars thin out the drum layer
- final 2 bars strip to tension and pre-drop energy
Use clip gain and fades to make edits feel intentional. Tighten any clicks by trimming to zero crossings where possible. You are not just chopping audio for novelty; you are shaping phrasing and anticipation.
Arrangement example:
- bar 1: filtered atmosphere
- bar 2: ghost snare and bass tail
- bar 3: break slice appears
- bar 4: short reverse swell
- bar 5: bass answer
- bar 6: empty hit space
- bar 7: stab and riser
- bar 8: drop-prep silence or impact tail
That final pocket before the drop matters. A half-bar of near-empty space can make the drop feel far bigger than another busy fill.
7. Process the resampled audio with two focused chains
Now treat the printed audio like an arrangement element. Don’t stack random effects. Use two purposeful chains depending on the role.
Stock-device chain example 2 for bass-resampled audio:
- EQ Eight
- Saturator
- Drum Buss
- Utility
Use EQ Eight to clean unnecessary sub overlap or harsh spikes. Try:
- low cut only if the resample contains stray non-bass material
- small cuts around 200–400 Hz if the intro gets cloudy
- gentle control around 2–5 kHz if the resample bites too hard
Saturator can add density. Keep it moderate; too much and the intro becomes noisy rather than heavy.
Drum Buss can help add transient weight to edited hits or break fragments, but use it carefully. A little drive or boom can thicken the intro, but too much boom may blur with the actual drop bass later.
The utility of resampling here is that you can now commit to an audio vibe and treat it like a sampled record element, which is very natural in darker DnB.
8. Check the intro in context with kick, snare, and bass from the drop
This is the real test. Bring in the first kick/snare or full drum pattern from the drop after the intro and listen to the transition. You need to know whether the intro is helping the drop, not competing with it.
Mute the intro bass on the final bar if needed, or filter it down so the drop’s sub has room. If your intro ends with too much sub energy, the drop will feel smaller even if it is technically bigger.
Mix-clarity note: keep the intro’s stereo energy mostly in the upper harmonics and texture. The low end should stay mostly mono-compatible and centered. Use Utility to narrow or mono the low region if the resample got too wide. In dark club music, width is for atmosphere; the sub must stay stable.
What to listen for:
- does the drop feel noticeably larger than the intro?
- does the intro leave a clean hole for the first strong drum or bass hit?
If the answer is no, reduce the last bar of the intro by thinning the bass or deleting a texture hit. Usually the fix is subtraction, not more processing.
9. Add one controlled transition edit and commit it
Add a final transition move: a reverse tail, a tape-stop-style moment, a fill slice, or a short stop-time gap before the drop. Keep it minimal and ruthless. Darkside intros do not need obvious festival transitions.
Good options:
- a reversed stab leading into the first drop hit
- a snare roll that peaks in the last half-bar and then cuts
- a single impact with a filtered tail
- a one-beat silence before the drop to let the room breathe
Now commit this to audio if the edit is getting complex. Printing the transition keeps you from endlessly revising tiny timing shifts and lets you move on to the next section of the track.
Workflow efficiency tip: rename your printed versions clearly, like `intro_resample_01`, `intro_edit_02`, `drop_preload_03`. That makes it much easier to compare versions without losing momentum.
10. Make one flavour choice for the second half of the intro
This is where you decide how the intro evolves. Choose one of these valid directions:
- Option A: Strip and deepen
- remove one drum layer
- keep the bass restrained
- add more space and atmosphere
- best for minimal, oppressive rollers
- Option B: Escalate and fragment
- add a chopped fill or extra syncopation
- increase filter movement
- add a more aggressive resampled stab
- best for neuro-leaning or high-tension warehouse tunes
Whichever you choose, the second half must feel like it is pointing somewhere. An intro that loops without evolving makes the track feel unfinished. In DnB, even a subtle rise in density across 8 bars can be enough if it is judged well.
A successful result should feel like the intro is pulling the listener deeper into the room while quietly making the drop inevitable.
Common Mistakes
1. Making the intro too full too early
- Why it hurts: if the intro already sounds like a drop, the drop has nowhere left to go.
- Fix: remove one bass layer or one drum element, then resample again with more air.
2. Leaving the sub in the resampled texture
- Why it hurts: low-end smear destroys the impact of the later drop.
- Fix: use EQ Eight or Utility to keep the printed intro centered and trim unnecessary low frequencies from non-sub material.
3. Chopping audio without respecting phrase length
- Why it hurts: random edits sound like mistakes, not tension.
- Fix: cut on 2-bar or 4-bar logic first, then add smaller half-bar or beat-level edits inside that structure.
4. Using too much reverb on dark intro layers
- Why it hurts: the intro turns cloudy and loses punch.
- Fix: shorten decay, high-pass the reverberant layer, or move reverb to a send so you can control how much space is actually printed.
5. Over-widening the bass resample
- Why it hurts: stereo bass collapses poorly in club systems and weakens mono playback.
- Fix: keep the core low end mono with Utility and reserve width for mid/high texture only.
6. Adding fills that fight the drop
- Why it hurts: if the transition is too busy, the drop feels smaller and less intentional.
- Fix: simplify the last bar. Often one clean silence or one impact is stronger than a flurry of edits.
7. Not checking the intro against the drum/bass hierarchy
- Why it hurts: the intro may sound cool soloed but fail in the track.
- Fix: audition it with the first full drum entry and the drop bass. If the transition feels weak, remove density before adding more processing.
Pro Tips for Darker / Heavier DnB
Mini Practice Exercise
Goal: Build a 6-bar dark intro that can lead into a DnB drop without sounding like a loop.
Time box: 15 minutes
Constraints:
Deliverable:
- one bass statement
- one drum or break layer
- one tension layer
- a clear transition into a notional drop
Quick self-check:
Recap
If you can make the intro feel like a locked warehouse message — tense, minimal, and purposeful — you’ve got the right DNA for a serious darkside DnB record.

