Main tutorial
Lesson Overview
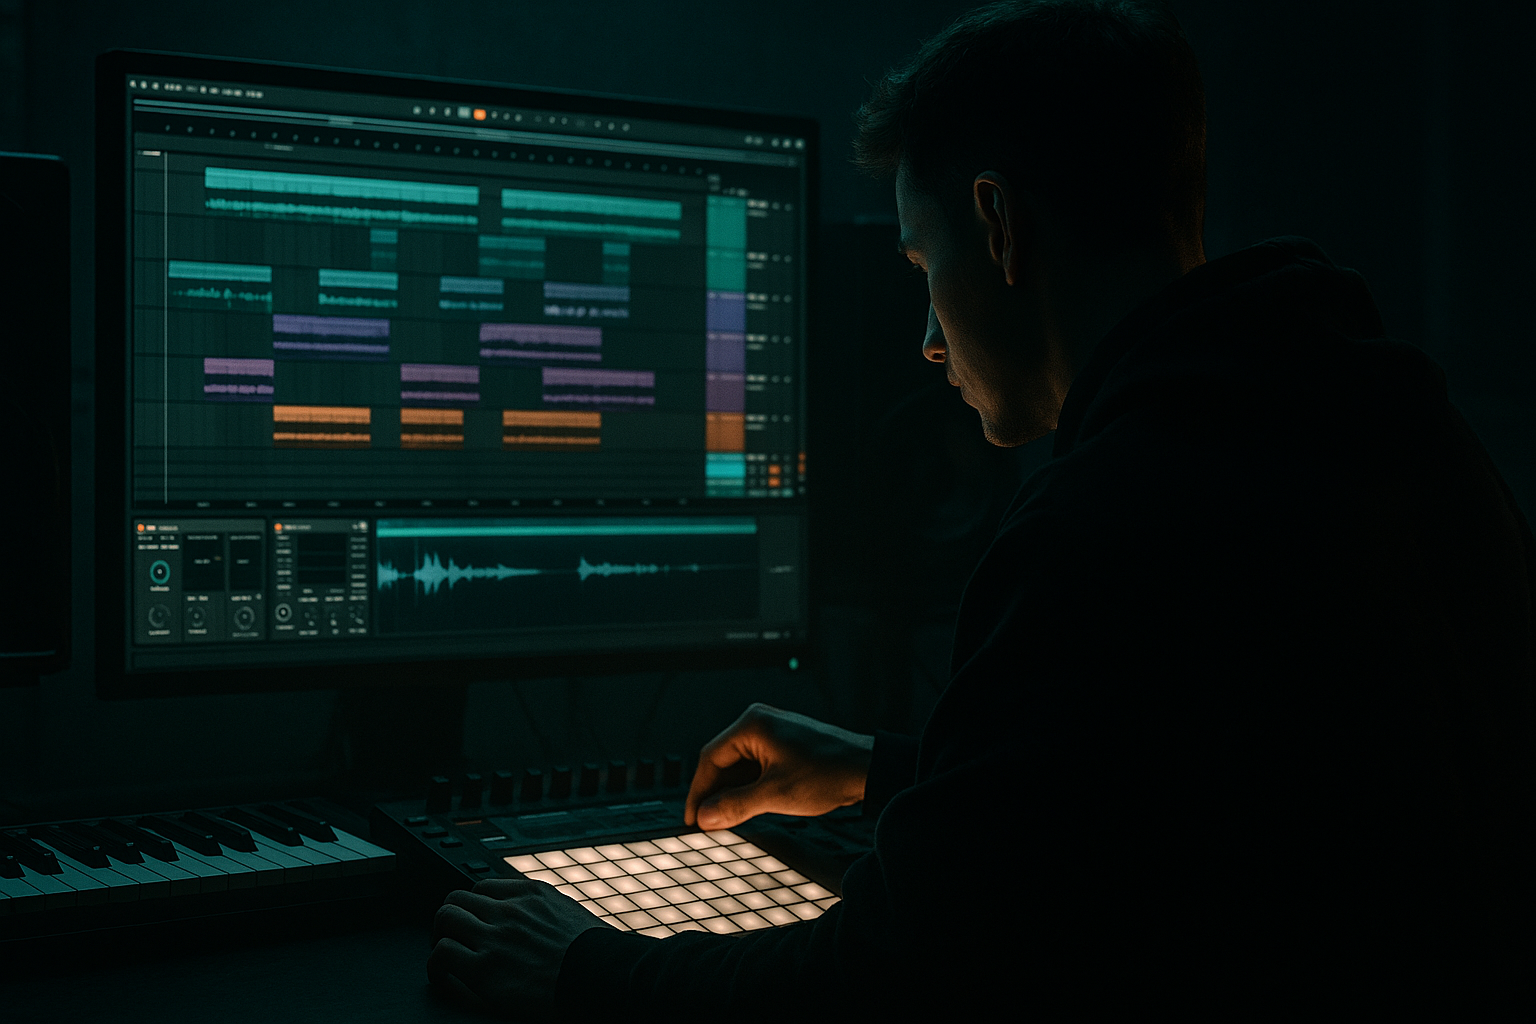
In this lesson you’re building a clean ragga cut from scratch in Ableton Live 12 and shaping it so it sits properly inside a jungle / oldskool DnB track. The goal is not just to chop a vocal and throw delay on it — it’s to make a tight, rhythmically useful edit that behaves like a real instrument in the drop: phrased, punchy, repeatable, and ready to live between breaks and bass without turning to mush.
This technique lives in the track as a call-and-response hook, a drop accent, or a tension tool. In jungle and oldskool-influenced DnB, a ragga cut can do a lot of work: it can signal the drop, reinforce the groove, add attitude, or become the “human” top-line that keeps the track from feeling like pure drum programming. Technically, it matters because vocal chops often bring too much low-mid clutter, too much stereo smear, or too much rhythmic vagueness if they’re not edited cleanly. A good cut has clear transient edges, controlled low end, and a loop shape that locks with the drums.
This lesson suits jungle, oldskool DnB, dancefloor rollers with reggae influence, and darker ragga-leaning tracks. By the end, you should be able to hear a vocal cut that feels like it belongs in the track: short, purposeful, gritty, and danceable — not floating on top, but sitting in the pocket with the break and bass.
What You Will Build
You’ll build a compact ragga cut phrase made from one sampled vocal phrase, edited into a 2-bar or 4-bar loop that feels ready for a jungle drop. The finished result should sound:
- Sonic character: gritty, chopped, slightly degraded, with controlled brightness and enough midrange edge to cut through breakbeats
- Rhythmic feel: syncopated and conversational, often landing around the snare and off-beats rather than constantly on the grid
- Role in the track: a hook or hyped-up call-and-response layer that adds identity without fighting the kick, snare, and sub
- Polish level: demo-ready to mix-ready, meaning it should already work in context before any fancy mastering
- Success criteria: when you mute the vocal cut, the drop loses character; when you unmute it, the groove feels more alive, more dangerous, and more “finished”
- Use the vocal as percussion, not just decoration. In darker jungle and heavy rollers, a ragga cut works best when it behaves like a syncopated top-loop. Short, aggressive phrases can reinforce the break’s ghost notes and make the whole groove feel more animated.
- Print a “dirty” version and a “clean” version. Keep one copy with heavier saturation and one with restrained processing. The dirty version may be perfect for the drop, while the cleaner one can carry the intro or breakdown without muddying the mix.
- Let one slice carry the identity. You do not need the whole phrase to be loud. Often one recognisable word or syllable is enough if it repeats in the right place. That creates a hook without overfilling the arrangement.
- Use contrast between sections. A very ragged, upfront vocal in drop 1 makes the second drop hit harder if you thin it out in the middle and bring it back with more air or a different chop order.
- If the tune is dark, keep the vowel content shorter and the consonants sharper. Long open vowels can feel too smooth in a brutal track. Shorter, clipped phrases often hit harder because they leave room for the break to breathe.
- Commit resampled edits early. If you find a ragga cut that works, resample it to audio and keep moving. In DnB, printed audio often sounds more decisive than endless live tweaking, and it reduces the temptation to over-process the hook.
- Protect the snare pocket. The snare is usually the authority in jungle and oldskool DnB. If your vocal starts stealing its space, trim the vocal tail or move the hit a few milliseconds earlier or later until the snare feels back in charge.
- Use only one vocal sample
- Use only three stock devices max for processing
- Keep the vocal phrase to 2 bars or less
- No additional melodic layers
- A looped 2-bar vocal cut placed over a simple break and bass loop
- One automation move for either filter, volume, or reverb
- One processed version bounced to audio
- Can you understand the phrase when the full beat plays?
- Does the snare still punch through?
- Does the vocal feel like part of the rhythm instead of floating above it?
A successful result should feel like the vocal is part of the rhythm section, not an extra effect pasted on top.
Step-by-Step Walkthrough
1. Choose a ragga phrase with strong rhythm and attitude
Start with a vocal sample that already has a clear rhythmic shape: short words, a rough accent, or a phrase that naturally wants to be chopped. For jungle / oldskool DnB, you want something with character in the midrange — not a lush sung line. Load it into an Audio Track and trim away dead air so the first useful sound starts quickly.
Why this matters: if the source phrase has a clean internal rhythm, your edits will sound intentional faster. Ragga cuts work best when the vocal already has movement and swagger.
What to listen for:
- a phrase with a strong consonant attack, like a “t”, “k”, “r”, or “d”
- a tone that still sounds clear when shortened
- a rhythm that can be repeated without sounding awkward
If you’re choosing between two samples, use this decision point:
- A: rougher, more percussive phrase → better for aggressive jungle cuts and faster breaks
- B: longer, more lyrical phrase → better if you want a more chant-like hook or spaced-out response line
2. Set the sample up so the chop feels musical, not accidental
In Ableton, enable Warp if needed and make sure the phrase plays in time with your project tempo. For a beginner workflow, use a simple warp mode that preserves the vocal’s shape rather than mangling it. Then trim the clip so the useful section sits neatly on the grid.
Practical target:
- keep the main phrase within 1–2 bars before chopping
- if the vocal has natural starts and stops, keep those edges intact
- nudge the clip so the strongest word hits a musically useful point, often just before or on beat 2 or 4
Why this works in DnB: the vocal cut needs to respect the drum phrasing. Jungle and oldskool DnB are extremely sensitive to groove placement. If the vocal drifts, the whole drop feels lazy.
What to listen for:
- does the phrase land with the snare, or does it blur over it?
- does the vocal start feel early, late, or exactly in the pocket?
Workflow efficiency tip: once the clip feels right, duplicate the audio track and keep one version untouched as a backup. That makes it easier to try more aggressive edits without losing the original rhythm.
3. Slice the phrase into usable pieces
Right-click the vocal clip and use a slice workflow so you can turn the phrase into separate hits. For a beginner-friendly setup, create a few clean slices manually around the most useful syllables rather than slicing every breath and noise.
Keep the slices musical:
- one short attack slice for the first hit
- one or two mid-phrase slices for movement
- one longer tail slice if the vocal has a nice texture at the end
Aim for a pattern that can function like a drum fill: hit, reply, hit, tail. In jungle, the vocal often works like a ghost percussion line — not a full melody.
If a slice starts too abruptly or clicks, add a tiny fade at the clip edge or shift the edit point a few milliseconds into a zero-crossing if needed. The goal is clean transients, not perfect microscopic editing.
4. Build a 2-bar or 4-bar call-and-response pattern
Place the slices into a simple loop. Start with something like:
- Bar 1: main ragga hit on beat 1 or the upbeat before 2
- Bar 2: smaller response or tail
- repeat with one variation in bar 4 to avoid a static loop
In oldskool DnB, this kind of phrasing matters because the listener needs a pattern they can latch onto while the break is busy. If the vocal hits are too constant, they flatten the energy. If they’re too sparse, the hook disappears.
A good beginner rule: make the vocal leave space for the snare to speak. Don’t park the loudest slice directly on every snare unless that is the specific effect you want.
What to listen for:
- does the vocal “answer” the drums, or does it step on them?
- does the loop feel like a phrase, not just repeated noise?
5. Shape the vocal with Simpler or a clean Audio Effect chain
Two realistic Ableton stock approaches work well here:
Option 1: Audio clip + light processing
- use the chopped audio directly
- add EQ Eight
- add Saturator
- add Auto Filter or Filter Delay only if needed
Option 2: Drag the vocal into Simpler
- use one-shot or slice-style playback behavior
- trigger the phrase from MIDI clips
- easier for timing changes and variation
For a beginner, the audio-clip route is fine if the rhythm already works. For more control, Simpler gives you a cleaner way to rearrange without constantly re-editing audio.
Suggested starting points:
- EQ Eight: high-pass around 120–200 Hz to clear sub clutter
- cut a little mud around 250–500 Hz if the vocal boxes up the break
- if it needs bite, add a gentle boost around 1.5–3 kHz
- Saturator: drive around 2–6 dB for audible grit without destroying the consonants
- Auto Filter: low-pass around 8–12 kHz if the vocal is too shiny or modern
Why this works: ragga cuts need to sound present in the upper mids, but they must stay out of the sub and low bass zone. The vocal becomes rhythmic texture, not a competing lead.
6. Control the dynamics so the cut stays punchy
Add Compressor after the EQ and saturation if the phrase has uneven levels. You do not want the loudest syllable jumping out and the quieter syllables vanishing. A modest amount of gain control keeps the loop steady enough to behave like a track element.
Good beginner settings to start with:
- ratio around 2:1 to 4:1
- attack around 10–30 ms to keep consonant punch
- release around 50–150 ms so the groove recovers naturally
- aim for only a few dB of gain reduction, not heavy squash
Listen for whether the vocal starts to feel more “locked” with the break. If the compressor is too fast, it can shave off the aggression. If it’s too slow, the peaks poke out and distract from the drums.
Stop here if the vocal already grooves cleanly with the drums. If it sounds like a solid hook with no obvious frequency mess, commit this stage to audio and keep moving. In DnB, committing a good chop early often helps you stop overworking it.
7. Place it against the break and bass before adding more flair
This is the critical context check. Put the vocal cut in the actual drop with your drums and bass loop — even if the track is unfinished. In DnB, a ragga cut that sounds exciting solo can fall apart once the break and sub arrive.
Check these things together:
- does the vocal mask the snare crack?
- does it collide with the bass note attack?
- does the off-beat phrasing support the break’s swing?
If the vocal is fighting the low end, keep it above the sub zone by tightening the high-pass and trimming any unnecessary tail. If it still feels crowded, mute some lower-mid break layers briefly to test whether the vocal is the problem or the drums are too full.
This is also where groove matters: a vocal that lands just behind the beat can sound more rude and laid-back; a vocal that lands right on the grid can feel more clipped and aggressive.
8. Choose between two flavours: raw or controlled
Here’s your A versus B decision point.
- A: Raw and damaged
- use more Saturator drive, maybe 5–8 dB
- keep more midrange bark
- allow a bit of roughness and clipping character
- best for darker jungle, ravey oldskool, and aggressive rewind moments
- B: Controlled and clean
- use lighter saturation, maybe 1–3 dB
- use EQ to remove mud and tame harshness
- keep the phrase tighter and easier to sit in a polished mix
- best for rollers, cleaner arrangements, and tracks with more detailed bass design
The right choice depends on the track’s personality. If your drums are already chaotic, option B often gives you more room. If the track is stripped back and you need attitude, option A can carry the whole hook.
9. Automate movement so the cut evolves across the arrangement
A ragga cut should not stay identical for the whole track. Use automation on filter cutoff, volume, or reverb send to create section changes.
Practical arrangement idea:
- intro: filtered vocal fragments or one teaser hit every 8 bars
- drop 1: full cut with the main phrase
- middle 8 or 16 bars: reduce the vocal to one or two hits, letting the drums breathe
- drop 2: bring the vocal back with a variation, octave shift, or extra tail
Use a simple phrase structure:
- 4 bars of full hook
- 4 bars with a thinner response
- 8 bars of drums and bass emphasis
- return with a slightly altered vocal
This keeps the tune DJ-friendly and helps the drop feel like it is developing rather than looping endlessly.
What to listen for:
- does the vocal create tension before the drop?
- does the second phrase feel like an upgrade, not a copy?
10. Finish with a mono and low-end reality check
Put the vocal in mono-friendly shape by keeping its important energy in the center. If you used any widening, keep it subtle and avoid making the low mids stereo-heavy. A ragga cut that sounds huge in headphones but folds weirdly on club systems is not done.
Simple rule:
- keep the core vocal body centered
- if you use delay or reverb, high-pass the return so it doesn’t cloud the kick and sub
- if the vocal sounds wide, check that the main phrase still reads clearly in mono
Good mix-clarity targets:
- vocal body mostly above 150–200 Hz
- reverb returns filtered so the low end stays clean
- delay throws used as accents, not as constant wash
What success sounds like: the cut hits hard, the words remain readable, the groove feels more dangerous, and the low end still has space to punch.
Common Mistakes
1. Leaving too much low-mid body in the vocal
- Why it hurts: the vocal muddies the break and crowds the bass line
- Fix: use EQ Eight to high-pass around 120–200 Hz, then gently reduce 250–500 Hz if the cut sounds boxy
2. Chopping every syllable too tightly
- Why it hurts: the phrase loses attitude and starts sounding like an error, not a hook
- Fix: keep at least one or two longer slices so the vocal has a human shape and a little sustain
3. Putting the vocal on top of every snare
- Why it hurts: the snare loses impact and the groove feels forced
- Fix: offset some vocal hits so they answer the snare instead of covering it; try placing a hit just before the snare or on the upbeat after it
4. Using too much reverb
- Why it hurts: the vocal stops feeling like a cut and turns into a wash that blurs the drop
- Fix: keep reverb short, use it on sends, and high-pass the return so the low mids don’t smear
5. Over-saturating until the consonants disappear
- Why it hurts: the ragga phrase loses its rhythmic edge and becomes fuzzy
- Fix: back off the drive on Saturator, or follow it with EQ to tame harsh upper mids instead of driving harder
6. Ignoring the bass line when editing the vocal
- Why it hurts: the vocal may sound cool alone but collide with the bass attack in the full track
- Fix: audition the cut with drums and bass looped; if it masks the bass transient, trim the vocal tail or move the hit
7. Making the vocal too wide
- Why it hurts: club systems and mono playback can hollow it out
- Fix: keep the main vocal centered and reserve width for short delays or reverbs only
Pro Tips for Darker / Heavier DnB
Mini Practice Exercise
Goal: Build a 2-bar ragga cut that works over a drum-and-bass loop without muddying the snare or sub.
Time box: 15 minutes
Constraints:
Deliverable:
Quick self-check:
If the answer to all three is yes, you’ve built a usable ragga cut.
Recap
A clean ragga cut in Ableton Live is about rhythm, space, and attitude. Pick a phrase with strong character, chop it into a musical pattern, keep the low end out of the way, and test it with drums and bass early. Use EQ, saturation, and light compression to make it punch without blurring the groove. Then automate it so the hook evolves across the arrangement. If the vocal sounds like a rhythmic weapon inside the track, not a random sample on top, you’ve nailed the result.

