DNB COLLEGE

AI Drum & Bass Ableton Tutorials

LESSON DETAIL

Think: pad pitch for warm tape-style grit in Ableton Live 12 for jungle oldskool DnB vibes (Intermediate)

An AI-generated intermediate Ableton lesson focused on Think: pad pitch for warm tape-style grit in Ableton Live 12 for jungle oldskool DnB vibes in the Vocals area of drum and bass production.

Free plan: 0 of 1 lesson views left today. Premium unlocks unlimited access.

Think: pad pitch for warm tape-style grit in Ableton Live 12 for jungle oldskool DnB vibes (Intermediate) cover image

Narrated lesson audio

The voice track includes the tutorial plus extra teacher commentary.

Open audio file

Main tutorial

```markdown

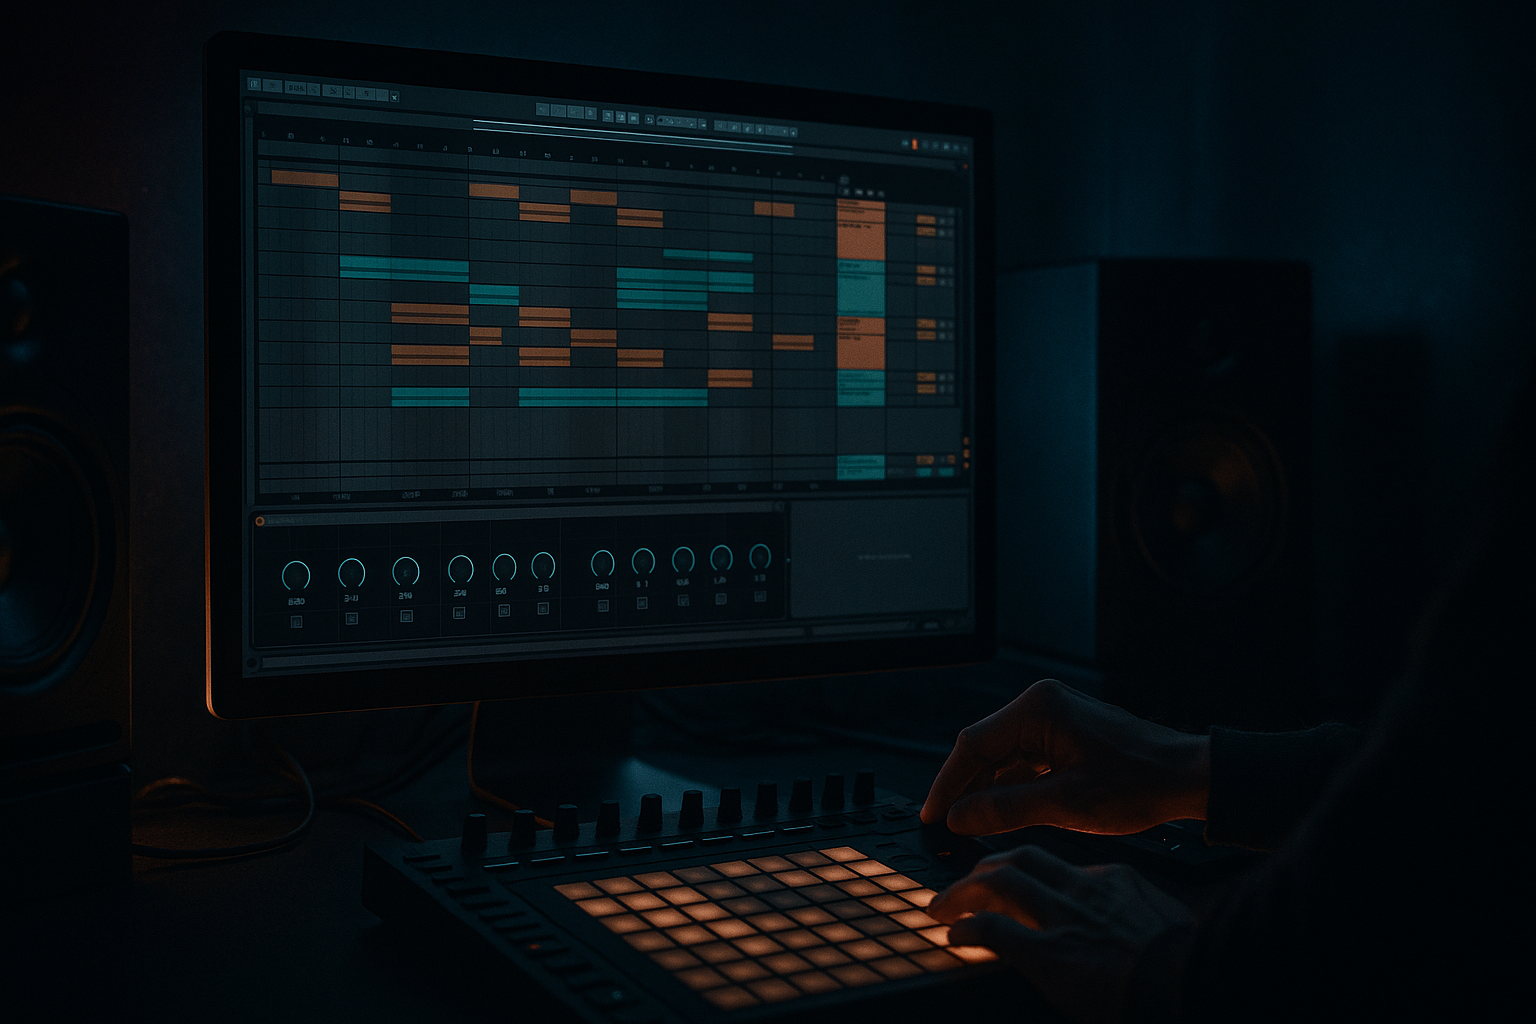
Think: Pad Pitch for Warm Tape-Style Grit in Ableton Live 12 (Jungle / Oldskool DnB Vocals)

1) Lesson overview

This lesson is about one specific “old tape + sampler” trick that screams jungle: pitching vocal pads down (or up) and then driving them into gentle saturation so they get warm, blurry, and gritty without turning harsh. 🎛️

We’ll do it the Ableton Live 12 stock way, focusing on vocal-based pads that sit behind breaks and bass—think dark warehouse atmosphere, Ragga ghosts, and 90s sample-CD haze.

You’ll learn:

  • How pad pitch changes vibe and perceived “tape age”
  • How to get tape-style grit with Roar / Saturator / Redux / Echo
  • How to keep it musical in a rolling DnB mix (160–174 BPM)
  • ---

    2) What you will build

    A playable vocal pad instrument made from a short vocal phrase (“ahh”, “ooh”, spoken word, MC ad-lib), processed to feel like it came off an old DAT/tape bounce:

    Chain goal (stock devices):

    Sampler (pitched)EQ EightSaturator / RoarRedux (light)Echo (wow/flutter-ish)ReverbSidechain glue

    And you’ll place it in a simple 8–16 bar jungle loop with breaks + bass, arranged like a proper oldskool roller.

    ---

    3) Step-by-step walkthrough

    Step 0 — Session setup (DnB mindset)

    1. Set tempo to 170 BPM.

    2. Create three tracks:

    - Breaks (Audio)

    - Bass (MIDI or Audio)

    - Vocal Pad (MIDI)

    Arrangement tip: You want the pad to feel like a constant atmosphere, not a lead. It should “breathe” with the kick/snare via sidechain.

    ---

    Step 1 — Choose and prep the vocal source (clean but characterful)

    1. Find a short vocal sample:

    - A sustained vowel (“ahh”), choir-ish, or a spoken phrase.

    - Jungle-friendly choices: ragga one-shots, old radio lines, classic diva fragments.

    2. Drop it onto your Vocal Pad track and choose “Sampler” when Live prompts. (If it doesn’t prompt: drag sample into Sampler manually.)

    Why Sampler (not Simpler)?

    Sampler gives you more shaping options (filters, modulation, zones). Simpler works too, but Sampler is a killer pad workstation.

    ---

    Step 2 — Turn the vocal into a pad you can hold

    In Sampler:

    A) Enable looping

  • Go to the Sample tab.
  • Turn Loop ON.
  • Set loop points on a stable part (a vowel portion with minimal consonants).
  • Crossfade if needed (Sampler has loop crossfade controls) to avoid clicks.
  • B) Shape the amplitude

  • In Amp Envelope:
  • - Attack: 30–120 ms (soft entry)

    - Decay: 1–3 s

    - Sustain: -6 to -12 dB (optional—depends on sample)

    - Release: 1–4 s (pads should “hang”)

    C) Smooth the tone (pad filter)

  • Use Sampler’s Filter:
  • - Type: LP24 (classic pad softening)

    - Cutoff: start around 3–8 kHz

    - Resonance: 0.10–0.30

  • Optional movement:
  • - Filter Envelope amount: small, like 5–15%

    - Filter Env Attack: 200–800 ms for a slow bloom

    ---

    Step 3 — The “Think” move: pad pitch for oldskool weight 🎚️

    This is the core trick: pitching down changes perceived age, tape thickness, and darkness.

    In Sampler, set Transpose (or tune):

  • Start with -5 semitones (instant jungle mood)
  • Try -7 for darker/creepier
  • Try -12 for “slowed tape” hypnosis (watch mud)
  • Workflow tip:

    Map Transpose to a Macro (if using an Instrument Rack) so you can audition quickly:

  • -3 (subtle)
  • -5 (classic)
  • -7 (dark roller)
  • -12 (extreme “tape drag”)
  • Important: Pitching down exposes low-mid buildup (200–500 Hz) and can clash with bass. We’ll manage that next.

    ---

    Step 4 — Pitch mode: get “sampler era” character, not pristine stretching

    If your sample timing matters (e.g., you want it to fit bars), you have two approaches:

    Option A (classic sampler feel):

  • Keep the pad playable and don’t warp it in audio.
  • Sampler playback pitch is “real”—pitch down = slower timbre vibe. This is authentic.

    Option B (phrase pad that stays in time):

  • Warp the audio before sampling OR use Clip Warp:
  • - Set Warp mode to Complex Pro

    - Formants: 0–40 (lower = darker/older)

    - Then resample into Sampler

    This keeps timing stable but still lets you pitch in Sampler for tone.

    For jungle authenticity, Option A tends to feel more “hardware.”

    ---

    Step 5 — Add tape-style grit (stock chain that actually works)

    Now we’ll build the grit like a tape/sampler path: gentle saturation, slight bit reduction, and soft modulation.

    #### Device 1: EQ Eight (pre-drive cleanup)

    Place EQ Eight right after Sampler:

  • High-pass at 80–140 Hz (12 or 24 dB/oct)
  • Keep subs for the bass, not the pad.

  • Dip 200–400 Hz by -2 to -5 dB (Q ~ 1.0) if it’s boxy
  • Optional gentle shelf down above 8–12 kHz if it’s fizzy
  • #### Device 2: Saturator (warmth + glue)

    Add Saturator:

  • Type: Soft Sine or Analog Clip
  • Drive: 2–6 dB
  • Output: pull down to match level (avoid “louder = better”)
  • Turn Soft Clip ON
  • Goal: it should feel thicker, not crunchy.

    (If you want more “tape machine” behavior, Roar can do this too—see below.)

    #### Device 3: Redux (subtle sampler grain)

    Add Redux lightly:

  • Bit Reduction: 12–14 bits (not 8 unless you want obvious crunch)
  • Sample Rate: 18–30 kHz (subtle aliasing haze)
  • Dry/Wet: 5–20%
  • This is your “old ROMpler / Akai” dust layer. Keep it classy.

    #### Device 4: Echo (wow/flutter-ish movement)

    Add Echo (this is huge for “tape aura”):

  • Mode: Tape
  • Time: try 1/8 or 3/16 (jungle bounce)
  • Feedback: 10–25%
  • Filter: HP around 300–800 Hz, LP around 4–8 kHz
  • Modulation:
  • - Rate: 0.10–0.40 Hz

    - Amount: 5–15%

  • Dry/Wet: 8–20%
  • You want motion behind the breaks, not audible repeats (unless you’re going for a dubby intro).

    #### Device 5: Reverb (space + blur)

    Use Hybrid Reverb:

  • Algorithm: Plate or Hall
  • Decay: 2.5–6 s
  • Pre-delay: 15–35 ms (keeps it from swallowing the transient of the pad onset)
  • EQ inside reverb:
  • - Low cut: 200–400 Hz

    - High cut: 6–10 kHz

  • Wet: 10–25%
  • Oldskool pads = long tails, but filtered.

    ---

    Step 6 — Sidechain it to the break like a proper roller 🥁

    Pads in DnB must move with the drums.

    Add Compressor at the end of the chain:

  • Sidechain: From Breaks track
  • Ratio: 2:1 to 4:1
  • Attack: 5–20 ms
  • Release: 80–180 ms (set to groove with your break)
  • Threshold: adjust for 2–6 dB gain reduction on kicks/snares
  • This makes the pad pump subtly so the break stays upfront.

    ---

    Step 7 — Build an Instrument Rack with “Pitch & Grit” macros (fast workflow)

    Group your chain into an Instrument Rack (Cmd/Ctrl+G) and map macros:

    Suggested macros:

    1. Pitch (Sampler Transpose)

    2. Tone (Sampler Filter Cutoff)

    3. Drive (Saturator Drive)

    4. Dust (Redux Dry/Wet)

    5. Flutter (Echo Mod Amount)

    6. Space (Reverb Wet)

    7. Duck (Compressor Threshold)

    8. Width (Utility Width 80–140%)

    Add Utility at the end:

  • Width: 110–140% (keep lows mono using Utility Bass Mono if needed)
  • Gain: keep levels controlled
  • This rack becomes your “jungle pad machine.”

    ---

    Step 8 — Arrangement ideas (oldskool structure)

    Try this simple 32-bar sketch at 170 BPM:

  • Bars 1–9 (Intro): pad only + filtered break ghost (lowpass break)
  • Bars 9–17 (Drop): full break + bass + pad pitched -5
  • Bars 17–25 (Variation): automate pitch to -7 for darker turn
  • Bars 25–33 (Switch): mute pad for 4 bars, then bring back with more “Dust” macro
  • Automation that works well:

  • Pitch macro down 1–2 semitones for tension before a snare fill
  • Reverb Wet up on the last 1/2 bar into a drop (then snap back)
  • Echo Dry/Wet throws on vocal tails
  • ---

    4) Common mistakes

  • Pitching down without EQ cleanup: you’ll get mud at 200–500 Hz and fight the bass.
  • Too much Redux: it turns into fizzy digital hash; jungle grit is usually subtle.
  • Reverb full-range: low-end reverb kills your roll. Always low-cut reverb returns.
  • No sidechain: pads that don’t duck will make breaks feel smaller.
  • Over-widening: wide pads can cause phase issues; keep lows mono and check in mono.
  • ---

    5) Pro tips for darker/heavier DnB

  • Use Roar for controlled “tape chew”:
  • Put Roar instead of Saturator, start simple:

    - Drive: low to moderate

    - Tone: darker tilt

    - Keep output matched

    Roar can add aggressive harmonics without losing weight if you don’t overcook it.

  • Split-band approach (clean lows, dirty highs):
  • - Create an Audio Effect Rack with 2 chains: Low / High (use EQ Eight to split)

    - Distort/saturate only the High chain

    - Keep Low chain clean and mono

    Result: heavy vibe without low-mid chaos.

  • Add subtle chorus movement (if needed):
  • - Try Chorus-Ensemble at 5–15% wet

    - Keep it slow and shallow so it feels like tape drift, not trance supersaw.

  • Make it “haunted”:
  • Pitch down -7, then automate Sampler filter cutoff slowly over 8 bars while the break rolls. Dark minimal magic. 🌑

    ---

    6) Mini practice exercise (15 minutes)

    1. Load any 1–2 second vocal (vowel or phrase).

    2. Build the rack:

    - Sampler (loop on) → EQ Eight → Saturator → Redux → Echo → Hybrid Reverb → Compressor (SC)

    3. Set pitch to -5, then -7, then -12.

    4. For each pitch setting, do:

    - Adjust EQ (HP + one mud dip)

    - Set Saturator Drive so it’s warmer but not louder

    - Set Redux wet so you feel it more than hear it

    5. Drop it behind a break loop and write a 16-bar section:

    - Bars 1–8: pitch -5

    - Bars 9–16: pitch -7 + slightly more Echo modulation

    Export a quick bounce and listen on low volume: if the pad still reads as “warm tape air” behind the break, you nailed it.

    ---

    7) Recap

  • Pad pitch is the vibe lever: -5 to -7 semitones is a sweet spot for jungle darkness.
  • Tape-style grit = gentle saturation + a touch of reduction + modulation (not just distortion).
  • EQ and sidechain are mandatory so the pad supports the break and bass instead of smothering them.
  • Build a macro rack so you can audition pitch/grit quickly while arranging—fast decisions = better tunes. 🚀

```

Ask GPT about this lesson

Chat with the lesson tutor, get follow-up help, or use quick actions.

Bigup 👽 Ask me anything about this lesson and I’ll answer in context.

Narration script

Show spoken script
Think: pad pitch for warm tape-style grit in Ableton Live 12, for jungle and oldskool DnB vocals. Intermediate level. Let’s get it.

Today we’re doing one of those deceptively simple moves that instantly puts your pads in the 90s: take a vocal, turn it into a playable pad, pitch it down into that heavy, smoky zone… then drive it gently like it’s been bounced through tape and an old sampler. Not harsh distortion. More like warm blur, fuzzy edges, a little dust, and that slow, seasick movement behind the break.

The goal is a vocal pad that sits behind drums and bass in a 170 BPM roller. Not the lead. It’s atmosphere. It breathes with the groove, it fills the room, and it makes everything feel more “warehouse” without getting in the way.

Alright, set up the session first.

Set your tempo to 170 BPM. Make three tracks: an audio track for your breaks, a bass track, and a MIDI track called Vocal Pad. If you’ve already got a loop going, even better. If you don’t, just drop in any classic break loop for now. We’ll mix the pad around it.

Now pick your vocal source.

You want something short and characterful. A sustained “ahh” or “ooh” is perfect. A tiny choir stab can work. A spoken phrase works too, especially if it’s got that ragga or radio vibe. The key is: it should have a steady section you can loop. Consonants are usually the enemy for pads because they click and “thwack” when you loop them.

Drag the sample onto the Vocal Pad MIDI track, and when Ableton asks what to do, choose Sampler. If it doesn’t prompt you, just load up Sampler and drag the sample into it.

Quick note: Simpler absolutely can work. But Sampler gives you more shaping tools, and for this kind of “instrument-style” pad workflow, it’s worth it.

Now turn the vocal into something you can hold like a pad.

Go into Sampler’s Sample tab and turn Loop on. Find a stable part of the vowel. You’re basically hunting for the most boring, steady part of the sound. Set your loop braces around that zone. If you hear clicks, use the loop crossfade. A little crossfade goes a long way. The goal is for it to feel like it can sustain forever without you noticing where the loop is.

Next, shape the amp envelope so it behaves like a pad.

Set your attack somewhere around 30 to 120 milliseconds. That gives it a soft entry so it doesn’t poke through the break like a stab. Decay can be one to three seconds. Sustain is optional depending on the sample, but you can pull it down a bit, like minus six to minus twelve dB, if the sustain feels too forward. Release is big for vibe: one to four seconds. When you let go, it should hang like fog, not stop like a gate.

Now we soften the tone with a lowpass filter.

In Sampler’s filter section, pick a 24 dB lowpass, LP24. Set cutoff somewhere like three to eight kilohertz to start. Keep resonance modest, around 0.10 to 0.30. You’re not trying to whistle; you’re trying to smooth.

If you want subtle movement, add a tiny filter envelope amount. Think five to fifteen percent, with a slower attack, like 200 to 800 milliseconds. That gives you that “bloom” where it opens slightly after you press the note.

Now we do the main move: pitch.

This is the “Think” trick. Pitching a vocal pad down doesn’t just change the musical note. It changes the perceived age, thickness, and mood. It also shifts formants, meaning the “mouth” character changes, and it can exaggerate breath and noise. That’s why it can suddenly feel like a ghost in a stairwell. That’s what we want… as long as it still sits in the track.

In Sampler, find transpose. Start at minus five semitones. That’s the classic jungle mood. Now audition minus seven. That’s darker, creepier, more “roller in the basement.” Then try minus twelve if you want that slowed tape hypnosis… but heads up, minus twelve is where mud and “demon voice” can show up fast.

If you’re building a performance-ready tool, group everything into an Instrument Rack later and map transpose to a macro so you can quickly audition minus three, minus five, minus seven, minus twelve. Fast decisions make better tunes. You don’t want to be hunting for vibe for an hour.

Now, an important technical choice: do we keep it “sampler era,” or do we keep it “in time”?

If you’re going for authentic hardware feel, don’t warp it in audio. Just let Sampler do what it does. Pitching down will naturally change the feel and the tone in a very believable way, like an old sampler or a tape machine.

If you need the phrase to fit the bar precisely, do this: warp the audio clip first, set warp mode to Complex Pro, and adjust formants. Lower formants gives you darker, older. Then resample that into Sampler. This keeps timing steady but still gives you control.

For most jungle atmosphere pads, the classic feel is usually Option A: keep it raw, let the pitch do the talking.

Now let’s build the tape-style grit chain. Stock Ableton only.

First device after Sampler: EQ Eight. This is the “don’t ruin your mix” stage.

High-pass the pad somewhere around 80 to 140 Hz. Pads do not need sub. Your bass needs sub. If you let the pad live down there, it will steal headroom and fight the low end of your tune.

Then check the low mids. Pitching down often inflates that 200 to 500 Hz area. If it sounds boxy or cloudy, do a dip around 200 to 400 Hz, maybe minus two to minus five dB, with a Q around 1. Don’t over-EQ; you’re just carving space.

If it feels too modern and fizzy, gently shelf down the very top above eight to twelve kHz. Jungle pads usually aren’t sparkling. They’re controlled.

Now saturation. Add Saturator next.

Choose Soft Sine or Analog Clip. Drive around two to six dB. Turn Soft Clip on. Then match the output so it’s the same loudness as bypassed. This is huge. The whole tape illusion falls apart if every stage is just getting louder. A good checkpoint is: bypass it, enable it. If it feels thicker at the same level, you’re doing it right. If it just feels louder and more aggressive, you’re heading into “fried” territory.

If you’re using Roar instead of Saturator, keep it simple: low to moderate drive, darker tone tilt, and again, match the output. Roar can get savage, but for this lesson we want “chew,” not destruction.

Next, add Redux, but treat it like seasoning, not the main ingredient.

Set bit reduction around 12 to 14 bits. Sample rate around 18 to 30 kHz. Keep dry/wet low, like five to twenty percent. The vibe is subtle grain, like an old Akai or ROMpler haze. If you push Redux too hard, you’ll get that fizzy digital hash that doesn’t feel like jungle; it feels like a broken MP3.

Now movement: Echo.

Drop Echo after Redux. Set Echo’s mode to Tape. Try a time of one-eighth or three-sixteenths; those sit nicely against 170. Feedback around ten to twenty-five percent. Filter the echo so it doesn’t clutter: high-pass the echo around 300 to 800 Hz and low-pass around four to eight kHz.

Then add modulation inside Echo. Rate around 0.10 to 0.40 Hz, amount around five to fifteen percent. Keep it in the “I feel it” zone. You’re chasing wow and flutter, not obvious repeats.

Dry/wet, eight to twenty percent. If you can clearly hear separate echo repeats in the middle of the drop, you might be overdoing it—unless you specifically want a dubby intro moment.

Now space: Hybrid Reverb.

Pick Plate or Hall. Decay two and a half to six seconds. Pre-delay around 15 to 35 milliseconds so the pad doesn’t instantly smear and swallow itself. Inside the reverb EQ, low cut at 200 to 400 Hz, high cut around six to ten kHz. Filtered long tails are the oldskool cheat code. Wet around ten to twenty-five percent. Again: haze, not wash.

At this point, your pad probably sounds gorgeous solo. Now we make it behave in a DnB mix.

Add a Compressor at the end, and sidechain it from the breaks track. Ratio two to one up to four to one. Attack five to twenty milliseconds, release around 80 to 180 milliseconds. Set threshold until you’re getting about two to six dB of gain reduction when the drums hit.

Coach note: for jungle rollers, sometimes you want the pad to get out of the way of the snare more than the kick. If your snare is the real “statement,” consider sidechaining from a drum buss or a version of the drums that emphasizes snare. Even an EQ’d sidechain signal can work. The sidechain should feel musical, like breathing, not like a trance pump effect.

Now, workflow upgrade: build macros.

Select your Sampler and effects and group them into an Instrument Rack. Map a few key controls: a Pitch macro for transpose, Tone for the Sampler filter cutoff, Drive for Saturator drive, Dust for Redux dry/wet, Flutter for Echo modulation amount, Space for Reverb wet, Duck for compressor threshold.

Then add Utility at the end. This is where you control width and sanity-check the stereo. Set width somewhere like 110 to 140 percent if you want it wider, but keep an eye on mono compatibility. Do a quick mono check: hit Utility’s mono button briefly while the beat plays. If the pad disappears or collapses weirdly, reduce width, reduce modulation, or keep the “core” more mono.

Also, a mixing target that helps: for oldskool haze, the pad often lives mainly between about 350 Hz and 3.5 kHz, with a controlled top end. If it’s blasting at six to ten kHz, it’ll sound too modern and hi-fi.

Now arrangement. Here’s a simple oldskool structure you can sketch in 32 bars.

Bars one to eight: intro. Bring the pad in, maybe the break is filtered or ghosted. Let the pad set the scene.
Bars nine to sixteen: drop. Full break, bass, pad at minus five.
Bars seventeen to twenty-four: variation. Automate pitch to minus seven for a darker turn, or slightly increase Dust and Flutter.
Bars twenty-five to thirty-two: switch energy. Mute the pad for a bar or half a bar right before something important, then bring it back. Dropouts make things feel louder without turning anything up.

Automations that really work: pitch down one or two semitones for the last two bars before a drop. Push reverb wet for the last half bar into a transition, then snap it back. Do quick Echo throws on the tail of the pad phrase if it’s more of a vocal line than a pure vowel.

Now a couple advanced variations, just so you’ve got options when the pad starts acting up.

If pitching down makes it too “monster,” do formant-preserving pitch. Warp the original vocal clip with Complex Pro, transpose it down a little like minus three to minus five, then raise formants slightly, like plus fifteen to plus forty, until it stays human. Resample that and load it into Sampler. You still get weight without going full creature.

If the pad is huge but smearing your mix, try a parallel “clean core plus dirty halo.” Make an Audio Effect Rack after Sampler with two chains. Core chain stays more mono and cleaner. Halo chain is high-passed higher, gets the heavier grit and wider effects. Blend to taste. That’s one of the best ways to get width and dirt without low-mid chaos.

If you want pitch instability without obvious LFO vibrato, modulate Sampler Fine tuning very slightly, like plus or minus five to fifteen cents, at a very slow rate, 0.05 to 0.20 Hz. You’re imitating transport instability, not making a synth wobble.

And here’s a classic: the phone booth ragga pad. After distortion but before reverb, bandpass it. High-pass around 300 to 500 Hz, low-pass around three to five kHz. Then a tiny bit more saturation. That gives you pirated-radio, tape-to-tape energy that sits behind breaks perfectly.

One last secret sauce: resampling.

When the pad feels right, print it to audio. Freeze and flatten, or record it to a new audio track. Then treat it like a sampled texture. You can even turn warp on and use Texture mode with a small grain size for a subtle smear. Chop one-bar “pad prints” and rearrange them. That kind of imperfection often lands more authentic than trying to make the MIDI pad do everything perfectly.

Quick mini practice drill you can do in 15 minutes.

Load any one to two second vocal.
Build the chain: Sampler looping on, then EQ Eight, Saturator, Redux, Echo, Hybrid Reverb, then Compressor with sidechain.
Set pitch to minus five, then minus seven, then minus twelve.
For each pitch, do three adjustments: EQ with a high-pass and one mud dip, set saturation so it’s warmer but not louder, and set Redux so you feel it more than you hear it.
Then drop it behind a break and write 16 bars: first eight at minus five, second eight at minus seven with a touch more Echo modulation.

Then bounce it and listen at low volume. That’s a big test. If at low volume the pad still reads as warm tape air behind the break, you nailed it. If it vanishes, it’s probably too wide or too dark. If it dominates, your low mids are probably too thick or your sidechain isn’t doing enough.

Common mistakes to avoid as you finish.

Don’t pitch down without EQ cleanup. That’s how you get mud and a bass fight.
Don’t overdo Redux. Subtle wins.
Don’t run full-range reverb. Always low-cut the reverb.
Don’t skip sidechain in DnB. Pads that don’t duck make breaks feel smaller.
And don’t trust stereo without a mono check.

Recap.

Pitch is your vibe lever. Minus five to minus seven is the sweet spot for jungle darkness.
Tape-style grit is a combination: gentle saturation, a touch of reduction, and slow modulation. Not just distortion.
EQ and sidechain are non-negotiable if you want it to roll.
And building a macro rack makes this a fast, repeatable tool you’ll use across tracks.

If you want a challenge, make three “tape generations” of the same pad: clean-ish, dub copy, and worn tape. Print them to audio, arrange them across 32 bars, keep the pad peaking under minus twelve dBFS on its channel, and make sure it survives in mono. That’s how you train your ear for mix-ready atmosphere.

Alright. Load a vocal, pitch it down, warm it up, add a little dust, make it breathe with the break, and let that haunted haze carry your roller.

Mickeybeam

Go to drumbasscd.com for +100 drum and bass YouTube channels all in one place - tune in!

Any 1 Tutorial FREE Everyday
Tutorial Explain
Generating PDF preview…