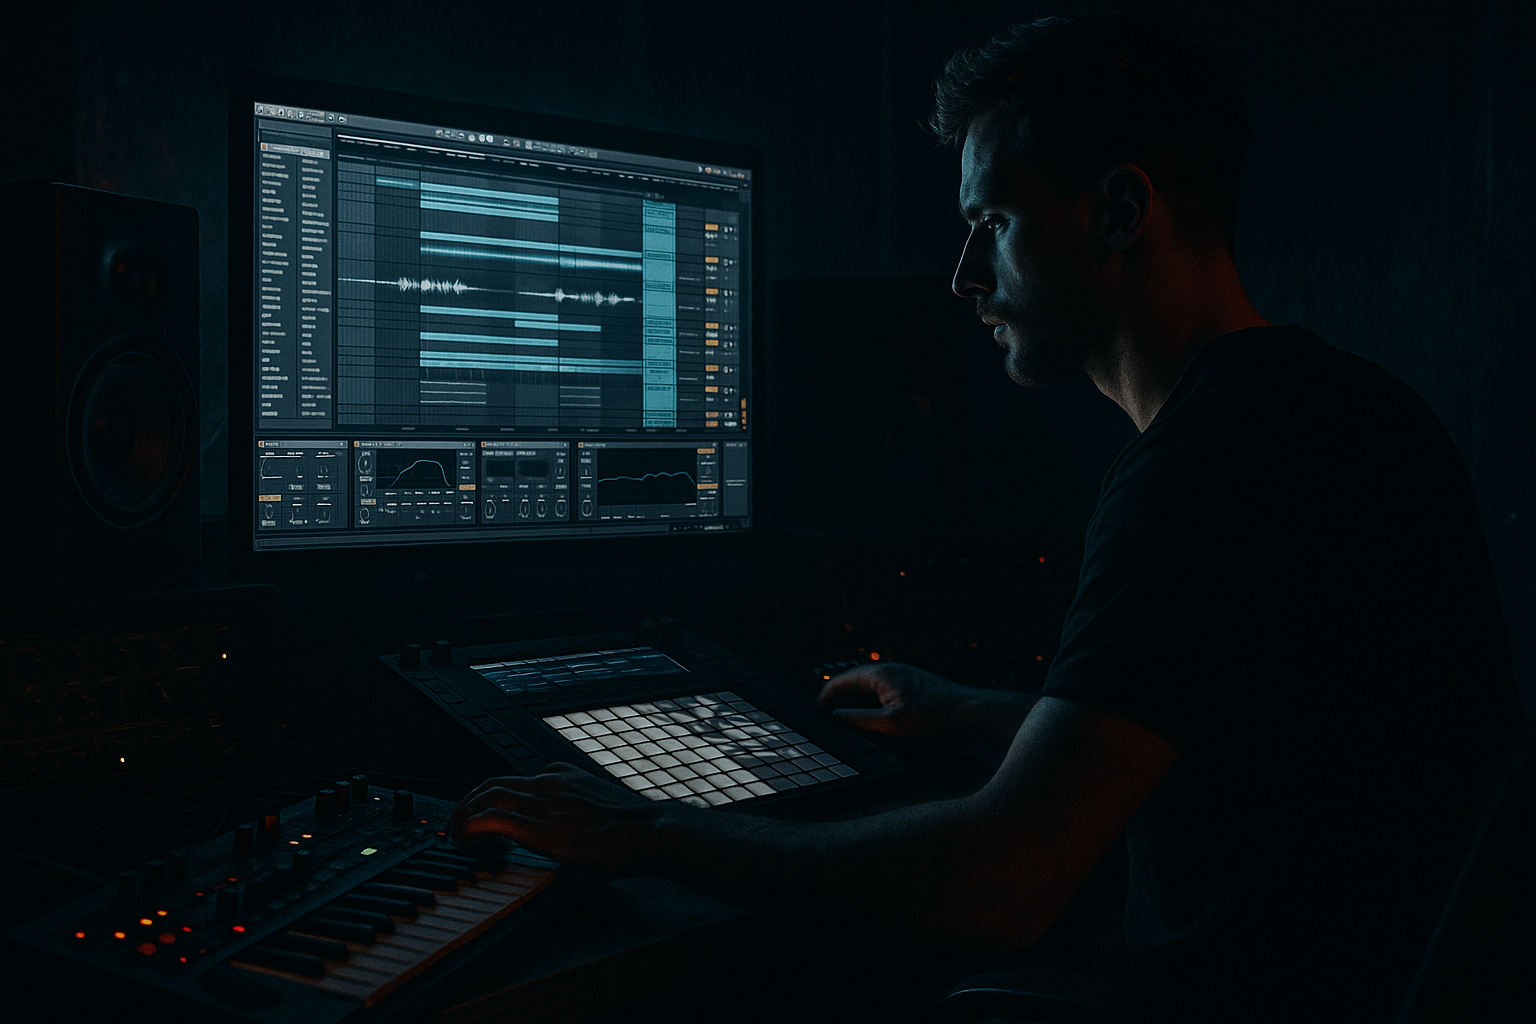
Main tutorial
Lesson Overview
A switch-up in DnB is that sudden, intentional change in groove, bass phrase, drum edit, or texture that makes the drop feel like it just got rewound and reloaded. In Ableton Live 12, the strongest switch-ups are rarely random—they’re built from sampling, resampling, and tight arrangement control so the drop can pivot from one idea to another without losing pressure.
For oldskool jungle and rewind-worthy DnB vibes, the goal is to create a moment where the listener thinks, “hold up, run that back” 😈. That could mean a half-time bass call suddenly flipping into a double-time break chop, a reese phrase mutating into a chopped amen answer, or a stripped section exploding back with a different drum syntax while keeping the same harmonic center.
This lesson sits right in the middle of drop design and arrangement, especially for:
- Jungle / oldskool DnB: break edits, DJ-style tension, surprise phrase swaps
- Rollers: subtle but effective bass/drum switch-ups to keep the floor locked
- Neuro / darker bass music: controlled mutation, sound-design-driven movement, automated texture shifts
- a sampled breakbeat that mutates mid-phrase
- a reese/sub bass line that changes articulation and stereo behavior
- a call-and-response bass edit using resampled audio
- a transition fill made from stock Ableton devices
- a drop arrangement that feels authentic to oldskool DnB, but modern in impact
- bars 1–4 establish the groove
- bars 5–8 introduce a bass phrase twist
- bars 9–12 switch the drum language
- bars 13–16 slam in a darker, more aggressive variation designed to feel like a reload moment
- Overdoing the switch-up with too many new elements
- Letting the sub get messy during resampling
- Making the break too quantized
- Using distortion on the full bass chain
- Transition fills that feel like EDM risers
- Switching sections without phrase logic
- Print and re-chop your own drop
- Use filtered noise like a texture layer, not a centerpiece
- Automate stereo width in the mids, not the sub
- Use tiny pitch shifts for tension
- Keep a “ghost” of the original groove underneath the switch
- Lean into silence
- Use Drum Buss carefully on breaks
Why it matters: in DnB, the drop can’t just be loud—it has to evolve fast enough to keep energy high while still feeling dancefloor-safe. A switch-up is one of the best ways to make a track feel advanced, human, and replayable without overcomplicating the whole arrangement.
What You Will Build
You’ll build a 16-bar drop section in Ableton Live 12 that starts like a heavy rollers/jungle hybrid, then flips into a rewind-worthy switch-up using:
By the end, you’ll have a drop where:
Step-by-Step Walkthrough
1. Build the core loop with two “identities”: drum drive and bass phrase
Start with a 4-bar loop at your target tempo, ideally 170–174 BPM for classic DnB/jungle, or around 172 BPM if you want it to sit comfortably between oldskool and modern rollers.
In Session or Arrangement View, create:
- one audio track for your breakbeat sample
- one MIDI track for your sub/reese bass
- one return or audio track for atmospheric FX and resample printing
For the drums, choose a break sample with enough transient detail to chop. Use Warp only if needed; if the break already sits close, keep it natural and manually slice it instead. In Simpler, use Slice mode or place the break on an audio track and use Slice to New MIDI Track. For oldskool DnB, a few strong slice points matter more than over-editing every transient.
For the bass, write a simple 2-bar phrase with a strong root-note anchor. Keep the notes sparse enough to leave space for the break. Think of it as:
- bar 1: root hit + short answer
- bar 2: rhythmic variation
- bar 3: same contour, slightly altered
- bar 4: phrase ending that invites the switch
Why this works in DnB: the genre relies on contrast inside repetition. If the loop is too busy, the switch-up has nothing to pivot against.
2. Shape the break for a real jungle-style groove
Use Ableton’s Drum Rack or Simpler depending on how granular you want the edit to be.
If you’re using audio slicing:
- chop the amen or break into kick, snare, ghost, and tail slices
- move a few ghost notes off-grid slightly, but keep the kick/snare anchors solid
- preserve a “question mark” in the groove: don’t fully quantize every hit
Add Groove Pool swing if needed. For jungle authenticity, try:
- MPC 16 Swing 55–58%
- or a lighter swing around 54–56% for a rollers feel
Then process the break with Drum Buss:
- Drive: 5–15%
- Boom: low, around 0–10% if you want more tail without bloating the sub
- Transient: slightly positive for extra snap, or slightly negative if the break is too spiky
Follow with EQ Eight:
- high-pass around 25–35 Hz only if the sample has unusable rumble
- reduce any muddy zone around 200–400 Hz if the break fights the bass
- tame harsh hats around 7–10 kHz if needed
Keep the break alive with variation: automate a hi-hat slice mute, or swap one ghost note every 4 bars so the loop feels “played,” not pasted.
3. Design the bass as two layers: sub discipline + upper movement
Put the bass on a MIDI track using Wavetable, Operator, or Analog. For darker DnB, a common stock-device pairing is:
- Operator for pure sub
- Wavetable for reese or mid bass texture
Build the sub in Operator:
- sine wave
- no unneeded movement below 100 Hz
- short amp envelope if you want punchier notes, or longer for rollers
Build the upper bass in Wavetable:
- use a saw or pulse-style source
- add subtle unison only in the mids, not on the sub
- low-pass filter automation for movement
Important advanced habit: separate the bass into two tracks or two chains. Keep sub and mid-bass controllable independently. This makes switch-ups much easier because you can mute, narrow, distort, or automate each part separately.
Add Saturator on the mid layer:
- Drive around 2–6 dB
- Soft Clip on if you want extra density
- Use Output to match level
For the sub, keep it clean. If you want a bit of texture, use very subtle Redux or Saturator, but don’t compromise the low-end center.
4. Write a bass phrase that can “answer itself”
A good switch-up often begins with a phrase that contains its own future mutation. In other words: the bass should already suggest another version of itself.
Create a 2-bar call-and-response:
- first hit: long, weighty note
- second hit: shorter, more syncopated answer
- third hit: rest or pickup
- fourth hit: accent note with different articulation
Then duplicate that phrase and change just one variable:
- filter open/close
- note length
- one pitch displacement
- rhythmic displacement by a 16th or 8th note
A practical setting idea:
- keep the bass mono below 120 Hz
- use Auto Filter on the upper layer with envelope amount around 10–25%
- automate cutoff between roughly 180 Hz and 2.5 kHz depending on how aggressive the switch should feel
This creates a bassline that can pivot from rolling to menacing without changing the entire harmonic identity.
5. Resample the strongest 1–2 bars of the drop
This is where the sampling workflow gets powerful. Route the bass and drums to a new audio track and resample the moment you like most. In Ableton Live 12, this is one of the best ways to create a switch-up that feels like a true production decision rather than a loop edit.
Print:
- one bar of bass-and-break synergy
- one bar where the bass has a strong accent or fill
- one bar with a drum variation
Then chop the recorded audio into usable pieces:
- use Slice to New MIDI Track
- or manually place warp markers and cut the audio into rearrangeable chunks
You’re now free to:
- reverse a tail
- repitch a bass stab by a few semitones
- move a ghost drum before the snare
- create a one-beat reload-style fill
Use Reverse on a tiny bass texture or snare tail, not the whole groove. That’s often enough to create tension without losing floor pressure.
6. Create the switch-up by changing the drum language, not just the volume
The best DnB switch-ups often work because the drums stop saying the same thing.
In bars 9–12, transform the break:
- remove the main kick for one bar
- bring in extra ghost notes
- introduce a chopped amen fragment
- switch from straight punch to syncopated shuffle
A strong oldskool move is to take a recognizable break phrase and:
- let the snare remain as the anchor
- replace the kick with short tom or rim hits
- add a tiny pickup fill into bar 12
For a more neuro-leaning switch:
- automate Beat Repeat on a return or insert
- set Interval to 1/8 or 1/16
- keep Chance low, around 5–15%
- use Grid around 1/16
- mix it in just for the fill or transition bar
Don’t overuse Beat Repeat as a gimmick. The goal is one precise moment of destabilization before the groove locks back in.
7. Automate the bass texture so the switch feels intentional
Use Auto Filter, Redux, Chorus-Ensemble, and Utility to make the bass evolve at the switch.
A good arrangement move:
- bars 1–4: bass wide enough in the mids, but mono below 120 Hz
- bars 5–8: automate filter cutoff open slightly
- bars 9–12: narrow the upper bass a touch with Utility or reduce stereo width
- bars 13–16: add more distortion or harmonic bite for the reload
Specific automation ideas:
- automate Auto Filter cutoff from about 250 Hz to 2.2 kHz over one bar
- increase Saturator Drive by 1–3 dB only during the switch-up
- use Utility Width at 0% for sub sections, then bring upper stereo content back in after the drop flip
Why this works in DnB: the ear reads filter and width changes as energy shifts, even when the notes are minimal. That means you can build a bigger emotional change without crowding the mix.
8. Design a rewind-worthy fill using printed audio and micro-edits
A rewind moment usually comes from a fill that feels both surprising and inevitable.
Take your resampled drop audio and create a 1-bar fill at the end of the 8th or 16th bar:
- cut a snare tail
- reverse a cymbal
- add a one-shot impact
- insert a bass pickup one 16th early
Useful stock devices:
- Reverb with short decay for a metallic space
- Echo with low mix and filtered repeats
- Utility for quick gain rides
- Simpler for a one-shot rewind vocal or scratch-style sample, if you’ve got one
Arrangement suggestion:
- mute the kick for the first half of the fill
- leave a snare ghost or break slice
- return with a fully weighted kick/snare/bass hit on the next downbeat
If you want oldskool flavor, a tiny vinyl-stop-style audio edit or reverse hit before the drop return can do more than a huge riser. Keep it short and believable.
9. Arrange the switch-up so the listener understands the story
Here’s a strong musical context example: imagine a 32-bar drop where bars 1–8 are a rolling jungle pressure section, bars 9–16 switch into a chopped break-and-reese variation, and bars 17–32 return to the original idea with more aggression.
That’s a classic DnB arrangement logic:
- establish
- mutate
- reload
- return stronger
In the Arrangement View, label sections clearly:
- Intro
- Drop A
- Switch-up
- Reload return
- Outro
Keep your switch-up aligned to phrase boundaries, usually every 4 or 8 bars. DnB works best when the listener can feel the turn, even if they can’t predict the exact edit. If your switch happens off-phrase without purpose, it can feel messy rather than hype.
10. Do a final mix pass with low-end discipline
Before calling the switch-up finished, check the balance:
- sub and kick should not mask each other
- breaks should keep snap without harshness
- the switch-up should increase intensity, not just add gain
Use Spectrum or your ears plus mono checking with Utility:
- listen in mono to verify the bass still hits
- reduce any midrange crowding around 250–500 Hz
- control harshness around 2.5–5 kHz if the break or distortion gets aggressive
If the switch-up feels exciting but smaller in the mix, don’t just raise volume. Instead:
- tighten the kick tail
- shorten bass release
- add a touch more harmonic saturation in the mids
- automate tiny gain lifts only for the transition bar
The best switch-ups feel like the track is changing form, not just getting louder.
Common Mistakes
- Fix: change one or two core variables only—usually drum language and bass articulation.
- Fix: keep sub on a separate mono layer, and never print uncontrolled low-end unless you mean to.
- Fix: preserve human groove with slight timing variation and selective swing.
- Fix: distort the mid layer more than the sub; keep the bottom clean.
- Fix: use short, sample-based edits, reverses, and drum pickups that fit DnB language.
- Fix: place the change on 4- or 8-bar boundaries so the dancefloor can follow it.
Pro Tips for Darker / Heavier DnB
- Resampling your own groove creates more believable switch-up material than relying only on raw MIDI.
- In Wavetable or Operator, add subtle top movement above the bass to create menace without clutter.
- Keep the foundation mono; let only the upper bass and atmospheres widen briefly for impact.
- Pitch a bass stab or break slice up/down by a semitone very briefly before the reload. Small moves feel nasty in darker DnB.
- Even if the drums change, retain one familiar anchor—often the snare or a key ghost note pattern—so the floor never loses the pulse.
- A half-beat gap before the reload can hit harder than a huge fill. In DnB, negative space creates pressure.
- A little drive goes a long way. Too much can flatten the transient story that makes the switch-up pop.
Mini Practice Exercise
Spend 10–20 minutes building a switch-up from an existing 8-bar DnB loop:
1. Duplicate your current drop loop.
2. In bars 5–8, mute one kick or snare element to create a “hole.”
3. Resample bars 1–4 onto a new audio track.
4. Chop the printed audio into 4–8 slices.
5. Reverse one slice and move it into the last beat of bar 8.
6. Automate a bass filter cutoff rise across one bar.
7. Add one Drum Buss or Saturator increase only during the transition.
8. Export or bounce the section and listen back immediately in mono.
Goal: make the switch-up feel like a deliberate reload moment, not a random edit.
Recap
A strong DnB switch-up in Ableton Live 12 comes from sampling, resampling, and arrangement control. Keep the sub disciplined, let the break evolve, and change the groove language at phrase boundaries. Use stock devices like Simpler, Drum Rack, Wavetable, Operator, Drum Buss, Saturator, Auto Filter, Beat Repeat, Utility, and Echo to create tension, mutation, and impact. The best switch-ups feel like the track remembers its first idea—then comes back harder.

