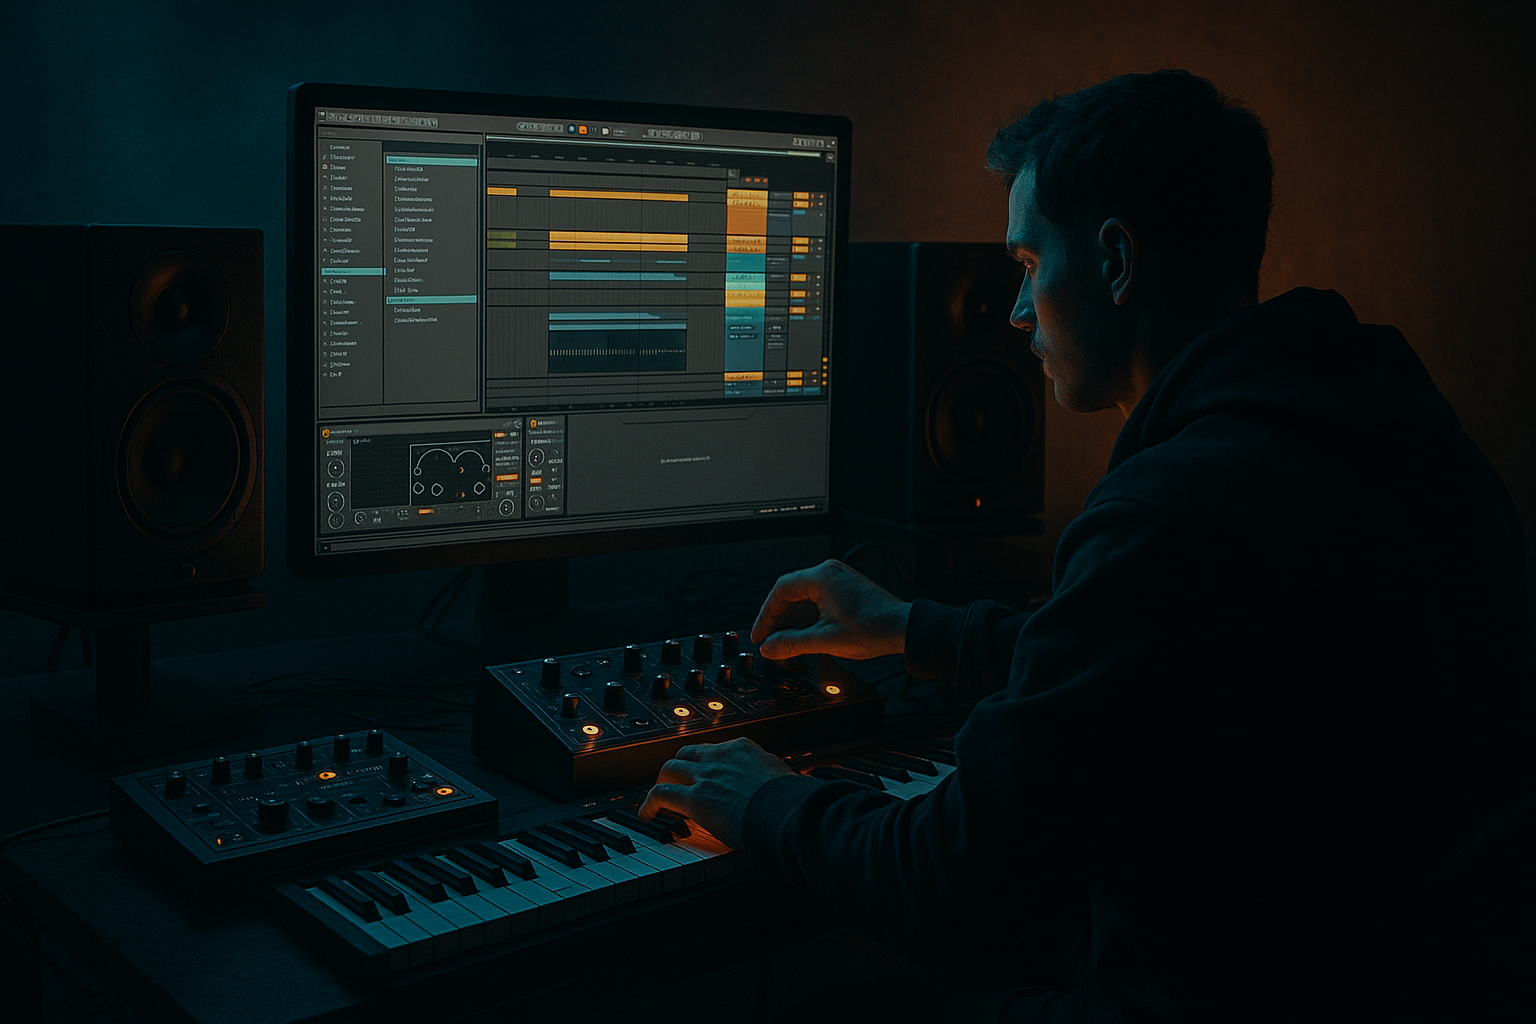
DNB COLLEGE

Drum & Bass Ableton Live 12 Tutorials

LESSON DETAIL

Stretch oldskool DnB FX chain for smoky warehouse vibes in Ableton Live 12 (Advanced)

An AI-generated advanced Ableton lesson focused on Stretch oldskool DnB FX chain for smoky warehouse vibes in Ableton Live 12 in the Drums area of drum and bass production.

Back to lessons
Stretch oldskool DnB FX chain for smoky warehouse vibes in Ableton Live 12 (Advanced) cover image

Narrated lesson audio

The voice track includes the tutorial plus extra teacher commentary.

Open audio file

Main tutorial

Stretch Oldskool DnB FX Chain for Smoky Warehouse Vibes in Ableton Live 12 (Advanced – Drums)

1. Lesson overview

You’re going to build a stretchable oldskool DnB/jungle FX chain that turns clean modern drums into that smoky warehouse vibe: gritty mids, crunchy transients, dubby space, tape wobble, and long “air trails” that you can throw on fills and ride during breakdowns. 🏭🌫️

This isn’t “add reverb and call it a day.” We’ll design a performance-ready rack in Ableton Live 12 using mostly stock devices, with macro controls for length, grime, space, and movement—perfect for rolling DnB, jungle, and techstep flavors.

---

2. What you will build

A Drum FX Rack you can drop onto:

  • your Drum Bus (recommended), or
  • a dedicated Drum FX Return (also great)
  • The rack will include (oldskool-leaning chain):

  • Transient shaping + glue (so it stays punchy)
  • Saturation / soft clipping for 90s grit
  • Band-limited “AM radio” mid crunch layer
  • Dubby send space (reverb + echo with “tape” vibe)
  • Time-stretch style smear using grainy/diffuse tricks
  • Throw section (momentary mega FX on fills)
  • Macro goals 🎛️

    You’ll map macros like:

    1. SMOKE (Reverb Amount)

    2. DUB (Echo Throw)

    3. CRUNCH (Drive/Clip)

    4. AGE (Filter + Noise)

    5. WOBBLE (Pitch/Mod)

    6. WIDTH (Stereo)

    7. TAIL (Freeze/Stretch)

    8. MIX (Parallel Blend)

    ---

    3. Step-by-step walkthrough

    Step 0 — Session setup (fast but important)

    1. Tempo: 170–176 BPM.

    2. Route your drums into a Drum Group:

    - Kick, snare, hats, breaks → Group → name it `DRUM BUS`.

    3. Put this rack on the DRUM BUS.

    Why: oldskool vibe is mostly about bus processing + throws, not over-processing every hit.

    ---

    Step 1 — Build the Rack structure (Audio Effect Rack)

    1. On `DRUM BUS`, drop Audio Effect Rack.

    2. Open Chain List and create 3 parallel chains:

    - `DRY PUNCH`

    - `CRUNCH MID`

    - `DUB TAIL`

    Set chain volumes initially:

  • DRY PUNCH: 0 dB
  • CRUNCH MID: -10 dB
  • DUB TAIL: -14 dB
  • This gives you a controllable blend without instantly washing your drums.

    ---

    Step 2 — DRY PUNCH chain (keep it hitting hard)

    Devices (in order):

    1. EQ Eight

    - HP filter: 30 Hz, 12 dB/oct (remove rumble)

    - Tiny dip around 250–400 Hz (box control), -1 to -3 dB if needed

    2. Drum Buss

    - Drive: 3–8%

    - Crunch: 0–10% (keep subtle here)

    - Boom: 0 (usually avoid on drum bus for DnB; you want controlled sub via kick/bass)

    - Transients: +5 to +15

    - Damp: 6–10 kHz (tames harsh modern top)

    3. Glue Compressor

    - Attack: 10 ms

    - Release: Auto

    - Ratio: 2:1

    - Threshold: aim 1–3 dB GR on peaks

    - Soft Clip: On

    4. Utility

    - Bass Mono: On, set around 120 Hz

    Why this works: You’re anchoring the rack with punch + controlled glue, so the “smoke” layers can go wild without killing impact. 💥

    ---

    Step 3 — CRUNCH MID chain (oldskool radio grit)

    This is the “midrange dirt” that makes drums feel sampled from a sweaty tape/plate/warehouse PA.

    Devices (in order):

    1. Auto Filter

    - Mode: Band-Pass

    - Freq: 700 Hz

    - Res: 0.70–1.20

    - Drive: 2–6 dB

    - Envelope: very subtle or off (we’re not making a wah, just focus)

    2. Saturator

    - Mode: Analog Clip

    - Drive: 6–12 dB

    - Soft Clip: On

    - Output: pull down to match level (avoid fooling yourself)

    3. Redux

    - Downsample: 2.0–6.0 (taste)

    - Bit Reduction: 0 or tiny (Downsample does the “old sampler” vibe without turning to videogame)

    4. EQ Eight

    - Low cut: 200 Hz

    - High cut: 8–10 kHz

    - Optional: small boost 1.5–3 kHz if snare needs “crack”

    5. Glue Compressor (optional but often 🔥)

    - Fast-ish to “pin” the grit:

    - Attack: 3 ms

    - Release: 0.1–0.3 s

    - Ratio: 4:1

    - GR: 2–5 dB (this chain can be crushed)

    Blend tip: Bring this chain up until the drums feel older + thicker, then back off 1–2 dB.

    ---

    Step 4 — DUB TAIL chain (the smoky warehouse stretch)

    This is where the “stretch” feeling comes from: long tails, diffusion, wobble, and a controlled wash.

    Devices (in order):

    #### A) Pre-shape (don’t reverb the sub/kick)

    1. EQ Eight

    - HP: 180–250 Hz (critical)

    - Gentle dip at 2–4 kHz if cymbals get harsh in the tail

    #### B) Echo “tape” smear

    2. Echo

    - Mode: Tape

    - Time: start 1/8 D (dotted) or 1/4

    - Feedback: 35–60%

    - Filter: HP 250 Hz, LP 6–8 kHz

    - Modulation: 2–6%

    - Noise: 0.5–3%

    - Wobble: 0.2–1.0 (subtle!)

    - Ducking: 20–40% (keeps punch while tail blooms)

    #### C) Reverb diffusion (warehouse haze)

    3. Hybrid Reverb

    - Choose Algorithmic or a short Convolution IR (warehouse/room) blended with algo.

    - Algorithmic settings baseline:

    - Size: 70–110

    - Decay: 2.5–6.0 s

    - Pre-delay: 10–25 ms

    - Diffusion: High

    - Low Cut: 250 Hz

    - High Cut: 7–9 kHz

    - If using Convolution: keep it shorter (0.8–1.8 s) and let the algo do the long haze.

    #### D) “Stretch” trick: freeze-like tails without killing the groove

    4. Spectral Resonator (Live 12 stock = secret weapon 😈)

    - Mode: try Freeze-adjacent behavior by using higher Decay and careful mix

    - Tune: Off (unless you want tonal ringing)

    - Decay: 2–6 s

    - Width: 0.5–0.9

    - Dry/Wet: 10–25%

    - Purpose: adds that shimmering, time-smeared air on snares/hats

    (Alternative if you want less “tonal”: use Corpus very subtly, or skip this and rely on Echo + Reverb.)

    #### E) Control dynamics of the tail (so it “breathes”)

    5. Compressor (sidechain from DRUM BUS input)

    - Sidechain: Audio From → DRUM BUS (Pre-FX) or from Kick+Snare bus

    - Ratio: 4:1

    - Attack: 1–5 ms

    - Release: 80–200 ms

    - GR: 3–8 dB when drums hit

    This keeps the wash behind the hits = instant warehouse clarity.

    ---

    Step 5 — Macro mapping (make it playable)

    Click Map in the rack and assign:

    1. SMOKE → Hybrid Reverb Dry/Wet (and maybe Decay in small range)

    - Map Reverb Dry/Wet: 0–35%

    - Map Decay: 2.5–6 s

    2. DUB → Echo Dry/Wet + Feedback (small range)

    - Echo Dry/Wet: 0–30%

    - Feedback: 30–60%

    3. CRUNCH → Saturator Drive (CRUNCH MID chain) + Drum Buss Drive (DRY PUNCH)

    - Saturator Drive: 6–12 dB

    - Drum Buss Drive: 3–8%

    4. AGE → Auto Filter freq (CRUNCH MID) + Redux Downsample

    - Bandpass Freq: 500–1.2k

    - Downsample: 2–6

    5. WOBBLE → Echo Wobble + Mod

    - Wobble: 0.2–1.0

    - Mod: 2–8%

    6. WIDTH → Utility Width on DUB TAIL chain

    - Width: 80–140% (don’t go insane; DnB needs mono compatibility)

    7. TAIL → Spectral Resonator Dry/Wet + Decay

    - Dry/Wet: 10–30%

    - Decay: 2–6 s

    8. MIX → Chain volumes (CRUNCH MID + DUB TAIL up/down together)

    - Map with inverse ranges if you want: more FX = less dry (optional)

    ---

    Step 6 — Arrangement: where to “stretch” drums in DnB

    Use automation like a weapon. 🔧

    Classic moves:

  • End-of-8-bar fill: automate DUB + SMOKE up for the last 1/2 bar, then snap back on bar 1.
  • Breakdown haze: raise TAIL and AGE, lower DRY PUNCH chain by 1–2 dB to “push drums back.”
  • Pre-drop tension: automate Auto Filter bandpass freq downward (AGE macro) to make drums feel like they’re collapsing into the room.
  • Drop impact: automate everything back to clean at the drop, then re-introduce subtle smoke over 16 bars.
  • Pro DnB tip: Put automation shapes slightly ahead of the grid (a few ms) if needed so the FX “catches” the hit, especially on snare throws.

    ---

    4. Common mistakes

  • Reverb on low end: if your tail chain HP isn’t high enough, your kick will turn to fog. Keep the reverb/echo above ~200 Hz.
  • Over-wobble: too much Echo wobble/mod makes drums sound seasick, not smoky.
  • No ducking/sidechain: long tails without ducking will smear the groove and reduce perceived tempo.
  • Grit without level matching: saturators get “better” when louder. Always trim output and compare fairly.
  • Too wide, too early: massive width on breaks can wreck mono compatibility in clubs.
  • ---

    5. Pro tips for darker/heavier DnB

  • Add a “PA bite” notch/boost: On CRUNCH MID chain, try a narrow boost at 1.8–2.5 kHz (+1 to +3 dB) to simulate harsh warehouse horn presence—then tame with a high cut so it’s not painful.
  • Parallel clip for aggression: Add Roar (stock) on CRUNCH MID:
  • - Style: Clip or OD

    - Drive: small but mean (start 5–10% depending on patch)

    - Filter: keep it mid-focused

    Roar is incredible for modern-dark DnB while still feeling “hardware abused.”

  • Make snares “smoke” more than kicks: Feed a Snare/Break bus into a separate instance of the rack and run heavier SMOKE/DUB there, lighter on full drums.
  • Gate the tail rhythmically (old rave trick): After Hybrid Reverb, add Gate
  • - Threshold so it closes between hits

    - Return around 120–250 ms

    This gives that pulsing warehouse cloud without full wash.

  • Print the throw: resample the DUB TAIL chain to audio, then slice it, reverse bits, or time-stretch specific chunks for proper jungle menace. 🧨
  • ---

    6. Mini practice exercise (15 minutes)

    1. Load a classic Amen-style break + a clean modern kick/snare layer.

    2. Drop this rack on the DRUM BUS.

    3. Automate:

    - Bars 1–8: subtle (SMOKE 10%, DUB 5%, CRUNCH low)

    - Bars 9–16: build tension (AGE up, SMOKE up)

    - Last 1/2 bar of bar 16: crank DUB + TAIL to create a throw

    4. Resample that throw to a new audio track:

    - Right-click → Freeze Track then Flatten, or record output.

    5. Chop the resample and place a reversed tail into bar 16 leading into bar 17.

    Goal: a clean drop that still feels like it’s inside a dusty warehouse.

    ---

    7. Recap

  • You built a 3-chain parallel drum FX rack: punch, mid grit, dub tail.
  • You used stock Ableton devices (Drum Buss, Glue, Echo, Hybrid Reverb, Spectral Resonator, Redux, EQ Eight, Utility) to create oldskool stretch + smoke without sacrificing impact.
  • You mapped macros so the vibe is performable and automatable—perfect for DnB arrangement tactics like throws, breakdown haze, and pre-drop tension. 🌫️🎚️

If you want, tell me your drum style (liquid rollers, jungle, techstep, neuro-adjacent) and whether you’re processing a break, two-step, or layered modern kit, and I’ll suggest exact macro ranges and an automation plan for a 64-bar arrangement.

Ask GPT about this lesson

Chat with the lesson tutor, get follow-up help, or use quick actions.

Bigup 👽 Ask me anything about this lesson and I’ll answer in context.

Narration script

Show spoken script
Title: Stretch oldskool DnB FX chain for smoky warehouse vibes in Ableton Live 12 (Advanced)

Alright, welcome in. In this lesson we’re building a performance-ready drum FX rack in Ableton Live 12 that takes clean modern drums and drags them into that smoky warehouse world: gritty midrange, crunchy transients, dubby space, tape wobble, and those long air trails you can throw on fills and ride during breakdowns.

This is advanced, and the big idea is simple: we’re not going to destroy every individual drum hit. We’re going to do this the oldskool way: bus processing plus controlled “throws.” That’s how you get size and atmosphere without losing the drive at 174.

Let’s set up first.

Set your tempo somewhere in the 170 to 176 BPM zone. Then route your drums into a group: kick, snare, hats, breaks, whatever you’re using. Group them, and name that group DRUM BUS. The rack we’re building goes right on the DRUM BUS.

Now, drop an Audio Effect Rack onto the DRUM BUS. Open the Chain List, and create three parallel chains. Name them DRY PUNCH, CRUNCH MID, and DUB TAIL.

Set initial chain volumes like this: DRY PUNCH at 0 dB, CRUNCH MID at minus 10 dB, and DUB TAIL at minus 14 dB.

This starting balance is important. If you start with everything loud, you’ll think it sounds “huge,” but you’ll actually just be listening to volume. We want controlled blend, so your macros feel like vibe, not accidental loudness.

Now, chain one: DRY PUNCH. This is your anchor. Everything else is allowed to get weird, because this chain keeps the drums hitting hard.

First device: EQ Eight. Put a high-pass at 30 Hz, 12 dB per octave, just to ditch rumble and subsonic nonsense. If your drum bus feels boxy, make a tiny dip somewhere around 250 to 400 Hz, maybe one to three dB. Keep it subtle.

Next, add Drum Buss. Set Drive somewhere like 3 to 8 percent. Crunch at zero to ten percent, but stay subtle here. Set Boom to zero; in drum and bass, you usually want sub control from your kick and bass relationship, not a bus “boom” knob. Push Transients up, like plus 5 to plus 15. And bring Damp down so it’s taming harsh top end; somewhere around 6 to 10 kHz is a good target.

Then add Glue Compressor. Attack at 10 milliseconds, Release on Auto, Ratio 2 to 1. Pull the threshold down until you’re getting about 1 to 3 dB of gain reduction on peaks. And turn on Soft Clip. That soft clip is part of the oldskool vibe: it shaves peaks in a way that feels like hardware and tape workflows.

Finally, add Utility. Turn on Bass Mono, and set it around 120 Hz. That’s club safety, and it’s also just “90s logic.” Keep the power in the middle.

Cool. That’s DRY PUNCH: tight, punchy, and controlled.

Now chain two: CRUNCH MID. This is the “AM radio” midrange dirt layer that makes drums feel sampled, resampled, and played through a sweaty warehouse PA.

Start with Auto Filter in Band-Pass mode. Put the frequency around 700 Hz as a starting point. Resonance around 0.7 to 1.2. Add a little Drive, maybe 2 to 6 dB. We’re not making a wah. We’re focusing the energy into a band that saturates in a nostalgic way.

After that, add Saturator. Put it on Analog Clip mode. Drive around 6 to 12 dB, Soft Clip on. Then do the important thing: trim the output so the chain isn’t just louder. If you don’t level match, you will always choose “more drive” because louder wins. Advanced production is a constant war against that trick.

Next, add Redux. Downsample somewhere around 2 to 6. Keep Bit Reduction at zero or extremely low. Downsample is that old sampler vibe without turning your drums into an 8-bit game.

Then add EQ Eight. Low cut at 200 Hz, high cut at 8 to 10 kHz. If your snare needs more crack, you can do a small boost around 1.5 to 3 kHz. But be careful. The 1 to 3 kHz area is the fatigue zone; too much and you’ll love it for ten minutes and hate it for ten hours.

Optionally, add another Glue Compressor here. This is where you can pin the grit. Try Attack at 3 milliseconds, Release around 0.1 to 0.3 seconds, Ratio 4 to 1, and go for 2 to 5 dB of gain reduction. This chain can be crushed because it’s parallel.

Now the blend move: bring CRUNCH MID up until the drums feel older and thicker, then back it off by one or two dB. That last tiny pullback is usually the sweet spot.

Before we move on, here’s a pro coach note that will save you time later. Put a Utility at the very end of each chain. Use those as final trim controls so that when your macros are at a neutral starting point, turning chains on and off doesn’t cause a big loudness jump. That way, when you automate SMOKE or DUB, it reads as atmosphere, not as “the drums got louder.”

Alright. Chain three: DUB TAIL. This is where the stretch happens. The goal is a long, smeared tail that feels like the room is breathing, but the groove still punches.

Start with EQ Eight, because we do not reverb the sub. High-pass this chain around 180 to 250 Hz. This is critical. If you ignore this, your kick turns into fog and your whole tune loses speed. If cymbals get harsh in the tail, do a gentle dip around 2 to 4 kHz.

Next, add Echo. Set Mode to Tape. Start with a time like 1/8 dotted, or 1/4 if you want it to lean dubby. Feedback around 35 to 60 percent. Use the Echo filter: high-pass at about 250 Hz, low-pass around 6 to 8 kHz. Add a little modulation, like 2 to 6 percent. Add Noise, maybe 0.5 to 3 percent. And Wobble, super subtle, like 0.2 up to 1.0 max.

Now, very important: turn on Ducking inside Echo, around 20 to 40 percent. This is one of the secrets to “big but not messy.” The tail gets out of the way when the hits happen, then blooms in the gaps.

After Echo, add Hybrid Reverb. You can go algorithmic, or blend a short convolution room with an algorithmic tail. If you’re staying algorithmic: Size around 70 to 110. Decay around 2.5 to 6 seconds. Pre-delay 10 to 25 milliseconds. Diffusion high. Low cut 250 Hz. High cut around 7 to 9 kHz. If you use convolution, keep it short, like 0.8 to 1.8 seconds, and let the algorithmic side create the long haze.

Now for the Live 12 secret weapon: Spectral Resonator. We’re using it to smear time and add that airy, shimmering tail without making the drums feel like they’re just drowning in reverb.

Set it so it’s subtle. Keep tuning off unless you want tonal ringing. Decay around 2 to 6 seconds, Width maybe 0.5 to 0.9. Dry/Wet around 10 to 25 percent. The idea is “heated air” and “grainy diffusion,” not “my snare is now a chord.”

Then add a Compressor to control the tail, sidechained from the drums. Turn on Sidechain, and choose Audio From the DRUM BUS, ideally pre-FX. If you want more “rave room realism,” sidechain from only kick and snare instead of the whole drum bus. Ratio 4 to 1, Attack 1 to 5 milliseconds, Release 80 to 200 milliseconds, and aim for 3 to 8 dB of gain reduction when drums hit. Now the wash sits behind the hits, and the tempo feels faster, not slower.

One more advanced warning: don’t let the tail become the transient. If your reverb wash starts sounding like it has a new click at the front, put a Drum Buss before Echo and Reverb in the tail chain, and set Transients negative, like minus 5 to minus 20. That softens the attacks feeding the space so the tail stays cloudy.

Okay. The rack structure is built. Now we make it playable.

Let’s map macros. Hit Map in the rack.

Macro one: SMOKE. Map Hybrid Reverb Dry/Wet from 0 to about 35 percent. Optionally map Decay too, but keep the range musical, like 2.5 to 6 seconds. Don’t map it to 20 seconds unless you specifically want special-effect territory.

Macro two: DUB. Map Echo Dry/Wet from 0 to 30 percent, and Feedback from about 30 to 60 percent. Keep it tight. Echo feedback is one of those parameters where the last 20 percent is chaos.

Macro three: CRUNCH. Map Saturator Drive in CRUNCH MID, like 6 to 12 dB, and also map Drum Buss Drive in DRY PUNCH, like 3 to 8 percent. Now one knob gives you “more abused tape” across the whole bus, but the punch stays intact.

Macro four: AGE. Map the Auto Filter bandpass frequency in CRUNCH MID, maybe 500 Hz to 1.2k. And map Redux Downsample, 2 to 6. This macro is your time machine: higher AGE can feel more degraded or more narrowband, depending where you set the filter.

Macro five: WOBBLE. Map Echo Wobble from 0.2 to 1.0, and Modulation from 2 to 8 percent. Remember: too much wobble makes drums seasick, not smoky. If you notice pitch wandering more than vibe, you’ve gone too far.

Macro six: WIDTH. Put a Utility on the DUB TAIL chain, and map Width from 80 to 140 percent. And keep mono compatibility in mind. Drum and bass is still built for systems.

Macro seven: TAIL. Map Spectral Resonator Dry/Wet from 10 to 30 percent, and Decay from 2 to 6 seconds. This is your “stretch” control. It’s not just louder reverb; it’s time smear.

Macro eight: MIX. This is your global parallel blend. Map the chain volumes so that as MIX increases, CRUNCH MID and DUB TAIL come up. Optionally, you can make DRY PUNCH come down slightly as the others rise, like an inverse mapping, but don’t overdo it. In DnB the downbeat needs authority.

Now, a high-level coaching point: macro taper matters. In the Macro Mapping browser, don’t be afraid to set narrow ranges. Most smoky tones live in the first third of a knob movement. The rest is for moments. If your macros feel touchy and unusable, it’s usually because your max values are set like a sound design demo instead of a performance tool.

Next: metering and troubleshooting. Live 12 makes this easier.

Drop a Spectrum or meter at the end of CRUNCH MID and at the end of DUB TAIL. Watch two danger areas. If CRUNCH MID is stacking too much in 1 to 3 kHz, you’ll get ear fatigue and harshness. If DUB TAIL builds up in 200 to 500 Hz, you’ll get mud and the groove will feel slower.

Also, if you’re processing breaks and you notice the break loses body when you blend in CRUNCH MID, you might be getting phase weirdness from parallel processing. Try adding a tiny Track Delay on the CRUNCH MID chain. Start around plus 0.10 to plus 0.40 milliseconds and listen for the point where the grit reinforces instead of hollowing the drum.

Now let’s talk arrangement, because this rack is only half the story. The other half is when you use it.

Classic move one: end-of-8-bar fill. In the last half bar before the next phrase, automate DUB and SMOKE up, maybe a little TAIL too, then snap back to clean on bar one. That snap back is what makes the drop feel like it hits harder, even if you didn’t change the kick at all.

Classic move two: breakdown haze. Raise TAIL and AGE, and lower the DRY PUNCH chain by one or two dB. You’re not just turning down the drums; you’re pushing them back into the room. If you want it to feel farther away, also darken the tail by lowering the Echo or Reverb low-pass slightly.

Classic move three: pre-drop tension. Automate AGE so the bandpass frequency moves downward. It feels like the drums are collapsing into the room. And if you want that big-but-controlled pre-drop, increase the ducking effect so the tail gets huge in the gaps but never steps on the transient.

And here’s a pro tip that sounds tiny but matters: if a throw isn’t catching the snare properly, nudge your automation a few milliseconds ahead of the grid. At 174 BPM, that micro-timing can be the difference between “cool effect” and “why didn’t it hit.”

Let’s do a quick 15-minute practice to lock this in.

Load an Amen-style break and layer a clean modern kick and snare if you want extra impact. Put this rack on the DRUM BUS.

Bars one to eight: keep it subtle. SMOKE around 10 percent. DUB around 5 percent. CRUNCH low.

Bars nine to sixteen: build tension. Raise AGE and SMOKE gradually.

Then on the last half bar of bar sixteen, crank DUB and TAIL for a throw. Immediately reset everything at bar seventeen so the drop hits clean.

Now print that throw. Freeze and flatten the track, or record the rack output to a new audio track. Chop the printed tail, reverse a piece, and place that reversed tail leading into bar seventeen. That’s proper jungle menace, but still controlled.

Before we wrap, a couple optional upgrades if you want to go even deeper.

One: split DUB TAIL into early and late reflections. Inside the DUB TAIL chain, add another Audio Effect Rack with two parallel chains: one short, darker room for early reflections, and one long, filtered algorithmic fog. Map a ROOM to FOG macro to crossfade them. This gives you warehouse walls without needing insane decay all the time.

Two: mono smoke, stereo air. Duplicate your tail into a mono body lane and a wide air lane. Keep the body centered, and widen only the high-passed air. Club-safe, but still massive.

Three: at the very end of the whole rack, add a Limiter catching one to two dB. Not to crush the drums, just to make resampled throws consistent so they drop back into your arrangement without random peaks.

Recap time.

You built a three-chain parallel drum FX rack: DRY PUNCH for impact and glue, CRUNCH MID for oldskool radio grit, and DUB TAIL for smoky warehouse stretch. You used stock Ableton devices like Drum Buss, Glue Compressor, Echo, Hybrid Reverb, Spectral Resonator, Redux, EQ Eight, and Utility. And you mapped macros so this isn’t just a mix chain, it’s an instrument you can automate like a DJ: subtle groove state, lift state, pre-drop tension, and that impact reset.

If you tell me what lane you’re in, liquid rollers, jungle, techstep, or something neuro-adjacent, and whether you’re working with a break, two-step, or a layered modern kit, I can suggest tighter macro ranges and a 64-bar automation plan that fits your arrangement.

mickeybeam

Go to drumbasscd.com for +100 drum and bass YouTube channels all in one place - tune in!

Generating PDF preview…