DNB COLLEGE

Drum & Bass Ableton Live 12 Tutorials

LESSON DETAIL

Stepper Ableton Live 12 transition masterclass for sunrise set emotion for jungle oldskool DnB vibes (Beginner)

An AI-generated beginner Ableton lesson focused on Stepper Ableton Live 12 transition masterclass for sunrise set emotion for jungle oldskool DnB vibes in the Sampling area of drum and bass production.

Back to lessons
Stepper Ableton Live 12 transition masterclass for sunrise set emotion for jungle oldskool DnB vibes (Beginner) cover image

Narrated lesson audio

The voice track includes the tutorial plus extra teacher commentary.

Open audio file

Main tutorial

```markdown

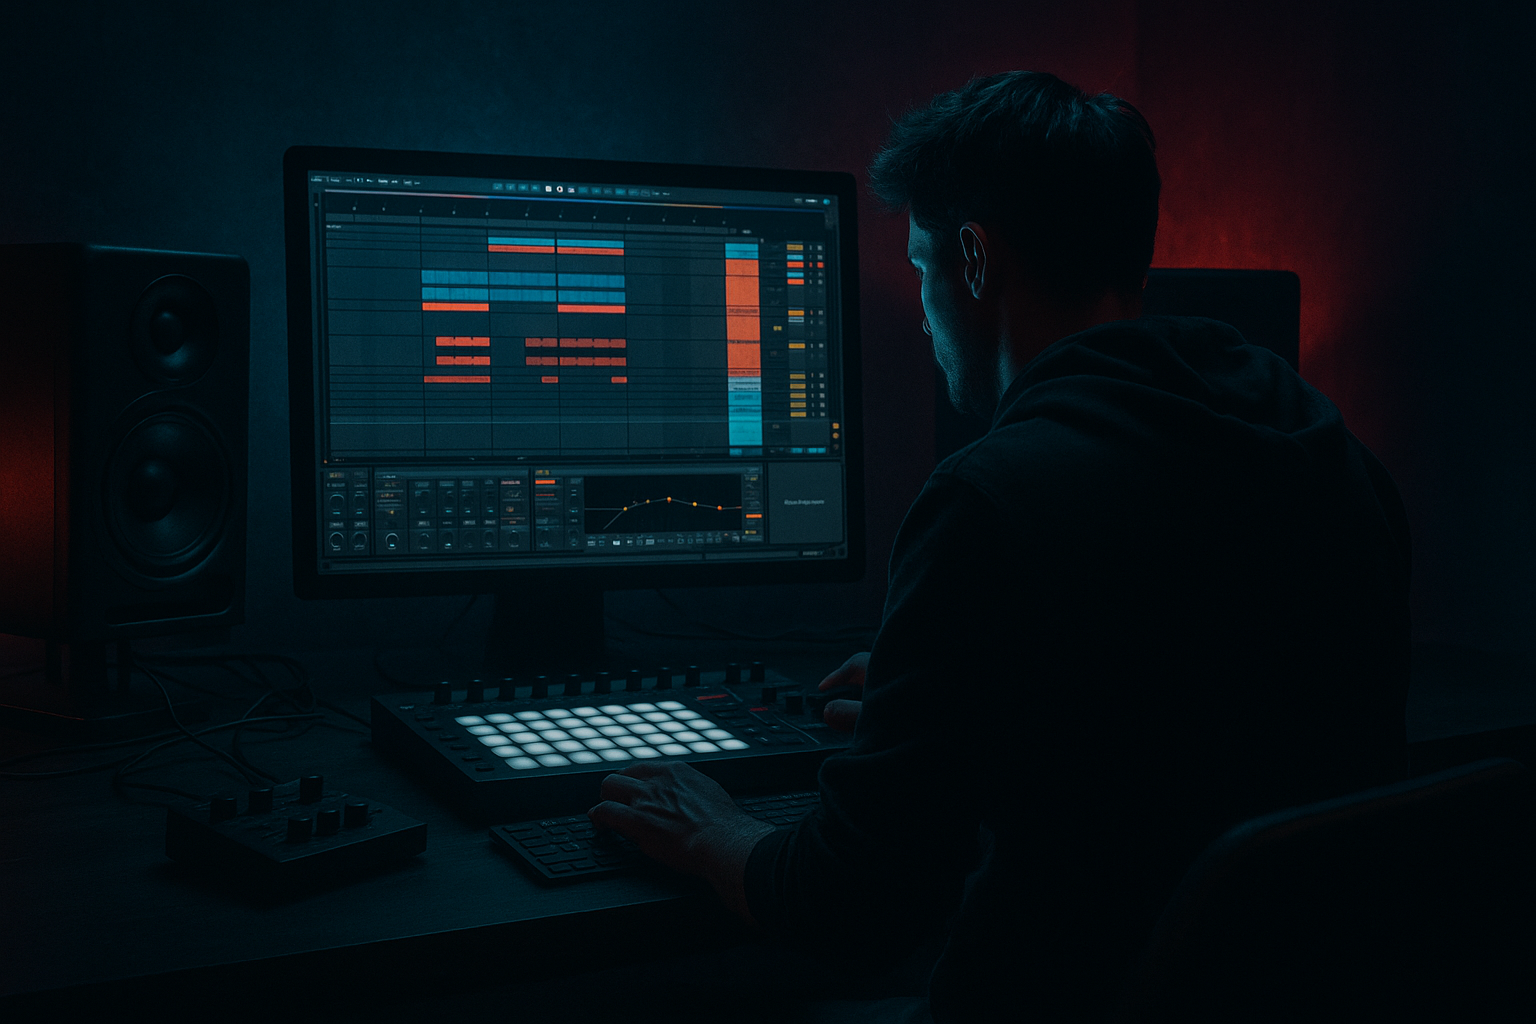
Stepper Ableton Live 12 Transition Masterclass

Sunrise-set emotion for jungle / oldskool DnB vibes (Beginner • Sampling) 🌅🥁

---

1) Lesson overview

This lesson is about building DJ-style but fully produced transitions inside Ableton Live 12 for a stepper DnB track that leans oldskool jungle—think: crisp breaks, warm pads, emotional melodies, and that “sunrise” lift.

You’ll learn how to:

  • Use sampling workflows (breaks, vocals, atmospheres, FX)
  • Create classic DnB transition moves: bass drop-out, filter rides, tape stops, risers, impacts, break edits
  • Arrange a 16–32 bar transition that feels intentional, musical, and club-ready
  • We’ll stick mainly to stock Ableton devices so you can do this immediately.

    ---

    2) What you will build

    A 32-bar transition section that takes you from a rolling stepper groove into an emotional sunrise “lift” and back into a proper jungle-flavoured drop:

  • Bars 1–16: Rolling stepper groove → gradual tension (filters + drum edits)
  • Bars 17–24: Breakdown lift → pads, vocal stab, filtered break tease
  • Bars 25–32: Pre-drop → snare roll + riser + impact → drop hits clean
  • You’ll end with:

  • A drum rack for break slicing
  • A bus chain for cohesive transition FX
  • A few automation lanes that do 80% of the emotional work 🎛️
  • ---

    3) Step-by-step walkthrough

    Step 0 — Session setup (DnB-ready)

    1. Set tempo to 172 BPM (classic range: 170–174).

    2. Create groups:

    - DRUMS

    - BASS

    - MUSIC (pads/melody)

    - FX / ATMOS

    - MASTER (no limiter yet while building)

    Why: transitions are easiest when you can automate groups, not 20 tracks.

    ---

    Step 1 — Get the “stepper + jungle” drum foundation (sampling)

    #### A) Load a break and slice it

    1. Drag a classic-style break (or any break sample) onto an Audio Track.

    2. In Clip View:

    - Turn Warp ON

    - Set Warp Mode: Beats

    - Preserve: 1/16

    - Check it loops tightly at 1 bar or 2 bars (adjust start marker)

    3. Right-click the clip → Slice to New MIDI Track

    - Slicing preset: Built-in (or “Slice by Transients”)

    - This creates a Drum Rack with break hits.

    #### B) Build a stepper pattern (simple but rolling)

    1. Create a new MIDI clip (1 bar) on the Drum Rack track.

    2. Program:

    - Kick: on 1 and 3

    - Snare: on 2 and 4

    - Add ghost notes from the sliced break (quiet snare/kick hits) between beats.

    3. Groove:

    - Use Groove Pool → try MPC 16 Swing 55–58

    - Apply at 30–50%.

    ✅ Goal: clean stepper backbone + jungle swing texture.

    ---

    Step 2 — Make a sunrise emotional bed (simple sampling layer)

    We’ll use a sampled texture + a pad so the transition feels “wide” and uplifting.

    #### A) Atmosphere sample

    1. Drag an ambient field recording / vinyl noise / jungle intro texture onto an Audio Track.

    2. Warp Mode: Complex (or Complex Pro if it’s tonal).

    3. Low cut it with EQ Eight:

    - HP filter at 120–200 Hz (so it doesn’t fight bass/kick)

    #### B) Warm pad (stock instrument + simple harmony)

    1. Add Wavetable or Analog on a MIDI Track.

    2. Choose a warm pad preset (or init + lowpass).

    3. Add Reverb:

    - Decay: 4–7s

    - Pre-delay: 20–35ms

    - Dry/Wet: 15–25%

    4. Add Auto Filter after Reverb:

    - Filter: Lowpass

    - Freq start around 700–1.5kHz (we’ll automate later)

    Keep chords simple: i–VI–VII style progressions work well for emotional DnB.

    ---

    Step 3 — Build the transition spine (32-bar arrangement)

    Create a 32-bar region in Arrangement View and label markers:

  • 1–16: Tension
  • 17–24: Lift
  • 25–32: Pre-drop
  • 33: Drop
  • #### A) Bars 1–16: Tension (subtract bass, add movement)

    1. Keep full drums + bass for bars 1–8.

    2. From bars 9–16, begin transition moves:

    Move 1: Bass “air gap”

  • On the BASS group, automate Utility Gain down:
  • - Bar 13: -2 dB

    - Bar 15: -6 dB

    - Bar 16 (last beat): -inf for 1/4 or 1/2 bar

    This creates anticipation without killing momentum.

    Move 2: Filter ride on drums

  • On DRUMS group, add Auto Filter:
  • - Type: Lowpass

    - Drive: 2–6%

    - Resonance: 10–20%

  • Automate cutoff:
  • - Bar 9: ~18 kHz

    - Bar 16: ~1.5–3 kHz

    This “DJ filter” scream is a classic transition cue.

    #### B) Bars 17–24: Lift (break tease + pad opens)

    Move 3: Break tease

    1. Duplicate a clean break loop to a new track (Audio Track).

    2. Put Auto Filter on it (Bandpass is great here):

    - Bandpass Freq: 1–2.5 kHz

    - Resonance: 20–35%

    3. Bring it in quietly around bar 17, rising in volume to bar 24.

    Move 4: Open the pad filter

  • Automate the pad’s Auto Filter cutoff gradually up:
  • - Bar 17: ~800 Hz

    - Bar 24: ~4–8 kHz

    Move 5: Emotional vocal stab (sampled)

    1. Take a short vocal phrase (“ah”, “yeah”, “ready”, “one time”) and drop it into Simpler.

    2. In Simpler:

    - Mode: One-Shot

    - Enable Snap

    - Add Fade Out a touch (avoids clicks)

    3. Add Delay (stock):

    - Ping Pong

    - Time: 1/8 or 1/4

    - Feedback: 20–35%

    - Filter: roll off lows < 200 Hz

    Place the vocal stab on bar 20 and 23 to punctuate the lift.

    #### C) Bars 25–32: Pre-drop (snare roll + riser + impact)

    Move 6: Snare roll (classic jungle energy)

    1. Create a MIDI track with a snare sample (or a sliced snare from the break).

    2. Program a roll that increases density:

    - Bar 25: 1/8

    - Bar 27: 1/16

    - Bar 31: 1/32 (last bar only)

    3. Automate velocity rising slightly (don’t max it).

    4. Add Saturator on the snare roll track:

    - Drive: 2–6 dB

    - Soft Clip: ON

    Move 7: White noise riser (stock)

    1. Create MIDI track with Wavetable (noise oscillator) or use a noise sample in Simpler.

    2. Add Auto Filter (highpass):

    - Start: 150 Hz

    - End: 6–10 kHz

    3. Add Reverb (bigger than pad):

    - Decay: 8–12s

    - Dry/Wet: 20–35%

    4. Automate volume up into bar 32.

    Move 8: Impact + sub drop control

  • Add an impact sample on the very first beat of the drop (bar 33).
  • On the bar right before the drop (last 1/4 or 1/2 bar), do a micro-silence:
  • - Mute drums for 1/8–1/4 bar

    - Keep only a reverb tail or vocal delay tail

    This “air pocket” makes the drop feel huge.

    ---

    Step 4 — Glue it together with a Transition FX Bus (super useful)

    Create a Return track called “TRANS FX”:

    1. Hybrid Reverb

    - Algorithm: Hall

    - Decay: 6–10s

    - Low Cut: 200 Hz

    2. Echo

    - Time: 1/4 Dotted or 1/8

    - Feedback: 25–45%

    - Mod: small (2–6)

    3. Auto Filter

    - Highpass around 150 Hz (keep return clean)

    Now send your vocal stab, break tease, and pad hits into this return during the lift.

    Automate send amounts to build space without drowning the mix.

    ---

    Step 5 — Make the drop hit like a record (basic mix moves)

    Right at the drop (bar 33):

  • Reset filters (drum group Auto Filter back to fully open)
  • Bring bass back to full level instantly
  • Ensure kick + snare are dry compared to the lift
  • On DRUMS group add:

  • Drum Buss
  • - Drive: 5–15

    - Boom: 20–40 Hz (careful—DnB subs can overload)

    - Damp: taste

  • Glue Compressor
  • - Attack: 3 ms

    - Release: Auto

    - Ratio: 2:1

    - Aim: 1–2 dB gain reduction max

    This keeps it punchy without flattening it.

    ---

    4) Common mistakes

  • Over-filtering everything: if pads, breaks, and drums are all filtered, the mix feels thin. Choose one main filter move.
  • No low-end plan: sunrise emotion still needs controlled subs. High-pass your FX/atmos heavily.
  • Risers too loud: they should guide energy, not become the track.
  • Transition is busy but not musical: add one emotional anchor (pad chord, vocal, or melody) and let it breathe.
  • Drop doesn’t “reset”: if reverb tails and delays are still huge at the drop, it won’t slap. Automate return sends down right before impact.
  • ---

    5) Pro tips for darker/heavier DnB (same technique, different mood) 🕶️

  • Swap the uplifting pad for a minor 2-note drone and automate frequency shifter subtly:
  • - Frequency Shifter: 10–30 Hz with small Dry/Wet for unease.

  • Use Redux lightly on break teases for grit:
  • - Downsample a bit (don’t destroy transients).

  • Add Roar (Ableton Live 12) on a drum parallel chain:
  • - Keep it subtle, automate Drive up into the pre-drop.

  • Make the “air pocket” longer:
  • - Try 1/2 bar silence before the drop for savage impact.

  • For heavier tension, automate Utility Width:
  • - Narrow to 0–30% in the build, then snap back to 100% on the drop.

    ---

    6) Mini practice exercise (15 minutes)

    1. Choose one break and slice it to Drum Rack.

    2. Program a 1-bar stepper loop + ghosts, add Groove at 40%.

    3. Build an 8-bar transition only (short version):

    - Bars 1–4: filter drums down to ~3k

    - Bar 5–7: add break tease + vocal stab with Echo

    - Bar 8: snare roll + micro-silence (1/8)

    4. Drop back into the full loop on bar 9.

    Goal: make the drop feel bigger than the loop, using only automation and sampling moves.

    ---

    7) Recap

    You now have a repeatable Ableton Live 12 workflow for stepper DnB transitions with jungle/oldskool flavour and sunrise emotion:

  • Slice breaks → build a clean stepper pattern with jungle swing
  • Use group automation (filters, utility gain, width) for DJ-like tension
  • Create lift with pads + vocal stabs + break teases
  • Deliver impact with snare rolls, risers, and a controlled air pocket
  • Glue everything using stock returns (Hybrid Reverb + Echo + Auto Filter)

If you want, tell me your current vibe (more Bukem-style sunrise vs Metalheadz dark sunrise) and I’ll suggest a specific 32-bar transition blueprint and a starter Ableton device chain for your drums and FX.

```

Ask GPT about this lesson

Chat with the lesson tutor, get follow-up help, or use quick actions.

Bigup 👽 Ask me anything about this lesson and I’ll answer in context.

Narration script

Show spoken script
Welcome in. Today we’re building a proper DJ-style transition, but fully produced inside Ableton Live 12, for that stepper drum and bass vibe with oldskool jungle flavor… and a sunrise-set emotional lift.

This is beginner-friendly, and we’re going to stay mainly stock. The big idea is: you don’t need a million tricks. You need one clear story arc, a few strong sampling moves, and clean automation that makes the drop feel like it just got twice as big.

By the end, you’ll have a 32-bar transition that goes: rolling groove into tension, into lift, into pre-drop pressure, and then a clean drop reset.

Alright. Open Live 12 and let’s set the stage.

First, set your tempo to 172 BPM. Anywhere 170 to 174 is home base for this, but 172 is a sweet spot.

Now make your life easy: create groups. One for DRUMS, one for BASS, one for MUSIC like pads or melody, one for FX or ATMOS, and keep your master clean for now. No limiter while we’re building. You want headroom so your effects don’t lie to you.

Quick coach note: transitions get messy when you automate twenty individual tracks. Groups are your best friend because you can do one filter move and it feels like a DJ mixer sweep, instantly.

Before we even automate, do a quick beginner gain staging pass. Aim for your drum group peaking around minus six dB. Music group around minus ten to minus eight. FX and atmos around minus fourteen to minus ten. That’s not a strict rule, it’s just a clean starting point so your return tracks don’t explode when you start sending reverb and delays.

Now let’s build the drum foundation using sampling, because jungle energy starts there.

Grab a break sample. Any classic-style break will do. Drag it onto an audio track.

In Clip View, turn Warp on. Set Warp Mode to Beats, and set Preserve to one sixteenth. Then make sure it loops tight at one bar or two bars. If the loop feels like it’s stumbling, nudge your start marker until it locks.

Once it’s tight, right-click the clip and choose Slice to New MIDI Track. Slice by transients is perfect. Live will create a Drum Rack filled with slices of the break.

Now we’re going to program a simple stepper pattern, but with jungle swing texture.

Create a one-bar MIDI clip on that Drum Rack. Put your kick on beat one and beat three. Put your snare on beat two and beat four. That’s your backbone.

Now the jungle part: add a few ghost notes from the sliced break. Quiet little in-between hits, maybe a soft snare tick before the main snare, or a tiny kick ghost that pushes into beat three. Keep them low in velocity. Think “movement,” not “more loud.”

For groove, open the Groove Pool and try an MPC 16 Swing, somewhere around 55 to 58. Apply it at 30 to 50 percent. If your groove suddenly feels like it’s leaning too hard, back it off. We want bounce, not drunkenness.

Goal check: you should have a clean stepper pulse that rolls, plus just enough break dirt to say “oldskool” without losing punch.

Now let’s build the sunrise bed: atmosphere plus a warm pad.

On an audio track, drop in an ambient texture. This could be field recording, vinyl noise, jungle intro haze, anything with character. Warp it in Complex, or Complex Pro if it’s tonal.

Then put EQ Eight on it and high-pass it around 120 to 200 Hz. This is important. Your low end is sacred in DnB. Atmos lives above the subs. If you forget this, your build will feel huge, but your drop will feel small because the sub never really left.

Next, create a pad. Use Wavetable or Analog. Pick something warm, not too bright. Add reverb: decay around four to seven seconds, pre-delay around 20 to 35 milliseconds, and keep the dry/wet around 15 to 25 percent. We’re not trying to drown it yet. We’re trying to create space that we can control.

After reverb, add Auto Filter on the pad. Lowpass mode. Start the cutoff somewhere around 700 to 1.5k. We’re going to automate this later to “open up” toward sunrise.

For chords, keep it simple. A minor progression like i to VI to VII works beautifully for emotional DnB. If you don’t know theory, here’s the cheat: pick three chords that feel like “longing,” and repeat them. The emotion comes more from movement and texture than complexity.

Now we build the transition spine: 32 bars.

Go into Arrangement View and create a 32-bar section. Drop markers, or just label it mentally:
Bars 1 to 16 is tension.
Bars 17 to 24 is lift.
Bars 25 to 32 is pre-drop.
Bar 33 is the drop.

Let’s start with bars 1 to 16.

For bars 1 to 8, let the full groove run: drums and bass are in, pad can be subtle or even off.

From bars 9 to 16, we start “transition moves.” And here’s a key mindset: you’re going to make the drop feel louder mostly through contrast, not by turning everything up.

First move: the bass air gap.

On the BASS group, add Utility. Automate the gain down gradually. Around bar 13, pull it down about two dB. By bar 15, maybe six dB. And then on the last beat of bar 16, kill it to minus infinity for a quarter bar or half bar.

That tiny gap is pure anticipation. The listener doesn’t always consciously notice it, but their body does.

Second move: a DJ-style filter ride on the drums.

On the DRUMS group, add Auto Filter, lowpass mode. Add a touch of drive, like two to six percent, and resonance around ten to twenty percent. Now automate the cutoff from basically open at bar 9, like 18k, down to somewhere around 1.5k to 3k by bar 16.

This is the classic “we’re going somewhere” cue. And notice what we’re doing: we’re taking away brightness and low-end weight, so when the drop resets, the transients and subs feel like they punch through a wall.

Quick warning: don’t filter everything at once. If drums, pads, and teasers are all filtered, the whole mix gets thin and small. Choose one main filter move that’s clearly the star. For beginners, that’s usually the drum group filter.

Now bars 17 to 24: the lift. This is where the sunrise emotion happens.

First, a break tease.

Duplicate a clean break loop onto a new audio track. Put Auto Filter on it in bandpass mode. Set the frequency around 1 to 2.5k, resonance around 20 to 35 percent. Bring it in quietly at bar 17 and slowly raise it toward bar 24.

This is such a jungle move: you’re hinting at break science without committing yet. It’s like showing the crowd the record you’re about to pull out.

Next, open the pad filter.

Automate the pad’s Auto Filter cutoff from around 800 Hz at bar 17 up to maybe 4k to 8k by bar 24. You’re literally “opening the sky.” That’s the sunrise feeling.

Now add an emotional vocal stab.

Take a short vocal phrase. An “ah,” “yeah,” “one time,” anything short. Drop it into Simpler. Set Simpler to one-shot mode, turn on Snap, and add a tiny fade out to avoid clicks.

Put Delay on it, or Echo if you prefer the character. Ping pong delay feels wide and uplifting. Set time to one-eighth or one-quarter, feedback around 20 to 35 percent, and filter out the low end under 200 Hz so it doesn’t cloud the kick and bass.

Place that vocal stab around bar 20 and bar 23. Think of it like punctuation. You’re telling the listener: pay attention, the moment is coming.

Coach tip: do call-and-response with your vocal. Make one version dry and short, and another version washed and long using a return send. Use the dry one earlier, then the wet one later. It feels like the room is opening up.

Now bars 25 to 32: pre-drop. This is where tension becomes physical.

We’ll do three main things: snare roll, riser, and an air pocket.

Start with the snare roll.

Create a MIDI track with a snare sample. You can even use a snare slice from the break to keep it authentic. Program a roll that increases density over time. Bar 25, use eighth notes. By bar 27, move to sixteenths. And in the last bar, bar 31 into 32, do thirty-seconds, but only for that last bar so it feels special.

Automate velocity to rise slightly. Don’t max it. If you slam velocity at 127 the whole time, you lose dynamics and it becomes a hissy blur.

Add Saturator on the snare roll track. Drive two to six dB, soft clip on. If it gets harsh, use EQ Eight: a small dip around 3 to 5k can tame pain, and a tiny boost around 180 to 240 Hz can add body if it’s too thin.

Now the riser.

Make a white noise riser with Wavetable’s noise oscillator, or just use a noise sample in Simpler. Add Auto Filter in highpass mode. Sweep from around 150 Hz up to 6k or even 10k by the end. Add Reverb with a bigger decay, like eight to twelve seconds, and keep it controlled, maybe 20 to 35 percent wet. Automate its volume up into bar 32.

If you want a riser that feels emotional, not just “whoosh,” layer a tonal riser too. Take your pad, freeze and flatten, grab one sustained note, put it in Simpler, and automate transpose up seven to twelve semitones over eight bars. That pitch rise hits people in the chest. It’s subtle, but it’s the sunrise trick.

Now the most important part: the air pocket and the reset.

Right before the drop, in the last eighth or quarter note, mute the drums. Just a micro-silence. Let a reverb tail or vocal delay tail hang for a split second, but remove the punch.

This is what makes the drop feel massive without you touching the master volume.

On bar 33, place an impact sample right on the first beat. Then EQ it: high-pass around 30 to 40 Hz so it doesn’t add useless sub rumble, and use Utility to turn it down if it’s threatening your headroom. Impacts should be felt, not be the loudest thing in the whole track.

Now we glue the whole transition with a dedicated Transition FX bus, because this is one of the easiest ways to sound “produced” fast.

Create a return track and name it TRANS FX.

Put Hybrid Reverb on it. Hall algorithm. Decay six to ten seconds. Low cut around 200 Hz.

After that, add Echo. Set the time to quarter dotted or one-eighth, feedback 25 to 45, a little modulation if you want movement.

Then put Auto Filter after Echo and high-pass around 150 Hz to keep the return clean.

Now, during the lift, send your vocal stab, your break tease, and occasional pad hits into that return. Automate the send amounts so the space grows toward bar 24 and bar 32.

But here’s the key move beginners forget: automate those sends down right before the drop. If your reverb is still exploding at bar 33, the drop won’t slap. The drop needs to be comparatively dry and tight.

Alright, now let’s make the drop hit like a record.

At bar 33, reset the drum group filter back to fully open. Instantly bring the bass back to full level. And make sure kick and snare are drier than the lift. That contrast is everything.

On the DRUMS group, add Drum Buss. Drive around five to fifteen, and be careful with Boom. If you use Boom, keep it subtle, and only if it helps. DnB subs can overload fast.

Then add Glue Compressor. Attack three milliseconds, release on auto, ratio two to one, and aim for one to two dB of gain reduction max. This is just glue, not flattening.

Now a quick “tension check” trick in Live 12 style.

Temporarily put a Utility on the Master and set width to zero, just to check mono. If your lift disappears in mono, it means your emotion is mostly stereo reverb and ping pong delay. Add a mid-focused element: a more mono vocal, a filtered break tease, or a pad layer that has a strong center.

Let’s also talk about the biggest transition mistakes so you can avoid them right now.

One: over-filtering everything. Pick one hero filter move.

Two: no low-end plan. High-pass your FX and atmos. Always.

Three: risers too loud. They’re there to guide energy, not become the song.

Four: busy but not musical. Choose one emotional anchor. Pad chord, vocal, or melody fragment. Let it breathe.

Five: the drop doesn’t reset. If your returns are still blasting and your filters are still closed, the drop feels like more build, not a new chapter.

Now, if you want a quick practice version, do this in 15 minutes.

Pick one break and slice it to Drum Rack. Program a one-bar stepper loop with ghosts, add swing at 40 percent. Then make an eight-bar transition: first four bars, filter the drums down to about 3k. Bars five to seven, add the break tease and a vocal stab with Echo. Bar eight, snare roll and a tiny micro-silence for an eighth note. Then drop back into the full loop at bar nine.

Your goal is simple: the drop should feel bigger than the loop, even if your meters barely change.

And here’s your final coach takeaway for sunrise steppers: pick one story arc. Energy down, emotion up, tension up, impact reset. If it ever feels cluttered, mute half the FX and keep only one rhythmic tease, one emotional hook, and one tension riser.

When you’re ready, tell me which direction you want: more Bukem-style smooth sunrise, or more Metalheadz dark sunrise. And I’ll give you a specific 32-bar blueprint with exact automation targets and a starter device chain for drums and FX.

mickeybeam

Go to drumbasscd.com for +100 drum and bass YouTube channels all in one place - tune in!

Generating PDF preview…