Main tutorial
Lesson Overview
“Soul Pride: shuffle carve” is about building a jungle-oldskool DnB loop that feels chopped, human, and slightly worn-in, then arranging it so it lands like a proper track section instead of a static loop. The key idea is to combine:
- a shuffled drum pocket
- a carved, syncopated bassline
- chopped-vinyl character from resampling, filtering, and micro-edits
- arrangement movement that feels like a DJ-ready oldskool breakdown/drop system
- a shuffled breakbeat that has chopped-vinyl feel
- a sub-heavy bassline with off-grid phrasing and call-and-response
- ghost notes and tiny edits that create momentum
- a main 8-bar phrase plus a variation in bars 9–16
- DJ-friendly intro/outro material for easy transition
- enough grit and character to work in oldskool jungle, rollers, or darker minimal DnB
- a rolling Amen-derived groove
- a subby two-note bass motif
- a filtered vocal or stab chop that answers the drums
- arrangement energy that feels strong at 174 BPM, with enough space for mixdown and later automation
- Over-swinging the break
- Too much low end in the break sample
- Bassline never leaves space
- Arrangement stays looped too long
- Resampling gets too messy
- Stereo low end
- Harsh top-end from broken-up breaks
- Layer a sine sub beneath the bass reese
- Use saturation before compression on the drum bus
- Automate a narrow band of resonance for tension
- Resample your drop, then re-chop one bar
- Use call-and-response between bass and top chop
- Keep the center lane clean
- Make one element slightly unstable
- For heavier energy, mute less often but hit harder
- Use shuffle and micro-timing to create the carved jungle feel.
- Let the drum break and bassline answer each other instead of competing.
- Resample and re-chop to get chopped-vinyl character inside Ableton Live.
- Arrange in 4- and 8-bar phrases so the track feels like a real DnB record.
- Keep the sub mono, the drums punchy, and the edits intentional.
This matters because a lot of DnB productions get technically clean but lose the swing, surprise, and grime that make jungle and oldskool rollers hit emotionally. In a track, this technique works best as the main drop groove, a secondary drop variation, or a bridge section where the rhythm gets more broken and the bass starts “talking” back to the drums.
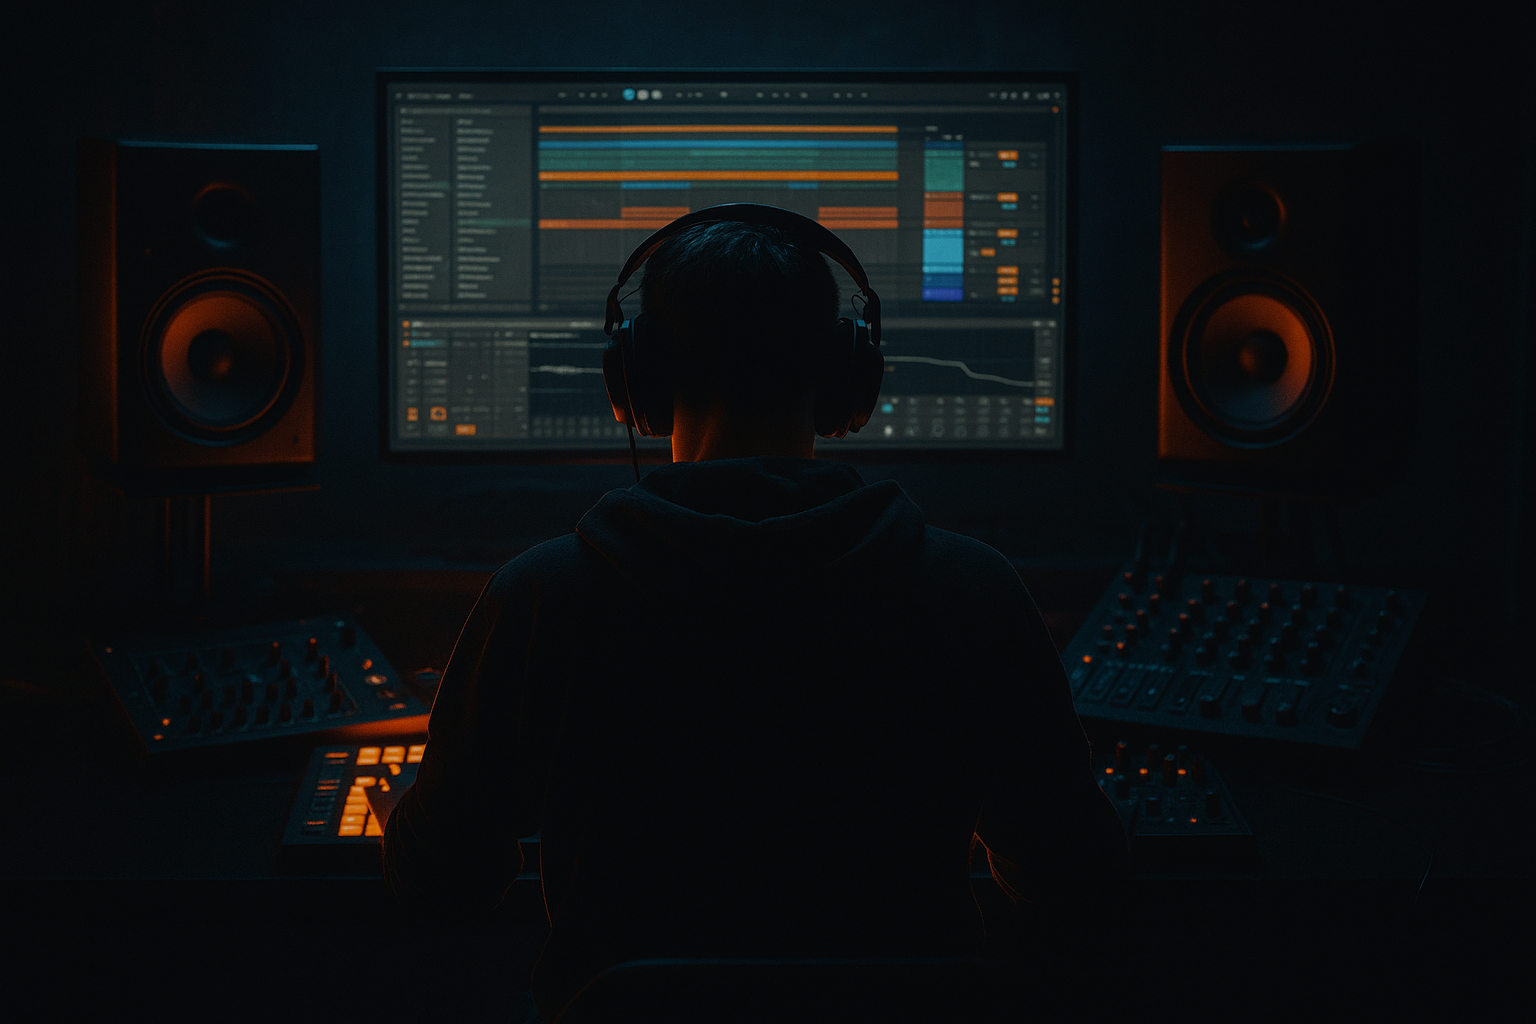
In Ableton Live 12, you can do this with stock devices only: Drum Rack, Simpler, Wavetable, Saturator, Drum Buss, Auto Filter, Echo, Utility, EQ Eight, Glue Compressor, and resampling through audio tracks. The goal is not just to make a loop sound old. The goal is to make it arrange like a record—with edits, tension, and a clear sense of movement. 🔥
What You Will Build
By the end of this lesson, you’ll have a 16-bar jungle/DnB drop section with:
Musically, think of something like:
The final result should feel like a loop that could sit inside a real track: tight in the low end, loose in the top groove, and deliberately arranged rather than endlessly repeating.
Step-by-Step Walkthrough
1. Set the tempo, reference, and arrangement grid
Start a new Ableton Live set at 170–176 BPM. For classic jungle-oldskool vibes, 174 BPM is the sweet spot. In Arrangement View, create a rough structure first:
- 0:00–0:16 intro
- 0:16–0:48 build
- 0:48–1:16 drop 1
- 1:16–1:32 breakdown / reset
- 1:32–2:00 drop 2 variation
Even if you only build the drop at first, having the structure in place helps you write edits with the track in mind. Load one reference track into another audio lane and keep it low in the mix. You’re listening for drum swing, bass phrasing, and how often the arrangement changes every 8 bars.
2. Build the shuffled break foundation in Drum Rack
Create a MIDI track and load Drum Rack. Put your main kick, snare, hats, and a chopped break into separate pads or zones.
For the break layer, drag an amen-style or funky break sample into Simpler set to Slice mode, or use a full break on a pad in Drum Rack and manually chop it on the MIDI grid.
Practical starting point:
- break loop length: 1 bar
- note velocity range: 70–110
- groove: use Ableton’s Swing 16-55 to Swing 16-60 as a starting point
- transient shaping: keep the break slices fairly sharp; don’t over-blur the attacks
Add a separate snare layer if needed for punch. A good oldskool DnB pattern often benefits from a main snare on 2 and 4 plus ghosted break hits around it. Use the break for the human feel, and let the extra snare anchor the groove.
Why this works in DnB: the break provides micro-timing and texture, while the programmed hits keep the track driving forward. That contrast is a big part of jungle energy.
3. Carve the shuffle with MIDI timing and note placement
The “shuffle carve” part is about shaping the pocket so it doesn’t just swing—it pushes and pulls in a musical way. In the MIDI clip, move selected break hits slightly off the grid instead of relying only on global swing.
Try these moves:
- push a hat or ghost snare 10–20 ms late for laid-back shuffle
- pull a pre-snare ghost hit 5–10 ms early to create lift
- remove one kick or low break hit every 2 bars so the groove breathes
Use the MIDI Note Grid at 1/16 or 1/32 for precision. For extra movement, duplicate the bar and make small changes every second bar:
- Bar 1: denser break phrasing
- Bar 2: remove one top-end hit
- Bar 3: add a ghost snare fill
- Bar 4: leave a tiny gap before the snare
Keep your kick and sub relationship clean. If the break has too much low end, high-pass it with EQ Eight around 120–180 Hz depending on the sample. This keeps the shuffle lean and lets the bass own the sub.
4. Design the bassline as a carved call-and-response phrase
Create a second MIDI track with Wavetable or Operator for the bass. For oldskool/jungle character, a simple reese-ish patch or a filtered saw stack works well.
Start with:
- oscillator: saw or detuned saw pair
- unison/detune: light to medium
- low-pass filter: moderate cutoff, some resonance
- envelope: short attack, medium decay for movement
- sub layer: sine or triangle underneath, either in the same instrument or a separate track
Suggested parameter ranges:
- filter cutoff: around 120–500 Hz depending on brightness
- filter resonance: 10–25%
- wavetable position / detune movement: subtle, not neon-bright
- sub level: just enough to feel, not so loud that it masks the kick
Write a 2-bar bass motif with clear rests. Don’t fill every gap. A strong pattern could be:
- note 1 on the “and” of 1
- note 2 just before beat 3
- note 3 on the “and” of 4
- then a longer sustain or a dropout
That spacing lets the drums speak. In DnB, bass is often more powerful when it answers the drums instead of continuously droning.
5. Add chopped-vinyl character by resampling and re-editing
Create an audio track and set its input to Resampling. Record 4–8 bars of your drum+bass groove. Then chop the recording into smaller pieces and reassemble the best fragments.
This is where the “vinyl” feel comes from—not fake record noise alone, but real audio phrasing:
- cut a snare tail and let it bleed into the next hit
- reverse a tiny break fragment into a fill
- leave one slightly imperfect chop before a drop point
- add a short silence before a heavy bass response
Use Warp carefully if the audio needs timing correction, but don’t sterilize it. If a slice feels good slightly late, keep it. The charm in jungle often comes from these almost-messy transitions.
On the resampled audio, try Auto Filter with automation:
- low-pass around 400–1,200 Hz for build sections
- open it sharply over 1–2 bars before the drop
- use a small resonance bump for a more vocal sweep
Also add Saturator or Drum Buss lightly:
- Saturator Drive: 2–6 dB
- Drum Buss Drive: 5–15%
- keep Boom very subtle or off if it muddies the kick/sub
6. Shape the groove bus and separate low-end duties
Route the drums to a Drum Bus and the bass to a dedicated Bass Bus. This helps you arrange and mix with intention.
On the Drum Bus:
- Glue Compressor: 1–2 dB gain reduction, slow attack, medium release
- EQ Eight: small cut around 250–400 Hz if the breaks feel boxy
- Drum Buss: mild transient and saturation for snap
On the Bass Bus:
- EQ Eight: high-pass any non-sub content below where necessary, but don’t cut the actual sub
- Utility: set bass low end to mono
- optional Saturator: gentle drive to make the bass audible on small speakers
Keep the kick and sub from fighting. A practical rule: if the kick is strongest around one low frequency region, let the sub sit just below or around it, but use arrangement and envelope shape so they aren’t fully stacking every hit. If the bass note lands exactly on a kick, shorten the bass envelope or place a small gap.
7. Arrange the 8-bar phrase like a real DnB record
Don’t just loop 1–2 bars. Turn the idea into a proper arrangement move:
- Bars 1–4: main groove, fewer bass notes, cleanest version of the break
- Bars 5–8: add a ghost snare fill, extra hat shuffle, or a reversed chop
- Bars 9–12: variation—change one bass note, remove one kick, or add a new top-loop layer
- Bars 13–16: tension peak—filter opens, more resampled grit, then a small drop-out at the end
A good musical context example: in a club mix, you might use bars 1–8 as the first drop after a breakdown, then bars 9–16 to introduce a darker bass answer line that gives DJs something fresh to blend with the next tune.
Add one or two transition elements:
- a short reverse cymbal
- a vinyl-style stop or momentary mute
- a noise riser using Auto Filter plus automation
- an impact hit on the downbeat of the variation
The key is phrase logic: something should change every 4 or 8 bars so the listener feels progression.
8. Automate tension, not just volume
In Arrangement View, automate parameters that affect energy:
- filter cutoff on bass or chopped sample
- reverb send on a vocal chop or stab
- delay feedback on a tiny fill
- Utility gain for pre-drop dropouts
- transpose on a chopped sample for a quick call-and-response twist
Good automation ideas:
- bass filter opens from 250 Hz to 900 Hz over 4 bars
- reverb send rises briefly on the last snare before a drop
- master-free buildup: pull drums down by 1–2 dB for the final half-bar before impact
- momentary low-pass on the drum bus for 1 beat, then snap open
In jungle and darker DnB, automation should feel like the room is moving, not like a synth demo. Keep it subtle but deliberate.
9. Use fill logic and negative space
Oldskool DnB feels powerful because it knows when to get out of the way. Create at least one fill every 8 bars:
- a 1/2-bar break chop
- a snare drag into the next phrase
- a bass rest followed by a heavy pickup note
- a quick mute on the break bus, then a full return
Add a short fill before the drop variation:
- duplicate the last bar
- remove the main kick on beat 1
- replace one hat with a reversed slice
- end on a snare flam or break hit
This makes the arrangement feel deliberate and keeps the groove from flattening out. In DnB, fills are not decoration—they are rhythmic punctuation.
10. Finish with a DJ-friendly intro and outro
Build the intro and outro so the track can mix cleanly:
- intro: filtered drums, sparse break ticks, maybe only top-end percussion and a teased bass chop
- outro: gradually remove bass elements, then leave drums and atmospherics
For DJ usability:
- keep a clean 16-bar intro for beatmatching
- avoid full-frequency chaos immediately at the start
- leave a clean section near the end for mixing out
Use EQ Eight or Auto Filter to thin the intro/outro. If you want extra atmosphere, add a very low-level field recording or noise layer, but keep it tucked behind the drums so the groove remains the focus.
Final check: play the section at performance volume and listen for whether the track still feels good when the bass is slightly reduced. If the arrangement still moves, your shuffle carve is working.
Common Mistakes
- Fix: reduce global swing or manually tighten a few hits. Too much shuffle can make the groove feel drunk instead of bouncing.
- Fix: high-pass the break with EQ Eight around 120–180 Hz so the sub and kick have room.
- Fix: shorten notes, add rests, and let the drums answer. DnB bass becomes stronger when it breathes.
- Fix: change something every 4 or 8 bars—filter, fill, mute, bass variation, or chop re-order.
- Fix: commit to a few great chops instead of stacking every weird sound. Chopped-vinyl character should sound intentional.
- Fix: use Utility to keep sub mono and check the mix in mono regularly.
- Fix: tame with EQ Eight or reduce high-frequency layers. Oldskool grit should feel dusty, not painful.
Pro Tips for Darker / Heavier DnB
- Keep it simple and centered. This gives you weight without crowding the arrangement.
- A little Saturator or Drum Buss before Glue Compressor can make break hits feel denser and more forward.
- On Auto Filter, a modest resonance bump during a build can make the chop feel more alive without sounding flashy.
- This is a great way to create a darker, more “recorded” feel. Re-editing audio often sounds more authentic than endlessly MIDI-tweaking.
- Example: bass hits on bar 1, vocal chop answers on the “and” of 2. That interaction makes the track feel like a conversation.
- Bass and kick should own the center. Put atmosphere, vinyl noise, or stereo texture more to the sides.
- Tiny pitch drift, filter motion, or sampled imperfection keeps the track from sounding too clinical.
- In darker DnB, fewer empty spots plus stronger transient contrast can feel more aggressive than busy fills.
Mini Practice Exercise
Spend 15 minutes making one 8-bar jungle/DnB phrase using only stock Ableton tools.
1. Set tempo to 174 BPM.
2. Build a 1-bar break pattern in Drum Rack with a kick, snare, and shuffled hats.
3. Write a 2-bar bassline in Wavetable or Operator using only 3–4 notes.
4. Resample 4 bars of the result onto an audio track.
5. Chop the resampled audio into 6–10 pieces and rearrange one bar so it feels more “vinyl.”
6. Add one automation move:
- bass filter open, or
- drum bus low-pass sweep, or
- reverb send on one chop
7. Duplicate the phrase into 8 bars and make a variation in bars 5–8:
- one bass rest
- one extra fill
- one chop reversed
Goal: by the end, you should have a loop that feels like a mini drop section, not just a pattern.

