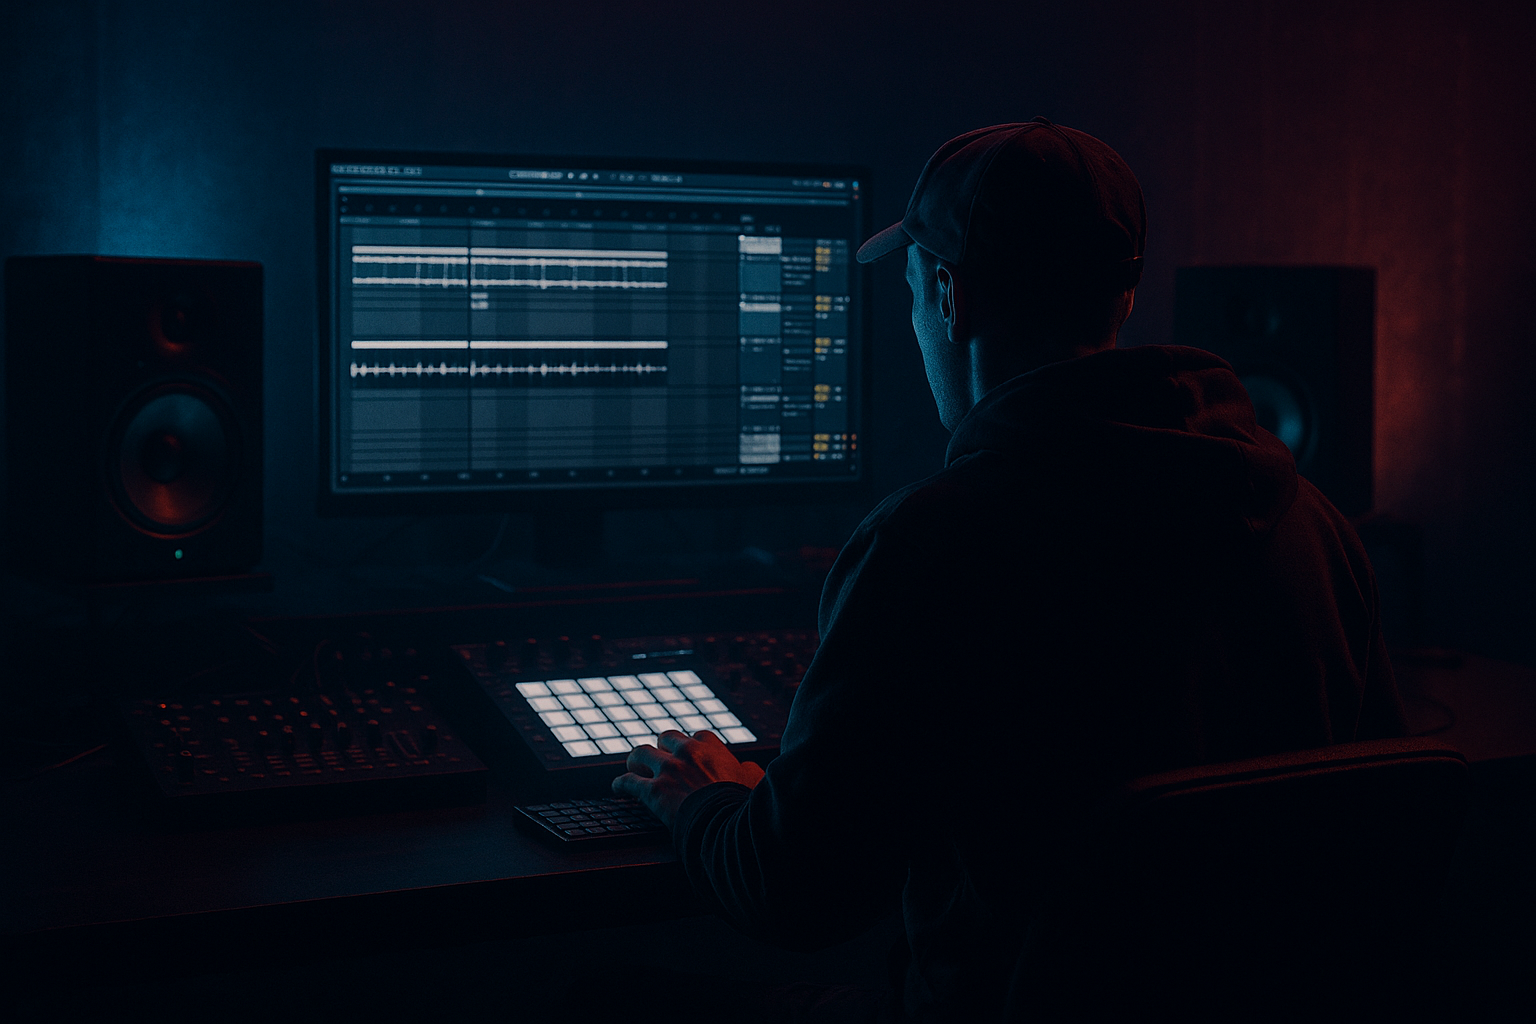
DNB COLLEGE

Drum & Bass Ableton Live 12 Tutorials

LESSON DETAIL

Sequence jungle drop for heavyweight sub impact in Ableton Live 12 (Beginner)

An AI-generated beginner Ableton lesson focused on Sequence jungle drop for heavyweight sub impact in Ableton Live 12 in the Ragga Elements area of drum and bass production.

Back to lessons
Sequence jungle drop for heavyweight sub impact in Ableton Live 12 (Beginner) cover image

Narrated lesson audio

The voice track includes the tutorial plus extra teacher commentary.

Open audio file

Main tutorial

1) Lesson overview 🎛️🥁

In this lesson you’ll sequence a jungle-style drop with heavyweight sub impact in Ableton Live 12—using a ragga/jungle rhythm approach (syncopation, call-and-response, snare weight, and bass “landing” moments).

You’ll learn how to:

  • Program a classic jungle drum pattern that hits hard on the drop
  • Design a sub-bass that slams without distorting your mix
  • Use Ableton stock devices to shape punch, weight, and movement
  • Arrange a convincing “drop moment” with fills, mutes, and impact
  • Target vibe: rolling jungle / ragga DnB with proper low-end authority 🔊

    ---

    2) What you will build ✅

    By the end, you’ll have a working 16–32 bar drop loop that includes:

  • Drums: kick, snare, hats, breaks/chops, ghost notes
  • Ragga elements: offbeat hits, call/response, space for vocals/FX
  • Sub bass: clean sine/triangle-based sub with controlled punch
  • Drop arrangement: pre-drop fill, impact, 4/8-bar variation
  • Mix foundation: clean low-end, controlled transients, headroom
  • ---

    3) Step-by-step walkthrough 🧭

    Step 0 — Project setup (fast + correct)

    1. Tempo: set to 170–174 BPM (try 172 BPM).

    2. Create tracks:

    - `DRUMS (Group)` → inside: `Kick`, `Snare`, `Hats`, `Break/Chops`, `Perc`

    - `SUB`

    - `FX` (impacts, risers, noise)

    3. Headroom: keep Master peaking around -6 dB while building.

    ---

    Step 1 — Build a drop-ready drum foundation 🥁

    We’ll start with a jungle skeleton and then make it drop hard.

    #### 1A) Kick pattern (simple but effective)

    On `Kick` (MIDI track with Drum Rack or Simpler):

  • Start with a clean, short kick (not a 909 boom unless you know it fits).
  • Pattern for 1 bar (16th grid):
  • - Kick on 1.1.1

    - Optional extra kick for drive: 1.3.3 (a little before beat 4 area)

    Ableton tip: In Live 12, use the MIDI Editor → Groove Pool later if you want swing, but start straight.

    Kick processing (stock chain):

  • EQ Eight
  • - HP filter: off (don’t high-pass your kick unless it’s too subby)

    - Small cut if boxy: around 250–400 Hz, -2 to -4 dB Q ~1.5

  • Drum Buss
  • - Drive: 2–6%

    - Boom: 0–10% (careful—sub will handle weight)

    - Damp: 5–20%

    - Transients: +5 to +20 for punch

    #### 1B) Snare / clap (the jungle “statement”)

    On `Snare`:

  • Put the main snare on beat 2 and 4:
  • - 1.2.1 and 1.4.1

    For jungle, layering helps:

  • Layer a tight crack + a wider clap (both in Drum Rack).
  • Keep the snare’s body around 180–220 Hz if it fits, but don’t let it fight the sub.
  • Snare processing chain:

  • EQ Eight
  • - High-pass: 90–120 Hz

    - Add presence: 2–5 kHz +2 dB (if needed)

    - Add snap: 8–10 kHz +1–3 dB shelf (if dull)

  • Saturator (Soft Clip on)
  • - Drive: 2–5 dB

    - Output: bring down to match

    #### 1C) Hats + shuffle (ragga/jungle bounce) 🎚️

    On `Hats`:

  • Closed hat: 8ths or 16ths, but with accents.
  • Try this 1-bar approach:

  • Closed hats on all 1/8 notes (1.1.3, 1.2.3, 1.3.3, 1.4.3)
  • Add 16th ghost hats between some steps for roll.
  • Human feel:

  • Select hats → randomize Velocity slightly (e.g., 65–95).
  • Nudge a couple hats late by 5–12 ms (Groove feel without a groove template).
  • Hat processing:

  • Auto Filter HP at 250–400 Hz (clear low junk)
  • Optional: Redux very lightly for grit (Downsample minimal)
  • Utility: width 120–150% (only hats/percs; keep sub mono)
  • ---

    Step 2 — Add the jungle break energy (without losing punch) 🔥

    A heavyweight drop often blends:

  • Clean kick/snare (punch + clarity)
  • Break layer (movement + heritage)
  • #### 2A) Pick a break and slice it

    On `Break/Chops` track:

    1. Load a break (Amen, Think, etc.) into Simpler.

    2. Set Simpler to Slice mode.

    3. Slicing preset: Transient works great.

    Now sequence a simple 1-bar chop pattern that complements your kick/snare (don’t fight it).

  • Keep your main snare on 2 and 4 from the snare track.
  • Use break slices mostly for ghost notes and fills.
  • #### 2B) Break processing (tight + aggressive)

  • EQ Eight
  • - High-pass around 120–180 Hz (break shouldn’t carry sub)

  • Drum Buss
  • - Drive: 5–15%

    - Transients: +10 to +30 (breaks love transient shaping)

  • Optional: Saturator (Warm Tube) low drive for grit
  • Gate (if too noisy), but subtle—don’t kill natural tails.
  • Drop trick: Automate break volume so it’s slightly lower in bar 1, then opens up by bar 2.

    ---

    Step 3 — Build the heavyweight sub (clean, loud, controlled) 🔊

    This is the core: sub that lands with the drums.

    #### 3A) Create the sub sound (stock operator)

    On `SUB` track: add Operator:

  • Oscillator A: Sine (or Triangle for more harmonics)
  • Voices: 1 (mono)
  • Glide/Portamento: Off at first
  • Filter: off (you can add later)
  • Add Utility after Operator:

  • Bass Mono: ON
  • Width: 0% (sub must be mono)
  • #### 3B) Write a ragga/jungle-friendly subline

    A common beginner mistake is writing too many notes. Jungle sub often hits like punctuation.

    Try a 2-bar phrase (key doesn’t matter—pick e.g. F minor):

  • Bar 1: hit root note on beat 1, hold 1/2 to 1 bar
  • Add a short “answer” note near beat 3.3 or 3.4
  • Bar 2: similar, but change the ending note (fifth or octave)
  • Keep it simple: long notes + a couple stabs = bigger impact.

    #### 3C) Make the sub audible on small speakers (without ruining it)

    Add Saturator after Utility:

  • Soft Clip: ON
  • Drive: 1–3 dB (tiny!)
  • Output: adjust so the level matches pre-saturation
  • Then add EQ Eight last:

  • Low-pass around 120–180 Hz (depending on your sound)
  • If your sub has unwanted mid harmonics, tame around 250–500 Hz
  • #### 3D) Sidechain the sub to the kick (clean space = louder drop)

    On `SUB`, add Compressor:

  • Sidechain: Kick track
  • Ratio: 4:1
  • Attack: 5–15 ms (let transient through slightly)
  • Release: 60–120 ms (tune to tempo; shorter = tighter)
  • Threshold: lower until you get 2–5 dB gain reduction
  • If it feels “pumpy,” shorten release. If it feels like kick and sub blur, increase reduction a bit.

    ---

    Step 4 — Sequence the drop impact (arrangement that hits) 💥

    Now we make it feel like a drop, not just a loop.

    #### 4A) Create a pre-drop bar (bar -1)

    Before your drop starts, do this for 1 bar:

  • Remove the kick (or high-pass the drums with Auto Filter)
  • Add a snare build (8th → 16th rolls)
  • Add an impact on the first beat of the drop
  • Impact (stock):

  • Use a crash + sub drop sample
  • Or synth one: Operator sine pitch envelope down (fast), then reverb tail
  • Add Reverb on impact (Decay 2–4s, HP the reverb input)
  • #### 4B) First bar of the drop: less is more

    To make bar 1 hit heavier:

  • Use less break in bar 1
  • Use clean kick + snare + sub upfront
  • Bring full break layer in bar 2
  • This contrast makes the drop feel bigger without changing your mix.

    #### 4C) Add 4/8-bar variation (essential in jungle)

    Every 4 bars, do one:

  • A quick snare fill (1/8 note flam or 16th burst)
  • A kick mute for 1/4 bar (space = impact)
  • A break chop switch (different slice pattern for 1 bar)
  • A ragga stab (offbeat horn/organ hit)
  • Stock trick: put Auto Pan on a stab with Amount 10–25% and Rate synced (1/4 or 1/8) for movement, but keep low end mono.

    ---

    Step 5 — Glue and control the drop (without killing it) 🧩

    On `DRUMS (Group)`, add:

    #### 5A) Drum glue (gentle)

  • Glue Compressor
  • - Attack: 10 ms

    - Release: Auto

    - Ratio: 2:1

    - Aim: 1–2 dB gain reduction on peaks

    #### 5B) Drum character (optional)

  • Drum Buss (on group)
  • - Drive: 2–8%

    - Boom: 0–5% (avoid stepping on sub)

    #### 5C) Check your low end

    Use Spectrum (on Master) to confirm:

  • Sub fundamental is strong around 40–60 Hz (depending on note)
  • Not too much energy piling at 80–120 Hz (mud zone)
  • ---

    4) Common mistakes 🚫

    1. Too many sub notes → makes the drop feel smaller and messy.

    2. Sub not mono → weak club translation. Use Utility width 0%.

    3. Kick and sub fighting → no sidechain or bad envelope timing.

    4. Break is full-volume from bar 1 → drop has no “opening punch.”

    5. Over-saturating sub → sounds cool solo, ruins headroom in context.

    6. Snare too thin → jungle needs a confident 2 and 4.

    ---

    5) Pro tips for darker/heavier DnB 🌑

  • Tune the kick roughly to the track (or at least avoid clashing with sub root).
  • Add a quiet reese layer above the sub (not in this lesson’s core, but powerful):
  • - Wavetable → saws → low-pass ~200–400 Hz for body, keep sub separate.

  • Use Echo on ragga stabs with HP filter in the feedback path (keeps low end clean).
  • Add room tone: a tiny Reverb on drums (very short decay 0.3–0.6s) to glue.
  • For meaner drums: parallel process the drum group:
  • - Create Return track `PARA SMASH` → Saturator (Drive 6–10 dB)Drum BussEQ Eight HP 150 Hz → return subtly.

    ---

    6) Mini practice exercise 🧪

    Do this in 15 minutes:

    1. Make a 1-bar drum loop: kick on 1, snare on 2+4, hats on 8ths.

    2. Add a break in Simpler Slice mode and program only ghost notes (no main snare hits).

    3. Write a 2-bar sub phrase with only 3 notes max total.

    4. Add sidechain compression from kick to sub (2–5 dB GR).

    5. Create a pre-drop bar: remove kick + add snare roll + impact.

    6. Export a quick 16-bar bounce and listen on headphones + phone speaker.

    Goal: the drop should still feel heavy on the phone (thanks to subtle saturation) and enormous on headphones (thanks to clean sub + punch).

    ---

    7) Recap 🧠

  • You built a jungle/ragga drop by combining clean punch (kick/snare) + break movement + sub punctuation.
  • The “heavyweight” feeling comes from contrast, space, and low-end control (mono sub + sidechain).
  • Ableton stock devices that did the heavy lifting: Operator, Utility, EQ Eight, Compressor, Drum Buss, Glue Compressor, Simpler, Spectrum.

If you want, tell me what vibe you’re aiming for (classic ragga jungle, modern foghorn jungle, darker techy roller), and I’ll suggest a specific 8-bar drop MIDI template plus drum sample guidelines.

Ask GPT about this lesson

Chat with the lesson tutor, get follow-up help, or use quick actions.

Bigup 👽 Ask me anything about this lesson and I’ll answer in context.

Narration script

Show spoken script
Title: Sequence jungle drop for heavyweight sub impact in Ableton Live 12 (Beginner)

Alright, let’s build a proper jungle-style drop in Ableton Live 12, with that ragga bounce and a sub that lands like a concrete block… but stays clean. We’re going for rolling jungle energy: syncopation, call-and-response, snare confidence, and those “landing moments” where the low end arrives on purpose.

By the end, you’ll have a working 16 to 32 bar drop loop: clean kick and snare, hats with swing, a sliced break for movement, ragga-style space in the rhythm, and a sub that hits hard without eating your headroom.

First, quick setup so we don’t fight the project later.

Set your tempo to somewhere between 170 and 174 BPM. I’ll use 172. Now make a DRUMS group, and inside it create tracks for Kick, Snare, Hats, Break or Chops, and Perc if you want. Then make a SUB track, and an FX track for impacts and risers.

Before we write anything: headroom. Keep your master peaking around minus 6 dB while building. If you start too loud, you’ll end up over-compressing everything just to survive. A super practical gain-staging target while you’re still writing: get your kick peaking around minus 10 to minus 8, your snare around minus 9 to minus 7, and your sub around minus 12 to minus 9. The sub will feel huge even when the meter says it’s lower. That’s normal.

Now let’s build the drop-ready drum foundation.

Start with the kick. Load a clean, short kick into a Drum Rack pad or Simpler. For jungle, you usually want something punchy and controlled, not a super long boomy tail that argues with the sub.

Program a one-bar pattern on a 16th-note grid. Put a kick right on 1.1.1. Then, optionally, add a second kick around 1.3.3. That second one is a little “push” that helps the groove drive into the back half of the bar without getting too busy.

Process the kick with stock devices. Add EQ Eight first. Don’t automatically high-pass the kick. Only do that if it’s ridiculously subby. Instead, listen for boxiness, and if you hear that cardboard vibe, make a small cut around 250 to 400 Hz, maybe minus 2 to minus 4 dB with a medium Q.

Then add Drum Buss. Keep it subtle. Drive somewhere around 2 to 6 percent. Boom at zero to maybe 10 percent, but be careful because we want the sub to own the deep weight. Damp around 5 to 20 percent, and give the transients a push, like plus 5 to plus 20, so the kick punches through.

Next, the snare: this is the jungle statement. Put the main snare on beat 2 and beat 4. So 1.2.1 and 1.4.1.

If you can, layer it. One tight crack for definition, and one wider clap or layer for width and attitude. In a Drum Rack, that can be as simple as two pads triggered together, or two samples stacked in the same chain.

Now EQ the snare. High-pass around 90 to 120 Hz so it’s not competing with the sub. If it needs presence, add a little at 2 to 5 kHz. If it’s dull, a gentle shelf around 8 to 10 kHz can add snap. Then add Saturator. Turn on Soft Clip, and drive about 2 to 5 dB, then bring the output down so you’re not just making it louder. We’re adding density, not volume.

Quick coach tip here: if you layered snares, check phase. Put Utility on one layer and hit phase invert left and right and see what happens. If the snare suddenly gets hollow or loses weight, flip it back. If it gets stronger and more focused, you just fixed a hidden problem in ten seconds.

Now hats. This is where the ragga/jungle bounce starts to feel alive.

Put closed hats on the offbeat eighth notes: 1.1.3, 1.2.3, 1.3.3, 1.4.3. Then add a couple quiet 16th ghost hats between steps so it rolls a bit. The key is accents and slight imperfection, not a machine-gun line.

Humanize it. Randomize velocities a little, like 65 to 95, and then pick two or three hats and nudge them late by 5 to 12 milliseconds. That tiny delay creates groove without you even touching a swing template yet.

Process hats with Auto Filter high-pass around 250 to 400 Hz to clear low junk. If you want grit, a tiny touch of Redux can work, but keep it light. Then Utility for width, like 120 to 150 percent, but only on hats and percussion. Your sub stays mono.

Now let’s bring in jungle break energy without losing the punch of our clean drums.

On your Break or Chops track, load a classic break into Simpler. Amen, Think, whatever you’ve got. Set Simpler to Slice mode, and choose Transient slicing. That usually lands right for breaks.

Now the important rule: your main snare is already handled by your snare track. So don’t let the break replace it. Use break slices as ghost notes, little fills, little shuffles, and heritage movement around the core kick and snare.

For processing, high-pass the break around 120 to 180 Hz. The break should not carry sub. Then add Drum Buss with a bit more aggression than the kick: Drive around 5 to 15 percent, and transients plus 10 to plus 30. If it needs some dirt, add Saturator on Warm Tube with low drive, and if the break is noisy, use Gate gently—subtle enough that you don’t chop the life out of it.

Here’s a drop trick that works ridiculously well: automate the break volume so it’s slightly lower in bar 1 of the drop, and then opens up by bar 2. That contrast makes the drop feel bigger without you changing your master level at all.

Now the main event: the heavyweight sub.

On your SUB track, add Operator. Oscillator A on Sine, or Triangle if you want a bit more harmonic content. Set voices to 1, make it mono, and keep glide off for now.

Put Utility after Operator. Turn on Bass Mono and set width to 0 percent. This is non-negotiable if you want club translation.

Now write the subline the jungle way: as punctuation, not constant noodling. A beginner mistake is playing too many notes. More notes usually makes the drop feel smaller, because there’s no space for the “landing.”

Pick a key, like F minor, but don’t stress. Write a two-bar phrase.
Bar 1: hit the root on beat 1 and hold it for half a bar to a full bar.
Then add a short “answer” note near beat 3.3 or 3.4.
Bar 2: repeat the idea, but change the ending note—maybe the fifth, maybe the octave.

And here’s an extra coaching rule that will instantly make your groove sound intentional: pick a sub landing grid and commit to it. For beginner jungle drops, choose one reliable spot where the sub lands every time—commonly beat 1 and/or the “and” after 3. Even if your break gets busy, the listener feels that anchor and your low end feels confident.

Use Live 12’s MIDI editor to help you here. Turn on Scale mode so you don’t hit wrong notes, and use highlighting so you can literally see where your kick and sub are landing. You’re aiming for “locked,” not “almost tight.”

Now make the sub audible on small speakers without destroying it.

Add Saturator after Utility. Soft Clip on. Drive just 1 to 3 dB, tiny. Then match the output so you’re not fooling yourself with loudness.

Then add EQ Eight at the end. Low-pass around 120 to 180 Hz depending on how bright your sub got. If you hear extra junk in the low mids, tame around 250 to 500 Hz. But don’t overdo it. Sub is supposed to be simple.

Optional but powerful Operator trick: add a very subtle pitch envelope to create a transient “thump” without making it clicky. Keep the amount tiny, and the decay short, like 10 to 40 milliseconds. You should feel it more than hear it.

Next, sidechain the sub to the kick. This is how you get loudness without distortion.

Add Compressor on the SUB track. Turn on Sidechain, select the kick track. Set ratio to 4 to 1. Attack around 5 to 15 milliseconds so the kick transient gets through. Release around 60 to 120 milliseconds and adjust by feel. Lower the threshold until you see 2 to 5 dB of gain reduction.

If it feels pumpy, shorten the release. If the kick and sub blur together, increase the reduction slightly or tweak release timing until the low end “breathes” cleanly.

Now let’s make it feel like a real drop, not just a loop.

We’ll build a pre-drop bar. One bar before the drop, remove the kick entirely, or high-pass your drum group with Auto Filter so the low end disappears for a moment. Add a snare build that speeds up, like eighths into sixteenths, and then put an impact right on the first beat of the drop.

For the impact, you can use a crash plus a sub drop sample. Or synth one fast: Operator with a sine, a fast pitch envelope downward, and then a reverb tail. If you do reverb, high-pass the reverb input so the reverb doesn’t smear your low end.

Now, first bar of the drop: less is more. Keep bar 1 clean and upfront. Clean kick, confident snare, sub landing, hats. Keep the break layer minimal in bar 1, then bring more break movement in bar 2. That contrast is what makes people do the face.

And now add variation, because jungle needs it. Every 4 or 8 bars, do one clear thing:
a quick snare fill, a tiny kick mute for a quarter bar, a break chop switch for one bar, or an offbeat ragga stab.

If you want a quick ragga stab using stock tools: make it in Wavetable with a saw and square, low-pass filter with a short envelope pluck, then add Echo. High-pass the Echo input or feedback so it doesn’t muddy the bass zone. You can resample one good hit so it behaves like a classic one-shot.

Also a big arrangement rule: put fills at the end of bar 4, 8, or 16… but keep beat 1 of the next bar clean. That reset is what reads as power.

Now we glue and control, but we don’t crush.

On the DRUMS group, choose one main bus move, not five. Beginners stack Glue, Drum Buss, Saturator, Limiter, all at once, and wonder why it got smaller. Pick one main character device.

If you choose Glue Compressor: attack 10 ms, release auto, ratio 2:1, and aim for only 1 to 2 dB of gain reduction on peaks.

If you choose Drum Buss on the group instead: Drive around 2 to 8 percent, Boom 0 to 5 percent, and again, don’t step on the sub.

Then check your low end with Spectrum on the master. You’re looking for a strong fundamental around roughly 40 to 60 Hz depending on the note, and you’re watching out for a pile-up around 80 to 120 Hz, the mud zone.

Two extra power moves before we wrap.

First: parallel harmonics for phone translation, the clean method. Duplicate the SUB track. Keep the original as pure sub and low-pass it. On the duplicate, add Saturator with a bit more drive, then EQ Eight and high-pass around 120 to 180 Hz so only harmonics remain. Blend it quietly. Now the drop reads on earbuds, but your real sub stays pristine.

Second: automate density, not volume. Instead of turning things up, add or remove note count. Mute a couple break slices in bar 1, restore them in bar 2. Make the sub longer in bar 1, shorter in bar 2 while a stab answers. That’s call-and-response, and it creates energy without a louder master.

Common mistakes to avoid as you build:
If you write too many sub notes, it gets messy and the drop feels smaller.
If your sub isn’t mono, it won’t translate.
If kick and sub fight, it’s usually sidechain timing or envelopes.
If the break is full volume from bar 1, you lose that opening punch.
If you over-saturate the sub, it sounds cool solo and ruins headroom in context.
And if the snare is too thin, jungle won’t feel confident on 2 and 4.

Now a quick 15-minute practice sprint you can do anytime.
Make a one-bar loop with kick on 1, snare on 2 and 4, hats on offbeat eighths.
Add a break in Slice mode and program only ghost notes.
Write a two-bar sub phrase with three notes max total.
Sidechain sub to kick for 2 to 5 dB gain reduction.
Create one pre-drop bar: remove kick, add snare roll, add impact.
Then export a quick 16-bar bounce and listen on headphones and your phone speaker.

The goal is simple: it should feel heavy on the phone because of subtle harmonics, and enormous on headphones because the real sub is clean, mono, and landing with intent.

Recap.
You built a jungle and ragga-style drop by combining clean punch from kick and snare, movement from break chops, and sub punctuation that lands on purpose. The heavyweight feeling comes from contrast, space, and low-end control—mono sub, sidechain, and not overfilling the bar.

If you tell me what direction you’re aiming for—classic ragga jungle, modern foghorn jungle, or a darker techy roller—I can give you a specific 8-bar drop MIDI template and a simple sample-picking guide so you can get to a convincing drop even faster.

mickeybeam

Go to drumbasscd.com for +100 drum and bass YouTube channels all in one place - tune in!

Generating PDF preview…