DNB COLLEGE

Drum & Bass Ableton Live 12 Tutorials

LESSON DETAIL

Second-drop bass variations masterclass for DJ-friendly sets (Advanced)

An AI-generated advanced Ableton lesson focused on Second-drop bass variations masterclass for DJ-friendly sets in the Basslines area of drum and bass production.

Back to lessons
Second-drop bass variations masterclass for DJ-friendly sets (Advanced) cover image

Narrated lesson audio

The voice track includes the tutorial plus extra teacher commentary.

Open audio file

Main tutorial

```markdown

Second-Drop Bass Variations Masterclass (DJ‑Friendly DnB Sets) 🔊🧠

Skill level: Advanced

Category: Basslines

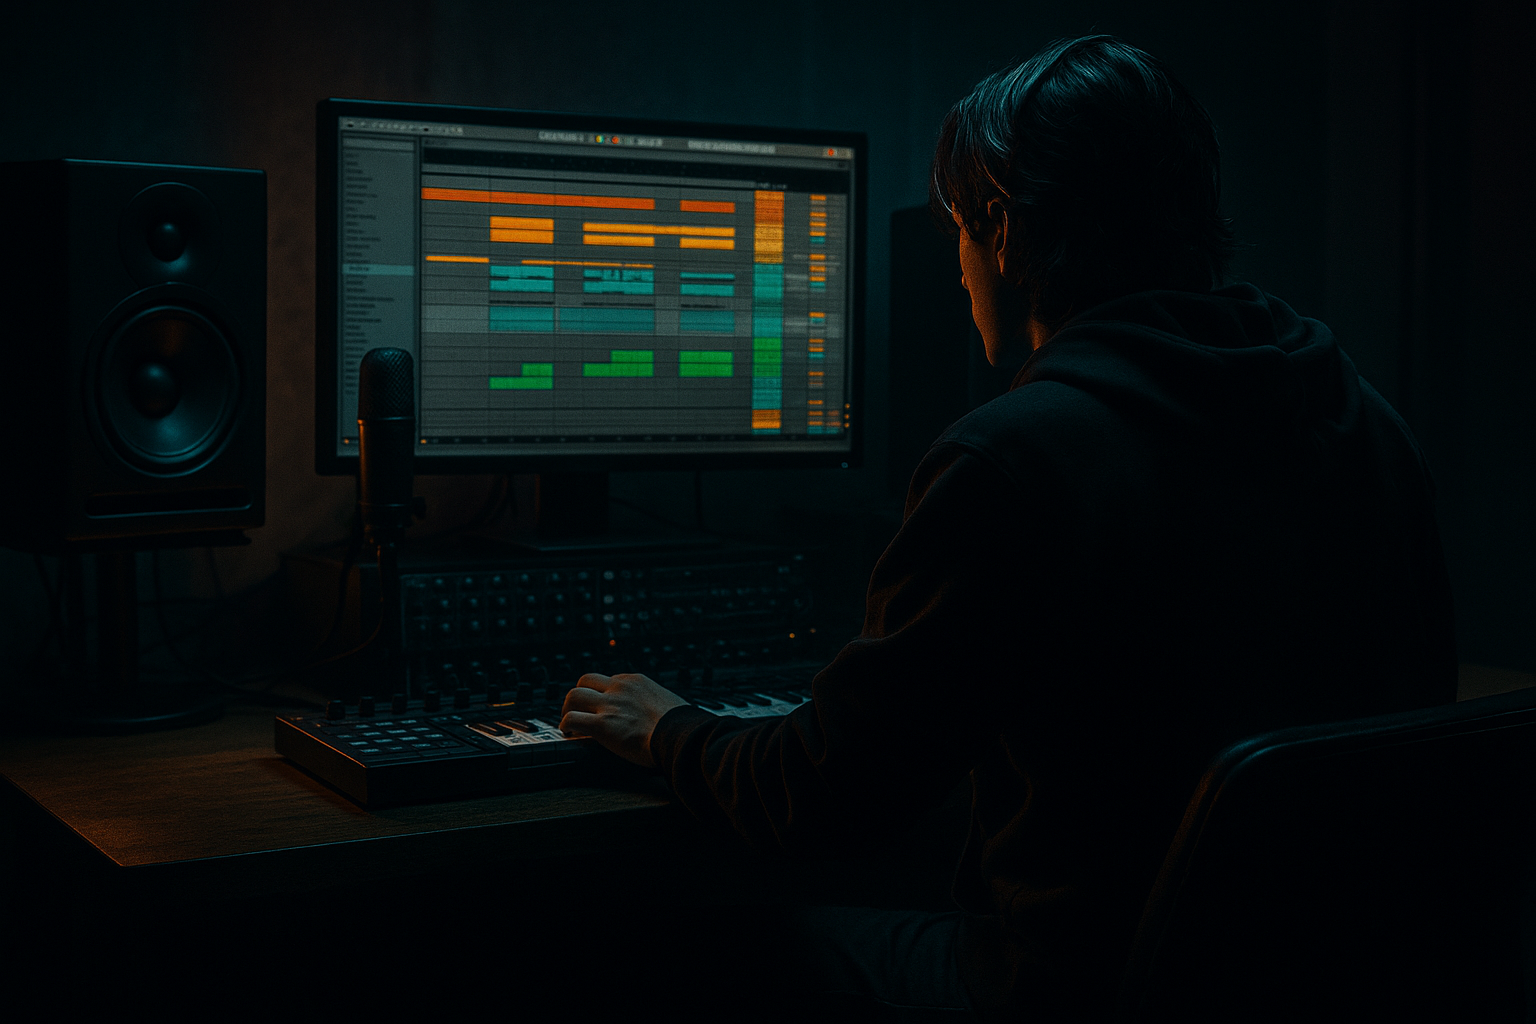
DAW: Ableton Live (stock devices highlighted)

---

1) Lesson overview

In drum & bass, the second drop is where you either (A) level up the bass to justify the repeat, or (B) twist it just enough to feel fresh while staying mixable for DJs. This lesson is about building second-drop bass variations that:

  • Hit harder and feel “new” ✅
  • Still DJ-friendly (phrasing, energy, and mixdown choices that translate) 🎧
  • Can be performed and arranged quickly in Ableton Live ⚡
  • Don’t break your groove or clash with your drums
  • We’ll focus on rolling / jump-up / neuro-adjacent techniques, applicable to jungle-influenced rollers too.

    ---

    2) What you will build

    You’ll create a bass system with two drop states:

  • Drop 1: A clean, foundational bass pattern (stable + mixable).
  • Drop 2: A “variation layer” system using macro-controlled changes:
  • - Harmonic shifts (formant / wavetable position / FM amount)

    - Movement changes (LFO rate, envelope snap, filter drive)

    - Call/response fills every 4 or 8 bars

    - Extra “mid” lane without ruining the sub

    Deliverable: a 16–32 bar drop where the second 16 bars feel upgraded but still locked for DJ sets.

    ---

    3) Step-by-step walkthrough

    Step 0 — Set up a DJ-friendly arrangement grid 🧱

    Goal: predictable phrasing for mixing and impact.

    1. Set tempo (typical): 172–176 BPM.

    2. In Arrangement View, create locators:

    - `Drop 1 start` (bar 33 for example)

    - `Drop 2 start` (bar 49)

    3. Make your drop structure:

    - 16 bars Drop 1

    - 16 bars Drop 2

    4. Keep energy phrases in 4/8 bar units. DJs love predictable tension/release.

    > DnB default: variations usually land on bar 9 and bar 13, and the big switch is at bar 17 (start of Drop 2).

    ---

    Step 1 — Build a 3-lane bass rack (Sub / Low-Mid / Mid-Top) 🎛️

    Why: second-drop changes should mostly live in the mids while the sub stays reliable.

    Create one MIDI track: BASS BUS

    Add an Audio Effect Rack with 3 chains:

    #### Chain A: SUB (mono + stable)

  • Instrument: Operator (stock)
  • - Osc A: Sine

    - Volume env: Short-ish release (avoid clicks)

  • Audio chain:
  • 1. EQ Eight

    - Low-pass around 80–100 Hz (24 dB/oct)

    - Optional tiny dip around 40–60 Hz if it’s too thick

    2. Utility

    - Width: 0% (mono)

    - Gain: adjust so sub is consistent drop-to-drop

    Rule: Your second drop should not rewrite sub fundamentals every bar unless you want chaos.

    #### Chain B: LOW-MID (weight + movement)

  • Instrument: Wavetable (stock)
  • - Osc 1: Basic Shapes / saw-ish

    - Osc 2: optional, subtle detune

    - Filter: LP24 with drive

  • Audio chain:
  • 1. Saturator

    - Drive: 2–6 dB, Soft Clip ON

    2. EQ Eight

    - High-pass around 90–120 Hz

    - Control 200–400 Hz “cardboard” if needed

    3. Compressor (optional glue)

    #### Chain C: MID-TOP (character + “second drop hype”)

  • Instrument: Wavetable or Operator (FM works great here)
  • Audio chain (starter):
  • 1. Auto Filter

    - BP or LP depending on vibe

    - Map cutoff to a Macro

    2. Amp (stock)

    - Adds edge; try “Rock” or “Heavy”

    3. Redux (very subtle)

    - Downsample a touch (e.g., 10–18 kHz), Dry/Wet low

    4. EQ Eight

    - High-pass 150–250 Hz

    - Manage harshness at 2–5 kHz

    5. Utility

    - Width: 120–160% only for mids, not sub

    ---

    Step 2 — Write a Drop 1 bass pattern that’s “DJ-solid” 🥁

    Use one MIDI clip that drives all chains.

  • Length: 8 bars (loop it for Drop 1)
  • Rhythm: keep it rolling and syncopated, but not overly busy.
  • Notes: choose a key typical for DnB (F, F#, G are common).
  • Advanced tip: keep a “hook cell” (1–2 bar recognizable motif).

    Second drop variations work best when they reference the original.

    ---

    Step 3 — Build the “Second Drop Variation Macros” (your control panel) 🎚️

    In the Audio Effect Rack, create 8 Macros. Map these targets:

    1. MID Filter Cutoff (Auto Filter cutoff on MID-TOP chain)

    2. MID Resonance (Auto Filter resonance)

    3. Wavetable Position / FM Amount (Wavetable position or Operator FM)

    4. Drive (Saturator drive on LOW-MID + maybe Amp gain on MID-TOP)

    5. LFO Rate (map to Wavetable LFO rate if used)

    6. LFO Amount (map to filter mod amount)

    7. Noise/Texture Level (Osc noise level or separate noise layer volume)

    8. Reese Width (Utility width on MID-TOP chain)

    Set sensible ranges:

  • Don’t map filter cutoff from 20 Hz → 20 kHz; tighten it (e.g., 200 Hz → 4 kHz) for musical control.
  • Limit width macros so you don’t go phase-mad (e.g., 100–160% max).
  • ---

    Step 4 — Create Drop 2 variation without changing the whole patch 🔁

    You want same identity, new attitude.

    #### Method A: Clip-based macro automation (fast + recallable)

    1. Duplicate your 8-bar bass clip.

    2. Rename:

    - `Drop1_Bass`

    - `Drop2_BassVar`

    3. In Clip View, enable Envelopes:

    - Choose MIDI Ctrl → your Macro (if you mapped Macros to a MIDI controller), or

    - Better: automate device parameters directly in Arrangement View.

    What to automate for Drop 2:

  • Increase Drive by ~10–25% compared to Drop 1
  • Faster LFO Rate in select bars (like bar 4 and 8 of the phrase)
  • More filter movement (bigger cutoff swings)
  • Introduce small formant-ish shifts (wavetable position increments)
  • #### Method B: A/B chain switching (DJ-friendly “switch flip”)

    Inside your MID-TOP chain, create two parallel chains:

  • `MID A (Drop 1)`
  • `MID B (Drop 2)`
  • On each chain:

  • Use different filter type or distortion flavor.
  • Then automate chain volume:
  • - Drop 1: A = 0 dB, B = -inf

    - Drop 2: A = -inf, B = 0 dB

    This keeps phrasing super clean: DJs feel a clear “upgrade” at drop 2.

    ---

    Step 5 — Add “call/response” fills every 4 or 8 bars (the secret sauce) 🧨

    Second drops often feel bigger because of strategic fills, not constant changes.

    Do this:

    1. Make a 1-bar fill clip (e.g., last bar of each 8).

    2. Increase motion:

    - LFO rate spike

    - Quick pitch dip or rise (1–3 semitones)

    - Add a quick bandpass “yoi” moment

    3. Keep the sub stable while the mids do the trick.

    Ableton stock fill tools:

  • Auto Filter with Envelope follower / LFO
  • Frequency Shifter (tiny amounts for metallic neuro flavor)
  • Saturator “Hot” mode (careful!)
  • ---

    Step 6 — Sidechain and dynamics: keep it mixable 🎚️🎧

    A second drop often fails because the bass gets louder but less controlled.

    Classic DnB approach (clean + strong):

  • On the BASS BUS, add Compressor with Sidechain from Kick (or Kick+Snare group).
  • - Ratio: 3:1–6:1

    - Attack: 3–10 ms

    - Release: 60–120 ms (tune to groove)

    - Aim for 2–5 dB gain reduction

    Alternative (tighter):

  • Use Shaper in a Max for Live device if you have it, but stock-only?
  • Use Compressor + careful envelope shaping in synth.

    Important: keep Drop 2 perceived louder via harmonics, not +6 dB fader moves.

    ---

    Step 7 — DJ-friendly mix decisions for Drop 2 🧩

    To make it easy to mix in/out:

  • Keep sub consistent (notes + level)
  • Add excitement in 200 Hz–5 kHz
  • Avoid massive stereo widening below 150 Hz
  • Avoid full-spectrum reverb washes on bass (muddy in clubs)
  • Practical check:

  • Put Spectrum on the master and compare Drop 1 vs Drop 2.
  • Drop 2 should show richer harmonics, not uncontrolled low-end spikes.
  • ---

    4) Common mistakes 🚫

    1. Changing the sub pattern too much in Drop 2

    → DJs lose the “anchor” and the groove feels like a new tune, not a second drop.

    2. Over-automating everything

    → The bass stops being a hook and becomes sound-design noise.

    3. Making Drop 2 wider instead of bigger

    → Wide bass in a club can vanish. Bigger = harmonic density + transient control.

    4. Distorting without re-EQing

    → Saturation adds low-mid build-up; always re-check 200–500 Hz.

    5. Ignoring drum relationship

    → If your snare is the star, don’t make Drop 2 mids fight at 180–250 Hz.

    ---

    5) Pro tips for darker/heavier DnB 🖤

  • Neuro-style movement (stock):
  • Use Auto Filter BP + LFO + Saturator. Automate BP center frequency in Drop 2 for talking movement.

  • Tone aggression without mud:
  • Add distortion above the sub:

    - Split using EQ Eight (HP at 120 Hz) before distortion, then blend back.

  • Controlled chaos:
  • Add Frequency Shifter on MID-TOP:

    - Mode: Ring Mod

    - Fine: 10–40 Hz (subtle)

    - Mix very low, automate higher for fills only.

  • Darkness in the gaps:
  • In Drop 2, reduce sustained bass notes slightly and emphasize gated, punchy phrases. Darkness = space + weight.

  • Old-school jungle edge (tastefully):
  • Tiny Redux or Erosion on the mids can give that crunchy heritage—keep it subtle.

    ---

    6) Mini practice exercise 🎯

    Goal: Make a second drop that feels 20% more intense with 0% more clutter.

    1. Take your Drop 1 bass (8 bars).

    2. Duplicate for Drop 2.

    3. For Drop 2, apply exactly three changes:

    - Change #1: Increase Saturator Drive on LOW-MID by +2 dB

    - Change #2: Add one call/response fill in bar 8 (filter/LFO spike)

    - Change #3: Slightly different MID filter movement (e.g., cutoff automation opens 15% more)

    4. Bounce a quick reference and A/B:

    - Drop 1 should feel stable.

    - Drop 2 should feel like the same tune but “more dangerous.”

    Bonus: test in mono using Utility on the Master (Width 0%). If Drop 2 collapses, your “bigness” was mostly stereo tricks.

    ---

    7) Recap ✅

  • Build bass as lanes: sub stays stable, mids carry variation.
  • Use Macros + automation to create second-drop upgrades quickly.
  • Make Drop 2 feel bigger by harmonics + controlled movement, not just volume.
  • Add variation through call/response fills and phrase-level switching, not constant micro-tweaks.
  • Keep it DJ-friendly with clean phrasing, stable low-end, and predictable energy jumps.

If you want, tell me your sub style (pure sine / reese sub / 808-ish) and your target vibe (roller, jump-up, neuro, jungle-tech), and I’ll suggest a specific Drop 2 macro map and an 8-bar automation blueprint. 🔥

```

Ask GPT about this lesson

Chat with the lesson tutor, get follow-up help, or use quick actions.

Bigup 👽 Ask me anything about this lesson and I’ll answer in context.

Narration script

Show spoken script
Title: Second-drop bass variations masterclass for DJ-friendly sets (Advanced)

Alright, let’s get into one of the most important make-or-break moments in drum and bass: the second drop.

Because in a DJ context, the second drop has a job. It’s not just “do it again.” It’s either level up the bass so the repeat feels justified, or twist the vibe just enough that it feels fresh, while still being mixable and predictable for a DJ to work with.

And that’s the key phrase for today: DJ-friendly. We want harder and newer, but not chaotic. We want impact that survives a blend. We want movement that locks to the drums, not movement that fights the groove.

By the end of this lesson, you’ll have a bass system with two drop states:
Drop 1 is your clean, foundational, stable identity.
Drop 2 is the upgrade, built using controlled variation, macro-style changes, call-and-response fills, and phrase-based structure.

Let’s build it in Ableton Live using mostly stock tools.

Step zero: set up a DJ-friendly arrangement grid.

Before we touch sound design, we’re going to set the chessboard. Open Arrangement View. Set your tempo somewhere in the classic DnB range: 172 to 176 BPM.

Now place locators so your phrasing is obvious. For example, put Drop 1 start at bar 33, Drop 2 start at bar 49. The exact bars don’t matter, the spacing does.

Make it 16 bars of Drop 1, then 16 bars of Drop 2.

And I want you to think in four and eight bar energy phrases. DJs love predictable tension and release. In DnB, a lot of variation naturally lands around bar 9 and bar 13, and the big switch is bar 17, the start of Drop 2. So we’re going to use that language on purpose.

Extra coach note here: think “DJ energy curve,” not “more automation.”
If everything is moving all the time, nothing feels special. The second drop reads bigger when your density of events increases in a predictable way: more mid accents, sharper articulation, slightly tighter gaps. Contrast is the entire trick.

Step one: build a three-lane bass rack: Sub, Low-Mid, Mid-Top.

Create one MIDI track and name it BASS BUS. Add an Audio Effect Rack. Inside it, create three chains.

Chain A is SUB. This is mono and stable.
Drop an Operator on it. Oscillator A is a sine wave. Give it a short release so it doesn’t click, but also doesn’t smear into the next note.

After Operator, add EQ Eight. Low-pass it around 80 to 100 Hz. The goal is simple: the sub lane is not here to be interesting. It’s here to be reliable.

Then add Utility. Set width to zero percent. Mono. Always.
Set the gain so your sub level is consistent between drops.

Rule for today: your second drop should not rewrite the sub fundamentals every bar unless you want chaos. The sub is the anchor for DJs. Keep the anchor.

Chain B is LOW-MID. This is weight plus movement.
Add Wavetable. Use a saw-ish basic shapes vibe. Optional second oscillator with subtle detune if you want thickness. Filter LP24 with a bit of drive.

Then add Saturator. Drive somewhere like 2 to 6 dB, Soft Clip on. That gives you density without instantly nuking your headroom.

Then EQ Eight. High-pass around 90 to 120 Hz so it doesn’t fight the sub lane. And watch the 200 to 400 Hz region. That’s where “cardboard” buildup happens fast, especially when you saturate.

Optionally add a Compressor for glue, but don’t squash it just because you can. We want controlled, not flat.

Chain C is MID-TOP. This is character. This is where your second drop hype lives.
Use Wavetable or Operator. FM can be amazing here.

Then add Auto Filter. Band-pass or low-pass depending on your vibe, and we’re going to map that cutoff to a macro later. After that, add Amp, try something like Rock or Heavy for edge. Then Redux, but subtle. Downsample just a touch, like 10 to 18 kHz, and keep dry/wet low. This is spice, not soup.

Then EQ Eight. High-pass around 150 to 250 Hz, because this lane should not interfere with your sub and low-mid weight. Tame harshness around 2 to 5 kHz if it starts biting your snare or hurting your ears.

Then Utility. Width can be wider here, like 120 to 160 percent, because this is mids only. But we’re not widening anything below about 150 Hz. Clubs will punish you for that.

Step two: write a Drop 1 bass pattern that’s DJ-solid.

Make one MIDI clip that drives all chains. I recommend an 8-bar clip that loops for Drop 1, because DnB likes long phrases, but you still want a manageable unit.

Keep it rolling and syncopated, but not overly busy. Pick a key that’s common and practical in DnB, like F, F sharp, or G.

Advanced tip: build a hook cell. A one or two bar motif that’s recognizable.
Because the best second drop variations don’t feel like a new song. They feel like the same identity, upgraded. The hook cell is the identity.

Step three: build your second drop variation macros.

Go back to your Audio Effect Rack and create eight macros. This is your control panel for Drop 2. Here’s what to map.

Macro one: Mid Filter Cutoff. That’s the Auto Filter cutoff on the MID-TOP chain.
Macro two: Mid Resonance.
Macro three: Wavetable position or FM amount, something that shifts harmonics in a “formant-ish” way.
Macro four: Drive. Map Saturator drive on LOW-MID, and you can also map Amp gain on MID-TOP if you want one knob for intensity.
Macro five: LFO Rate if you’re using LFO movement in Wavetable.
Macro six: LFO Amount, like filter modulation depth.
Macro seven: Noise or texture level, either oscillator noise or a separate layer volume.
Macro eight: Reese width, basically Utility width on MID-TOP.

Now, set sensible ranges. This is huge.
Don’t map filter cutoff from 20 Hz to 20 kHz like a maniac. Tighten it. Something like 200 Hz up to 4 kHz is a musical range. Same with width: cap it so you don’t go phase-mad. Like 100 to 160 percent.

Because DJ-friendly means predictable translation. If your bass disappears in mono or gets weird in a blend, the second drop is not an upgrade. It’s a liability.

Step four: create Drop 2 variation without changing the whole patch.

This is the philosophy: same identity, new attitude.

Method A is clip-based automation.
Duplicate your 8-bar bass clip. Rename one Drop1_Bass and the other Drop2_BassVar.

For Drop 2, automate a few key changes:
Increase drive by around 10 to 25 percent compared to Drop 1. Not a massive jump, just enough to increase harmonic density.
Speed up your LFO rate in select bars, like bar 4 and bar 8 of the phrase, so it feels like a controlled surge.
Add more filter movement, bigger cutoff swings.
And introduce small wavetable position shifts, like stepping through slightly different vowels.

Notice what I’m not saying: I’m not saying “change everything.” We’re choosing a small number of moves that read clearly.

Method B is A/B chain switching, and this is super DJ-friendly because it’s a clean switch flip.
Inside MID-TOP, create two parallel chains: MID A for Drop 1, MID B for Drop 2.
Give them slightly different filter types or distortion flavors.

Then automate chain volumes.
During Drop 1, MID A is on and MID B is muted.
During Drop 2, MID B is on and MID A is muted.

That makes Drop 2 feel like a deliberate upgrade on bar one of the second drop, which is exactly where DJs and dancers expect it.

Step five: add call-and-response fills every four or eight bars.

This is the secret sauce. A lot of second drops feel bigger because of strategic fills, not constant modulation.

Make a one-bar fill clip, usually the last bar of each 8-bar phrase. In that fill, increase motion.
Spike the LFO rate.
Do a quick pitch dip or rise, one to three semitones, but keep it on the mid lanes, not the sub.
Do a quick band-pass “yoi” moment with Auto Filter.
You can also add Frequency Shifter with tiny amounts for metallic neuro flavor, and automate it higher just for the fill.

Teacher tip: if the fill feels sick in solo but weak in the full mix, you probably put the excitement in the wrong frequency zone. Often it’s either too fizzy up at 8 to 12 kHz, or it’s fighting the snare around 200 Hz. The best fills live in a controlled mid band and respect the drum transients.

Step six: sidechain and dynamics to keep it mixable.

Second drops fail all the time because people make the bass louder but less controlled. The DJ hears “bigger,” but the dancefloor hears “messier.”

On the BASS BUS, add a Compressor and sidechain it from the kick, or from a kick and snare group.
Ratio: 3 to 1 up to 6 to 1.
Attack: 3 to 10 milliseconds.
Release: 60 to 120 milliseconds, tuned to the groove.
Aim for 2 to 5 dB of gain reduction.

And here’s a major mindset shift: keep Drop 2 perceived louder through harmonics, not a plus six dB fader move. Peaks can stay similar. We’re increasing mid density, not creating low-end spikes.

Extra coach note: if you want to be really serious, compare Drop 1 and Drop 2 by peak level and by perceived loudness. Drop 2 can show a slightly higher RMS because of harmonics, while peaks stay similar. That’s the “bigger without sloppier” sweet spot.

Step seven: DJ-friendly mix decisions for Drop 2.

Keep sub consistent in notes and level.
Add excitement in 200 Hz to 5 kHz.
Avoid widening below 150 Hz.
Avoid big reverb washes on bass. Clubs will turn that into mud instantly.

Do a practical check. Put Spectrum on the master and compare Drop 1 versus Drop 2. Drop 2 should show richer harmonics, not uncontrolled low-end spikes.

And do a fast mono test: put Utility on the master and set width to zero. If Drop 2 collapses, your bigness was mostly stereo tricks. Fix it by focusing on harmonic content, transient shaping, and clean midrange.

Quick advanced variation ideas you can try, still DJ-safe.

One: same notes, new groove.
In Drop 2, don’t change pitch. Change note lengths and rests. Shorten the first note of each bar for punch. Add one extra offbeat ghost note every two bars in the low-mid only. Or move one syncopation hit earlier by a sixteenth in bars seven and eight for a mini stumble.
Use the Note Length MIDI effect on the mid lanes only, keep the sub untouched.

Two: introduce an “energy lane” accent voice for Drop 2.
A short bark or yoi that hits once per bar or every two bars. Band-limit it, like 300 Hz to 3.5 kHz, so it doesn’t step on hats and air.
DJs will perceive this as a new hook, while your core bass stays the same.

Three: phrase-coded variation.
Give each 4 bars a rule. Bars 1 to 4: more drive and tighter filter motion. Bars 5 to 8: occasional pitch dip in mids. Bars 9 to 12: new vowel position. Bars 13 to 16: busiest fills and fastest modulation.
That’s how you get progression without random knob-wiggling.

Four: quantize modulation to groove.
If your LFO is free-running, Drop 2 can feel messy. In Wavetable, use LFO retrigger tied to note-on. Change LFO rate only at bar boundaries, like every one or two bars, not as a continuous ramp. Movement that’s locked to drums reads as heavier.

Now, common mistakes to avoid.

Don’t change the sub pattern too much in Drop 2. DJs lose the anchor and it stops feeling like a second drop.
Don’t over-automate everything. Your hook turns into noise.
Don’t make Drop 2 wider instead of bigger. Wide bass can vanish in clubs. Bigger is harmonic density and transient control.
Don’t distort without re-EQing. Saturation adds low-mid buildup. Always recheck 200 to 500 Hz.
And don’t ignore the drum relationship. If your snare is the star, don’t create a mid fight around 180 to 250 Hz.

Alright, mini practice exercise. This is your discipline test.

Goal: make a second drop that feels twenty percent more intense with zero percent more clutter.

Take your Drop 1 bass clip, eight bars. Duplicate it for Drop 2.
For Drop 2, apply exactly three changes.

First change: increase Saturator drive on the LOW-MID by plus 2 dB.
Second change: add one call-and-response fill in bar 8, like a filter or LFO spike.
Third change: slightly different mid filter movement, like opening cutoff about fifteen percent more than Drop 1.

Bounce a quick reference and A/B it.
Drop 1 should feel stable.
Drop 2 should feel like the same tune, but more dangerous.

Bonus: test in mono again. If it collapses, fix the mid design rather than reaching for width.

Before we wrap, one last pro move: do a 30-second DJ test inside Live.
Drop a reference track on another channel, practice a simple transition. Low EQ swap, phrase alignment, then cut back to your Drop 2.
If Drop 2 loses impact during a blend, your upgrade might be living too high, like fizzy air, or too wide. Pull the excitement down into the solid mid band and keep the sub clean.

Recap.

Build bass as lanes: sub stays stable, mids carry variation.
Use macros and automation to create second-drop upgrades quickly.
Make Drop 2 feel bigger through harmonics and controlled movement, not just volume.
Add variation with call-and-response fills and phrase-level switching, not constant micro-tweaks.
Keep it DJ-friendly with clean phrasing, stable low-end, and predictable energy jumps.

If you tell me your sub style, like pure sine, reese sub, or 808-ish, and your target vibe, roller, jump-up, neuro, or jungle-tech, I can suggest a specific Drop 2 macro map and an 8-bar automation blueprint that fits your sound exactly.

mickeybeam

Go to drumbasscd.com for +100 drum and bass YouTube channels all in one place - tune in!

Generating PDF preview…