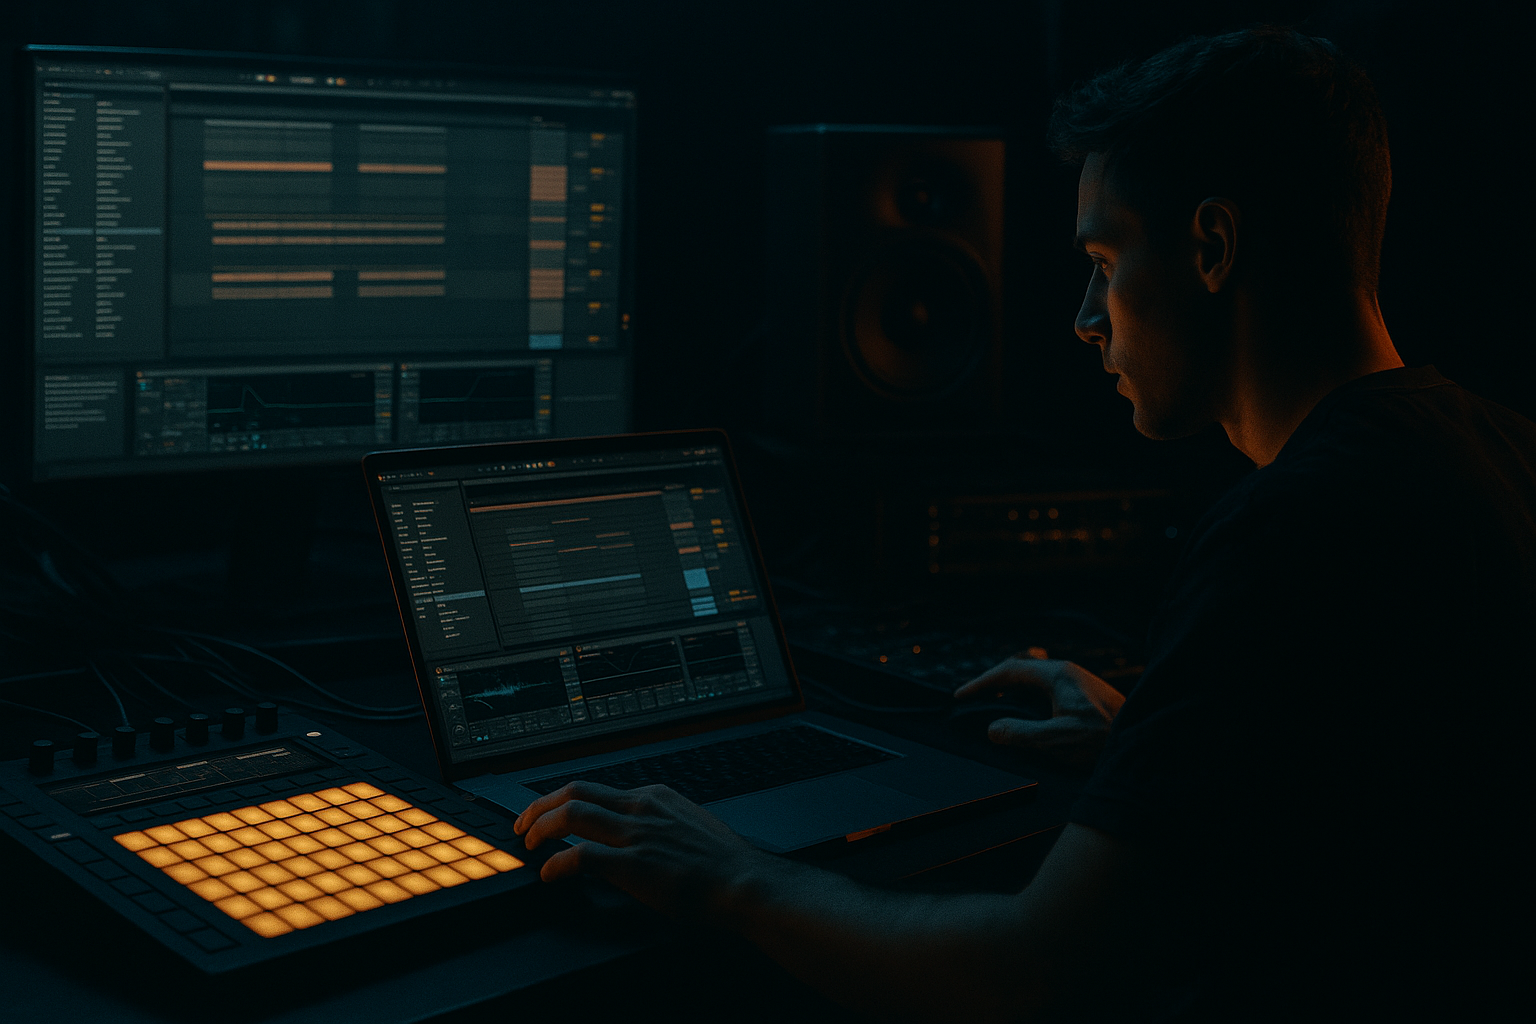
DNB COLLEGE

Drum & Bass Ableton Live 12 Tutorials

LESSON DETAIL

Riser in Ableton Live 12: resample it for sunrise set emotion for jungle oldskool DnB vibes (Advanced)

An AI-generated advanced Ableton lesson focused on Riser in Ableton Live 12: resample it for sunrise set emotion for jungle oldskool DnB vibes in the Workflow area of drum and bass production.

Back to lessons
Riser in Ableton Live 12: resample it for sunrise set emotion for jungle oldskool DnB vibes (Advanced) cover image

Narrated lesson audio

The voice track includes the tutorial plus extra teacher commentary.

Open audio file

Main tutorial

Riser in Ableton Live 12: Resample It for Sunrise Set Emotion + Jungle Oldskool DnB Vibes 🌅🥁

1. Lesson overview

In this lesson, you’re going to build a custom riser from resampling inside Ableton Live 12 and shape it so it feels emotional, sunrise-ready, and rooted in oldskool jungle / rolling DnB energy.

This is not about the usual glossy EDM uplifter. We want something with:

  • tension and release
  • lo-fi texture
  • jungle-era motion
  • nostalgic atmosphere
  • enough energy to lift into a drop or next section
  • For DnB, risers often work best when they are more rhythmic and textural than obvious. Instead of one clean synth sweep, think:

  • chopped reese fragments
  • pitched-up vocal haze
  • reverb tails from breaks
  • noise layered with drum ghosts
  • resampled movement that feels “played” rather than programmed
  • Using resampling in Ableton Live 12 lets you capture a sound, process it, and re-record it repeatedly until it becomes its own thing. That’s where the magic happens. 🎛️

    ---

    2. What you will build

    You’ll create a 4–8 bar DnB riser that can lead into:

  • a drop
  • a breakdown
  • a double-drop switch
  • a sunrise arrangement lift
  • The final riser will include:

  • source material: synth, noise, or break fragment
  • resampling chain: delay, reverb, saturation, modulation
  • tape-like pitch and filter motion
  • stereo widening and movement
  • automation for emotional lift
  • optional jungle flavor: amen slices, toms, vinyl noise, vocal ghosts
  • The goal is a riser that feels like it could come from a late-night set turning into dawn.

    ---

    3. Step-by-step walkthrough

    Step 1: Set up a dedicated resample track

    Create two audio tracks:

    1. SOURCE

    2. RESAMPLE

    On the SOURCE track, put your initial sound source. Good options for jungle/DnB:

  • a reese held note
  • a single vocal chop
  • a noise burst
  • a breakbeat slice
  • a pad chord
  • a rimshot or percussion loop
  • For this tutorial, use a simple 1-bar reese chord or vocal pad because that gives strong emotional potential.

    #### Suggested source chain

    On the SOURCE track, try:

  • Instrument: Wavetable, Analog, or a Simpler loaded with a vocal/pad sample
  • EQ Eight
  • - High-pass around 120–200 Hz

    - If muddy, cut 250–500 Hz by 2–4 dB

  • Saturator
  • - Drive: 2–6 dB

    - Soft Clip: On

  • Auto Filter
  • - Low-pass around 8–14 kHz

    - Slight resonance: 10–20%

    You want a sound that is already a bit emotional, but not fully finished. It should still be open for transformation.

    ---

    Step 2: Create the first pass of movement

    The riser needs motion before you resample it.

    Use one or more of these:

    #### Option A: Filter automation

    Automate Auto Filter cutoff upward over 4–8 bars.

  • Start cutoff around 300 Hz to 1.5 kHz
  • End around 8–16 kHz
  • Use a gradual curve for a more natural build
  • For darker DnB, keep resonance moderate so it doesn’t sound cheesy
  • #### Option B: Pitch automation

    If using Simpler, Wavetable, or an audio clip:

  • Slowly pitch the source up +3 to +12 semitones
  • For jungle vibes, try smaller rises first, then a sudden jump near the end
  • Use a ramp that feels like pressure building, not a straight EDM climb
  • #### Option C: Delay/reverb swell

    Add:

  • Echo or Delay
  • Hybrid Reverb or Reverb
  • Suggested settings:

  • Echo
  • - Time: 1/8 dotted or 1/4

    - Feedback: 25–55%

    - Filter: roll off low end

  • Hybrid Reverb
  • - Decay: 2.5–6 s

    - Pre-delay: 10–30 ms

    - Low cut: 200–400 Hz

    - High cut: 8–12 kHz

    This creates a spacey tail that resamples beautifully.

    ---

    Step 3: Route the source into the resample track

    On the RESAMPLE track:

  • Set Audio From to Resampling if you want to capture the full mix, or
  • Set Audio From to SOURCE if you want to capture only that track
  • For focused control, use SOURCE as the input.

    #### Recording setup

  • Arm the RESAMPLE track
  • Make sure monitoring is set appropriately:
  • - In if you want to hear the live capture

    - Auto if you are recording normally

    Now record the source movement for 4 or 8 bars.

    Don’t worry if it sounds too plain at first. The next passes will turn it into a character piece.

    ---

    Step 4: Process the resampled audio like raw material

    Now that you have audio, treat it like a synth sample, not like a finished loop.

    Drag the recorded clip into a new audio track or keep it on the resample track.

    #### Suggested post-resample chain

    Add these devices in order:

    1. EQ Eight

    - Remove unnecessary low end below 120–180 Hz

    - Cut harsh resonances around 2–5 kHz if needed

    2. Redux or Saturator

    - Redux for crunchy jungle texture

    - Bit Reduction: subtle, around 8–12 bits if you want grit

    - Downsample very lightly if you want oldskool aliasing

    - Saturator drive: 1–4 dB for body

    3. Auto Filter

    - Use a band-pass or low-pass sweep

    - Add subtle modulation with envelope or LFO if desired

    4. Echo

    - Add rhythmic ghost tails

    - Feedback: 15–35%

    - Use Ping Pong if you want width

    5. Utility

    - Use Width control to manage stereo

    - Keep lows mono if the riser has any bass content

    This is where you can sculpt the emotion. A resampled layer often feels more organic than a synth automation alone.

    ---

    Step 5: Add jungle-era character

    To get that oldskool jungle lift, layer in imperfect elements.

    #### Layer ideas

  • Amen break slice
  • - Reverse a tiny fragment

    - Stretch it to fit the riser

    - High-pass aggressively

  • Vinyl noise
  • - Keep it subtle under the build

  • Tape stop / pitch bend effect
  • - Use clip transpose automation or the native Resonators / Frequency Shifter for weirdness

  • Vocal ghost
  • - A chopped “ahh” or “yeah” phrase pitched up

  • Tom hit or rim
  • - Faint rhythmic marker before the drop

    #### Good Ableton devices for this

  • Simpler
  • Slice to New MIDI Track
  • Warp modes:
  • - Complex Pro for tonal stuff

    - Beats for drum slices

  • Frequency Shifter
  • - Small shifts create eerie movement

  • Grain Delay
  • - Great for unstable, misty buildup

  • Corpus
  • - For metallic or resonant tension

    Use these layers sparingly. Jungle vibes work when the detail feels dug from an old record bin, not over-designed.

    ---

    Step 6: Build the emotional sunrise curve

    For a sunrise set, your riser should feel like it’s opening up, not just getting louder.

    Try this macro progression over 8 bars:

    #### Bars 1–2

  • Low-pass fairly closed
  • More reverb
  • Low-volume atmosphere
  • Minimal movement
  • #### Bars 3–4

  • Raise cutoff
  • Increase delay feedback slightly
  • Add stereo widening
  • Introduce a soft harmonic layer
  • #### Bars 5–6

  • Bring in higher harmonics
  • Increase saturation a bit
  • Fade in a subtle break fragment
  • Reduce reverb low-cut slightly for body
  • #### Bars 7–8

  • Tighten the low end
  • Automate a tiny pause or reverse hit
  • Add a short crash or filtered noise burst
  • Let the riser hit the drop with a clean edge
  • That sunrise feeling often comes from brightness + space + emotional memory, not just “more noise.”

    ---

    Step 7: Resample again for the final texture

    This is the advanced workflow move.

    Once your first resampled layer is processed, resample it again.

    Why?

    Because the second pass captures:

  • filter sweeps
  • delay wash
  • saturation harmonics
  • random playback texture
  • your automation decisions as audio
  • #### Second-pass workflow

    1. Route the processed riser to a new audio track

    2. Record another 4–8 bars

    3. Warp and trim the best section

    4. Reverse small pieces

    5. Add fades at edges

    6. Layer with the original for thickness

    You can then create a stacked riser:

  • one layer clean and emotional
  • one layer distorted and grainy
  • one layer low-level break texture
  • one layer noise for brightness
  • That layered audio approach is very effective in DnB because it translates well on big systems.

    ---

    Step 8: Arrange it in a DnB context

    A riser in drum and bass should be placed with the drum phrase architecture in mind.

    #### Good placements

  • 8 bars before a drop
  • 4 bars before a switch-up
  • 2 bars before a fill
  • last bar before a half-time breakdown
  • #### Arrangement ideas

  • Use the riser under a rolling drum build
  • Let it swell into a snare fill
  • Cut everything for 1/2 bar of silence before the drop
  • Pair with a sub re-entry
  • Use a reverse crash into the first kick/snare
  • For jungle, a classic move is:

  • riser + amen chop build
  • then hard cut
  • then full break drop
  • For sunrise/melodic DnB:

  • riser + emotional pad lift
  • then clean sub drop with atmospheric continuation
  • ---

    4. Common mistakes

    1. Overdoing the brightness

    A riser that gets too sharp becomes annoying fast, especially on club systems.

    Fix:

    Use EQ Eight to control 6–10 kHz and keep the top end exciting but not painful.

    ---

    2. Too much low end in the riser

    If your riser carries bass too heavily, it can fight the drop.

    Fix:

    High-pass the riser, usually somewhere around 120–250 Hz, depending on the source.

    ---

    3. Making it too “EDM”

    Super-smooth white noise sweeps and giant clean lifts can feel out of place in jungle/DnB.

    Fix:

    Add:

  • grit
  • chopped breaks
  • resampled artifacts
  • imperfect pitch movement
  • tonal darkness underneath the rise
  • ---

    4. No rhythmic relationship to the drums

    A riser floating without groove can feel disconnected from the tune.

    Fix:

    Align it with:

  • break hits
  • snare fill timing
  • 1/16 or 1/8 rhythmic pulse
  • ghost percussion
  • ---

    5. Not resampling enough

    If you only automate one synth and call it done, the result may sound static.

    Fix:

    Resample multiple passes. That’s where the texture comes from.

    ---

    5. Pro tips for darker/heavier DnB

    If you want the riser to lean darker or heavier while keeping the sunrise emotion, use these moves:

    A. Blend emotion with menace

    Layer a warm pad or vocal with a detuned reese shadow underneath.

  • Keep the pad bright
  • Keep the reese low-mid focused
  • Filter both independently
  • That contrast gives you “hope with teeth.” 😈

    B. Use Frequency Shifter subtly

    A tiny shift can add unsettling motion.

  • Try +5 to +25 Hz
  • Automate the amount slowly
  • Combine with reverb for ghostly sidebands
  • C. Use Glue Compressor for cohesion

    On the riser bus:

  • Ratio: 2:1
  • Attack: 10–30 ms
  • Release: Auto or 100–300 ms
  • Aim for just 1–3 dB gain reduction
  • This glues layered textures without flattening them.

    D. Mid/Side with Utility

    Use Utility or EQ Eight to control width.

  • Keep the low mids centered
  • Widen only the airy top layer
  • Inverse width automation can make the lift feel bigger before the drop
  • E. Add controlled lo-fi

    A little Redux or sample rate degradation can make it feel more authentic to jungle heritage.

  • Don’t destroy the whole signal
  • Just add enough grain for character
  • F. Use reverse drum ghosts

    Reverse a snare tail or break hit and tuck it behind the riser.

    This can create a classic “pull into the drop” feeling.

    ---

    6. Mini practice exercise

    Build three 4-bar risers from the same source, each with a different vibe:

    Version 1: Sunrise emotional

  • Pad or vocal source
  • Gentle filter rise
  • Long reverb tail
  • Minimal distortion
  • Wide top end
  • Version 2: Oldskool jungle

  • Amen slice or break fragment
  • Heavy resampling
  • Redux and Saturator
  • Fast filter motion
  • Rougher, more chopped ending
  • Version 3: Dark/heavy DnB

  • Reese note or bass harmonic
  • Band-pass automation
  • Frequency Shifter
  • Shorter delay
  • Tighter stereo image
  • Then compare:

  • Which one lands best into a drop?
  • Which one feels most “set-opening”?
  • Which one sounds most like it belongs in a club mix?
  • Export each and audition them in the arrangement against drums and bass.

    ---

    7. Recap

    Here’s the core workflow:

    1. Create a source sound with emotional potential

    2. Automate movement with filter, pitch, delay, and reverb

    3. Resample it in Ableton Live 12

    4. Process the audio like sample material

    5. Layer jungle elements like breaks, noise, vocal ghosts, and tape grit

    6. Resample again for deeper texture

    7. Arrange it musically so it lifts into the DnB phrase structure

    The key idea:

    In drum and bass, the best risers often feel like atmosphere that has learned to move. 🌅

    If you want, I can also give you:

  • a specific Ableton Live 12 rack chain for this riser,
  • a MIDI clip example, or
  • a full 8-bar arrangement template for jungle / sunrise DnB.

Ask GPT about this lesson

Chat with the lesson tutor, get follow-up help, or use quick actions.

Bigup 👽 Ask me anything about this lesson and I’ll answer in context.

Narration script

Show spoken script
Welcome to this advanced Ableton Live 12 lesson on building a custom riser by resampling, with that sunrise-set emotion and oldskool jungle DnB flavor.

Today we are not making a generic EDM uplifter. We are making something that feels alive, a little dusty, a little haunted, and emotionally open enough to carry you into dawn. Think tension and release, tape texture, breakbeat ghosts, and that feeling of a room shifting from night energy into morning light.

The big idea here is simple: instead of drawing a riser from scratch with one synth and one automation lane, we are going to print sound to audio, process it, print it again, and let the imperfections become the character. In drum and bass, especially jungle and oldskool styles, that kind of resampling can sound way more authentic than a clean, polished sweep.

Start by setting up two audio tracks. Name the first one SOURCE and the second one RESAMPLE. On the SOURCE track, choose something with emotional potential. A held reese chord works great. A vocal pad works great too. Even a single noise burst or a chopped break fragment can work, but for this lesson I want you to start with something tonal, because that gives the riser a sense of memory and melody.

On the SOURCE track, build a simple starting chain. Use an instrument like Wavetable, Analog, or Simpler loaded with a vocal or pad sample. Then add EQ Eight and high-pass around 120 to 200 hertz so you are not building low-end clutter into the rise. If the sound feels muddy, make a small cut somewhere in the 250 to 500 hertz area. After that, put on Saturator with a little drive, maybe 2 to 6 dB, and turn soft clip on if needed. Then finish with Auto Filter, low-passed somewhere around 8 to 14 kilohertz. You want the sound to feel emotionally present, but still open to transformation.

Now we create movement before we resample anything. That is a big part of the magic. A riser is not just brighter over time. It should feel like it is breathing, leaning forward, and slowly opening up.

You can automate the Auto Filter cutoff upward over 4 or 8 bars. Start it fairly closed, maybe around 300 hertz to 1.5 kilohertz, and open it toward the top end by the end of the phrase. Keep the motion smooth and natural. If you want more tension, add a little resonance, but do not overdo it. We are going for jungle atmosphere, not a flashy EDM squeal.

You can also add a gentle pitch rise. If you are using a clip, Simpler, or Wavetable, automate the pitch up a few semitones, maybe plus 3 to plus 12 over the phrase. A small rise can actually feel more musical than a giant one. For oldskool energy, sometimes a slower drift and then a sudden little jump near the end feels much more convincing than one straight climb.

Then add space. Put an Echo or Delay, and a Hybrid Reverb or standard Reverb. For Echo, try a dotted eighth or quarter-note time, feedback around 25 to 55 percent, and roll off the lows so the delay stays clean. For reverb, set a decay somewhere in the 2.5 to 6 second range, with a little pre-delay so the source stays readable. Cut the low end of the reverb as well. This gives you that misty tail that resamples beautifully later.

Now route the SOURCE into the RESAMPLE track. On the RESAMPLE track, set Audio From to SOURCE if you want a focused capture, or use Resampling if you want to record the entire output. For this lesson, I recommend recording just the SOURCE so you can control the result more precisely. Arm the RESAMPLE track, check your monitoring, and record 4 or 8 bars of the movement you just created.

Do not worry if it sounds simple right now. Right now you are capturing raw material, not the finished piece. That is an important mindset shift. In this workflow, audio is clay.

Once you have the first pass recorded, treat that clip like a sample, not like a loop. You can keep it on the resample track, or drag it to a fresh audio track if that helps your organization. Then process it like new source material.

A good post-resample chain starts with EQ Eight again. Remove any unnecessary low end below about 120 to 180 hertz. If there are harsh resonances around 2 to 5 kilohertz, tame those too. After EQ, try Redux or Saturator. Redux is great if you want that crunchy jungle texture, subtle bit reduction, or a little sample-rate grit. If you want a smoother body, Saturator with a few dB of drive is enough. Then add Auto Filter again, maybe with a band-pass or low-pass sweep, and see how the resampled motion responds to a second layer of movement.

Echo can add ghost tails and rhythmic haze, especially if you use ping-pong for width. Then use Utility to manage the stereo image. Keep the low end centered if there is any bass content, and let the top layer be wide if it needs to feel expansive. This is where the emotional shape starts to emerge.

Now let’s bring in the jungle character. This is where we stop sounding like a clean synth build and start sounding like an old record turning into sunrise.

Layer in something imperfect. A tiny amen slice works beautifully. A reverse fragment of a breakbeat can add instant pull. A little vinyl noise underneath can make the whole thing feel like it was found, not manufactured. A chopped vocal ghost, a rimshot, or a faint tom hit can all add that oldskool motion. You can use Simpler, Slice to New MIDI Track, or warp the audio in different ways. Complex Pro is useful for tonal material. Beats is great for sliced drum fragments. Frequency Shifter can add subtle eerie movement if you use just a small amount. Grain Delay is another strong choice if you want unstable, misty buildup. Corpus can give metallic resonance and tension.

The trick is restraint. Jungle vibes work best when the detail feels dug from the crates. We are not trying to stack fifty effects. We are trying to make the listener feel a history inside the sound.

Now shape the emotional curve across the phrase. Think about this like a scene change. At the start, the sound should feel close, narrow, and maybe a little dim. Then it slowly widens, brightens, and becomes more open. In the middle, add more harmonics, a little more saturation, maybe a subtle break fragment. Near the end, you can thin the low end, create a small air pocket, or even drop the density for a beat so the final hit feels bigger. That little moment of space before the drop matters a lot.

This is one of the most useful coaching notes in this whole lesson: build in air pockets. A tiny gap, a reverse tail, or one beat where the density drops can make the drop feel way more powerful than a constant wall of sound.

Now for the advanced move: resample again.

Once your first resampled layer is shaped, route it to another audio track and record it a second time. This second pass captures your filter sweeps, your delay wash, your saturation harmonics, and even the little random qualities of playback. That is where the sound starts to feel like its own instrument. After the second pass, warp the clip, trim the best section, maybe reverse a small piece, and add fades. Then layer that with the original or with another version of the same material.

You can build a stacked riser this way. One layer can be clean and emotional. One can be grainy and distorted. One can be a faint break texture. One can just be high-frequency noise for brightness. That layered audio approach works especially well in drum and bass because it translates on big systems and still holds detail up close.

Now think about arrangement. In DnB, a riser is not just a lead-up. It is part of the drum phrase architecture. Place it 8 bars before a drop if you want a full build. Use 4 bars if you want a quicker switch. Try 2 bars before a fill, or even the last bar before a half-time breakdown. You can also tuck the riser under a rolling drum build, let it swell into a snare fill, and then cut everything for half a bar of silence before the impact. That contrast is huge.

For oldskool jungle, a classic move is to let the riser work with an amen chop build, then hard cut, then drop into the full break. For sunrise or melodic DnB, you might do a pad-like emotional lift that opens into a clean sub drop and atmospheric continuation. The riser should foreshadow the next scene, not compete with it.

A few mistakes to avoid. First, do not make it too bright. A riser that gets painfully sharp will wear people out fast, especially in a club. Use EQ to keep the top end exciting but controlled. Second, do not leave too much low end in the riser. High-pass it so it does not fight the drop. Third, do not make it sound too polished. Clean white-noise EDM sweeps can feel out of place here. Add grit, break fragments, resampled artifacts, and imperfect pitch movement. Fourth, keep the rhythm connected to the drums. If the build does not breathe with the break pattern, it will feel pasted on. And fifth, do not forget to resample more than once. That is where the texture really happens.

If you want a darker or heavier edge while keeping the sunrise emotion, there are a few great tricks. Layer a warm pad or vocal over a detuned reese shadow. Keep the pad bright and the reese low-mid focused. Use Frequency Shifter very subtly, maybe just a few hertz, and automate it slowly for eerie motion. Put a Glue Compressor on the riser bus with a light touch, just enough to glue the layers together without flattening them. Use Utility or EQ Eight to manage width so the low mids stay centered and the airy top layer can widen. And if you want a touch of authentic jungle flavor, add a little Redux. Not too much. Just enough grain to feel lived-in.

You can also create a break-driven riser instead of a straight sweep. Take tiny slices from a drum break, pitch each slice slightly upward, vary the start points, and add tiny reverse fades. That kind of fractured motion sounds very oldschool and very believable in a jungle context. If you want a more melancholic sunrise feeling, reduce stereo width early, then introduce instability late, and let the final beat collapse into a filtered tail. That creates emotional uncertainty, which can be really beautiful before a drop.

Here is a great practice challenge. Build three different 4-bar risers from the same source material. Make one version emotional and sunrise-like, with gentle filter rise, long reverb, and minimal distortion. Make one version oldskool jungle, with break fragments, heavy resampling, Redux, and rougher ending texture. Then make one version dark and heavy, with a reese source, band-pass automation, subtle Frequency Shifter, and a tighter stereo image. Compare how each one feels in the arrangement and against the drums.

So, to recap the whole workflow. Start with a source sound that has emotional potential. Automate movement with filter, pitch, delay, and reverb. Resample it in Ableton Live 12. Process the audio like sample material. Layer in jungle elements like breaks, noise, and vocal ghosts. Resample again for deeper texture. Then arrange it musically so it lifts into the phrase structure of the track.

The key takeaway is this: in drum and bass, the best risers often feel like atmosphere that has learned to move. If you treat the riser like a scene change, print your decisions to audio, and let the resampling process shape the vibe, you can get something that feels both emotional and raw, both sunrise-ready and rooted in jungle history.

If you want to keep going, the next move would be to build this as a full Ableton rack chain or turn it into an 8-bar arrangement template for jungle or sunrise DnB.

mickeybeam

Go to drumbasscd.com for +100 drum and bass YouTube channels all in one place - tune in!

Generating PDF preview…