Main tutorial
Retro Rave Ableton Live 12 FX Chain Blueprint for Jungle / Oldskool DnB
Stock devices only • Advanced workflow • Drum & bass focused 🥁⚡
---
1. Lesson overview
If you want authentic retro rave energy in Ableton Live 12, you need more than “bitcrush everything and pray.” Oldskool jungle and early DnB were built from a very specific set of production behaviors:
- Aggressive sample manipulation
- Fast, dancefloor-friendly FX movement
- Dubby space
- Resampled chaos
- Tight control of low-end and transient punch
- drum bus
- break bus
- reese bass
- stab loop
- vocal one-shot
- FX returns
- transition buses
- warehouse reverb
- AM radio grit
- tape-warped instability
- hard sample chopping
- big dub delays
- tempo-locked energy
- breakbeat group
- drum bus
- stab loops
- vocal snippets
- midrange synths
- controlled low-end cleanup
- punch
- harmonic grit
- bit-depth destruction
- movement
- tempo-synced delay
- rave space
- mono/width management
- break chops
- fill hits
- snare claps
- acid stabs
- FX risers
- Audio Effect Rack
- Dub delay return
- Huge rave room return
- Lo-fi atmospheric wash
- Resampled distortion return
- High-pass at 25–35 Hz if this is not a sub-bass track
- Small cut around 200–350 Hz if the sample is boxy
- Gentle boost around 3–6 kHz if the break needs snap
- If the source is harsh, notch out 7–9 kHz before adding distortion
- Drive: 5–15%
- Crunch: 10–25%
- Boom: off for breaks, or set to taste for drum groups
- Transients: +5 to +20
- Damp: adjust until the top end feels less brittle
- making breaks hit harder
- adding controlled saturation
- tightening the transient shape
- Drive: 2–8 dB
- Soft Clip: ON
- Curve: try Default or Analog Clip
- Output: trim to match bypass level
- For breaks: subtle saturation
- For stabs: heavier saturation
- For reese bass mids: use carefully to increase presence
- Downsample: 2–6
- Bit Reduction: 8–12 bits
- Dither: off unless needed for texture
- Dry/Wet: 10–35%
- break loops
- snare hits
- old rave synth stabs
- FX bursts
- Filter type: LP24 or BP12
- Frequency: automate between 400 Hz and 12 kHz depending on section
- Resonance: 10–35%
- Drive: a little extra if needed
- Enable LFO only if you want subtle wobble
- Low-pass a break before a drop
- Band-pass a vocal stab for a transition
- Sweep a loop into the background during a breakdown
- Add rhythmic motion to a rave stab without needing another synth
- Time: 1/8, 1/4, or dotted 1/8
- Feedback: 20–45%
- Filter: cut lows below 200 Hz
- Modulation: subtle
- Noise / Wobble: light amounts only
- Dry/Wet: 8–25% on inserts, higher on sends
- dub-style repeats
- filtered feedback
- tape-like modulation
- stereo movement
- Apply on vocal phrases
- Use on stab loops to create call-and-response
- Automate feedback for transition tails
- Use dotted timings for rave bounce
- Decay Time: 1.2–3.5 s
- Pre-delay: 10–25 ms
- Size: medium to large
- Low Cut: 200–400 Hz
- High Cut: 5–9 kHz
- Dry/Wet: 5–15% on inserts
- Bass Mono: if available in your version/workflow, use it to keep lows centered
- Width: 80–120% depending on source
- Gain: trim to match level
- mono-ing low-mid-heavy break loops
- widening stabs
- controlling return width
- checking mix compatibility
- Just Utility or nothing
- This is your dry reference
- Saturator Drive: 6–12 dB
- Soft Clip: ON
- Redux bit depth: 6–10 bits
- Downsample: 2–4
- EQ Eight: high-pass around 120 Hz to keep the low end from exploding
- nasty break detail
- gritty hats
- snare trash
- compressed rave energy
- Auto Filter: band-pass or low-pass
- Echo: feedback 35–60%
- Reverb: long decay, low-cut heavy
- breakdown atmospheres
- transition swells
- ghost echoes behind main drums
- Reverb decay: 1.5–2.5 s
- Gate threshold: set so the reverb tail is chopped after the hit
- EQ Eight: high-pass at 250 Hz
- Macro 1: Dirt → Saturator Drive / Redux Bit Depth
- Macro 2: Space → Reverb Wet / Echo Feedback
- Macro 3: Sweep → Auto Filter Frequency
- Macro 4: Width → Utility Width
- Macro 5: Crush Blend → chain volumes for clean vs crushed
- Macro 6: Tail Length → Reverb Decay / Echo Feedback
- Echo feedback: 40–70%
- Time: 1/8, 1/4, dotted 1/8
- EQ Eight: high-pass at 250 Hz, low-pass around 6–8 kHz
- Utility: control return level
- vocal chops
- stab hits
- snare fills
- breakdown effects
- Reverb decay: 2–5 s
- Pre-delay: 15–30 ms
- EQ Eight: cut lows hard
- Compressor: lightly glue if needed
- warehouse ambience
- snare tails
- synth atmosphere
- intro textures
- FX fills
- background loops
- sampled radio noise
- EQ Eight
- Drum Buss
- Saturator
- Redux
- Auto Filter
- Utility
- Sub layer: mostly dry, just Utility/EQ Eight
- Mid layer: Saturator, Auto Filter, Echo very lightly, maybe Redux
- High-pass the mid layer around 90–140 Hz
- Use Saturator Drive around 2–6 dB
- Add subtle stereo width only above the sub range
- Use Echo sparingly for movement on fills
- EQ Eight
- Saturator
- Auto Filter
- Echo
- Reverb
- automate filter cutoff for build-ups
- ping-pong the delay on offbeats
- use shorter reverbs for denser mixes
- resample the stab with delay tails, then re-chop
- Drum Buss
- Saturator
- EQ Eight
- short Reverb send
- Keep the dry snare sharp
- Send only a portion to the room
- Use gated reverb sparingly for retro lift
- If the snare loses snap, reduce the reverb decay and high-cut more aggressively
- filter cutoff
- echo feedback
- reverb wet
- rack macro blends
- utility width
- saturator drive
- 200–800 Hz for character
- 1.5–5 kHz for aggression
- Echo with heavy low-pass
- Reverb with high-cut lowered to 4–6 kHz
- light Redux if needed
- increase Redux amount
- narrow filter bandwidth
- raise delay feedback briefly
- cut dry signal for 1 bar
- slam back into a clean drop
- Drive up
- Transients up
- brief saturation spike
- then return to normal
- dry chain
- crushed chain
- dub chain
- gated room chain
- vocal one-shots
- tom fills
- amen edits
- synth stabs
- FX shots
- one chopped break loop
- one stab loop
- one vocal phrase
- one reese bass note or drone
- your FX rack + returns
- Break loop filtered low-pass
- Light reverb send
- Minimal bass
- Echo on vocal phrase only
- Increase filter cutoff slowly
- Add crushed parallel chain to the break
- Add short delay throws on the stab
- Automate Redux slightly upward on the break bus
- Raise Echo feedback on the vocal
- Open the stab filter
- Increase reverb send on the snare hit
- Create one “dirty fill” using Drum Buss drive automation
- Strip the reverb back
- Kill the delay tail
- Bring the bass back dry and focused
- Drop into full arrangement with the cleanest, hardest version of your drums
- memory
- pressure
- release
- impact
- EQ Eight
- Drum Buss
- Saturator
- Redux
- Auto Filter
- Echo
- Reverb
- Utility
- Clean
- Crushed
- Dub filter
- Gated room
- Dub delay
- Rave room
- Lo-fi wash
- protect the sub
- process breaks in layers
- use parallel distortion, not just insert abuse
- automate movement
- resample aggressively
- keep space controlled
- make the arrangement evolve bar by bar
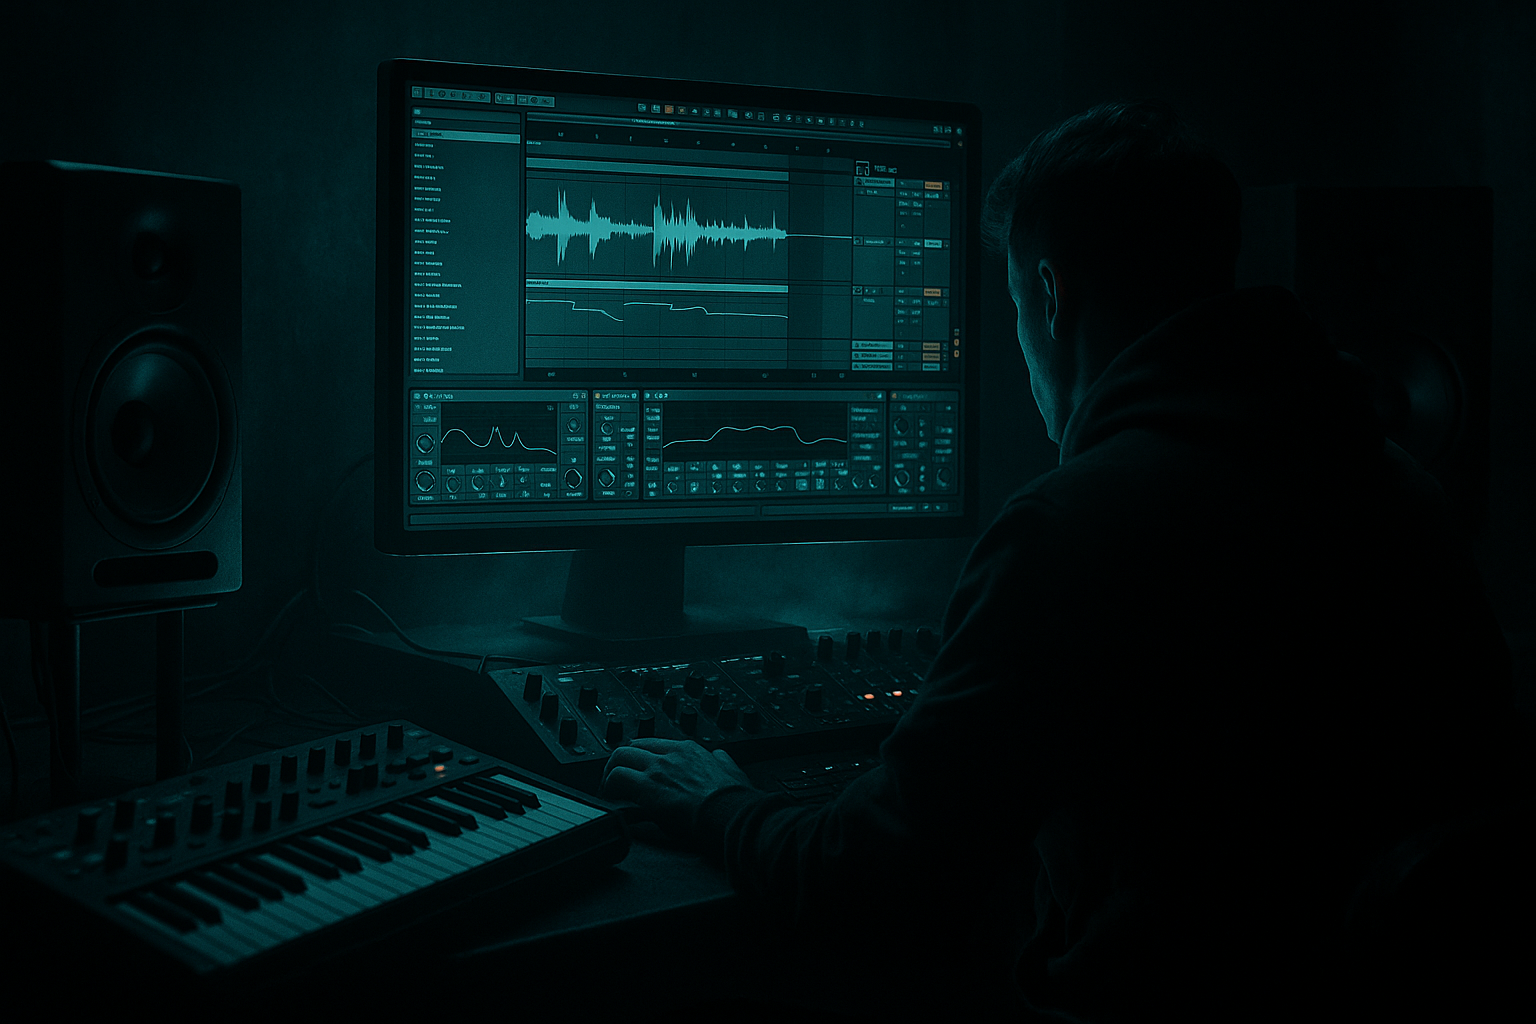
In this lesson, you’ll build a modular FX chain blueprint using only stock Ableton devices that can be used on:
The goal is to create a retro rave processing chain that sounds like it belongs in a jungle set, but still holds up in a modern mix. We’re going for that blend of:
This is an advanced workflow lesson, so we’ll focus on how to build chains you can reuse, not just one-off sound design tricks.
---
2. What you will build
You’ll build a three-part FX system in Ableton Live 12:
A. Main Retro Rave Insert Chain
Use this on:
Chain concept:
1. EQ Eight
2. Drum Buss
3. Saturator
4. Redux
5. Auto Filter
6. Echo
7. Reverb
8. Utility
This gives you:
---
B. Parallel Destroy / Character Rack
Use this in parallel for:
Chain concept:
- Chain 1: clean
- Chain 2: crushed
- Chain 3: filtered dub
- Chain 4: gated room
You’ll blend these with macro controls for instant tension changes.
---
C. Return FX for jungle atmosphere
Create send/return channels for:
This is critical for DnB because the groove stays clean while the space gets messy.
---
3. Step-by-step walkthrough
Part 1 — Build the Main Retro Rave Insert Chain
Create an audio track or group bus for your breaks, drums, or midrange elements.
Step 1: EQ Eight — clean before you destroy
Start with EQ Eight.
#### Suggested settings:
#### Why this matters:
Oldskool sounds are gritty, but not messy. Clean the source before the FX chain so your distortion reacts musically.
---
Step 2: Drum Buss — instant rave punch
Add Drum Buss next.
#### Suggested starting point:
#### Use it for:
#### DnB tip:
For jungle breaks, too much Boom can blur the kick/snare relationship. Keep the low-end controlled unless the source needs extra weight.
---
Step 3: Saturator — glue and aggression
Add Saturator after Drum Buss.
#### Suggested settings:
#### Why:
This simulates the kind of analog overload and mixer saturation that gave old rave records their bite.
#### Practical use:
---
Step 4: Redux — digital degradation in moderation
Add Redux for the classic crusty digital edge.
#### Suggested settings:
#### Important:
Don’t obliterate the whole signal unless you’re doing it in parallel. For jungle, the sweet spot is usually just enough aliasing and grain to feel “sampled”.
#### Best use cases:
---
Step 5: Auto Filter — movement and dub-style tone shaping
Add Auto Filter.
#### Suggested settings:
#### How to use it:
#### DnB workflow:
Map the filter cutoff to a macro if this track is a performance instrument. Retro rave is all about movement and tension.
---
Step 6: Echo — tempo-locked rave space
Add Echo next.
#### Suggested starting settings:
#### Why Echo over Delay?
Ableton’s Echo is ideal because it can do:
#### Jungle use:
---
Step 7: Reverb — warehouse scale, but controlled
Add Reverb after Echo.
#### Suggested settings:
#### For jungle/DnB:
Reverb should create space without washing out the break. Keep the low end out of the verb. If your snare loses impact, reduce wetness or move reverb to a send.
---
Step 8: Utility — mono control and final width shaping
Finish with Utility.
#### Suggested settings:
#### Use cases:
---
Part 2 — Build the Parallel Destroy / Character Rack
This is where the fun starts. Create an Audio Effect Rack on a drum bus, break bus, or FX track.
Chain 1: Clean
Chain 2: Crushed
Insert:
1. Saturator
2. Redux
3. EQ Eight
#### Suggested settings:
This chain is for:
---
Chain 3: Dub Filter
Insert:
1. Auto Filter
2. Echo
3. Reverb
#### Suggested settings:
Use this for:
---
Chain 4: Gated Room
Insert:
1. Reverb
2. Gate
3. EQ Eight
#### Suggested settings:
This creates a classic rave chopped-space effect that works brilliantly on snares and stabs.
---
Map Rack Macros
Map these controls:
This turns the rack into a playable performance tool.
---
Part 3 — Build your return FX system
For jungle and oldskool DnB, returns are essential. They let your main drums stay punchy while the atmosphere gets wild.
Return A: Dub Delay
Insert:
1. Echo
2. EQ Eight
3. Utility
#### Suggested settings:
Use this on:
---
Return B: Rave Room
Insert:
1. Reverb
2. EQ Eight
3. Compressor or Gate if needed
#### Suggested settings:
Use this to create:
---
Return C: Lo-Fi Wash
Insert:
1. Redux
2. Auto Filter
3. Reverb
This is excellent for:
---
Part 4 — Apply the chain to actual DnB elements
A. On a jungle break
Goal: keep the groove hard while adding vintage grit.
#### Recommended chain:
#### Workflow:
1. Chop the break first.
2. Process the full loop lightly.
3. Resample the processed loop.
4. Chop the resampled audio again for tighter control.
That resampling step is huge for authentic jungle workflow. It makes the break feel “produced” rather than just “processed.”
---
B. On a reese bass
Goal: keep the sub clean while the mids get rough.
#### Recommended split:
#### Settings:
#### Important:
Never let the distortion chain compromise the sub. Jungle and DnB need a stable bottom.
---
C. On rave stabs and piano hits
Goal: classic rave urgency.
#### Chain:
#### Tricks:
This is how you get that early rave “stab conversation” between phrases.
---
D. On snares and claps
Goal: punch + air + attitude.
#### Chain:
#### Suggested approach:
---
4. Common mistakes
1. Overcooking the whole mix
Retro rave dirt is exciting, but if every track is crushed, the arrangement loses contrast.
Fix: Use parallel chains and returns. Keep your core drums and sub clean.
---
2. Distorting the sub bass
This is one of the fastest ways to ruin a DnB mix.
Fix: Split sub and mid layers. Use EQ Eight to protect everything below roughly 90–120 Hz.
---
3. Too much reverb on breaks
Classic jungle has space, but the break still needs definition.
Fix: Use shorter decays, high-pass reverb, or send-only ambience.
---
4. Random bitcrushing without context
Redux is not a style by itself.
Fix: Use it for a reason: sampled memory, texture, or transition energy.
---
5. Forgetting resampling
A huge part of oldskool workflow is printing audio and rearranging it.
Fix: Resample processed loops, then re-edit them. This creates a more authentic jungle feel than leaving every effect live forever.
---
6. No automation
Retro rave energy comes from motion.
Fix: Automate:
---
5. Pro tips for darker/heavier DnB
Tip 1: Use filtered feedback as tension, not decoration
For dark DnB, set Echo feedback so it dies in a controlled way and filters darker over time. This creates pressure before drops.
---
Tip 2: Push mids, keep the low end disciplined
A lot of dark jungle energy lives in:
Use Saturator and EQ Eight to emphasize these zones without wrecking the sub.
---
Tip 3: Create “shadow returns”
Set one return to be very dark:
This gives your track a haunted, underground vibe.
---
Tip 4: Automate destroy sections into drop entries
Before a drop:
This contrast is pure DnB drama 😈
---
Tip 5: Use Drum Buss on break fills, not just the main loop
Small fill moments become huge if you automate:
This is excellent for 2-bar turnaround sections.
---
Tip 6: Make a “rave chaos” preset rack
Save an Audio Effect Rack with:
Then you can drop it onto:
This saves huge amounts of time.
---
6. Mini practice exercise
Exercise: Build a 16-bar jungle breakdown into drop transition
Use:
Your task:
#### Bars 1–4:
#### Bars 5–8:
#### Bars 9–12:
#### Bars 13–16:
Goal:
Make the transition feel like:
That is very much the jungle/DnB aesthetic.
---
7. Recap
Here’s the blueprint in its simplest form:
Main insert chain
Parallel character rack
Return channels
Core DnB workflow principles
If you apply this blueprint to jungle breaks, rave stabs, and rolling DnB drums, you’ll get that retro warehouse pressure without losing mix clarity. That’s the sweet spot: dirty, musical, and dancefloor-ready 🔥
If you want, I can also turn this into:
1. a rack-by-rack Ableton preset blueprint,
2. a drum bus version specifically for amens, or
3. a full retro rave project template layout.

