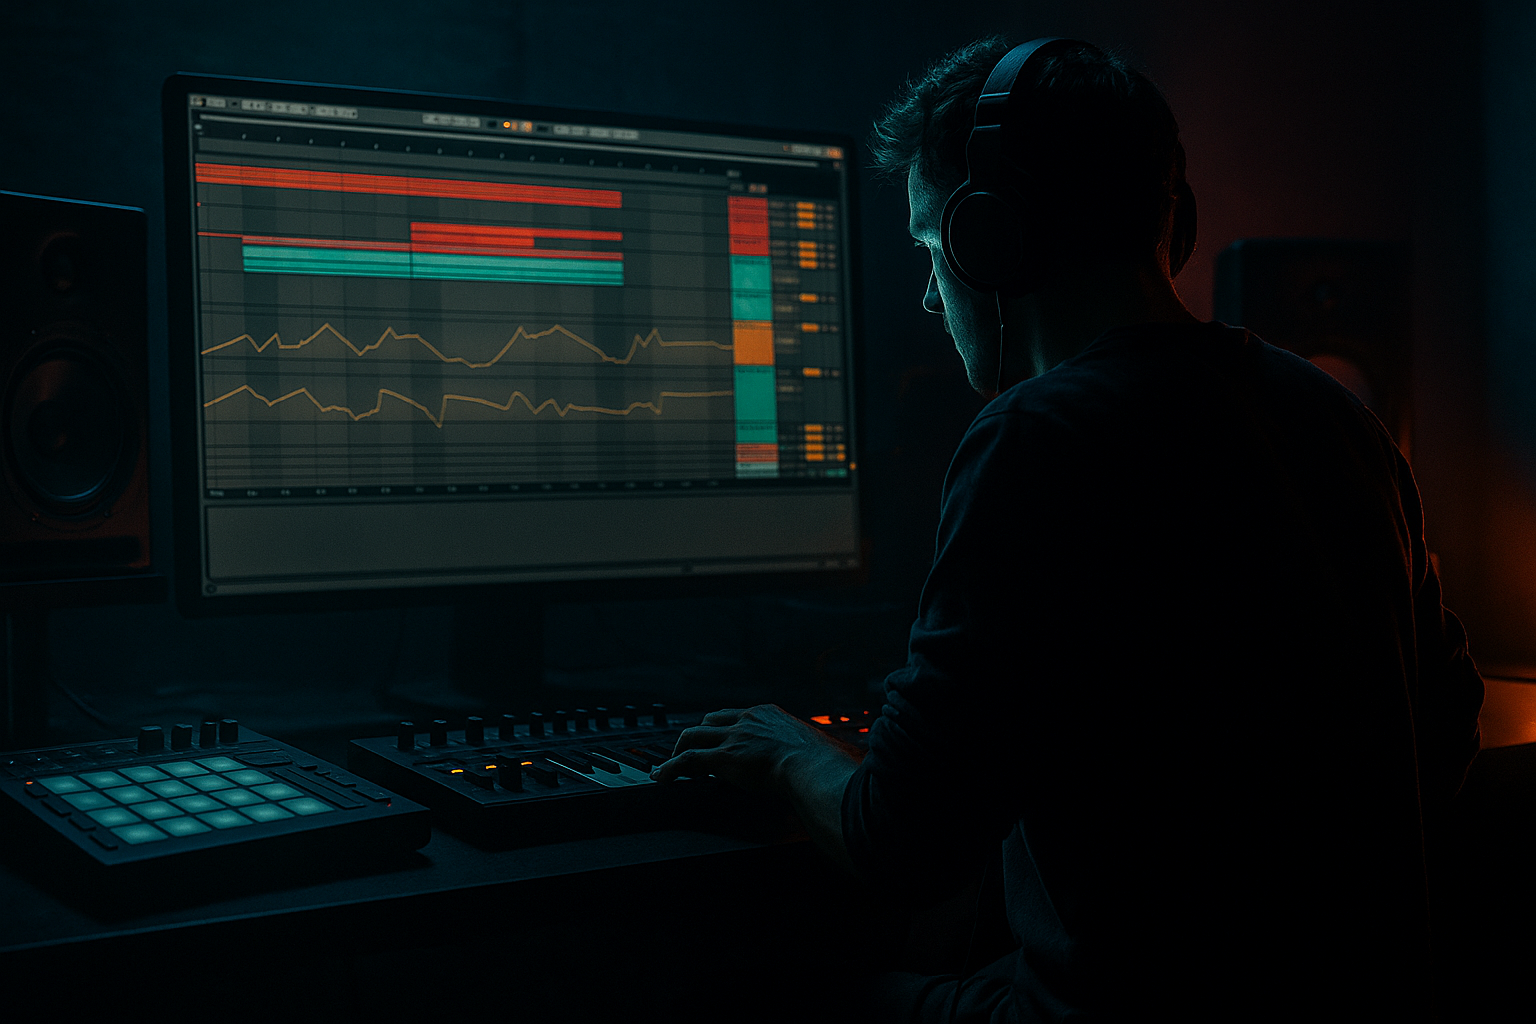
DNB COLLEGE

Drum & Bass Ableton Live 12 Tutorials

LESSON DETAIL

Ragga Ableton Live 12 mid bass masterclass for ragga-infused chaos (Advanced)

An AI-generated advanced Ableton lesson focused on Ragga Ableton Live 12 mid bass masterclass for ragga-infused chaos in the Mixing area of drum and bass production.

Back to lessons
Ragga Ableton Live 12 mid bass masterclass for ragga-infused chaos (Advanced) cover image

Narrated lesson audio

The voice track includes the tutorial plus extra teacher commentary.

Open audio file

Main tutorial

```markdown

Ragga Ableton Live 12 Mid Bass Masterclass (Ragga‑Infused Chaos) 🔥🇯🇲

Skill level: Advanced

Category: Mixing (in the context of DnB/jungle production)

DAW: Ableton Live 12 (stock devices emphasized)

---

1. Lesson overview

This lesson is about mixing a ragga-style mid bass so it punches through rolling drums, sub weight, and ragga vocals/FX, without turning into a muddy mess. We’re not doing “make it loud” tricks—we’re building a controlled, aggressive, animated mid bass that stays readable in a busy jungle/DnB arrangement.

You’ll learn:

  • How to split sub vs mid (cleanly) and mix them like separate instruments
  • How to create movement + grit without losing transient space for the drums
  • A proven Ableton chain using EQ Eight, Saturator, Roar, Auto Filter, Glue Compressor, Multiband Dynamics, and sidechain strategy
  • How to arrange mid bass phrases to feel ragga: call/response, stop-starts, and rude edits 😈
  • ---

    2. What you will build

    A two-layer bass system:

    1) SUB track (mono, stable, fundamental)

    2) MID BASS track (stereo-aware but mono-compatible, aggressive, animated, “ragga chaos”)

    Plus:

  • A Mid Bass Bus with glue and tone shaping
  • A Drum-driven sidechain network that lets kicks/snares own the front
  • Optional “Ragga Smash” parallel channel for nasty bursts in drops
  • Target vibe: rolling steppers + ragga vocal chops + gnarly mid bass stabs—think classic jungle attitude with modern control.

    ---

    3. Step-by-step walkthrough

    Step 0 — Session prep (so mixing is fast later) ⚙️

    Project defaults (recommended):

  • Sample Rate: 48kHz (fine at 44.1 too, but 48 keeps aliasing artifacts a bit cleaner when you drive distortion)
  • Warp: Complex Pro OFF for drums/bass; use Beats for breaks if needed
  • Group structure:
  • - `DRUM BUS`

    - `BASS BUS` (contains `SUB` + `MID`)

    - `MUSIC BUS` (pads/stabs/vocals)

    - `MASTER` (light, not a landfill)

    Gain staging:

  • Keep individual tracks peaking around -12 to -6 dBFS.
  • Your `BASS BUS` should not be pinning the red ever. Save headroom for impact.
  • ---

    Step 1 — Build the sub (clean, boring, powerful) 🧱

    Create `SUB` (MIDI track). Use Operator or Wavetable.

    Operator setup:

  • Osc A: Sine
  • Level: -12 dB-ish (adjust later)
  • Amp Env:
  • - Attack: 0.5–2 ms

    - Decay: ~300 ms (or to taste)

    - Sustain: -inf (if you want plucks) or ~0 dB (for held notes)

    - Release: 60–120 ms (avoid clicks)

    Processing chain on SUB (stock only):

    1) EQ Eight

    - HP filter OFF (don’t cut the fundamentals)

    - Add a gentle dip at 200–300 Hz if your MIDI overlaps mid bass layer

    2) Saturator

    - Mode: Soft Sine or Analog Clip

    - Drive: 1–3 dB

    - Output: compensate so level matches bypass

    (Goal: subtle harmonics so sub reads on smaller speakers without fuzz.)

    Rules for the sub:

  • Mono always. Use Utility → Width 0%
  • Keep sub simple rhythmically—ragga chaos belongs in the mids.
  • ---

    Step 2 — Create the mid bass source (character first) 🧨

    Create `MID` (MIDI track). Use Wavetable (fast) or Operator (sharp).

    We want a sound that can do “WOMP / YOI / BRAAP” with vowel movement and growl.

    Wavetable starting point:

  • Osc 1: “Basic Shapes” (square-ish)
  • Osc 2: “Saw” or “Complex”
  • Unison: 2–4 voices (don’t go crazy yet)
  • Detune: low (3–10)
  • Filter: MS2 or PRD type
  • Drive: 10–25%
  • Modulation (movement):

  • LFO 1 → Filter Freq: subtle but audible
  • - Rate: 1/8 or 1/4 synced

    - Amount: small (you’ll exaggerate with processing)

  • Envelope 2 → Filter Freq (for pluck)
  • - Decay: 150–350 ms

    Key DnB trick: Write MIDI like a conversation:

  • Bar 1: “statement” (longer note with movement)
  • Bar 2: “response” (short stabs / rests)
  • Add gaps. Silence is the rudest sound in jungle.
  • ---

    Step 3 — Split the spectrum properly (mid bass must not fight sub) ✂️

    On `MID`, do the first cleanup early:

    Device 1: EQ Eight

  • High-pass at 120–180 Hz (24 dB slope)
  • - Choose cutoff based on your sub note range:

    - If sub is around F (43 Hz)–A (55 Hz), HP around 140–160 Hz often works well.

  • Optional dip: 250–400 Hz (mud zone) -2 to -4 dB if it’s boxy.
  • Device 2: Utility

  • Width: start at 80–110% (don’t max it)
  • Optional: Bass Mono is not a Utility feature, so rely on your HP filter and keep low mids controlled.
  • ---

    Step 4 — The “Ragga Chaos” mid-bass mixing chain (stock-focused) 🧪

    Here’s a practical chain that works in real DnB sessions. Put this on `MID`:

    #### 4.1 Auto Filter (movement & vowel control)

  • Filter type: Bandpass or Lowpass
  • Drive: 3–9
  • Envelope: small amount if you want pick attack
  • Map Filter Frequency to a Macro (if using Instrument Rack)
  • Tip: Use two stages of filtering (Wavetable filter + Auto Filter) for “talking” bass.

    #### 4.2 Roar (modern aggression without destroying dynamics) 😈

    Ableton Live 12 Roar is perfect for controlled nastiness.

  • Mode: Start with Tube or Warm (then experiment)
  • Drive: 10–30% (or whatever equals “feels rude but still readable”)
  • Tone/Filter inside Roar: cut some fizz above 10k if needed
  • Modulation:
  • - Use Roar’s internal mod to wobble Drive slightly (tiny amounts)

    - Or automate Drive for “shouts” at phrase ends

    Goal: harmonic density in 200 Hz–3 kHz, not just white fizz.

    #### 4.3 Saturator (edge + consistency)

    Place after Roar for final bite:

  • Mode: Analog Clip
  • Drive: 2–6 dB
  • Soft Clip: ON
  • Output: match level
  • #### 4.4 Glue Compressor (control peaks, keep punch)

  • Attack: 3 ms
  • Release: Auto (or 0.1–0.3s for groove)
  • Ratio: 2:1
  • Threshold: aim for 1–3 dB gain reduction on heavy hits
  • Soft Clip: ON (subtle)
  • This keeps the mid bass from randomly spiking and stealing headroom from snares.

    #### 4.5 EQ Eight (post-distortion cleanup) 🧼

    After distortion you must clean again:

  • Narrow cut (Q 6–10) if you find a harsh ring at 1.8–3.5k
  • Gentle high shelf down if it’s too fizzy above 8–10k
  • Optional wide dip around 300 Hz if it feels like cardboard
  • #### 4.6 Multiband Dynamics (optional “contained madness”)

    Use this when the mid bass gets unruly across notes.

  • Start with the “OTT” preset but tame it:
  • - Amount: 15–30%, not 100

  • Or manual:
  • - Low band: don’t boost; keep stable

    - Mid band: slight upward compression for presence

    - High band: control fizz (downward)

    DnB context: You want consistent mid presence even when drums are smashing.

    ---

    Step 5 — Sidechain like a DnB mixer (not like EDM) 🥁

    We want kick + snare clarity and still keep mid bass rolling.

    Option A: Classic Compressor sidechain (simple, effective)

  • On `MID`: Compressor
  • - Sidechain: from a Drum Sidechain track (see below)

    - Ratio: 2:1 to 4:1

    - Attack: 1–5 ms

    - Release: 60–140 ms (tempo dependent)

    - GR: 2–5 dB on kick hits

    Make a dedicated “DRUM SC” trigger (pro workflow):

  • Create a MIDI track called `DRUM SC`
  • Put Drum Rack with a short clicky sample (or use Simpler)
  • Program a pattern that matches kick/snare (or only kick)
  • Route its output to Sends Only (silent), but use it as sidechain input
  • This gives you surgical control: you can duck bass on snare only in fills, or kick only in drop, etc.

    Option B: Volume shaping for rude edits

  • Use Auto Pan as a tremolo (Phase 0°, Shape square-ish)
  • Sync: 1/8 or custom via automation
  • This gives that classic stop-start gate that feels ragga when paired with vocal chops.

    ---

    Step 6 — Bus the bass (glue SUB + MID into one weapon) 🎯

    Group `SUB` + `MID` into `BASS BUS`.

    BASS BUS chain:

    1) EQ Eight

    - Tiny dip at 200–300 Hz if the mix clouds

    - Tiny dip at 40–60 Hz only if the sub is too dominant (be careful)

    2) Glue Compressor

    - Ratio: 2:1

    - Attack: 10 ms

    - Release: Auto

    - GR: 1–2 dB max (this is glue, not punishment)

    3) Limiter (safety only)

    - Ceiling: -0.3 dB

    - Only catching rare peaks (1 dB or less)

    Why: You want the bass to feel like one instrument while still being controllable.

    ---

    Step 7 — Stereo strategy (wide attitude, mono compatibility) 📡

    Mid bass can have width, but jungle/DnB systems punish sloppy low-mids.

    On MID (or BASS BUS), add Utility (if needed):

  • If the mix gets smeary:
  • - Width: pull down to 70–90%

  • Check mono:
  • - Use Utility → Mono toggle temporarily

    - If bass vanishes, your width is coming from phasey content—reduce unison, reduce widening, or use less chorus.

    Pro move: Keep “character width” above 300–500 Hz by ensuring low content is filtered and stable.

    ---

    Step 8 — Arrangement ideas for ragga-infused chaos 🧩

    Mid bass mixing is easier when the arrangement behaves.

    Try these proven patterns:

  • Call/response every 1–2 bars
  • Bass line says “YOI” → vocal chop answers → bass stabs return.

  • Bar 8 / Bar 16 rude edits
  • Drop to silence for 1/8–1/4, then smash back in.

  • Double-drop illusion
  • First 8 bars: less distortion / narrower

    Next 8 bars: automate Roar Drive + widen slightly + add parallel smash

    Automation lanes to ride:

  • Roar Drive (phrases end = shout)
  • Auto Filter frequency (vowel sweeps)
  • Saturator Drive (drop sections only)
  • Sidechain depth (less in breakdown, more in drop)
  • ---

    Step 9 — Parallel “Ragga Smash” channel (for controlled violence) 💥

    Create a return track `A – Ragga Smash` and send MID into it lightly.

    Ragga Smash chain (return track):

    1) Roar

    - More extreme drive

    2) Saturator

    - Drive 6–12 dB (yes, nasty)

    3) EQ Eight

    - High-pass 200–300 Hz (keep it from muddying)

    - Low-pass 6–9 kHz (avoid fizzy spray)

    4) Compressor (sidechain from DRUM SC)

    - Duck it so it appears between drum hits

    Send amount: start at -20 to -12 dB, automate up in the drop.

    This gives you “chaos” without wrecking the main mid bass clarity.

    ---

    4. Common mistakes

  • Not splitting sub and mid: you end up distorting your sub and losing weight on a system.
  • Over-widening the mid bass: sounds huge in headphones, disappears in mono / club.
  • Too much 200–400 Hz: the classic “cardboard fog” that fights snares and breaks.
  • Sidechain too slow: bass masks the kick transient; groove feels late.
  • Distortion without post-EQ: you generate harsh resonances and blame the limiter.
  • Everything moving all the time: constant wobble removes impact. Use movement in phrases.
  • ---

    5. Pro tips for darker/heavier DnB 🕯️

  • Tune distortion to the key:
  • If your track is in F/G, find resonant peaks around ~1–2k and tame the ones that scream off-key.

  • Make the mid bass “speak” around the snare:
  • Carve a small notch where your snare crack lives (often 180–250 Hz body + 2–4k snap). Don’t overdo it.

  • Use “less top” than you think:
  • Dark DnB often feels heavier with a controlled high end. Low-pass distorted parallel returns.

  • Micro-swing via MIDI + sidechain:
  • Shift some mid bass notes slightly late (a few ms) while keeping sub stable—creates that lurching, militant roll.

  • Breakbeat compatibility check:
  • If you’re layering breaks, make sure the mid bass isn’t eating the break’s mid grit (around 800 Hz–2 kHz). Trade space intentionally.

    ---

    6. Mini practice exercise (20 minutes) ⏱️

    Goal: Build a 16-bar drop loop with a clean sub + chaotic ragga mid that still mixes clean.

    1) Write drums:

    - Kick on 1 and the “and” of 2 (or your favorite steppers)

    - Snare on 2 and 4

    - Add a tight hat pattern (1/16 with slight velocity variation)

    2) Write sub MIDI:

    - 2 notes only (root + fifth), keep it simple

    3) Write mid bass MIDI (16 bars):

    - Bars 1–4: steady statement

    - Bars 5–8: more gaps + stabs

    - Bars 9–12: introduce automation (filter sweep / drive)

    - Bars 13–16: add 2 rude edits (silence cuts)

    4) Build the mid chain:

    - EQ Eight HP 150 Hz → Auto Filter → Roar → Saturator → Glue → EQ Eight cleanup

    5) Sidechain:

    - Create `DRUM SC` trigger and duck MID 2–5 dB

    6) Check:

    - Toggle mono: bass should still be present

    - Bypass Ragga Smash return: main bass should still work without it

    Deliverable: export an 8-bar loop and A/B with and without the parallel return.

    ---

    7. Recap ✅

  • Split bass into SUB (mono, clean) and MID (animated, distorted).
  • Use a two-stage tone approach: movement (filters/LFO) + aggression (Roar/Saturator) + cleanup (EQ).
  • Sidechain like DnB: kick/snare lead the transient game, bass fills the gaps.
  • Control chaos with bus glue and parallel smash, not by ruining your main channel.
  • Arrange with ragga attitude: call/response, gaps, and rude edits bring the vibe more than any plugin.

If you want, tell me the tempo + key + whether you’re using steppers or breaks, and I’ll suggest exact cutoff points and a macro rack layout for your mid bass.

```

Ask GPT about this lesson

Chat with the lesson tutor, get follow-up help, or use quick actions.

Bigup 👽 Ask me anything about this lesson and I’ll answer in context.

Narration script

Show spoken script
Title: Ragga Ableton Live 12 Mid Bass Masterclass for Ragga-Infused Chaos (Advanced)

Alright, welcome in. This is an advanced mixing lesson inside Ableton Live 12, and the mission is specific: you’re going to mix a ragga-style mid bass so it punches through rolling drums, heavy sub weight, and ragga vocals and FX… without turning your entire drop into a muddy argument.

We’re not doing “make it loud” tricks. We’re building controlled chaos. Aggressive, animated, readable. The kind of mid bass that can go womp, yoi, braap… and still leaves space for the snare to slap you in the face.

Before we touch a single distortion knob, let’s frame the whole system. You’re building a two-layer bass weapon.

Layer one is the sub: mono, stable, boring on purpose, powerful.
Layer two is the mid: stereo-aware but mono-compatible, nasty, moving, and full of ragga attitude.

Then we’re going to glue them together on a bass bus, create a drum-driven sidechain network so kicks and snares own the front edge, and if you want that extra violence, we’ll add a parallel “Ragga Smash” return that you can automate for bursts in the drop.

Step zero: session prep, because future-you deserves a clean setup.

Set your project sample rate to 48k if you can. It’s not mandatory, but it does help keep distortion a bit cleaner when you start driving things hard.

Set warping smart: don’t use Complex Pro on drums and bass. Keep drums crisp. For breaks, Beats mode is usually your friend.

Now structure. Make a drum bus. Make a bass bus. Inside that bass bus, you’ll have SUB and MID. Then a music bus for everything else like stabs, pads, vocals. And keep your master light. Don’t turn the master into a landfill of fixes for problems you created upstream.

Gain staging: aim for individual tracks peaking around minus twelve to minus six dBFS. The bass bus should never be pinning red. Headroom is impact. If you spend all your headroom early, your drop will feel smaller even if it’s louder.

Extra coach tip before we go on: mid-bass decisions are where your ears lie to you. Here’s a cheat code. While you’re designing and mixing the mid, temporarily high-pass your master around 30 Hz with EQ Eight. Just temporarily. You’re not “fixing” the sub, you’re stopping yourself from compensating for mid problems by accidentally cranking low end. When the mid is behaving, turn that high-pass off.

Also, level-match your distortion A/B. Louder always sounds better, and it will trick you. An easy workflow: after each drive device, throw a Utility and use it to match the level when you bypass. If you can’t decide which sounds better when levels are matched, you probably don’t need that stage… or you need less of it.

Now step one: build the sub. Clean, boring, powerful.

Create a MIDI track named SUB. Use Operator or Wavetable. Operator is perfect: Oscillator A as a sine wave.

Set your amp envelope so it doesn’t click. Tiny attack, like half a millisecond to two milliseconds. Decay around 300 milliseconds if you’re doing plucks, or sustain up if you’re holding notes. Release around 60 to 120 milliseconds so it stops clean but doesn’t pop.

Processing chain on SUB: keep it minimal.

First, EQ Eight. No high-pass. Don’t cut the fundamentals on your sub track, that’s literally the job. If you need it, add a gentle dip around 200 to 300 Hz if there’s overlap with your mid layer. This is a cleanup, not a sculpt.

Then Saturator. Soft Sine or Analog Clip. Drive one to three dB, subtle. The goal is not fuzz. The goal is a little harmonic support so the sub reads on smaller speakers without becoming a noisy mess.

And here’s a rule that isn’t optional: make the sub mono. Utility, width at zero percent. Always.

Keep the sub rhythm simple. Ragga chaos belongs in the mids. The sub is your foundation, not your personality.

Step two: create the mid bass source. Character first.

Make another MIDI track called MID. Use Wavetable for speed, Operator for bite. We want something that can talk. So think square-ish plus saw-ish, with a filter that can do vowel-ish motion.

In Wavetable, start with Osc 1 as Basic Shapes leaning square. Osc 2 as a saw or something more complex. Add unison, but don’t go crazy: two to four voices. Low detune, like three to ten. Filter type like MS2 or PRD, and add a little drive in the filter, maybe ten to twenty-five percent.

Now movement. LFO to filter frequency, synced to tempo. One-eighth or one-quarter is a classic DnB pulse. Keep the amount subtle for now. Then add an envelope to the filter as well, so you get a little pluck or “wah” at the note start. Decay around 150 to 350 milliseconds.

And the real DnB trick is not a device. It’s the MIDI. Write it like a conversation. One bar is a statement, next bar is a response. Use gaps. Silence is the rudest sound in jungle.

If everything is wobbling all the time, nothing feels special. But if you leave space, that next hit feels like a punchline.

Step three: split the spectrum properly. The mid must not fight the sub.

On the MID track, do your first cleanup early. Put EQ Eight first.

High-pass at around 120 to 180 Hz with a steep slope, like 24 dB. Where you set that depends on your sub notes. If your sub is living around F to A, you’ll often land somewhere like 140 to 160 Hz for the mid high-pass. The goal is simple: stop low junk from hitting the distortion chain and stop phasey overlap with the sub.

Then if it’s boxy, dip a little around 250 to 400 Hz, maybe two to four dB. This is the cardboard fog zone. If your mix feels like it’s wearing a wet blanket, check here.

Then add Utility. Start your width around 80 to 110 percent. Don’t max it. “Wide” isn’t a number, it’s a feeling, and club systems punish sloppy low mids.

Now step four: the ragga chaos mid-bass mixing chain. This is where the fun starts, but we’re staying controlled.

The chain, in order, is: Auto Filter, then Roar, then Saturator, then Glue Compressor, then EQ Eight cleanup, and optionally Multiband Dynamics.

First, Auto Filter. This is your performance mouth. Bandpass or lowpass, depending on your vibe. Add some drive, like three to nine, and if you want extra bite, a tiny bit of envelope amount so the filter responds to note attacks. Map the filter frequency to a macro if you’re using an Instrument Rack, because you’re going to automate this like an instrument, not like a static mix.

Teacher note: two stages of filtering usually talk better than one. Your synth filter can be the “throat,” and Auto Filter can be the “mouth.” That separation keeps the movement musical.

Next, Roar. Ableton Live 12’s Roar is perfect for modern aggression without totally flattening your dynamics.

Start with Tube or Warm. Set drive so it feels rude but readable. Ten to thirty percent is a decent starting bracket, but trust your ears. Inside Roar, use tone or its filtering to cut some fizz above 10k if it starts spraying. And here’s a pro move: modulate the drive slightly, tiny amounts, or automate it only at phrase ends. That way it shouts, then backs off.

Your goal is harmonic density in the 200 Hz to 3 kHz region. Not just a bunch of 6k fizz that sounds cool solo and makes the full mix painful.

After Roar, add Saturator. Analog Clip, drive two to six dB, soft clip on. This stage is about consistency and edge. Again, level-match the output so you’re not just falling in love with loudness.

Then Glue Compressor. This is not for slamming. This is to catch peaks so the mid doesn’t randomly steal headroom from your snare.

Set attack around 3 milliseconds. Release on Auto, or somewhere around 0.1 to 0.3 seconds if you want it to breathe with groove. Ratio 2 to 1. Threshold so you’re seeing maybe one to three dB of gain reduction on heavy hits. Soft clip on, subtle.

Next, EQ Eight after distortion. This is mandatory. Distortion creates resonances. If you don’t clean, you’ll blame the limiter later.

Sweep with a narrow bell and listen for harsh ringing around 1.8 to 3.5k. If you find a whistle, cut it with a tight Q, like six to ten. If the top is fizzy, pull down with a gentle high shelf above eight to ten k. And if the cardboard vibe came back, a wide dip around 300 Hz can help.

Optional: Multiband Dynamics for contained madness. If your mid is changing character too much across notes, this can stabilize it.

You can start from the OTT preset, but do not leave it at 100 percent unless you want your bass to sound like it’s trapped in a soda can. Pull the amount down to fifteen to thirty percent. The concept is: keep low band stable, lift mids slightly for presence, and control highs so the fizz doesn’t take over.

Now step five: sidechain like a DnB mixer, not like EDM.

In DnB, the kick and snare own the transient game. The bass fills the gaps. So we want ducking that’s rhythmic and intentional, not a huge pumping effect unless you want that as a special edit.

Option A is classic Compressor sidechain on the MID. Ratio two to one up to four to one. Attack one to five milliseconds, release around sixty to one-forty milliseconds depending on tempo. Aim for two to five dB of gain reduction on kick hits.

But here’s the pro workflow: don’t sidechain directly from your drum bus. Create a dedicated sidechain trigger track.

Make a MIDI track called DRUM SC. Put a Drum Rack with a tiny clicky sample. Program a pattern that matches your kick and snare, or just kick, whatever you want to control. Route its output to Sends Only so it stays silent, but use it as your sidechain input.

This gives you surgical control. You can duck the bass only on the snare in fills, only on the kick in the drop, change patterns without touching your drums, and basically treat ducking as part of the arrangement.

Advanced variation: dual-sidechain. Make two silent triggers, one for kick and one for snare. Put two Compressors in series on the MID. First compressor keyed to kick with a fast release, tight pocket. Second keyed to snare with a slightly longer release, so the snare crack gets air. This avoids the “one duck fits all” groove.

And another vibe option: rude edits with volume shaping. Auto Pan can act like a tremolo if you set phase to zero degrees. Make the shape more square-ish, sync it, and now you can do stop-start gating without drawing a million volume automation points. Pair that with vocal chops and it instantly feels ragga.

Step six: bus the bass. Glue SUB and MID into one instrument.

Group your SUB and MID into BASS BUS.

On the bass bus, start with EQ Eight. Tiny dip at 200 to 300 if the mix clouds up. If the sub is too dominant, you can consider a tiny dip around 40 to 60, but be careful. That’s the foundation. Don’t sabotage it.

Then Glue Compressor on the bus. Ratio two to one. Attack around ten milliseconds, release Auto. One to two dB of gain reduction max. This is glue, not punishment.

Then a Limiter just as a safety net. Ceiling minus 0.3 dB. It should only catch rare peaks, like one dB or less. If it’s working hard, fix the bass, don’t lean on the limiter.

Step seven: stereo strategy. Wide attitude, mono compatibility.

Mid bass can have width, but low mids get punished if they’re phasey. Here’s a better mono check than just hitting “mono” on the channel: create a monitoring return with Utility width at zero percent. Don’t print it. Just monitor through it sometimes.

Listen for two things. Does the vowel movement stay audible? Great. Or does it collapse into a hollow comb-filtered weirdness? If it collapses, your width is coming from phase tricks. Fix it at the synth stage: reduce unison, reduce detune, reduce chorus, and keep the low part filtered and stable.

Pro move: keep the “character width” above 300 to 500 Hz. One of the cleanest approaches is to split by frequency. Let everything above 500 be a little wider, and keep 120 to 500 more conservative, like 70 to 100 percent width. That gives you size without sacrificing club mono stability.

Step eight: arrangement ideas that make mixing easier, because arrangement is mixing.

Ragga-infused chaos is about call and response. Every one to two bars, let the bass speak, then let the vocal chop answer, then let the bass come back with stabs.

Add rude edits at bar eight or bar sixteen. Drop to silence for an eighth note or a quarter note, then smash back in. But here’s an upgrade: instead of muting everything, do micro-mutes.

Mute only the mid layer for a sixteenth to an eighth while the sub continues. That keeps momentum but still feels like a rude cut.
Or mute the sub for a sixteenth while the mid spits, which creates a cheeky “lift” before the weight returns.

And if you want a double-drop illusion without adding new tracks: first eight bars, keep distortion lower, width narrower, sustain shorter. Next eight, automate Roar drive up, widen slightly, and bring in the parallel smash. Same patch, three attitudes, pure performance.

When vocals answer the bass, don’t let them fight in the same articulation band. During vocal chops, automate the mid bass to slightly reduce one to three kHz, where speech lives, and maybe boost 300 to 700 a touch so the bass still reads without sounding like a second mouth talking over the vocalist.

Step nine: the parallel Ragga Smash return. Controlled violence.

Create a return track called A – Ragga Smash. Send the MID to it lightly.

On the return, put Roar first, more extreme drive than your main chain. Then Saturator, drive six to twelve dB, yes, nasty. Then EQ Eight: high-pass at 200 to 300 so it doesn’t muddy your low end, and low-pass around six to nine k so it doesn’t turn into fizzy spray.

Then a Compressor sidechained from your DRUM SC so the smash appears between drum hits, not on top of them. Start the send around minus twenty to minus twelve dB. Automate it up in the drop, and pull it back when you need clarity.

Key concept: your main mid should work without the parallel. The parallel is hype, not structure.

Now, common mistakes to avoid, because these are the things that wreck mixes fast.

If you don’t split sub and mid, you’ll distort the sub and lose weight on a real system.
If you over-widen the mid, it’ll sound huge in headphones and disappear in mono.
If you stack too much energy in 200 to 400 Hz, you get that cardboard fog that fights snares and breaks.
If your sidechain is too slow, the bass masks the kick transient and the groove feels late.
If you distort without post-EQ, you generate harsh resonances and blame the limiter.
And if everything moves all the time, you lose impact. Movement needs phrasing.

Extra coach note on micro-dynamics: sometimes the issue isn’t peaks, it’s sustain. The bass tail masks hats and shuffles. Try this: put a Gate on the MID, keyed by itself. Fast return, hold around ten to forty milliseconds, release around sixty to one-sixty. You’re trimming tails, not chopping attacks. It keeps the groove snappy without making the bass feel thin.

Another advanced trick: watch Spectrum in a way that actually helps. Put Spectrum on the MID, set block to 4096 and averaging to two to four seconds. This helps you see whether your “presence” is actually in the 400 Hz to 1.2k range, which reads on most systems, or if it’s mostly 2 to 6k fizz that sounds impressive solo but gets tiring and harsh in a full track. And on the bass bus, watch for “mid-bass hump creep” around 250 to 450. Distortion stacks there even when you think you filtered it.

Now let’s do the mini practice exercise. Twenty minutes. No excuses. This is where it becomes real.

Write a 16-bar drop loop.

First, drums. Steppers is an easy base: kick on one and the “and” of two, snare on two and four. Add tight hats in sixteenths with slight velocity variation so it rolls.

Second, sub MIDI. Two notes only: root and fifth. Keep it militant.

Third, mid bass MIDI across 16 bars. Bars one to four, steady statement. Bars five to eight, more gaps and stabs. Bars nine to twelve, introduce automation, like filter sweep or drive moves. Bars thirteen to sixteen, add two rude edits, those micro silences.

Fourth, build the mid chain: EQ Eight high-pass around 150, Auto Filter, Roar, Saturator, Glue, then EQ cleanup.

Fifth, sidechain. Create DRUM SC and duck the MID two to five dB.

Sixth, check. Toggle mono. The bass line should still be readable. Bypass the Ragga Smash return. Your main bass should still feel like a complete instrument without it.

Export an eight-bar loop. A/B with and without parallel. If the whole vibe collapses without the parallel, your main chain isn’t solid yet. Fix the core first.

Final recap so you can carry this into any session.

Split the bass into SUB, mono and clean, and MID, animated and distorted.
Use a two-stage tone approach: movement from filters and LFOs, aggression from Roar and Saturator, then cleanup from EQ.
Sidechain like DnB: kick and snare lead the transient game, bass fills the gaps.
Control chaos with bus glue and parallel smash, not by ruining your main channel.
And arrange with ragga attitude. Call and response, gaps, and rude edits create more vibe than any plugin.

If you tell me your tempo, your key, and whether you’re doing steppers or break-led drums, I can suggest more exact crossover points for the mid high-pass, plus a clean 8-macro rack layout with safe ranges so your controls stay performable instead of going from zero to unusable in five percent.

mickeybeam

Go to drumbasscd.com for +100 drum and bass YouTube channels all in one place - tune in!

Generating PDF preview…