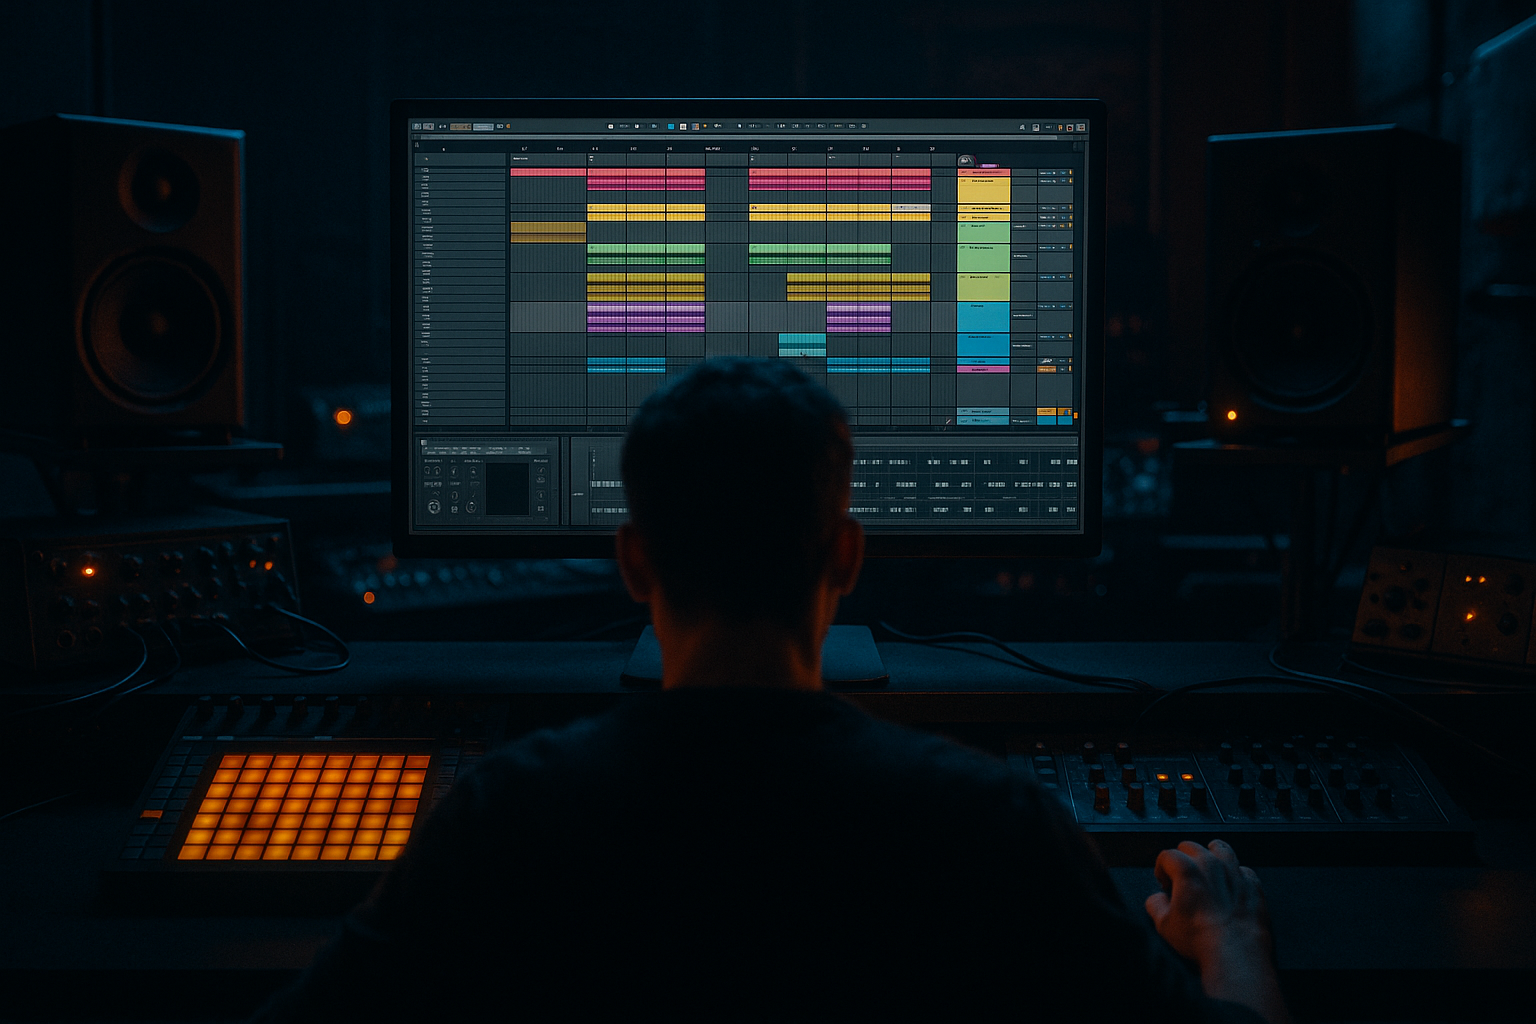
DNB COLLEGE

Drum & Bass Ableton Live 12 Tutorials

LESSON DETAIL

Pitch oldskool DnB sampler rack for oldskool rave pressure in Ableton Live 12 (Intermediate)

An AI-generated intermediate Ableton lesson focused on Pitch oldskool DnB sampler rack for oldskool rave pressure in Ableton Live 12 in the Mastering area of drum and bass production.

Back to lessons
Pitch oldskool DnB sampler rack for oldskool rave pressure in Ableton Live 12 (Intermediate) cover image

Narrated lesson audio

The voice track includes the tutorial plus extra teacher commentary.

Open audio file

Main tutorial

Pitch Oldskool DnB Sampler Rack for Rave Pressure (Ableton Live 12) 🔥🎛️

Skill level: Intermediate

Category: Mastering (with “mix-to-master” thinking)

---

1. Lesson overview

Oldskool jungle/DnB pressure often comes from pitched breaks, pitched stabs, and resampled grit—but the secret sauce is controlling the tonal shift and transient behavior so it still hits hard on a modern system. In this lesson you’ll build a pitch-focused Ableton Sampler Rack designed for that classic “rave-lean” energy, then glue it into a mastering-aware chain that keeps loudness and weight without flattening the groove. 🚀

We’ll aim for:

  • Breaks that speed up / pitch up like old hardware samplers
  • Controlled low-end so the master doesn’t buckle
  • A “finished” pressure feeling that translates in clubs
  • ---

    2. What you will build

    You’ll create a single Instrument Rack called:

    “Rave Pressure Pitch Rack”

    It will include:

  • Sampler with break/stab samples
  • Macro-controlled pitch (with “old sampler” behavior)
  • Transient shaping + saturation tuned for jungle drums
  • Pre-master “pressure” bus (glue + clip) to hit the master right
  • Optional parallel dirt chain for extra grit
  • You’ll also set up a simple Mastering-aware workflow:

  • Gain staging into the master chain
  • A light master chain using stock Ableton devices (Glue Compressor, Saturator, Limiter) 🎚️
  • ---

    3. Step-by-step walkthrough

    Step 0 — Session prep (DnB context) 🏁

    1. Set tempo to 170–174 BPM (start at 172).

    2. Create a Drum Bus group and a Music Bus group (stabs/bass).

    3. Leave headroom: target -6 dB peak on the Master before limiting.

    Why: pitch-based energy can spike transients and low-end; headroom keeps your mastering moves clean.

    ---

    Step 1 — Build the Sampler Rack core 🎹

    1. Create a MIDI track → load Instrument Rack.

    2. Drop Sampler into the Rack.

    3. Drag in an oldskool source:

    - Classic Amen / Think / Funky Drummer slice, or

    - A rave stab / hoover hit / reese one-shot

    Sampler settings (break-focused starting point):

  • Warp: Off inside Sampler (we want classic pitch/time coupling)
  • Voices: 8 (or 4 if CPU tight)
  • Filter: On
  • - Type: MS2 (or PRD)

    - Freq: 12–16 kHz (start open, we’ll macro it)

    - Res: 0.10–0.30

  • Pitch/Osc tab: keep at default for now
  • Key concept: “Oldskool pitch-up = faster playback + higher pitch.” That’s the vibe.

    ---

    Step 2 — Add key tracking + “Old Sampler” pitch behavior 🎚️

    We want two pitch modes:

    1) Classic pitch (affects speed + tone)

    2) Fine offset “tune” for keying into your track

    #### A) Macro 1: “Rave Pitch”

    1. In Sampler → Transp. (Transpose)

    2. Map it to Macro 1

    3. Set Macro range: 0 to +7 semitones (DnB sweet spot)

    - If you want more chaos: try -5 to +12

    Tip: +3 to +7 semitones gives instant “rave pressure” on breaks without becoming chipmunk chaos.

    #### B) Macro 2: “Fine Tune”

    1. Map Sampler Detune to Macro 2

    2. Range: -20 to +20 cents

    Use: lock the break/stab into the key of your bassline.

    ---

    Step 3 — Keep the low-end stable (crucial for mastering) 🧱

    Pitching breaks up often pushes low-mid bite, but you must prevent sub clutter.

    1. After Sampler, add EQ Eight

    2. Set:

    - HPF at 25–35 Hz (24 dB/oct)

    - Gentle dip if needed:

    - 250–400 Hz: -2 to -4 dB (Q ~1.2) if it gets boxy

    - Optional: small cut around 7–10 kHz if hats get brittle when pitched

    Macro 3: “Low Cut”

  • Map EQ Eight HPF frequency to Macro 3
  • Range: 20 Hz → 90 Hz (for quick cleanup when pitching high)
  • This is a mastering-minded move: pitch changes can wreck master headroom if the low-end blooms.

    ---

    Step 4 — Add punch and grit (oldskool bite without killing transients) 💥

    Add Drum Buss after EQ Eight.

    Suggested starting settings:

  • Drive: 5–12%
  • Crunch: 10–25%
  • Boom: 0–15%
  • - Frequency: 50–70 Hz (be careful—can fight your sub)

  • Damp: 10–30% (tames harshness)
  • Transient: +5 to +20 (helps breaks stay snappy)
  • Macro 4: “Grit”

  • Map Drum Buss Drive + Crunch together
  • Keep it subtle—this is “pressure,” not fuzz.
  • ---

    Step 5 — Add “rave air” movement with controlled distortion 🌪️

    Add Saturator after Drum Buss.

    Settings:

  • Mode: Analog Clip
  • Drive: 2–6 dB
  • Soft Clip: On
  • Output: pull down to match level (aim same loudness on/off)
  • Macro 5: “Clip Push”

  • Map Saturator Drive (2 → 8 dB)
  • Map Output inversely (0 → -6 dB) so it doesn’t jump wildly
  • This gives you that “printed hot to tape/sampler” feel while staying gain-controlled.

    ---

    Step 6 — Build parallel dirt inside the Rack (big oldskool energy) 🧪

    In the Instrument Rack:

    1. Click Chain List → create 2 chains:

    - Clean

    - Dirt Parallel

    Clean chain: keep what you built so far.

    Dirt Parallel chain: copy the chain, then add:

  • Redux (yes—old sampler magic)
  • - Downsample: 2.0–6.0

    - Bit Reduction: 0–3 (tiny amounts)

  • Auto Filter (band-limit like old hardware)
  • - Type: Bandpass

    - Freq: 500 Hz – 8 kHz

    - Drive: small (0–6)

    Now set chain volumes:

  • Clean: 0 dB
  • Dirt Parallel: -12 to -20 dB (blend only!)
  • Macro 6: “Dirt Blend”

  • Map Dirt chain volume from -inf → -12 dB
  • This is huge for jungle vibe—grit without losing punch.

    ---

    Step 7 — Add “rave pitch throws” for arrangement impact 🎯

    Oldskool arrangement trick: pitch-up moments to lift energy into drops or fills.

    1. Automate Macro 1 (Rave Pitch) at key moments:

    - End of 8 or 16 bars: ramp +0 → +5 semitones over 1 bar

    - Quick jab: +0 → +7 for a single snare fill hit

    2. Combine with Macro 3 (Low Cut):

    - When pitching up, also raise low cut from 30 → 70 Hz

    - This prevents low-mid “woof” and keeps master clean.

    DnB arrangement idea (rolling):

  • Bars 1–16: base groove (Macro 1 at 0)
  • Bars 17–32: add subtle Dirt Blend
  • Bar 33 (pre-drop): 1-bar pitch ramp + low cut ramp
  • Bar 34: drop back to 0 semitones, low cut back down—impact feels massive 🎇
  • ---

    Step 8 — “Mastering-aware” pressure bus (before the Master) 🧷

    Create a Return track or a Drum Bus group processing chain (recommended: group your pitched breaks + drums).

    On the Drum Group add:

    #### A) Glue Compressor (gentle glue, not squashing)

  • Attack: 3 ms
  • Release: Auto (or 0.3s)
  • Ratio: 2:1
  • Threshold: adjust for 1–2 dB gain reduction on peaks
  • Makeup: Off (level match manually)
  • #### B) Saturator (bus polish)

  • Mode: Soft Sine or Analog Clip
  • Drive: 1–3 dB
  • Soft Clip: On
  • #### C) Limiter (only catching spikes on the bus, not final loudness)

  • Ceiling: -1.0 dB
  • Gain: 0 dB (don’t slam it—just safety)
  • This keeps your master limiter from doing all the work.

    ---

    Step 9 — Simple master chain (stock, clean, DnB-safe) 🎛️

    On the Master, keep it minimal:

    1. EQ Eight (optional)

    - HPF at 20 Hz (very gentle; 12 dB/oct)

    - Tiny shelf if needed: +0.5–1 dB at 10 kHz

    2. Glue Compressor (optional)

    - Aim: 0.5–1 dB GR max

    3. Limiter (Ableton Limiter)

    - Ceiling: -1.0 dB

    - Push Gain until you hit your target

    - For modern DnB loudness, many aim roughly -7 to -5 LUFS integrated (genre dependent), but don’t wreck your transients to get there.

    Check: If the limiter is pumping, fix it upstream (low cut, less boom, less clip push).

    ---

    4. Common mistakes ⚠️

  • Warping the break in audio with Beats/Complex while also pitching in Sampler → phasey, smeary transients. If you want oldskool pitch, keep Sampler Warp off.
  • Pitching up without low-cut automation → low-mid builds and the master limiter chokes.
  • Too much Redux → hats turn to sand, snare loses crack. Blend it in parallel.
  • Over-compressing the drum group → kills the “rolling” bounce and makes the groove feel small.
  • No gain staging → saturation and clipping become random, not musical.
  • ---

    5. Pro tips for darker/heavier DnB 🖤

  • Make the dirt midrange-only: put an EQ Eight before Redux on the Dirt chain with HPF ~200 Hz and LPF ~8–10 kHz. Keeps sub clean and top controlled.
  • Add “shadow” with Roar (Live 12 stock) (optional):
  • - Put Roar on the parallel chain with a band focused around 300 Hz–3 kHz, mild drive, and mix low. This adds threat without fizz.

  • Reese synergy: tune the pitched breaks/stabs to the reese’s root or fifth (Macro 2 fine tune helps). Dissonance is cool—but controlled dissonance is heavier.
  • Transient-first mindset: if it stops feeling like DnB, it’s usually transients getting too soft. Use Drum Buss Transient or back off Glue.
  • Automate pitch for “pressure phrases”: subtle +2 semitone lift for 8 bars can feel like the room is speeding up.
  • ---

    6. Mini practice exercise 🎓

    Goal: Build a 32-bar rolling loop with one “rave pressure” lift.

    1. Load an Amen (or any break) into your rack.

    2. Program a simple 2-step or rolling pattern (kick/snare backbone) and layer the break quietly.

    3. Set:

    - Macro 1 (Rave Pitch): 0

    - Macro 6 (Dirt Blend): around -18 dB (barely there)

    4. At bar 31 → 32, automate:

    - Macro 1 ramp 0 → +5

    - Macro 3 ramp 30 Hz → 70 Hz

    - Macro 5 (Clip Push) +1–2 dB

    5. Drop at bar 33 back to normal.

    Listen for:

  • Drop feels bigger when pitch returns
  • Master limiter works less hard on the lift (because low cut is managed)
  • ---

    7. Recap ✅

  • You built a Sampler-based pitch rack that captures oldskool “speed-up” energy while staying master-friendly.
  • You used macros to control pitch, tuning, low-cut, grit, clip push, and dirt blend—so the sound is playable and automatable.
  • You reinforced the vibe with parallel Redux dirt and controlled bus pressure using Glue + Saturator + safety limiting.
  • You learned an arrangement trick: pitch ramps + low-cut ramps = rave tension without ruining headroom.

If you want, tell me what kind of source you’re using (Amen, Think, stab, hoover, etc.) and the key of your tune, and I’ll suggest macro ranges and EQ points tailored to your loop.

Ask GPT about this lesson

Chat with the lesson tutor, get follow-up help, or use quick actions.

Bigup 👽 Ask me anything about this lesson and I’ll answer in context.

Narration script

Show spoken script
Title: Pitch oldskool DnB sampler rack for oldskool rave pressure in Ableton Live 12 (Intermediate)

Alright, let’s build some proper oldskool rave pressure in Ableton Live 12, but with a modern, mastering-aware mindset. The goal here is that classic jungle and early DnB energy: pitched breaks that feel like they’re speeding up on hardware, stabs that bite harder when they’re pushed, and that gritty resampled edge… without your master limiter choking or your low end turning to soup.

By the end, you’ll have one Instrument Rack called “Rave Pressure Pitch Rack” with macros that make it playable and automatable: pitch, fine tuning, low-cut control, grit, clip push, and a parallel dirt blend. Then we’ll set up a drum pressure bus and a simple master chain so the whole thing translates in a club.

First, session prep. Set your tempo to 170 to 174 BPM. I like 172 as a default. Create two groups: a Drum Bus group, and a Music Bus group for stabs, bass, and anything melodic. And here’s the important part: leave headroom. Before you do any final limiting, aim for about minus 6 dB peak on the master. Pitch-based stuff can spike transients and shift energy into harsh zones fast, so this headroom is what keeps your later “loud” decisions clean instead of desperate.

Now let’s build the rack.

Create a new MIDI track. Drop an Instrument Rack on it. Then drop a Sampler inside the rack.

Drag in your source. For this lesson, think Amen, Think, Funky Drummer slices, or a classic rave stab, hoover, or reese one-shot. We’re going for that old sampler behavior where pitch and time are linked: when you pitch up, it plays back faster. So inside Sampler, make sure Warp is off. That’s a key vibe decision. If you warp the audio and also pitch in Sampler, you’ll often get phasey, smeary transients—exactly the opposite of crisp jungle pressure.

Set Voices to around 8, or 4 if you’re trying to keep CPU light.

Turn the Sampler filter on. Choose a character filter like MS2 or PRD. Start the filter fairly open, like 12 to 16 kHz, with a low resonance—something like 0.1 to 0.3. We’ll control it later, but for now we want to hear the full break.

Now we’re going to build the pitch control, and this is the heart of the rack.

Macro 1: this is “Rave Pitch.” Go to Sampler’s Transpose parameter and map it to Macro 1. Set the macro range from 0 up to +7 semitones. That’s a sweet spot for DnB: you get instant urgency and lift without turning everything into cartoon-chipmunk chaos. If you want more wildness later, you can expand it to something like minus 5 up to plus 12, but start sane.

Macro 2: “Fine Tune.” Map Sampler Detune to Macro 2, and set it to around minus 20 to plus 20 cents. This macro is how you keep the break or stab sitting with your tune’s key. And don’t underestimate this: even if breaks are “atonal,” the way the snare ring or cymbal wash sits against your bass can feel wrong if it’s slightly off. Fine tune is your glue.

Next, we need to get mastering-minded about the low end.

After Sampler, add EQ Eight. Put a high-pass filter at about 25 to 35 Hz, steep-ish, like 24 dB per octave. That’s your safety against rumble that steals headroom but doesn’t translate on most systems.

Then listen for boxiness. A lot of pitched breaks, especially when you push them up, can get thick and papery in the 250 to 400 Hz zone. If you hear that, do a gentle dip, maybe 2 to 4 dB, Q around 1.2. Also, if pitching makes the hats brittle, consider a small cut around 7 to 10 kHz.

Now map Macro 3: “Low Cut.” Map the EQ Eight high-pass frequency to Macro 3, and set the range from about 20 Hz up to 90 Hz.

Here’s the reason: when you pitch up, the perceived energy shifts, and the low mids can start eating limiter headroom in a really unmusical way. Macro 3 is how you keep pitch excitement without “woof.”

Now for punch and grit.

After EQ Eight, add Drum Buss. Starting settings: Drive somewhere like 5 to 12 percent. Crunch around 10 to 25 percent. Boom at zero to 15, but be careful—Boom can fight your actual sub and make mastering harder. If you use Boom, keep it around 50 to 70 Hz and be conservative. Damp at 10 to 30 percent if the top starts to sting. And Transient, this is big for DnB: try plus 5 up to plus 20. That helps the break stay snappy and rolling.

Now Macro 4: “Grit.” Map Drum Buss Drive and Crunch to the same macro. When you turn it up, you’re adding pressure and attitude, but you’re not trying to turn it into fuzz. If you find yourself loving it only because it got louder, pause and level match—because pitching and saturation both trick your brain with loudness.

Quick coach note: pitching often feels louder because it pushes energy into the 2 to 6 kHz zone where your ears are super sensitive. So do quick A and B checks that are level-matched. A simple way is to put a Utility after the rack and map its gain to a spare macro, or just adjust the rack volume so when you pitch up, you’re not accidentally just turning up.

Next, controlled clipping for that “printed hot” feel.

After Drum Buss, add Saturator. Set it to Analog Clip. Turn Soft Clip on. Drive around 2 to 6 dB, and then pull the output down so it’s roughly the same loudness when bypassed.

Macro 5: “Clip Push.” Map Saturator Drive from about 2 to 8 dB. Map Output inversely, so as Drive rises, Output drops—something like 0 down to minus 6 dB. This keeps it musical and consistent, instead of “every macro move explodes the level.”

Now for the magic sauce: parallel dirt.

Open the Instrument Rack chain list, and make two chains: Clean, and Dirt Parallel.

Your Clean chain is what you’ve already built.

Duplicate that chain for Dirt Parallel, then add Redux on the dirt chain. Keep it tasteful. Downsample somewhere like 2.0 to 6.0. Bit Reduction: tiny amounts, like 0 to 3. Redux is one of those devices where one millimeter can be the difference between “classic sampler grime” and “broken sandpaper hats.”

After Redux, add Auto Filter. Set it to bandpass, and band-limit it like old hardware. Try a range that lives mostly in the midrange, something like 500 Hz to 8 kHz, and a little drive if you want.

Now balance the chain volumes. Keep Clean at 0 dB. Set Dirt Parallel to something like minus 12 to minus 20 dB. This is a blend, not the whole meal.

Macro 6: “Dirt Blend.” Map the Dirt chain volume from minus infinity up to around minus 12 dB. That gives you a usable range where you can sneak grit in and out for movement.

Pro tip for heavier, darker DnB: keep the dirt midrange-only. Put an EQ Eight before Redux on the Dirt chain and high-pass around 200 Hz, low-pass around 8 to 10 kHz. That way the dirt adds threat and density without messing with sub stability or turning your top into fizz.

Optional Live 12 extra: if you want more menace, try Roar on that parallel chain, focused in a band like 300 Hz to 3 kHz, mild drive, low mix. That’s “shadow,” not “brightness.”

Now let’s talk arrangement: pitch throws.

Oldskool trick: pitch-up moments to lift energy into a drop or fill. Automate Macro 1, Rave Pitch. For example, at the end of 8 or 16 bars, ramp from 0 up to +5 semitones over one bar. Or do a quick jab: +7 for a single fill hit.

But here’s the mastering-aware part: pair it with Macro 3, Low Cut. When you pitch up, also raise the low cut from maybe 30 Hz up to 70 Hz. That’s how you prevent the low-mid buildup that makes your master limiter grab and pump.

Try a simple phrase plan:
Bars 1 to 16, base groove, pitch at zero.
Bars 17 to 32, bring in a little Dirt Blend, just enough to feel it.
Bar 33, the pre-drop: one-bar pitch ramp plus the low-cut ramp.
Then bar 34, drop back to pitch zero and low-cut back down. That return feels massive because your ear got used to the “sped up” tension.

Now, another coach detail that matters a lot once you start pitching: the Sampler start point.

When you transpose, tiny changes in start time—like 1 to 5 milliseconds—can massively change perceived punch. If your snare loses crack when pitched, don’t instantly reach for more compression. Go into Sampler and nudge the Start slightly later until the click and front edge come back. Then re-check whether you even need extra transient shaping.

Alright. Now we’re going to set up a “pressure bus” so the master doesn’t have to do all the work.

Group your drums, especially this pitched break rack and other drum layers, into a Drum Group.

On that Drum Group, insert Glue Compressor. Keep it gentle: Attack around 3 milliseconds, Release on Auto or around 0.3 seconds, Ratio 2 to 1. Set threshold so you’re only getting 1 to 2 dB of gain reduction on peaks. Makeup off, and level match manually.

After that, put a Saturator as a bus polish device. Soft Sine or Analog Clip both work. Drive 1 to 3 dB, Soft Clip on.

Then a Limiter, but only as a safety net. Ceiling at minus 1 dB, Gain at 0. You’re not trying to make it loud here. You’re just catching rogue spikes so your master limiter isn’t doing panic control.

Advanced stability trick: consider routing. If your true sub—like your kick and your sub-bass layer—is getting dragged into this pressure processing, you might want a separate Drum Sub Bus. Let the kick and sub stay cleaner and more direct, while the pitched break and tops hit the bus clipper. That routing decision can do more for mastering stability than another EQ band ever will.

Now, the master chain. Minimal and clean.

Optional EQ Eight first: gentle high-pass at 20 Hz, 12 dB per octave, just for infra cleanup. Maybe a tiny high shelf at 10 kHz, like half a dB to one dB, only if the mix needs it.

Optional Glue Compressor on the master: aim for half a dB to one dB of gain reduction max. If it’s doing more, it’s usually telling you the mix is unstable upstream.

Then Ableton Limiter at the end. Ceiling at minus 1 dB. Push gain until you hit your loudness target. Modern DnB often lives around minus 7 to minus 5 LUFS integrated, but don’t chase numbers if it destroys the groove. If your limiter is pumping during pitch lifts, do not just accept it. Fix it upstream: raise the low cut during lifts, reduce Boom, back off Clip Push, or tame harsh low mids.

Also, a “pressure meter” that isn’t LUFS: listen for whether your peaks still jump out of the body. If everything becomes a flat block, it won’t roll. DnB needs crest factor. It needs the front edge. If the break stops feeling fast, it’s usually because transients got rounded off. Sometimes the fix is less glue; sometimes it’s changing the order so it’s EQ first, then Drum Buss transient, then Saturator clip—because clipping too early can shave the attack before the transient shaper can help.

Let’s do a quick mini practice so you lock this in.

Build a 32-bar rolling loop. Load an Amen into the rack. Program a backbone beat, and layer the break quietly under it so it’s giving motion more than dominating.

Set Macro 1, pitch, to 0. Set Dirt Blend so it’s barely there, around minus 18 dB.

Then at bar 31 into 32, automate a lift:
Macro 1 ramps 0 to +5 semitones.
Macro 3 low cut ramps 30 Hz to 70 Hz.
Macro 5 Clip Push goes up just one to two dB.

At bar 33, drop everything back to normal.

Listen for two things. One: the drop feels bigger when pitch returns to zero. Two: your master limiter should not suddenly work twice as hard during the lift. If it does, that’s your cue to adjust low cut, low-mid EQ, or boom—not to just turn the whole drum track down.

Common mistakes to avoid while you’re building this:
Warping the break in audio with Beats or Complex and also pitching in Sampler—smears transients.
Pitching up with no low-cut automation—builds low mids and chokes the master.
Too much Redux—hats turn to sand and snares lose crack. Keep it parallel.
Over-compressing the drum group—kills the rolling bounce and makes the groove feel small.
And no gain staging—then saturation and clipping become random instead of musical.

Before we wrap, here’s an advanced variation to think about once the basic rack works: a pitch compensation macro.

As you pitch up, you can link subtle compensations so the break doesn’t get thin or harsh. For example, when transpose rises, add a tiny low shelf around 120 to 200 Hz, like half to one and a half dB, or slightly reduce an aggressive band around 3 to 6 kHz. And maybe increase Drum Buss Damp a touch as pitch rises. The goal is it feels like it’s speeding up, not like the low end vanished and the top took over.

Another big upgrade is a dual-chain rack: one chain for Body, band-limited and warm; another for Snap, high-passed and transient-forward. Then you get a Snap Blend macro. This lets you pitch aggressively while keeping that consistent crack.

Recap time.

You built a Sampler-based pitch rack that captures oldskool speed-up energy while staying master-friendly. You made macros for pitch, fine tune, low cut, grit, clip push, and dirt blend, so you can perform and automate the vibe. You added parallel Redux dirt for that jungle texture without sacrificing punch. And you set up a pressure bus using gentle glue, a touch of saturation, and safety limiting so the master limiter doesn’t have to do all the work.

If you tell me what you’re pitching—Amen, Think, a stab, a hoover—and what key your tune is in, I can suggest tighter macro ranges and exact EQ points for pitch compensation that suit that specific source.

mickeybeam

Go to drumbasscd.com for +100 drum and bass YouTube channels all in one place - tune in!

Generating PDF preview…