DNB COLLEGE

Drum & Bass Ableton Live 12 Tutorials

LESSON DETAIL

Pitch a reese patch with jungle swing in Ableton Live 12 (Beginner)

An AI-generated beginner Ableton lesson focused on Pitch a reese patch with jungle swing in Ableton Live 12 in the Vocals area of drum and bass production.

Back to lessons
Pitch a reese patch with jungle swing in Ableton Live 12 (Beginner) cover image

Narrated lesson audio

The voice track includes the tutorial plus extra teacher commentary.

Open audio file

Main tutorial

Pitch a Reese Patch with Jungle Swing in Ableton Live 12 🎛️🥁

1. Lesson overview

In this lesson, you’ll learn how to take a Reese bass patch and make it feel like it has jungle swing and pitch movement in Ableton Live 12.

This is a core Drum & Bass skill because a good Reese doesn’t just sound wide and heavy — it moves, breathes, and locks into the break. In jungle and DnB, pitch motion can make a bassline feel more aggressive, more alive, and more musical.

By the end, you’ll know how to:

  • build a simple Reese bass using stock Ableton devices
  • add pitch movement in a controlled way
  • make the bass groove with jungle-style swing
  • shape it so it works in a DnB mix
  • arrange it into a rolling 8- or 16-bar loop
  • ---

    2. What you will build

    You’ll create a 2-layer Reese bass with:

  • a detuned unison synth layer
  • a sub layer for weight
  • pitch automation on the Reese movement
  • swinged rhythm placement to give it that jungle bounce
  • basic filtering, saturation, and sidechain for mix clarity
  • This is ideal for:

  • rolling liquid / deep DnB
  • jungle-influenced rollers
  • dark halftime-to-fast switch-ups
  • old-school-inspired bassline movement 🕶️
  • ---

    3. Step-by-step walkthrough

    Step 1: Set your project up for DnB tempo

    1. Open Ableton Live 12

    2. Set the tempo to 170 BPM

    - For modern DnB, anywhere from 170–174 BPM works well.

    - For a more classic jungle feel, try 165–172 BPM.

    3. Set your grid to 1/16 for editing bass notes cleanly.

    4. Load a drum break or simple kick/snare loop so you can hear the bass against the groove.

    Tip: If you already have a breakbeat, leave it running while building the bass. Jungle swing is all about how the bass interacts with drums.

    ---

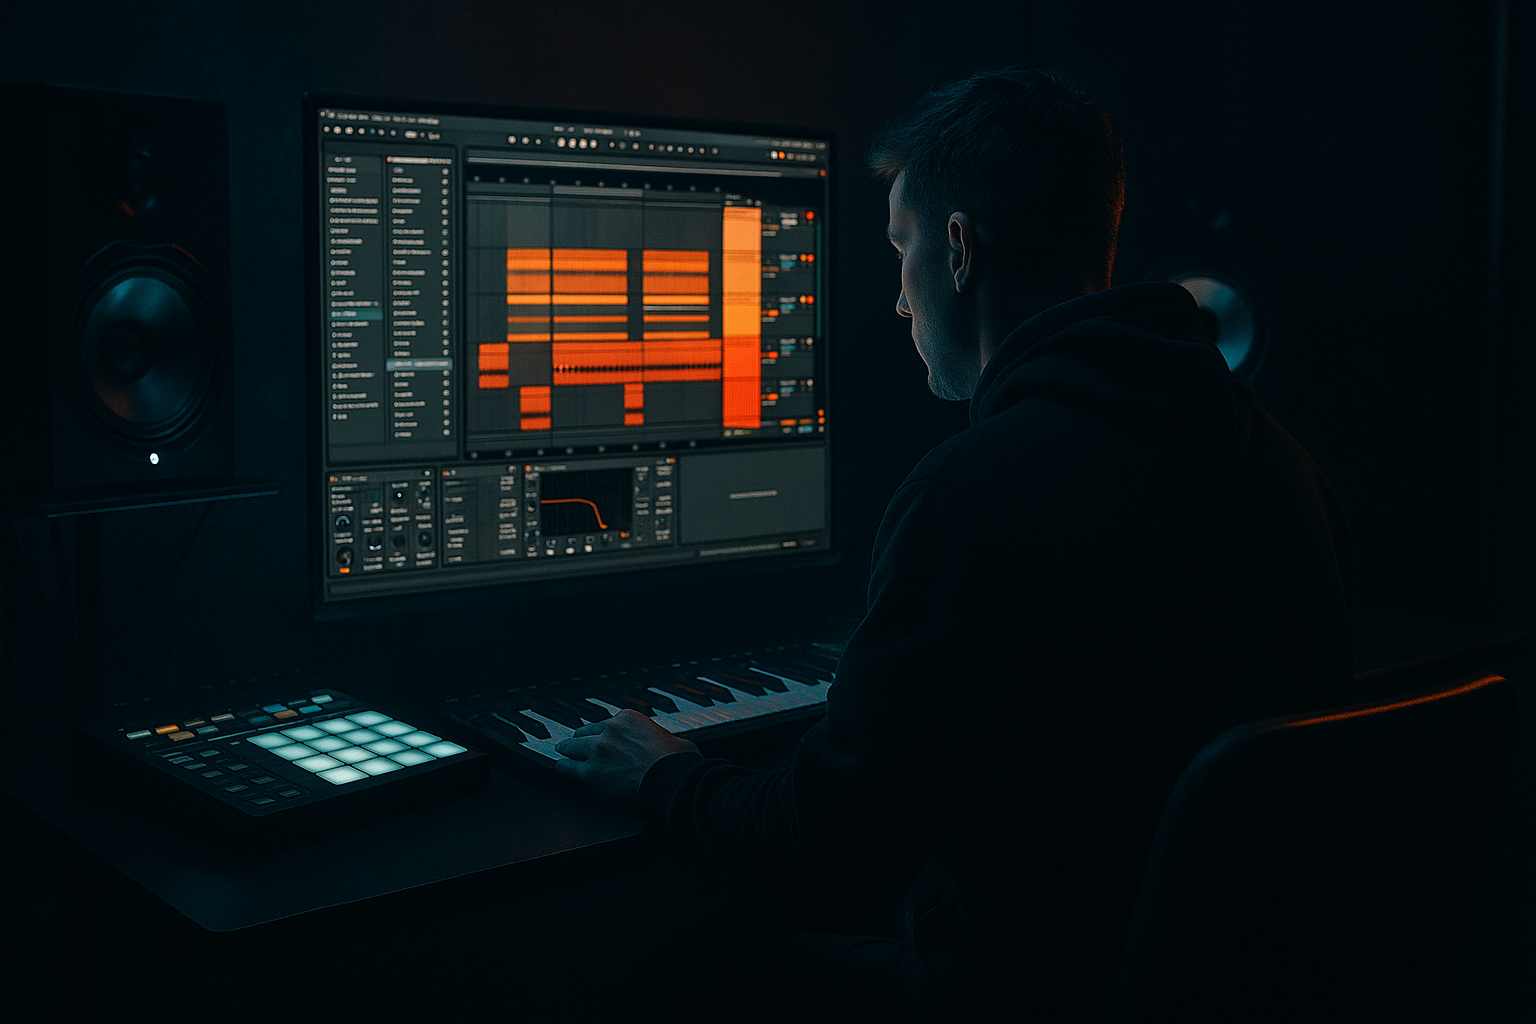
    Step 2: Build the Reese patch with stock Ableton devices

    You can build a Reese using Wavetable or Analog. Wavetable is great for beginners because it’s flexible and clear.

    Option A: Wavetable Reese

    1. Create a new MIDI track.

    2. Load Wavetable.

    3. Choose a basic waveform:

    - Oscillator 1: Saw

    - Oscillator 2: Saw

    4. Detune the oscillators slightly:

    - Osc 1: center

    - Osc 2: detune just a little, around +7 to +12 cents

    5. Set unison if needed:

    - Use 2–4 voices

    - Keep Spread moderate, not extreme

    6. Turn on a low-pass filter:

    - Filter type: LP24 if available

    - Start cutoff around 200–500 Hz

    - Add a touch of resonance if you want bite

    Add movement

    Insert these stock devices after Wavetable:

  • Saturator
  • - Drive: 2–6 dB

    - Turn on Soft Clip

  • Auto Filter
  • - Use a Low-Pass or Band-Pass

    - Map an LFO or automate the cutoff later

  • EQ Eight
  • - Cut unnecessary low-mids if muddy

    - High-pass the Reese layer carefully, but do not remove the sub from the separate sub layer

    Optional wider texture

    If you want the Reese to feel more classic and wide:

  • add Chorus-Ensemble
  • - keep it subtle

    - use a low amount of dry/wet, around 10–20%

  • or use Utility to control width
  • Important: Keep your sub separate. A Reese layer should usually handle mid-bass character, not sub weight.

    ---

    Step 3: Make a clean sub layer

    Create a second MIDI track for the sub.

    1. Load Operator or Analog

    2. Use a sine wave or very clean triangle-like tone

    3. Play the same notes as the Reese

    4. Keep it mono

    - Use Utility and set Width = 0% if needed

    5. Roll off any extra highs with EQ Eight

    Suggested sub chain

  • Operator
  • EQ Eight
  • Utility
  • Settings

  • Low-pass or simple sine
  • No unneeded effects
  • Volume lower than the Reese layer, but present enough to anchor the track
  • DnB rule: If the sub is messy, the whole bassline loses power.

    ---

    Step 4: Write a jungle-style bass phrase

    Now we’ll make the rhythm feel like it belongs in a jungle or rolling DnB track.

    Start simple

    In the MIDI editor, write a 1-bar or 2-bar loop.

    Use short notes with some space:

  • leave room for the kick and snare
  • avoid filling every 16th note at first
  • think in call and response
  • Example rhythmic shape

    Try something like:

  • note on beat 1
  • short note before beat 2
  • a syncopated hit after the snare
  • a longer note into the last 1/8 or 1/16
  • In jungle, the bass often works because it pushes and pulls against the break, not because it’s constant.

    Make it feel more “swung”

    You can create swing in a few ways:

    #### Method 1: Note placement

  • Move some notes slightly late
  • Keep others right on the grid
  • This gives a human, rolling feel
  • #### Method 2: Groove Pool

  • Drag a swing groove into the Groove Pool
  • Try a light swing amount
  • Apply it subtly to the bass MIDI clip
  • #### Method 3: Note length variation

  • Shorten some notes
  • Extend others
  • This creates a bouncy, musical phrasing
  • Best beginner approach: Start with manual note movement before using heavy groove settings.

    ---

    Step 5: Add pitch movement to the Reese

    This is the core of the lesson: making the Reese feel like it has pitch swing and motion.

    Method A: Use MIDI pitch automation in the clip

    1. Open the MIDI clip.

    2. Add bass notes in your main phrase.

    3. Use pitch bends if your instrument supports it, or automate device parameters if not.

    4. If using Wavetable/Operator, assign a macro or map a pitch-related control.

    Method B: Create pitch slides with overlapping notes

    For a more jungle-style effect:

    1. Write two notes close together

    2. Overlap them slightly

    3. If the synth supports glide/portamento, enable it

    4. Set glide time short, around 30–80 ms

    This makes the bass sound like it’s “leaning” into the next note.

    In Wavetable:

  • Turn on Glide/Portamento
  • Keep it subtle
  • Use short note overlaps to trigger the slide effect
  • DnB-friendly pitch movement ideas

  • small pitch rise before the snare hit
  • quick downward drop at the end of a phrase
  • 2-note answer phrase with a pitch bend up on the second note
  • automated filter + pitch combo for tension buildup
  • A practical move

    Create an 8-bar loop and automate:

  • bars 1–2: stable bass
  • bars 3–4: slightly more pitch motion
  • bars 5–6: more aggressive pitch rise
  • bars 7–8: a small fill or drop before the loop resets
  • This helps the bass feel like it’s evolving instead of repeating flatly.

    ---

    Step 6: Make the bass groove with the break

    A jungle swing bassline works best when it leaves room for the drums.

    Check these rhythm relationships:

  • Don’t let the bass constantly fight the snare on 2 and 4
  • Use bass hits that support the kick pattern
  • Place some notes just after the drum hits for a laid-back push
  • Leave holes for chopped break energy
  • Good DnB approach

  • Let the bass answer the break
  • Use off-beat stabs
  • Keep some notes shorter than you think
  • Let one note sustain into the next bar occasionally for tension
  • Try this workflow

    1. Loop 2 bars of drums

    2. Place a bass note every few hits

    3. Listen for clashes with snare accents

    4. Shift notes until the groove feels locked

    If the bass feels rigid, it usually needs:

  • more note length variation
  • a little swing
  • fewer notes, not more
  • ---

    Step 7: Shape the sound with a practical device chain

    Here’s a simple, effective stock Ableton chain for the Reese layer:

    Reese chain

    1. Wavetable

    2. Saturator

    3. Auto Filter

    4. EQ Eight

    5. Compressor or Glue Compressor

    6. Utility

    Suggested settings

  • Saturator
  • - Drive: 3–6 dB

    - Soft Clip on

  • Auto Filter
  • - Low-pass cutoff automated or moved by clip envelope

  • EQ Eight
  • - Cut muddy low-mids around 200–400 Hz if needed

    - Remove harshness around 2–5 kHz if it gets buzzy

  • Compressor
  • - Light control only

    - Avoid crushing the bass too much

  • Utility
  • - Use to check mono compatibility and width

    Sidechain

    For DnB, sidechain the bass to the kick if needed:

  • Use Compressor on the bass
  • Sidechain input from the kick
  • Use a fast attack and medium release
  • Keep it subtle if you want the bass to stay heavy
  • ---

    Step 8: Arrange it like a real DnB loop

    A loop is not enough — you want it to feel like the start of a track.

    Basic 16-bar arrangement idea

  • Bars 1–4: stripped-back groove, only foundational bass movement
  • Bars 5–8: add pitch bends and extra syncopation
  • Bars 9–12: introduce a higher Reese layer or filter opening
  • Bars 13–16: fill, stop, or reverse-style tension before the drop repeats
  • Arrangement trick

    Duplicate your loop and make small changes every 4 bars:

  • one extra note
  • one pitch rise
  • one filter open
  • one rest before the restart
  • That’s how you avoid a loop that sounds too static.

    ---

    4. Common mistakes

    1. Making the Reese too wide

    A super-wide bass can sound impressive soloed but weak in a mix.

  • Keep the sub mono
  • Check the bass in mono regularly
  • 2. Using too much pitch movement

    A little glide is powerful. Too much makes it sound messy or off-key.

  • Keep pitch motion controlled
  • Use short slides for impact
  • 3. Filling every space

    Jungle groove needs breathing room.

  • Leave gaps for drums
  • Don’t overprogram the bassline
  • 4. Letting sub and Reese clash

    If both layers cover the same frequency area, the low end gets cloudy.

  • Separate the layers
  • EQ them carefully
  • 5. Too much distortion

    A bit of grit is great. Too much kills clarity.

  • Use saturation in stages
  • Compare with bypass often
  • ---

    5. Pro tips for darker/heavier DnB 🔥

    Tip 1: Tune the Reese to the track

    A Reese sounds heavier when it’s in key.

  • Build around the root note of your track
  • Use minor keys for darker vibes
  • Tip 2: Automate the filter, not just volume

    For dark DnB, movement comes from tone as much as level.

  • open the filter slightly during fills
  • close it for tension before drops
  • Tip 3: Layer a noisy top with intention

    Add a very quiet layer of:

  • Operator noise
  • a filtered sample
  • a metallic texture
  • This helps the bass cut through on smaller speakers.

    Tip 4: Use pitch drops for impact

    At the end of a phrase:

  • automate a quick pitch dip
  • or use a short note that falls downward
  • This is especially effective before a snare fill.

    Tip 5: Resample your bass

    Once you have a good loop:

    1. Record or bounce it to audio

    2. Chop the best hits

    3. Re-arrange them into new rhythmic patterns

    This is very jungle-friendly and often sounds more organic than MIDI alone.

    ---

    6. Mini practice exercise

    Goal

    Make a 2-bar Reese bassline with pitch movement and swing.

    Exercise steps

    1. Set tempo to 172 BPM

    2. Create:

    - one Reese synth track

    - one sub track

    3. Write a 2-bar MIDI phrase

    4. Add at least:

    - 4 short notes

    - 1 slide or overlapping note

    - 1 note that lands slightly off-grid for swing

    5. Apply:

    - Saturator

    - Auto Filter

    - EQ Eight

    - Utility on the sub

    6. Loop it with a drum break and listen

    Challenge version

    Make 3 variations:

  • Version A: clean and sparse
  • Version B: more pitch movement
  • Version C: darker and more distorted
  • Then compare which one grooves best with the break.

    ---

    7. Recap

    You now know how to build a jungle-swing Reese bass in Ableton Live 12 using stock devices and practical DnB workflow.

    Key takeaways:

  • build the Reese from saws or a similar detuned source
  • keep the sub separate and mono
  • use short notes, overlap, and glide for pitch movement
  • place notes with swing and space so the break can breathe
  • use saturation, EQ, and filtering to shape the tone
  • arrange in 4- or 8-bar sections for real track energy
  • If you want, I can also turn this into:

  • a beginner Ableton project template
  • a MIDI pattern example
  • or a follow-up lesson on resampling the Reese into jungle chops 🎚️

Ask GPT about this lesson

Chat with the lesson tutor, get follow-up help, or use quick actions.

Bigup 👽 Ask me anything about this lesson and I’ll answer in context.

Narration script

Show spoken script
Welcome to this beginner lesson on pitching a Reese patch with jungle swing in Ableton Live 12.

In this one, we’re building a bass that does more than just sit there and sound heavy. We want it to move, breathe, and lock into the drums like it belongs in a real drum and bass or jungle track. That means a solid Reese tone, some controlled pitch motion, and rhythm placement that feels loose, but still tight in the groove.

The big idea here is simple: a good Reese is not only about width and weight. It’s about motion. The bass should feel like it’s talking to the breakbeat. Sometimes it answers the snare. Sometimes it pushes ahead of the beat. Sometimes it leans into the next note with a little glide. That’s the vibe we’re after.

First, set your project up for DnB tempo. I’d start around 170 BPM. If you want a slightly more classic jungle feel, you can stay anywhere from 165 to 172. Set your grid to 1/16 so your note editing stays clean. And if you have a drum break or even just a kick and snare loop, keep that playing while you build. That’s important, because jungle swing is all about the relationship between the bass and the drums.

Now let’s build the Reese patch using stock Ableton devices. For beginners, Wavetable is a great choice because it’s flexible and easy to understand.

Create a new MIDI track and load Wavetable. Start with two saw waves. Saw waves are a classic foundation for Reese bass because they have that rich, buzzy character once they’re detuned and processed. Keep one oscillator centered, and detune the second just a little, maybe around plus 7 to plus 12 cents. You do not want wild detuning here. Just enough to create movement and thickness.

If you want, add a little unison, maybe two to four voices, but keep the spread moderate. Too much spread can make the bass sound huge in solo, but weak or messy in a full mix. Then turn on a low-pass filter. Start with the cutoff somewhere around 200 to 500 Hz, and add just a touch of resonance if you want more bite.

Next, add some processing after Wavetable. A Saturator is a great first step. Set the drive around 2 to 6 dB and turn on Soft Clip. That gives the bass some grit and helps it cut through without getting too harsh. After that, use Auto Filter. You can use this later for movement, or just to help shape the tone. Then add EQ Eight so you can clean up any muddy low mids or harsh upper mids if needed.

One important thing here: keep the sub separate. The Reese should handle the mid-bass character, but the sub should live on its own track. That separation makes the low end much easier to control.

So now create a second MIDI track for the sub. Load Operator or Analog and use a sine wave, or something very close to it. Make sure it stays mono. If needed, use Utility and set the width to 0 percent. Keep the sub clean, simple, and focused. Use EQ Eight to roll off any extra highs. No fancy effects on the sub. The goal is just to anchor the track and give it weight.

A good beginner rule in DnB is this: if the sub is messy, the whole bassline feels weak. So keep it clean.

Now we can start writing the bass phrase. Think in phrases, not just loops. A lot of beginners fill every space, but in jungle and drum and bass, the groove needs breathing room. Start with a one-bar or two-bar MIDI pattern and keep it fairly simple. Use short notes, leave gaps, and let the bass interact with the drums instead of fighting them.

Try a shape like this: a note on beat one, a short note before beat two, a syncopated hit after the snare, and maybe a longer note that carries into the last part of the bar. That kind of call-and-response feel works really well. The bassline should feel like it’s answering the break, not just running over it.

To get that jungle swing, there are a few ways to approach timing. The simplest one is manual note placement. Move some notes a little late, keep others on the grid, and let the pattern breathe. Even tiny timing changes can make a huge difference. You can also use the Groove Pool if you want a subtle swing feel, but for beginners, I’d recommend starting with manual editing first so you can hear exactly what’s happening.

Another way to create movement is by varying note length. Some notes should be short and punchy. Others can sustain a little longer. That contrast gives the line a more natural bounce.

Now for the key part of the lesson: pitch movement. This is what makes the Reese feel alive.

One simple method is to use overlapping notes. Write two notes close together, slightly overlap them, and if your synth supports glide or portamento, turn that on. Keep the glide time short, maybe around 30 to 80 milliseconds. That way the bass slides into the next note instead of jumping there abruptly.

In Wavetable, enable glide and keep it subtle. Don’t overdo it. The goal is not to make the bass wobble constantly. The goal is to give it a little lean, a little push, a little tension.

You can also use pitch bends or automate pitch-related controls if you want more direct movement. A small pitch rise before the snare can create excitement. A quick downward drop at the end of a phrase can make the line feel more dramatic. A short slide into a note can make the bass feel more human and more jungle-inspired.

A really practical way to think about this is in 8-bar sections. For example, keep bars one and two stable. Add a little more pitch movement in bars three and four. Make it more active in bars five and six. Then use bars seven and eight for a small fill or drop before the loop resets. That way the bassline evolves instead of repeating in a flat way.

Now let’s make sure the bass grooves with the break. This is where the magic happens.

Check the bass against the snare first. If the line feels good with just kick and snare, it’ll usually hold up when the full break is playing. Don’t let the bass constantly clash with the snare on two and four. Leave space for the drums to breathe. Put some notes just after drum hits to create a laid-back push. Let one note sustain into the next bar if you want tension, but don’t overcrowd the rhythm.

If the line feels stiff, the first thing to try is not adding more notes. Usually, the better fix is fewer notes, more space, and a little more swing.

Now let’s shape the sound with a solid Ableton chain. For the Reese layer, a simple chain could be Wavetable, then Saturator, Auto Filter, EQ Eight, Compressor or Glue Compressor, and finally Utility. Use Saturator for warmth and edge, Auto Filter for movement, EQ Eight to clean up the tone, and Compressor lightly if you need a bit of control. Utility is great for checking width and mono compatibility.

If you’re using sidechain compression, keep it subtle. You want the kick to have room, but you do not want the bass to disappear. A fast attack and medium release is a good starting point. Just enough ducking to create space.

At this point, it’s a good idea to A/B your bassline with and without movement. Make one version that’s almost static, and another with more slides, more swing, or more filter motion. Then compare them. A lot of the time, the version that sounds best is the one that leaves more room for the drums.

For arrangement, think beyond a loop. Even a small 16-bar section can feel like a real track if you vary it every four bars. Start stripped back in bars one to four. Add more pitch movement in bars five to eight. Open the filter a little in bars nine to twelve. Then use bars thirteen to sixteen for a fill, stop, or tension move before the loop comes back in.

Little changes matter. One extra note, one rest, one filter open, one pitch drop. Those small moves keep the listener engaged.

A few common mistakes to watch out for: making the Reese too wide, using too much pitch movement, filling every empty space, letting the sub and Reese fight in the same frequency area, and overdoing distortion. A bit of grit is good. Too much and you lose clarity fast.

If you want to push the sound a little further, tune the Reese to your track key. Minor keys often work great for darker DnB vibes. Automate the filter, not just the volume. Add a quiet noisy top layer if needed, maybe a filtered noise texture or metallic layer, just enough to help the bass cut through on smaller speakers. And when you get a good loop, resample it. Recording the bass to audio, then chopping and rearranging the pieces, is a classic jungle move and can lead to way more interesting results than MIDI alone.

Here’s a quick practice exercise to finish. Set your tempo to 172 BPM. Build one Reese track and one sub track. Write a two-bar phrase with at least four notes, one off-grid note, and one slide or overlap. Add Saturator, Auto Filter, EQ Eight, and Utility on the sub. Then loop it with a drum break and listen carefully to how it grooves.

If you want to challenge yourself, make three versions: one clean and sparse, one with more pitch movement, and one darker and more distorted. Then compare which one leaves the most space for the drums, which one feels biggest in mono, and which one feels most like jungle.

So that’s the core idea: build a detuned Reese, keep the sub clean and mono, use short notes and controlled glide for pitch movement, and place your rhythm with enough swing to let the break breathe. Do that, and you’re already making basslines that feel much more alive.

If you want, I can turn this into a timed voiceover script with pauses and section cues, or a shorter version for a 3 to 5 minute lesson.

mickeybeam

Go to drumbasscd.com for +100 drum and bass YouTube channels all in one place - tune in!

Generating PDF preview…