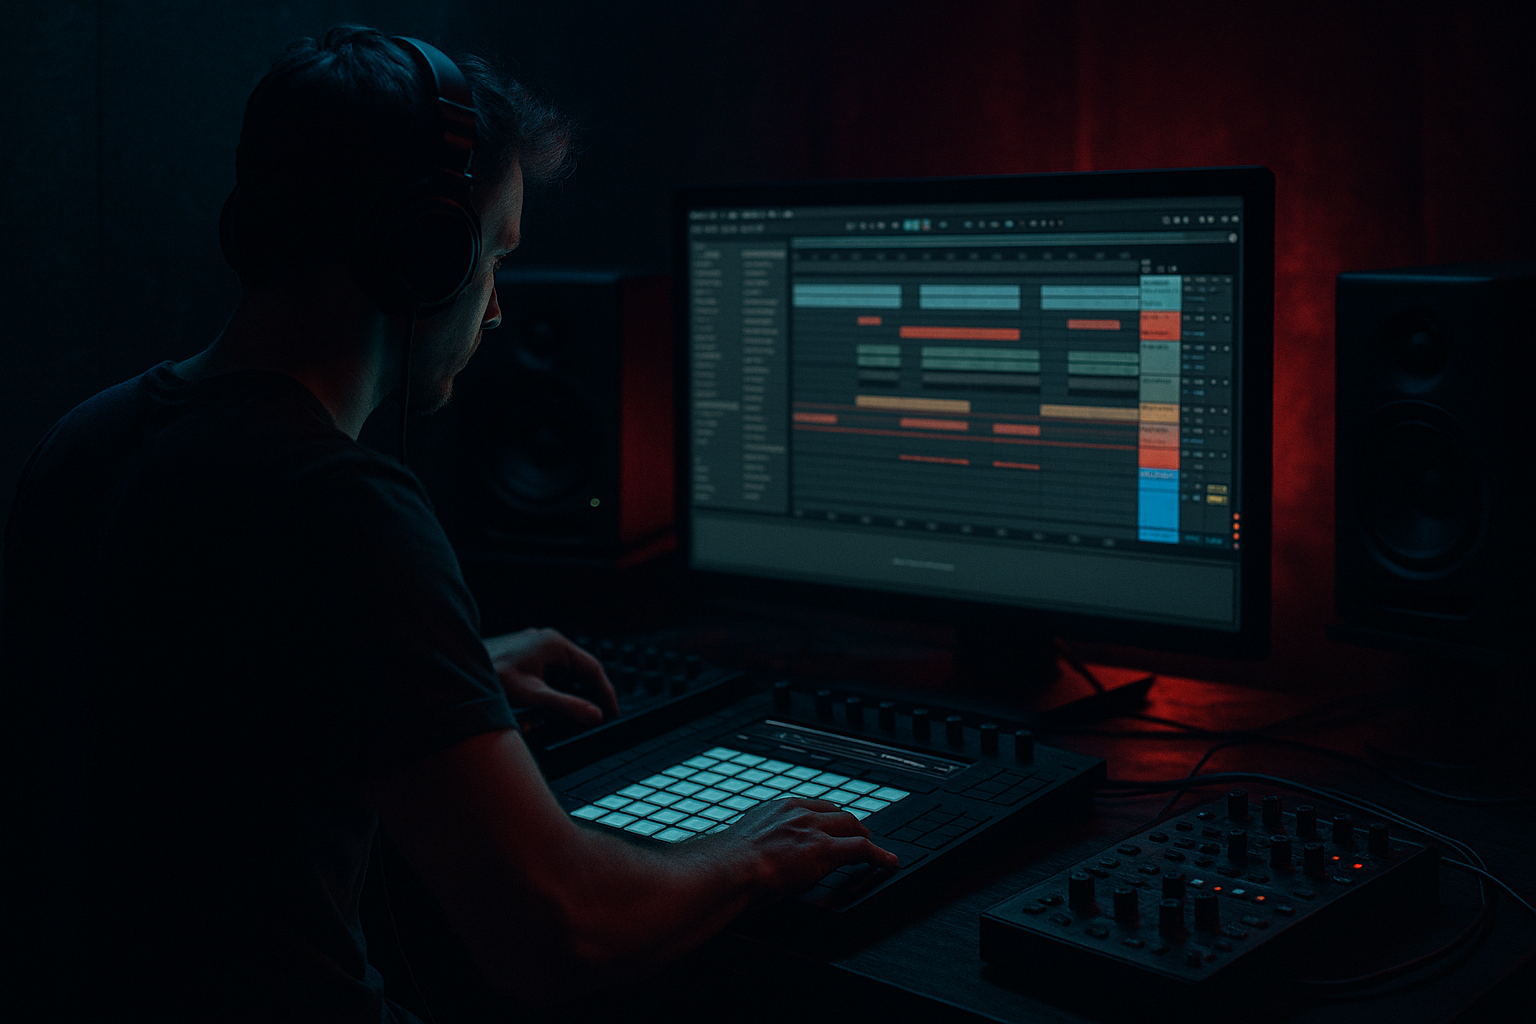
DNB COLLEGE

Drum & Bass Ableton Live 12 Tutorials

LESSON DETAIL

Oldskool rewind moment flip deep dive for smoky warehouse vibes in Ableton Live 12 (Beginner)

An AI-generated beginner Ableton lesson focused on Oldskool rewind moment flip deep dive for smoky warehouse vibes in Ableton Live 12 in the Risers area of drum and bass production.

Back to lessons
Oldskool rewind moment flip deep dive for smoky warehouse vibes in Ableton Live 12 (Beginner) cover image

Narrated lesson audio

The voice track includes the tutorial plus extra teacher commentary.

Open audio file

Main tutorial

Oldskool Rewind Moment Flip (Deep Dive) — Smoky Warehouse Vibes in Ableton Live 12

Category: Risers | Skill level: Beginner | DnB/Jungle-focused

---

1. Lesson overview

In oldskool jungle/DnB, a rewind moment (sometimes called a “pull-up”) is that iconic DJ/MC energy shift: the track hits a peak, then slams into a reverse/stop effect, and the drop re-enters with extra weight. In modern production, we can flip that vibe into a riser + tension tool that feels authentic in a smoky warehouse setting. 🔥

In this lesson you’ll build a rewind flip that works in an arrangement (not just as a one-off effect) using Ableton Live 12 stock devices and a clean, beginner-friendly workflow.

---

2. What you will build

You’ll create a 4-bar “rewind flip” riser moment leading into a drop:

  • Bar -4 to -2: tension builds (noise + pitch + reverb swell)
  • Bar -2 to -1: a tape-stop + reverse suck like a DJ pulling it back
  • Last beat before drop: a sub dip + air vacuum moment (silence/space)
  • Drop: your drums and bass come back harder, with a short “impact” accent
  • You’ll end with a reusable Rewind Riser Rack you can drag into future DnB projects. ✅

    ---

    3. Step-by-step walkthrough

    A) Set the scene (tempo + layout)

    1. Set tempo to 170–174 BPM.

    2. In Arrangement View, locate your drop (where the full drums + bass hit).

    3. Create a 4-bar pre-drop section right before it (this is where the rewind flip lives).

    DnB arrangement tip:

    A classic move is 16 bars groove → 4 bars tension → drop.

    ---

    B) Build the “warehouse air” riser (Noise + Filter + Reverb)

    We’ll make a gritty, smoky air-rise that feels like fog and metal beams.

    #### 1) Create a new MIDI track: “Air Riser”

  • Drop in Wavetable (stock) or Operator (stock).
  • We’ll use noise as the main source.
  • Option 1: Operator (super simple)

  • Operator → click Noise (instead of Osc A)
  • Turn Filter ON
  • Filter type: LP24
  • Freq start: ~300 Hz, end: 10 kHz (we’ll automate)
  • #### 2) Add this device chain (in order)

    1. Auto Filter

    - Type: Band-Pass (BP) or Low-Pass (LP) (BP is more “telephone/warehouse”)

    - Resonance: 20–35%

    2. Echo

    - Time: 1/8 or 1/4 (try 1/8 for rolling energy)

    - Feedback: 20–35%

    - Filter inside Echo: HP around 300 Hz, LP around 7–9 kHz

    3. Hybrid Reverb

    - Algorithm: Hall or Warehouse/Room-like IR if you have one

    - Decay: 4–8s

    - Mix: 20–35% (we’ll automate higher near the end)

    4. Saturator

    - Drive: 2–6 dB

    - Soft Clip: ON

    5. Utility

    - Use for gain control + automation tricks

    #### 3) Draw a MIDI note

  • Put a single note for the whole 4 bars (any pitch, doesn’t matter much for noise).
  • #### 4) Automate the rise 🎚️

    In Arrangement automation lanes:

  • Auto Filter Frequency:
  • - Start: ~300 Hz

    - End: 10–14 kHz over 4 bars

  • Hybrid Reverb Mix:
  • - Start: 15–20%

    - End: 45–60% in the last bar (big “fog bloom”)

  • Utility Gain:
  • - Gently ramp up +2 to +4 dB (watch headroom)

    This creates the “smoky air” lift that reads as warehouse tension.

    ---

    C) The rewind flip core: Tape-stop + reverse “suck back”

    Now we build the actual rewind moment that makes people pull a face 😤

    #### 1) Choose what gets rewound

    Beginner-friendly choice: rewind the full mix EXCEPT sub, or rewind a Drum Bus group.

    Best practice for DnB:

  • Rewind drums + tops + music, but keep sub controlled (or mute it cleanly), so it doesn’t smear.
  • #### 2) Make a “Rewind Print” audio track (clean workflow)

    1. Create a new audio track: “REWIND PRINT”

    2. Set its input to Resampling (top of I/O section).

    3. Arm the track and record 2 bars right before the drop (the part you want to “pull up”).

    4. You’ll now have an audio clip that represents your mix moment.

    This is the easiest way to get reliable rewind behavior without complex routing.

    #### 3) Create the rewind effect using clip reverse + pitch automation

    1. Duplicate that recorded clip (Cmd/Ctrl + D).

    2. On the duplicate clip:

    - Enable Reverse (in Clip View).

    - Warp Mode: Complex Pro (more “tape-y”), or Beats for more chopped artifacts.

    Now make it feel like a DJ pull:

  • Turn Warp ON
  • Use Clip Transposition automation:
  • - Over 1 bar, automate Transpose from 0 → -12 (or -24 for dramatic)

  • Add a quick volume dip at the end (last 1/8 note) so it “drops out” before the drop hits.
  • #### 4) Add the “brake” with Shifter (stock) or Delay tricks

    Add Shifter after the clip (audio effects on “REWIND PRINT” track):

  • Mode: Pitch
  • Fine: -10 to -30 cents (subtle wobble)
  • Drive (if available): light
  • Mix: 20–40%
  • Then add Auto Filter after Shifter:

  • Set to HP (high-pass)
  • Automate cutoff up in the last half-bar to “thin out” into the silence.
  • This makes the rewind feel like it’s being yanked back through a system.

    ---

    D) Add the “vacuum moment” (the inhale before the slam)

    The oldskool vibe is often about space—one beat where everything disappears.

    1. On the master (or a group bus), place Utility (if not already).

    2. Automate Gain down hard right before the drop:

    - Last 1/8 or 1/4 note before drop: dip -inf to -12 dB quickly

    - Snap back to 0 exactly on the drop

    Optional: add Reverb Tail Only

  • Create a Return track with Hybrid Reverb 100% wet, long decay.
  • Automate a quick send “throw” right before the dip.
  • The dry disappears but the tail hangs like smoke. 🌫️
  • ---

    E) Make the drop hit harder (impact + drum re-entry)

    A rewind moment only works if the re-entry is confident.

    #### 1) Add a short impact layer

    Create an audio track: “Impact”

  • Use a short kick impact, vinyl hit, or metal slam (DnB-friendly).
  • Place it exactly on the drop.
  • Processing chain:

  • EQ Eight: cut mud around 200–400 Hz if needed
  • Saturator: +2–5 dB
  • Limiter: to keep it controlled
  • #### 2) Tighten the first bar of drums

    In your main drums group:

  • Consider muting some hats in the first half bar so the drop feels cleaner.
  • Or do the opposite: add a quick ride/hat burst for energy.
  • #### 3) Sub management (important)

    If your rewind affected low-end:

  • Keep sub muted for the rewind and reintroduce it cleanly on the drop.
  • Or automate a high-pass on the bass group during the rewind section.
  • Ableton stock: Auto Filter on the Bass group

  • HP at 80–120 Hz during rewind moment → back to normal at drop.
  • ---

    F) Arrangement blueprint (very DnB-friendly)

    Try this structure:

  • Bars 1–16: rolling groove (drums + bass + minimal tops)
  • Bars 17–20: rewind flip section
  • - 17–18: air riser grows

    - 19: reverse/rewind pull

    - last beat: vacuum dip

  • Bar 21: drop slams back with impact + full bass
  • If you want it more “oldskool rave,” add a vocal stab (e.g., “REWIND!”) right before the pull. 🎙️

    ---

    4. Common mistakes

    1. Rewinding the sub

    Makes the mix wobble and kills impact. Keep lows clean or muted.

    2. Too much reverb into the drop

    A massive tail can blur your transient punch. Use a reverb throw then a dip.

    3. Rewind timing feels late

    The pull should resolve exactly on the grid. Make the final silence land right before the drop.

    4. Overly bright riser

    “Smoky warehouse” means controlled highs. Don’t let 12–16 kHz dominate—shape it.

    5. No payoff

    If the drop doesn’t change (extra crash, impact, bass fullness), the rewind feels pointless.

    ---

    5. Pro tips for darker/heavier DnB

  • Add grit in the mids (300 Hz–3 kHz)
  • Use Roar (if available in your Live 12 suite) or Saturator to give the rewind texture that feels industrial.

  • Use subtle vinyl/noise bed under the whole section
  • A quiet noise layer makes the rewind feel like it’s happening on a real system.

  • Sidechain the riser to the kick
  • Put Compressor on the Air Riser, sidechain from kick:

    - Ratio: 4:1

    - Attack: 3–10 ms

    - Release: 80–150 ms

    That “breathing” is very warehouse.

  • Make the rewind narrower, drop wider
  • On the rewind track, add Utility → Width 60–80%

    On the drop, bring full width back. Contrast = impact.

  • Use a tiny pitch-down on the master just before drop (careful!)
  • Very subtle: automate Shifter on a pre-drop FX bus only, not the full master, to avoid ruining your whole mix.

    ---

    6. Mini practice exercise (10–15 minutes)

    1. Take a drum loop + bass loop at 172 BPM.

    2. Create a 4-bar pre-drop section.

    3. Build:

    - Air Riser (Noise → Auto Filter → Echo → Hybrid Reverb)

    - Rewind Print (Resample 2 bars → reverse clip → transpose down)

    - Vacuum dip (Utility automation)

    4. Export two versions:

    - Version A: rewind affects drums only

    - Version B: rewind affects full mix (minus sub)

    5. Compare: which one hits harder on the drop?

    ---

    7. Recap

  • You built a DnB-friendly rewind flip that acts like a riser + tension reset.
  • You used stock Ableton Live 12 devices: Auto Filter, Echo, Hybrid Reverb, Saturator, Utility (plus optional Shifter/Roar).
  • You kept the vibe oldskool + warehouse by emphasizing space, controlled highs, gritty mids, and a clean sub re-entry.
  • You printed audio (Resampling) for reliable, repeatable rewind behavior.

If you want, tell me the vibe you’re aiming for (early jungle, 2000s rollers, or modern foggy minimal DnB) and I’ll suggest a matching rewind timing (1 bar vs 2 bar), filter curve, and drop-impact recipe.

Ask GPT about this lesson

Chat with the lesson tutor, get follow-up help, or use quick actions.

Bigup 👽 Ask me anything about this lesson and I’ll answer in context.

Narration script

Show spoken script
Title: Oldskool rewind moment flip deep dive for smoky warehouse vibes in Ableton Live 12, beginner lesson

Alright, let’s build one of the most iconic bits of jungle and drum and bass culture… the rewind. Sometimes people call it a pull-up. That moment where the energy peaks, the DJ yanks it back, the room reacts… and then the drop lands even heavier.

But we’re not just doing it as a gimmick. We’re flipping that concept into a modern, usable riser-and-tension tool that lives inside your arrangement and feels like a real smoky warehouse system.

By the end, you’ll have a four-bar pre-drop sequence that goes:
tension building… pull back… tiny vacuum gap… and then the drop slams in with extra weight.
And you’ll do it with stock Ableton Live 12 devices, in a super repeatable workflow.

First, set the scene.

Set your tempo anywhere from 170 to 174 BPM. I’m going to think 172 in my head, because that’s a comfy DnB pocket.

Go to Arrangement View, find your drop, the point where your full drums and bass hit. Now create a four-bar section right before that. That’s our rewind flip zone.

Quick coach tip: a classic DnB move is 16 bars of groove, then 4 bars of tension, then the drop. So if your loop is rolling already, just carve out those four bars as your “moment.”

Now we’re going to build two main pieces:
one, the warehouse air riser, the fog.
two, the rewind itself, printed to audio so it behaves every time.

Let’s start with the air riser: gritty, smoky, industrial air.

Create a new MIDI track and name it Air Riser.

Drop in Operator. Super beginner friendly. In Operator, switch your sound source to Noise. You’re basically making controlled “air,” like the room breathing.

Turn the filter on in Operator, set it to a low-pass 24 dB slope, LP24. Don’t worry about the exact frequency yet, we’re going to automate the motion with effects too.

Now, add this device chain after Operator, in this order.

First, Auto Filter. Set it to band-pass if you want that warehouse, telephone-through-a-PA vibe. Low-pass is fine too, but band-pass really nails that “metal beams and fog” feeling. Put the resonance somewhere around 20 to 35 percent. Not whistling, just focused.

Next, Echo. Set the time to one-eighth for rolling energy, or one-quarter if you want it slower and more dramatic. Feedback around 20 to 35 percent. Inside Echo, use its filters: high-pass around 300 Hz so it doesn’t get boomy, and low-pass around 7 to 9 kHz to keep it dark. Remember: smoky warehouse is controlled highs. We’re not doing shiny EDM air.

Next, Hybrid Reverb. Pick Hall, or a room or warehouse-ish impulse if you have one. Decay around 4 to 8 seconds. Mix around 20 to 35 percent for now.

Then Saturator. Drive around 2 to 6 dB, and turn Soft Clip on. This is how you get that gritty, “it’s hitting the system” feeling without it getting painfully loud.

Then Utility at the end. This is your control knob for gain and little automation tricks.

Now draw one MIDI note that lasts the full four bars. Any pitch is fine because it’s noise-based, but keep it in a mid range just out of habit.

Now let’s automate the rise.

On Auto Filter, automate the frequency so it opens over those four bars. Start around 300 Hz, end up around 10 to 14 kHz. If it starts sounding too hissy near the end, you can stop closer to 10k. Dark is good.

On Hybrid Reverb, automate the mix. Start maybe 15 to 20 percent, and in the last bar ramp it up to around 45 to 60 percent. That last bar is where the fog blooms.

On Utility, automate gain up gently, like plus 2 to plus 4 dB over the four bars. And quick gain-staging checkpoint: keep an eye on your master. Try to keep peaks roughly around minus 6 dB while you build this. Reverb and saturation sneak up on you, and we want the drop to feel bigger, not the pre-drop.

Optional but very warehouse: add Auto Pan after Saturator, super slow, like 0.1 to 0.3 Hz. Barely moving. It makes the air drift like smoke.

Cool. That’s the tension bed.

Now the main event: the rewind flip core.

Here’s the big beginner-friendly trick: we’re going to print audio using Resampling. This avoids routing headaches and it makes the rewind feel consistent and “DJ-like.”

Decide your rewind target. Less is more.
Best practice for DnB: rewind the drums, tops, and music… but keep the sub and sometimes even the kick clean. If you reverse the sub, the whole moment can feel like the PA is falling over instead of a controlled pull-up.

So, create a new audio track and name it REWIND PRINT.

In the I/O section, set its input to Resampling. Arm the track for recording.

Now, right before the drop, record about two bars of your mix, or two bars of the group you want to rewind. If you want to be extra clean, you can temporarily mute your sub group while you record the print. That gives you a rewind that has hype without low-end smear.

Record it, then stop. Now you’ve got an audio clip that is literally your track captured as a moment. That’s the material we’re going to “pull up.”

Duplicate that printed clip so you have a safety copy. On the duplicate, turn on Reverse in Clip View.

Set Warp on. For warp mode, Complex Pro will usually feel more tape-like and smeary in a good way. Beats mode can sound more chopped and artifact-y. Both can be cool, but for “oldskool rewind,” Complex Pro tends to feel more physical.

Now let’s sell the DJ pull with pitch.

We’re going to automate clip transposition. Over one bar, automate Transpose from 0 down to minus 12 semitones. Want it more dramatic? Go to minus 24. That’s the “everyone in the room pulls a face” setting.

Then do one more crucial thing: right at the very end of the reverse clip, add a quick volume dip so it drops into space. You can do this with clip gain automation or track volume automation. Aim for the last one-eighth note, or last quarter note, depending on how dramatic you want the inhale to be.

Teacher tip: zoom in and make sure the end of your rewind lands exactly where you want it on the grid. The illusion is energy… pull… tiny gap… and the drop hits dead-on. If the reverse ends late, it doesn’t feel like a rewind, it feels like an edit mistake.

Also add tiny fades on the audio clip, especially at the end, so you don’t get clicks. The vacuum moment should feel intentional and clean.

Now let’s add a little “brake texture” so it feels like a deck is physically slowing.

On the REWIND PRINT track, after the clip, add Shifter. Set it to Pitch mode. Add just a tiny fine detune, like minus 10 to minus 30 cents, and keep the mix around 20 to 40 percent. You’re not trying to re-pitch the whole thing, you’re adding instability, like the platter is being touched.

After Shifter, add Auto Filter set to high-pass. Then automate the cutoff up during the last half-bar of the rewind so the audio thins out into the gap. That thinning is what makes the drop feel huge when the lows come back.

Optional variation that’s very classic: one beat before the reverse starts, throw in Beat Repeat for one beat only. One-sixteenth or one-thirty-second grid. On for one beat, then off. Then the reverse begins. That tiny stutter is like the DJ’s hand catching the deck.

Now we build the vacuum moment: the inhale before the slam.

Put Utility on your master, or on your main music group if you’d rather not touch the full master. Automate a quick gain dip right before the drop. You can do last one-eighth note, or last quarter note. Dip it hard, even down to minus infinity for a super clean cut, or try minus 12 dB if you still want a hint of tail.

And here’s a really nice warehouse trick: do a reverb throw right before the dip, so the dry disappears but the space hangs in the air like smoke.

Create a Return track with Hybrid Reverb set to 100 percent wet, long decay. High-pass that return around 200 to 400 Hz so it doesn’t muddy the drop. Then automate a quick send to that return right before the vacuum dip.

Even better: if your kick is about to come back on the drop, you can duck that reverb return with a Compressor sidechained to the kick, so the kick punches through the fog instead of fighting it.

Now, make the drop hit harder. Because the rewind only works if the re-entry feels confident.

Create an audio track called Impact. Drop in a short kick impact, vinyl hit, metal slam, anything DnB-friendly. Place it exactly on the drop downbeat.

Process it lightly: EQ Eight, cut mud around 200 to 400 Hz if it’s boxy. Add Saturator, plus 2 to 5 dB. And a Limiter just to keep it controlled.

Now check your drum arrangement on the first bar of the drop. Sometimes the strongest move is making the first half-bar simpler: let kick, snare, and bass define the return, then bring busy hats back in bar two. That contrast is what makes people feel the drop, even at the same loudness.

Sub management is the final big piece.

If your rewind touched the low-end, fix it now. You want the sub to re-enter clean, on-grid, and solid.

Put Auto Filter on your bass group, set it to high-pass, and during the rewind moment automate it up to around 80 to 120 Hz. Then snap it back to normal exactly on the drop. That keeps the rewind exciting without making the whole mix wobble.

One more contrast trick that’s easy and powerful: make the rewind narrower, and the drop wider.

On the REWIND PRINT track, add Utility and reduce Width to around 60 to 80 percent during the rewind section. Then when the drop hits, bring the rest of your music back to full width. Keep the sub mono, though. Mono sub, wide tops, that’s the warehouse standard.

Now let’s do a quick arrangement blueprint so you can place everything.

Bars 1 through 16: rolling groove.
Bars 17 through 20: rewind flip section.
In bars 17 and 18, your Air Riser is growing.
In bar 19, your reverse rewind pull takes over.
Last beat before bar 21, you do the vacuum dip.
Bar 21: drop lands, impact hits, sub comes back clean.

If you want the proper oldskool rave nod, you can throw in a vocal stab like “REWIND!” right before the pull. If you don’t want vocals, make a little signal sound: a short synth note with Saturator or Redux and a short delay, one bar before the pull. It tells the listener, “something’s about to happen.”

Before we wrap, common beginner mistakes to avoid, so yours sounds intentional.

Don’t rewind the sub unless you really mean to. It usually kills the punch.
Don’t let a massive reverb tail smear into the downbeat. High-pass the return and consider ducking it.
Make sure the timing is grid-tight and the silence lands right before the drop.
And keep the riser dark enough. If it’s all 12 to 16k fizz, it won’t feel smoky, it’ll feel like spray cans.

Mini practice you can do in 10 to 15 minutes:
take a drum loop and bass loop at 172 BPM.
Make a four-bar pre-drop.
Build the Air Riser.
Print two bars with Resampling, reverse it, pitch it down.
Add the vacuum dip.
Then export two versions: one where the rewind is drums-only, and one where it’s the full mix minus sub. Compare which one hits harder and which one feels more “warehouse.”

Recap:
You built a four-bar rewind flip that functions like a riser, a tension reset, and a payoff enhancer.
You used stock Live 12 tools: Auto Filter, Echo, Hybrid Reverb, Saturator, Utility, and optionally Shifter and Beat Repeat.
And you kept it authentic by controlling highs, adding gritty mids, using space, and bringing the sub back clean on the drop.

If you tell me what your drop style is, like amen jungle, 2000s rollers, foggy minimal, or jump-up, I can suggest whether your rewind should be one bar or two bars, and exactly how aggressive to go on the pitch drop and the vacuum gap.

mickeybeam

Go to drumbasscd.com for +100 drum and bass YouTube channels all in one place - tune in!

Generating PDF preview…