DNB COLLEGE

Drum & Bass Ableton Live 12 Tutorials

LESSON DETAIL

Oldskool masterclass edit: an Amen-style call-and-response riff shape from scratch in Ableton Live 12 (Intermediate)

An AI-generated intermediate Ableton lesson focused on Oldskool masterclass edit: an Amen-style call-and-response riff shape from scratch in Ableton Live 12 in the Drums area of drum and bass production.

Back to lessons
Oldskool masterclass edit: an Amen-style call-and-response riff shape from scratch in Ableton Live 12 (Intermediate) cover image

Narrated lesson audio

The voice track includes the tutorial plus extra teacher commentary.

Open audio file

Main tutorial

Lesson Overview

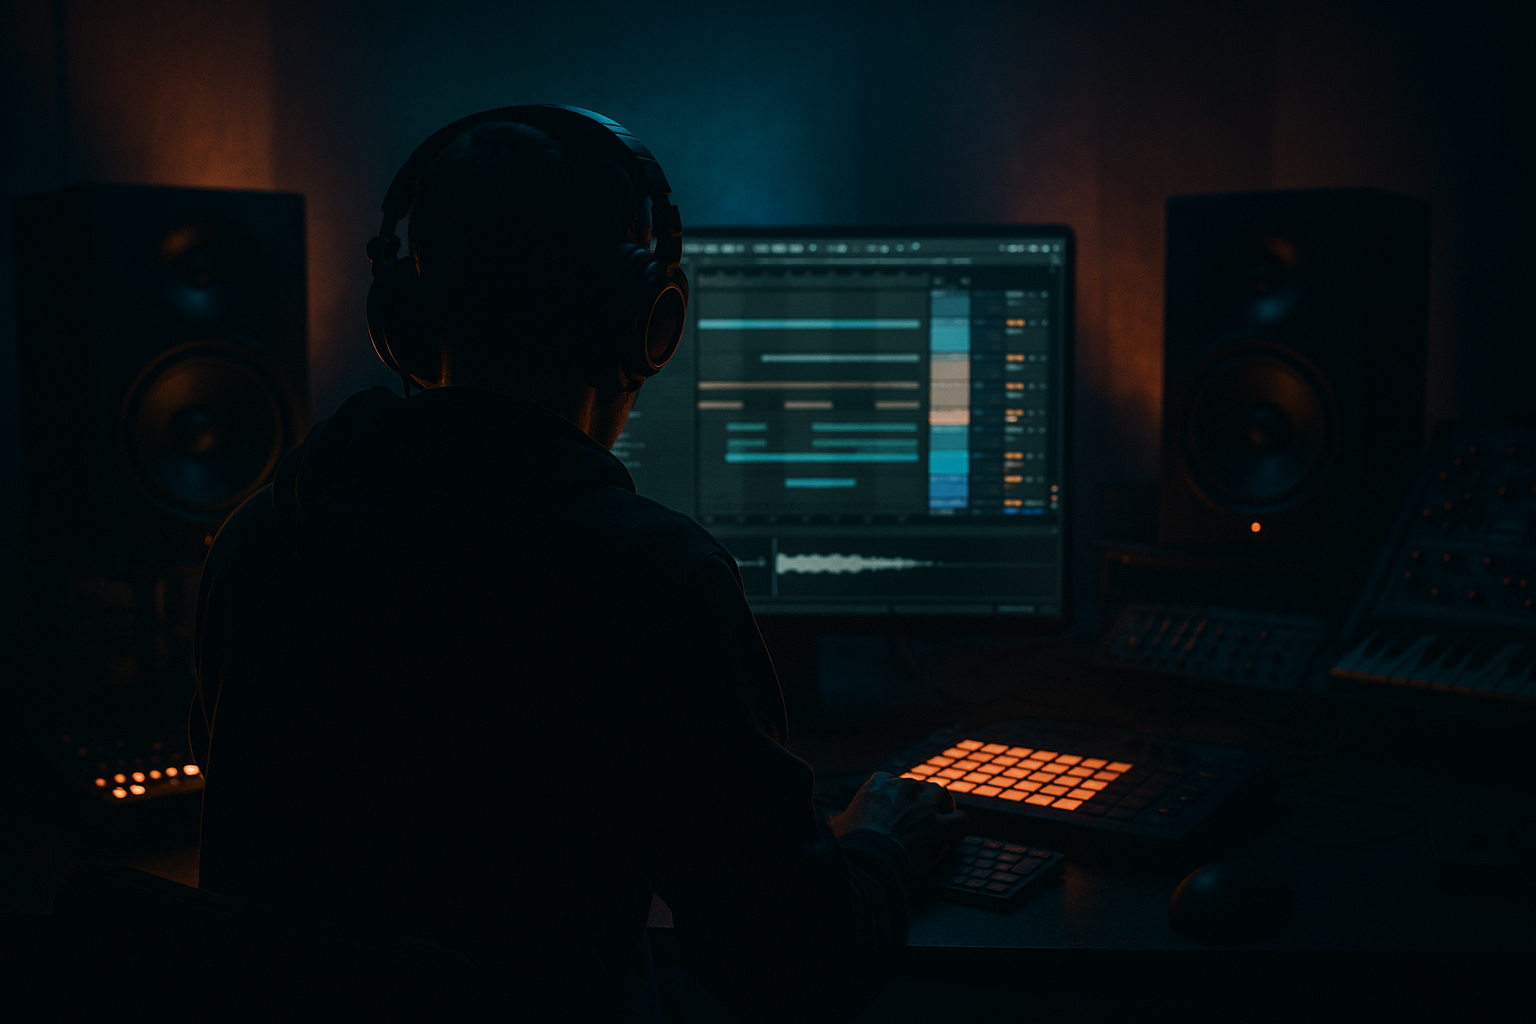
In this lesson, you’ll build an oldskool Amen-style call-and-response riff shape from scratch in Ableton Live 12, designed for a DnB / jungle / rollers context. The focus is not just on chopping a break — it’s on turning that break into a musical phrase that answers itself, with a clear “question / reply” energy that works in a drop, a switch-up, or a DJ-friendly breakdown.

This matters because a lot of DnB drums are technically good but musically flat. The classic jungle approach gives you rhythm, attitude, and movement without needing a full drum loop to carry the groove. A call-and-response riff shape keeps the listener locked in because the pattern feels like a conversation: one bar says something, the next bar answers it. That’s a huge part of why oldskool edits still hit hard in modern tracks.

We’ll use Ableton stock tools to:

  • chop and reshape an Amen-style break
  • build ghost notes and micro-edits
  • create two contrasting drum phrases
  • add swing, weight, and tension
  • arrange it into a usable 8-bar drop idea
  • This is especially useful if you’re making:

  • classic jungle-inspired rollers
  • dark halftime-to-double-time hybrids
  • neuro-adjacent drum movement
  • modern oldskool edits with a clean, punchy finish
  • Why this works in DnB: the genre thrives on variation inside repetition. A call-and-response riff gives you that balance — enough repetition to groove, enough change to stay alive. 🥁

    What You Will Build

    By the end, you’ll have a 2-bar Amen-based drum riff that loops as a call-and-response phrase, plus a simple 8-bar arrangement around it.

    Musically, it will feel like this:

  • Bar 1 = call: a confident, syncopated Amen chop with strong kick/snare punctuation
  • Bar 2 = response: a variation that answers the first bar with a fill, reverse feel, or displaced hit
  • Ghost notes and micro-cuts: to keep the break rolling rather than sounding grid-locked
  • Layered sub-kick support: just enough low-end reinforcement to keep the drums authoritative
  • Optional bass space: designed so a sub or reese can sit underneath without clutter
  • The final result should feel like a tight oldskool edit that could sit in a modern DnB drop, especially alongside a sub-heavy bassline and a clean arrangement with DJ-friendly structure.

    Step-by-Step Walkthrough

    1. Set up the session and choose your drum source

    - Start a new Ableton Live 12 project at 170–174 BPM. That tempo range keeps the Amen energy authentic while still fitting modern DnB phrasing.

    - Drag in a clean Amen break sample onto an audio track. If you have multiple versions, pick one with:

    - decent transient definition

    - not too much room sound

    - enough length to slice cleanly

    - Warp it using Complex Pro only if needed. If the sample is already close to tempo, keep warp minimal to preserve punch.

    - Create a Group called `DRUM EDIT` so your chops, layers, and sends stay organized.

    - Set the project with enough headroom: aim for peaks around -6 dB on the drum group later, so the bass can breathe.

    2. Find the core hits you want to speak the loudest

    - Open the break in Clip View and identify the strongest hits:

    - kick

    - snare

    - open hat

    - ghost snare / ghost kick

    - In an Amen, the magic is often in the snare placement and the small in-between hits.

    - Slice the break at transients using Slice to New MIDI Track.

    - Choose a slicing preset that gives you playable pads, then rename the new MIDI track `AMEN SLICES`.

    - In the MIDI clip, audition hits and map the most usable ones to a 1-bar or 2-bar MIDI phrase. Don’t try to use everything — choose the hits that create the clearest rhythmic identity.

    Practical starting point:

    - use the main snare as the anchor on beat 2 or the backbeat equivalent

    - use one or two ghost snares for forward motion

    - use one kick for the heavy downbeat

    - use one “pickup” hat or rim-like transient for anticipation

    3. Build the “call” phrase: make bar 1 strong and recognisable

    - Program a 1-bar MIDI pattern from your sliced break.

    - Think in terms of statement: the call should sound like “here’s the groove.”

    - A solid starting shape:

    - kick on the first strong beat

    - snare early enough to create push

    - a couple of chopped fragments before the backbeat

    - one short tail or ghost hit at the end of the bar

    - Use Clip Start/End edits on slices to tighten tails. Shorter note lengths often sound more intentional in jungle edits.

    - Add subtle Groove Pool swing if the break feels too rigid. Try a classic MPC-style groove or a light shuffle around 54–58% swing feel, but don’t overdo it.

    Why this works in DnB: the call phrase creates recognition. In a fast genre, listeners need an anchor. A consistent first bar gives the ear something to hold onto before the response bar bends the pattern.

    4. Design the “response” phrase: answer the groove with contrast

    - Duplicate the MIDI clip and modify bar 2 so it answers bar 1 rather than repeating it.

    - Good response moves in DnB:

    - shift the main snare slightly later or earlier

    - replace one kick with a ghost hit

    - add a quick snare drag into the downbeat

    - remove one hit to create breathing room

    - insert a fast two-note fill at the end of the bar

    - The response should feel like a reply, not a full reset.

    - Aim for contrast in at least one of these areas:

    - density

    - register

    - transient shape

    - stereo/width impression

    - note length

    Example musical context:

    - In an 8-bar drop, bars 1–2 can introduce the main call-and-response riff.

    - Bars 3–4 can repeat it with slight variation.

    - Bars 5–6 can remove one kick and add a fill.

    - Bars 7–8 can build into a switch-up or bass drop.

    5. Tighten the break with drum shaping tools

    - Put Drum Buss on the `DRUM EDIT` group.

    - Start with subtle settings:

    - Drive: 5–15%

    - Boom: low, around 0–15% unless you want extra sub punch

    - Transients: +5 to +20 for snappier chop attacks

    - Use EQ Eight after Drum Buss:

    - high-pass gently around 25–35 Hz to clear rumble

    - dip any harsh band around 3–6 kHz if the snare gets brittle

    - If the break feels too loose, add Saturator before EQ Eight:

    - Drive: +2 to +6 dB

    - turn on Soft Clip for extra density

    - For extra control, add Compressor with very light glue:

    - ratio around 2:1

    - attack around 10–30 ms

    - release around 50–120 ms

    - only 1–3 dB gain reduction

    Keep this subtle. The goal is not to flatten the break — it’s to make the edit feel like one coherent performance.

    6. Layer a support kick or sub-hit without losing the break feel

    - Add a separate MIDI or audio track for a reinforcement kick if the Amen’s low end is weak.

    - Use a short, punchy kick from an Ableton Drum Rack or a resampled kick transient.

    - High-pass the layer if necessary so it reinforces attack without muddying the low end.

    - Good layering strategy:

    - keep the original break for character

    - use the layer only for weight and consistency

    - If you’re working with a sub-heavy bassline later, be conservative:

    - the drum layer should support the groove, not fight the bass

    - avoid overlapping long kick tails with sub notes

    Ableton workflow note: route your layered kick and chopped Amen track to a Drum Bus group, then process the group together. That makes the edit feel glued instead of pasted.

    7. Add ghost notes, micro-delays, and tiny edits for authentic jungle movement

    - Ghost notes are what make the riff feel alive.

    - Add low-velocity extra hits around the main snare and kick positions.

    - Use velocity to push them back in the mix:

    - main hits: roughly 90–127 velocity

    - ghost notes: roughly 20–60 velocity

    - Try Track Delay or tiny note nudges:

    - move one ghost hit a few milliseconds late for drag

    - move a pickup hit slightly early for tension

    - Use tiny edit tricks:

    - slice off the last few milliseconds of a hit

    - reverse one short fragment for a classic oldskool-feel accent

    - mute a repeating hat on the second bar to create space

    These micro-moves matter because jungle phrasing is often less about big drums and more about how the gaps speak.

    8. Create movement with automation and arrangement punctuation

    - Use automation on the drum group to keep the riff evolving over 8 bars.

    - Strong automation ideas:

    - Auto Filter: very subtle low-pass movement on fill bars

    - Reverb send: briefly increase on one snare at the end of bar 4 or 8

    - Delay send: tiny throw on a ghost hit or chopped stab

    - Drum Buss Drive: automate a little lift into transition bars

    - For arrangement, try this:

    - bars 1–2: main call-and-response

    - bars 3–4: repeat with one extra ghost hit

    - bars 5–6: remove a kick and add a fill

    - bars 7–8: build tension for bass re-entry or switch-up

    - Keep the intro/outro DJ-friendly if this is for a full track:

    - intro with filtered drums and fewer lows

    - outro with a stripped version of the riff for mixing

    This is where the edit stops being a loop and becomes a section.

    9. Check the low end, mono compatibility, and drum-bass space

    - Put Utility on the drum group and check mono.

    - If the break collapses badly in mono, reduce any excessive stereo widening or widen-only FX.

    - Use EQ Eight to make room for bass:

    - cut unnecessary low-mid buildup around 150–350 Hz if the break feels boxy

    - keep the true sub area clean so your bassline can own it

    - If you’re planning a reese or sub later, don’t let the drum loop get too thick below 100 Hz.

    - In DnB, the bass and drums need a clear division of labour:

    - drums = transient impact, groove, rhythmic identity

    - bass = sustained low-end pressure and movement

    10. Print a resample and make one more musical version

    - Once the riff is working, resample it to a new audio track using Resampling or by recording the drum bus.

    - This gives you a “finished” chop you can re-edit, reverse, or stretch.

    - After resampling, create one variation:

    - reverse a bar-ending fill

    - duplicate the best snare accent

    - add a one-hit stop for tension

    - This is a powerful finishing move in Ableton because it turns a functional edit into a signature phrase.

    - Save both versions:

    - `Amen Call`

    - `Amen Response`

    - Keep them in your library or project so you can reuse the idea in future roller or jungle sessions.

    Common Mistakes

  • Making every bar equally busy
  • - Fix: let the call have stronger identity and the response create contrast. If both bars are equally dense, the riff stops feeling like a conversation.

  • Overprocessing the break
  • - Fix: use Drum Buss, Saturator, and EQ Eight lightly. If you crush the Amen too hard, you lose the swing and transient life that makes it special.

  • Ignoring ghost notes
  • - Fix: lower the velocity and keep them short. Ghost notes should feel like pressure and motion, not extra clutter.

  • Too much low-end from the drum edit
  • - Fix: high-pass rumble, trim long kick tails, and leave space for the bassline. Oldskool drums should hit hard, not mask the sub.

  • No clear phrase structure
  • - Fix: think in 2-bar conversation units. If the listener can’t hear call and response, it just sounds like random chops.

  • Stereo tricks on the wrong elements
  • - Fix: keep core kick/snare energy centered. Use width for texture, not for the main impact hits.

    Pro Tips for Darker / Heavier DnB

  • Use subtle saturation before compression
  • - A little Saturator or Drum Buss Drive can thicken the Amen before it hits the compressor, making it sound denser without needing huge gain.

  • Resample your best 2-bar edit and chop the resample
  • - This often sounds more “finished” than endlessly editing the original break. You can then reverse tiny pieces or add fill accents for a darker, more intentional feel.

  • Automate filter movement on response bars
  • - A slight low-pass or band-pass sweep on the response can create tension, especially before a bass drop or switch-up.

  • Keep one element slightly unstable
  • - In darker DnB, one off-grid ghost hit or delayed snare drag can create menace. Don’t quantize everything to death.

  • Use short ambience, not big reverb
  • - A tiny room or very short plate can make the drums feel deeper, but long verb will blur the break. For heavier music, clarity wins.

  • Pair the edit with a restrained bassphrase
  • - If the drum call-and-response is active, keep the bassline more selective: long notes under the call, stabs or pauses under the response. That separation makes the whole drop feel bigger.

  • Make the response bar slightly more aggressive
  • - For neuro-leaning or darker rollers, add a harder snare accent, a reverse chop, or a clipped fill at the end of bar 2. The answer should escalate the tension.

    Mini Practice Exercise

    Spend 10–20 minutes making three variations of the same Amen call-and-response riff.

    1. Start with one 2-bar Amen edit.

    2. Make Version A:

    - straightforward call in bar 1

    - sparse response in bar 2

    3. Make Version B:

    - keep bar 1 the same

    - add one extra ghost note and a reversed chop in bar 2

    4. Make Version C:

    - reduce one kick in bar 1

    - increase snare tension in bar 2 with a tiny fill

    5. Compare all three at full tempo in Ableton.

    6. Pick the version that feels most like a drop-ready DnB phrase rather than just a loop.

    7. Save the best one as a reusable drum rack or audio clip for future tracks.

    Goal: train your ear to hear how small edits change the emotional direction of the groove.

    Recap

  • Build your Amen edit as a 2-bar call-and-response phrase, not just a loop.
  • Keep the call clear and rhythmic, and make the response contrast it.
  • Use Ableton stock tools like Slice to New MIDI Track, Drum Buss, Saturator, EQ Eight, Utility, and Auto Filter to shape the groove.
  • Add ghost notes, micro-edits, and small automation moves for authentic jungle movement.
  • Protect the drum-bass balance: clean low end, strong transients, mono-safe core hits.
  • Resample once the groove works — that’s often where the edit starts sounding like a real track element.

If you can make the drums feel like they’re talking to each other, you’re already inside the classic DnB mindset.

Ask GPT about this lesson

Chat with the lesson tutor, get follow-up help, or use quick actions.

Bigup 👽 Ask me anything about this lesson and I’ll answer in context.

Narration script

Show spoken script
Welcome in. In this lesson, we’re going to build an oldskool Amen-style call-and-response riff shape from scratch in Ableton Live 12, and the goal is not just to chop a break, but to make it feel like it’s talking back to itself.

This is a really important skill for drum and bass, jungle, rollers, and those darker halftime-to-double-time hybrids, because a lot of drum edits can be technically solid but musically a bit flat. The oldskool approach fixes that. It gives you movement, attitude, and a clear sense of phrase. One bar makes a statement, the next bar answers it. That call-and-response energy is a huge part of why classic jungle edits still sound so alive.

So let’s build something that feels like a real groove, not just a loop.

Start by opening a fresh Ableton Live 12 project and set the tempo somewhere around 170 to 174 BPM. That keeps the feel in classic DnB territory while still working for modern phrasing. Now drag in a clean Amen break sample onto an audio track. If you’ve got a few versions, choose one with decent transient clarity, not too much room sound, and enough length to slice cleanly.

If the sample already sits close to the tempo, don’t over-warp it. Keep the warp settings minimal if possible, because the punch and the swing are part of the character. If you do need to warp it, Complex Pro can help, but use it carefully. We want the break to breathe, not get smudged.

Create a group track and call it something like DRUM EDIT. That’ll keep the slices, layers, and processing neat as the idea develops. And just from the start, think about headroom. You want the drum group landing around minus 6 dB later on, because the bass needs space to hit properly.

Now open the Amen in Clip View and listen for the strong hits. You’re listening for the main kick, the snare, open hat hits, ghost notes, and those smaller in-between transients that give the break its personality. The magic of Amen edits is often in the snare placement and the tiny details around it.

Right-click and slice the break at transients using Slice to New MIDI Track. Let Ableton create a playable sliced instrument, then rename that track AMEN SLICES. This is where the break becomes more like a drum kit you can perform with. Try not to use every slice just because it’s there. Pick the hits that give you the clearest rhythmic identity.

As a starting point, think in terms of anchors. You want a strong snare, one or two ghost snares for motion, one solid kick for weight, and maybe a pickup hat or rim-like transient for anticipation. The idea is to create a phrase that feels intentional.

Now let’s build the call. This is bar one, and bar one needs to sound like a statement. Program a one-bar MIDI pattern from your slices. Keep it confident and recognisable. A good call shape often starts with a strong kick, then a snare that lands with enough authority to lock the groove in, plus a couple of chopped fragments that lead the ear forward.

A useful trick here is to shorten the note lengths. Use tight clip start and end edits so the slices don’t ring out too long unless you want that tail. In jungle-style edits, shorter often feels more controlled and more musical. If the break starts feeling a little too stiff, use the Groove Pool and add a light swing. Something in the range of a classic MPC-style shuffle can work beautifully, but don’t overcook it. The groove should lean, not wobble.

And that leaning is important. If the phrase feels too straight, push one ghost hit a tiny bit ahead of the grid. That slight forward lean can create urgency. If you want it to feel heavier, place one accent a touch late. That tiny delay gives the bar some weight and attitude. These are subtle moves, but at DnB tempo they matter a lot.

Now for the response. Duplicate the clip so bar two starts from the same DNA, then change it so it answers bar one instead of repeating it. The response should feel like a reply, not like a copy.

There are a few strong ways to do that. You can shift the main snare slightly later, remove one kick to make room, swap a full hit for a ghost hit, add a quick snare drag into the downbeat, or throw in a fast two-note fill right at the end of the bar. What matters is contrast. If bar one is dense, bar two can be a little more open. If bar one is dry and direct, bar two can feel slightly more roomy or saturated. If bar one is stable, bar two can feel like it’s tilting into the next phrase.

That contrast is what makes the listener hear conversation. One bar says, here’s the groove. The next bar says, yeah, and here’s the reply.

For an eight-bar drop, a nice way to think about it is this: bars one and two establish the main call-and-response idea, bars three and four repeat it with a small variation, bars five and six strip something back and add a fill, and bars seven and eight build toward a switch-up or a bass re-entry. That way, the riff develops without losing its identity.

Now let’s tighten the sound. Put Drum Buss on the DRUM EDIT group. Use it subtly. A little drive can help, maybe around 5 to 15 percent. Keep Boom low unless you specifically want more sub emphasis. And if the break needs more snap, lift the Transients a little. We’re not flattening the break here. We’re giving it more cohesion and punch.

After Drum Buss, add EQ Eight. Clean up the rumble with a gentle high-pass somewhere around 25 to 35 Hz, and if the snare gets harsh or brittle, consider dipping a small area in the 3 to 6 kHz region. If the break still feels a little soft, Saturator before the EQ can help. A small amount of drive, with Soft Clip enabled, can thicken the groove without making it sound crushed.

If the edit needs a bit of glue, add a Compressor after that, but keep it light. A ratio around 2 to 1, a moderate attack, a fairly quick release, and only a few dB of gain reduction is usually enough. The idea is to make it feel like one performance, not to squash the life out of it.

Next, think about reinforcement. Sometimes the Amen’s low end needs a little help, especially if you want the drums to hit hard in a modern DnB mix. You can layer a short, punchy kick underneath. Keep it clean and controlled. If needed, high-pass the layer so it reinforces the attack and low punch without muddying the mix. The original break should keep its character; the layer should just support it.

Now bring in the ghost notes and micro-edits. This is where the edit starts to feel genuinely alive. Add low-velocity extra hits around the main snare and kick positions. Keep the main hits strong, and tuck the ghost notes way back in the mix. A good rough guide is main hits around 90 to 127 velocity, and ghost notes maybe around 20 to 60. The exact numbers aren’t sacred, but the contrast is.

You can also nudge a few notes off the grid. Move a pickup slightly early to create tension, or place a ghost hit a touch late for drag. Try reversing one short fragment for a classic oldskool accent. Or mute a repeating hat on the second bar so the phrase breathes more. The gaps are part of the rhythm too. In jungle, the silence between the hits can be just as important as the hits themselves.

Now let’s make it move over time. Use automation on the drum group. A very subtle low-pass sweep with Auto Filter can make a fill section feel like it’s opening or closing. You can throw a tiny bit of reverb onto a snare at the end of bar four or bar eight to mark a transition. A quick delay throw on a ghost hit can add a little flick of energy. You can even automate Drum Buss Drive slightly upward into a transition bar if you want the whole loop to push harder.

For a simple eight-bar arrangement, try this: bars one and two are your main call-and-response. Bars three and four repeat it, but with one extra ghost hit. Bars five and six remove a kick and bring in a fill. Bars seven and eight build tension for the next section, whether that’s a bass drop, a switch-up, or a breakdown moment.

Once the pattern is feeling good, check the low end and the mono compatibility. Put Utility on the drum group and hit mono to make sure the core of the break doesn’t collapse in a bad way. If it does, reduce any unnecessary stereo widening or remove width-heavy effects from the main hits. Then use EQ Eight to carve out any low-mid buildup around 150 to 350 Hz if the break feels boxy. The drums need to hit hard, but they also need to leave room for the bass to own the subs.

That balance is crucial in DnB. Drums should carry the transient impact, the groove, the rhythmic identity. Bass should carry the sustained low-end pressure and movement. If both are fighting for the same space, everything gets blurry.

Now for a really powerful finishing move, resample the groove. Record the drum bus or use resampling to print the edit to a new audio track. This gives you a finished chop you can re-edit, reverse, stretch, or use as a signature element. Once it’s printed, try making one more version. Reverse a bar-ending fill, duplicate your best snare accent, or create a one-hit stop to generate tension. This is often where a functional loop starts sounding like a proper track idea.

Save the versions with clear names, like Amen Call and Amen Response, so you can reuse them later in other jungle or roller sessions. And if you want to sharpen your ear, make a few versions of the same idea. Keep one steady, one with more tension, and one that goes a little more chaotic. Compare them at full tempo and listen for which one feels like it’s actually leading somewhere, not just looping.

A few common mistakes to avoid here. First, don’t make every bar equally busy. The call needs identity, and the response needs contrast. If both bars are packed full of hits, the conversation disappears. Second, don’t overprocess the break. A little saturation, a little compression, a little shaping is great. Too much and you lose the swing and the transient life. Third, don’t forget the ghost notes. They’re tiny, but they’re often what makes the edit feel human. And fourth, don’t overload the low end. The break should hit hard, not swallow the sub.

A good rule of thumb is to think in accents, not just slices. The power of an Amen edit often comes from which hits you emphasize, not how many you use. Sometimes muting one obvious hit and letting a quieter pickup do the job gives you way more personality. And don’t feel like every imperfection needs fixing. Oldskool edits often sound best when one chop is rough, clipped, or slightly unstable. If it adds attitude and doesn’t wreck the groove, leave it in.

If you want to push this further, try flipping the roles of the bars. Make bar one more restrained and bar two more aggressive. That setup-and-payoff energy can be huge before a drop. Or build a three-step cycle, where the first two bars are the basic conversation, the next two add ghost notes, and the next two strip it back again with a fill. That keeps the energy evolving without losing the identity of the riff.

You can also experiment with a parallel grit lane. Duplicate the drum group, smash the copy a bit harder with Saturator and EQ, and blend it quietly underneath the clean version. That can add aggression without losing the clarity of the main hits. Or try a very short room reverb on selected snare accents, just enough to give depth without blurring the break.

By now, you should have an Amen-style call-and-response riff that feels musical, not mechanical. That’s the key. In classic DnB thinking, the drums are not just keeping time. They’re speaking. The call sets up the idea, the response answers it, and the little ghost notes, timing shifts, and texture changes give the whole thing personality.

So remember the main goal: build a two-bar phrase, not just a loop. Keep the call clear. Make the response contrast it. Use Ableton’s stock tools to shape, tighten, and animate it. Protect the drum-bass space. And once the groove works, resample it, because that’s often the moment it starts sounding like a real track element.

If you can make the drums feel like they’re talking to each other, you’re already deep into the classic DnB mindset.

mickeybeam

Go to drumbasscd.com for +100 drum and bass YouTube channels all in one place - tune in!

Generating PDF preview…