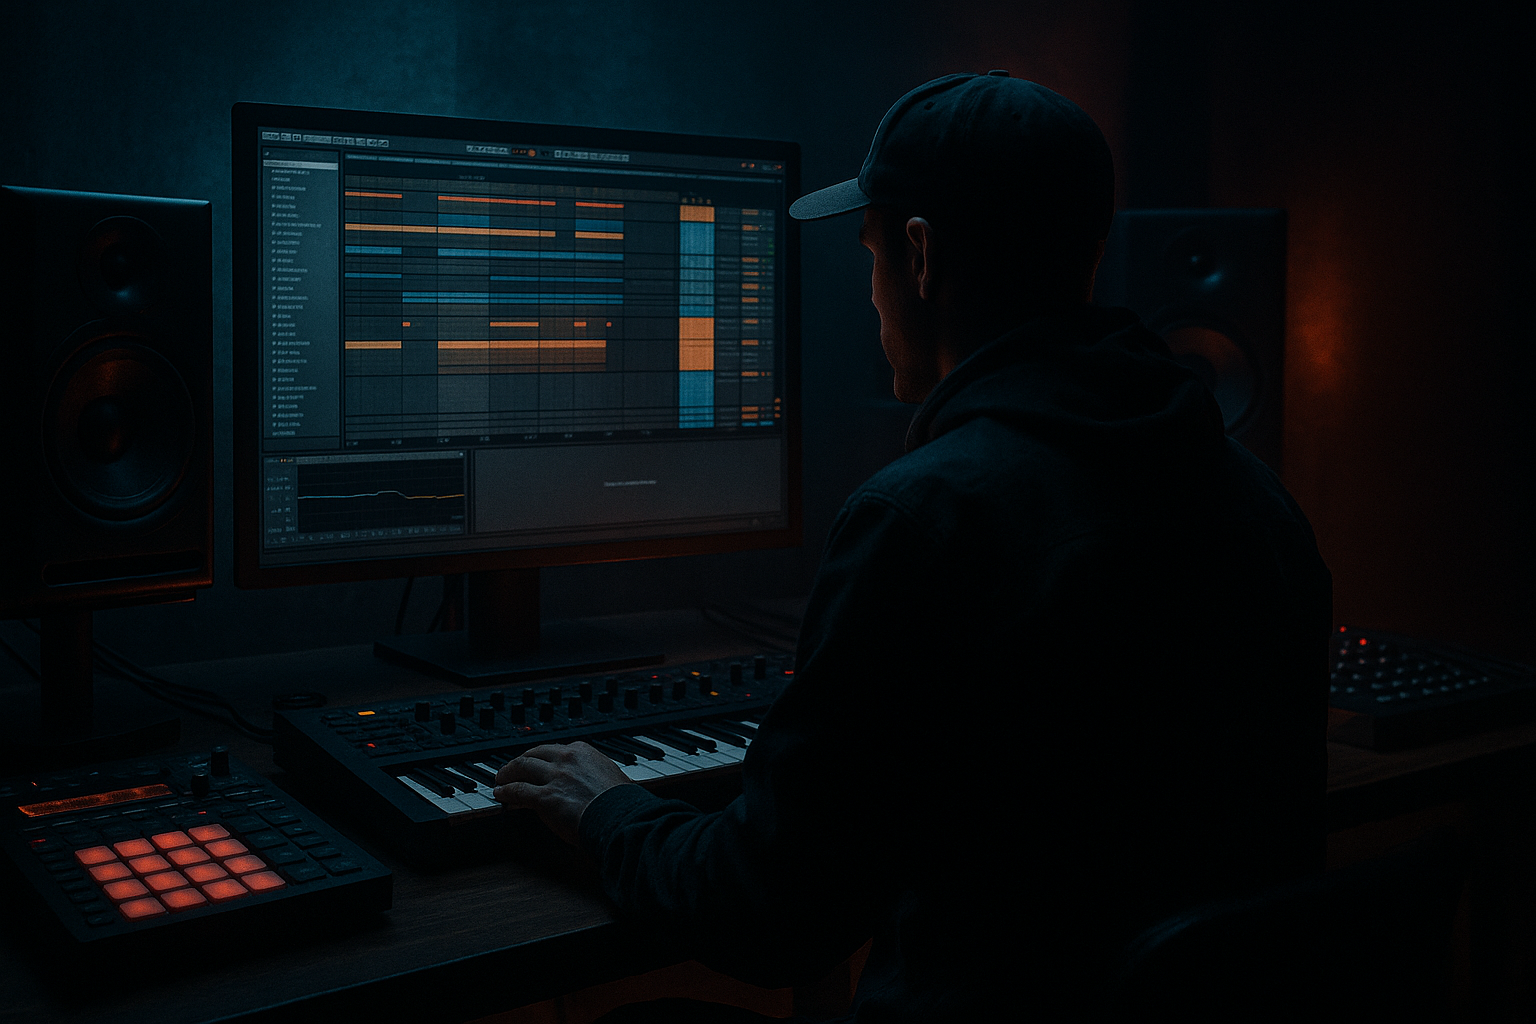
DNB COLLEGE

Drum & Bass Ableton Live 12 Tutorials

LESSON DETAIL

Moonlit Jungle amen variation design guide from scratch in Ableton Live 12 (Beginner)

An AI-generated beginner Ableton lesson focused on Moonlit Jungle amen variation design guide from scratch in Ableton Live 12 in the Edits area of drum and bass production.

Back to lessons
Moonlit Jungle amen variation design guide from scratch in Ableton Live 12 (Beginner) cover image

Narrated lesson audio

The voice track includes the tutorial plus extra teacher commentary.

Open audio file

Main tutorial

Lesson Overview

In this lesson, you’ll build a Moonlit Jungle amen variation from scratch in Ableton Live 12: a shadowy, rolling Drum & Bass edit that keeps the classic amen energy but feels fresh, darker, and more controlled. This sits right in the edit / drum arrangement part of a DnB track — the section where you take a raw break and turn it into a performance tool with swing, chops, ghost notes, fills, and tension.

Why this matters: in Drum & Bass, especially jungle, the drum edit is not just “drums playing.” It’s the identity of the drop. A strong amen variation gives your track movement, personality, and forward drive without needing too many extra layers. If the break feels alive, the whole tune feels alive. 🌙

We’ll keep this beginner-friendly, but still make it sound like a real DnB workflow inside Ableton Live 12. You’ll use stock devices, simple routing, and practical edit choices that work in darker jungle, rollers, and heavier bass music contexts.

---

What You Will Build

By the end of this lesson, you’ll have:

  • A 1-bar and 2-bar amen variation built from an imported break or a sliced loop
  • Tight kick/snare placement with chopped break fragments and ghost hits
  • A moonlit jungle feel: dark, atmospheric, slightly smoky, with a rolling backbeat
  • Basic drum bus shaping using Ableton stock tools like Drum Buss, EQ Eight, Saturator, and Glue Compressor
  • Simple automation for fills, tension, and transitions
  • A structure that can work as a drop loop, turnaround, or DJ-friendly edit section
  • A drum part that leaves space for a sub, reese, or growling bass to answer the rhythm
  • Musically, think of it as:

    breakbeat + controlled chops + ghost note groove + dark atmosphere + bass-friendly spacing.

    ---

    Step-by-Step Walkthrough

    1) Set up your project for a clean DnB edit workflow

    Start with a fresh Ableton Live 12 set and set the tempo to a standard Drum & Bass range:

  • 174 BPM for classic jungle / roller energy
  • 170–172 BPM if you want a slightly heavier, darker feel
  • Create these tracks:

  • Drums / Break
  • Drum Layer or One-Shots
  • Bass
  • Atmos / FX
  • For now, focus on the drum track. Drag in a clean amen loop or any classic break with good transient detail. If you don’t have a loop, use a break from your sample library and keep it short, ideally 1 or 2 bars.

    If your loop is slightly off-grid, use Warp and choose a mode that preserves transients well. For breaks, Beats mode is often a good starting point. Try these settings:

  • Transient Loop Mode: keep it on if the break is repetitive
  • Preserve: around Transients
  • Transient Envelope: around 80–100 for sharper hits
  • Why this works in DnB: jungle edits rely on a break sounding punchy and intentional. If the break smears, you lose the snap that makes the groove move.

    2) Slice the break into playable pieces

    Right-click the break clip and choose Slice to New MIDI Track. In Ableton Live 12, this is one of the fastest ways to turn an amen into an editable instrument.

    Use slicing based on:

  • Transient markers
  • Or 1/16 notes if you want more control and simpler beginner slicing
  • Ableton will create a Drum Rack with slices mapped across pads. Now you can trigger individual snare, kick, hat, and ghost fragments like drum hits.

    Keep the slices simple at first:

  • Kick-heavy chunks
  • Snare hits
  • Small ghost notes
  • Hat fragments
  • One or two reversed or tail slices if available
  • Don’t try to use every slice. A great DnB edit is usually about selective chopping, not stuffing the bar.

    3) Build a core 1-bar groove with anchor hits

    Now create a MIDI clip with a simple 1-bar pattern. Your goal is to preserve the DnB anchor points while letting the break breathe.

    Use this as a starting logic:

  • Strong kick on the 1
  • Snare or main break snare on the 2
  • Another strong snare on the 4
  • Ghost notes between those anchors for motion
  • In many jungle edits, the snare on 2 and 4 is the backbone, while chopped fragments fill the space around it. If your break already contains those hits, align your chops so they reinforce the groove instead of fighting it.

    Try this practical approach:

  • Place one kick slice on beat 1
  • Place a snare slice or break snare on beat 2
  • Add a quieter ghost slice just before beat 2 or just after it
  • Add a hat or break tail before beat 4
  • Finish with a snare or snare variation on beat 4
  • Keep velocities varied:

  • Main hits: 100–127
  • Ghost notes: 35–80
  • Hats or tiny break fragments: 50–90
  • This creates that living, shuffled jungle feel instead of a flat loop.

    4) Create variation with call-and-response phrasing

    Now make a second bar that answers the first bar. This is where the edit becomes musical, not just mechanical.

    In bar 1, keep the groove fairly clear and stable.

    In bar 2, add one or two of these ideas:

  • A snare drag before the main snare
  • A quick kick double to push momentum
  • A reverse slice leading into the 4
  • A tiny drum fill at the end of the bar
  • A ghost note cluster between hits
  • A beginner-friendly rule:

    Bar 1 = establish. Bar 2 = answer.

    For example:

  • Bar 1: kick on 1, snare on 2, snare on 4, light hat movement
  • Bar 2: same skeleton, but add a doubled snare pickup near the end and a tiny break fill into the loop restart
  • This is a classic DnB arrangement trick. It keeps the listener locked in while preventing loop fatigue.

    5) Tighten the drums with stock Ableton processing

    Now shape the break so it sits properly in a modern DnB mix.

    On the break or Drum Rack group, add:

    EQ Eight

    Use EQ Eight to clean mud and harshness.

    Suggested starting moves:

  • High-pass only very gently if needed, around 25–35 Hz
  • Cut a little mud around 200–400 Hz if the break feels boxy
  • If the break is harsh, reduce a narrow area around 6–9 kHz
  • Don’t overdo the cuts. You want the break to keep character.

    Drum Buss

    Add Drum Buss to add punch and a bit of dirt.

    Starter settings:

  • Drive: 5–15%
  • Crunch: low to moderate, around 5–20%
  • Boom: usually low for jungle breaks unless you want extra low punch
  • Transient: slightly positive if the break needs more snap
  • This helps the break feel more glued and energetic.

    Saturator

    If the break feels too polite, add Saturator after EQ Eight or before Drum Buss.

    Try:

  • Soft Clip on
  • Drive around 2–6 dB
  • This is especially useful in darker DnB where you want grit without destroying the transient edge.

    6) Layer a controlled kick or snare if the break needs more weight

    A lot of jungle edits use a break as the texture, but reinforce the low-end drum hits with extra one-shots. This is very common in modern DnB edits.

    Create a new track with:

  • A tight kick one-shot
  • Or a short snare layer
  • Use Ableton’s Simpler or Drum Rack with stock samples.

    Suggested layering approach:

  • Layer the kick lightly under the break’s main kick
  • Layer the snare for extra crack if the break snare is too thin
  • Keep layering subtle:

  • Kick layer should add weight, not become a new kick pattern
  • Snare layer should add transient snap, not widen the groove too much
  • If needed, use EQ Eight on the layer:

  • Cut low muddiness below 40–60 Hz on the snare layer
  • Keep the kick layer focused on the low punch
  • This is useful in rollers and darker bass music where the bassline needs a firm drum foundation.

    7) Make the bass leave space for the edit

    Even though this lesson is about the amen variation, your drum edit must work with bass. In DnB, the bass and drums are a conversation.

    Create a simple bass placeholder using a stock synth:

  • Operator for a sub
  • Or Wavetable for a reese-style mid layer
  • For beginner clarity, keep it simple:

  • Sub note on the root
  • Long sustained note under the drop
  • Avoid playing the bass exactly where the snare fill needs space
  • Useful workflow:

  • Let the bass drop out slightly before a fill
  • Or automate a short bass mute at the end of bar 2
  • Why this works in DnB: the drum edit feels bigger when the bass stops fighting the same rhythmic spaces. Silence is part of the groove.

    8) Add movement with automation and transition FX

    Now make the edit feel like a real arrangement section.

    Use automation on:

  • Reverb send for selected snare hits
  • Delay send on a final fill hit
  • Auto Filter for a short intro or breakdown-style movement
  • Drum Buss Drive for tension lift into the next bar
  • Practical ideas:

  • Automate Auto Filter low-pass slightly closed in the first half, then open it on the return
  • Send a single snare hit to Reverb at the end of bar 2 for a ghostly tail
  • Automate a tiny boost in Drum Buss Drive for the final two beats of the phrase
  • For atmosphere, add a low-key pad or vinyl-style texture very quietly in the background. Keep it subtle — the edit should still be the star.

    9) Build an 8-bar structure for a real track context

    A strong edit doesn’t just loop; it supports arrangement.

    Try this simple 8-bar DnB context:

  • Bars 1–2: main amen variation, clear groove
  • Bars 3–4: slightly busier ghost notes or one extra snare fill
  • Bars 5–6: strip back the fill and make it cleaner
  • Bars 7–8: build tension with a snare roll, reversed slice, or filter automation
  • This is useful in a drop section because it creates movement without needing a full drum rewrite. You can make one break loop feel like a progressing phrase.

    If you’re building a DJ-friendly arrangement, keep the first and last few bars less busy so they mix well.

    10) Check the mix in mono and keep the low end disciplined

    Drum & Bass lives or dies on low-end clarity. Make sure the break and bass are not cluttering each other.

    Do these quick checks:

  • Put your bass mostly in mono
  • Keep the break’s low end controlled
  • Use Utility to check mono compatibility
  • Make sure the kick and sub aren’t both blasting at the same time
  • A simple beginner rule:

  • Sub lives in the center
  • Drum groove can have width in hats, atmospheres, and tiny break textures
  • Main kick/snare impact should stay focused and readable
  • If the break has too much low rumble, clean it with EQ so the sub can breathe.

    ---

    Common Mistakes

    1) Over-chopping the break

    If every beat is sliced into tiny bits, the groove can lose its human feel.

    Fix: keep a few anchor hits intact and use small chops only as accents.

    2) Too much low end in the break

    A loud break and a loud sub will fight instantly.

    Fix: cut mud in the break with EQ Eight and leave the real sub space for the bass track.

    3) No velocity variation

    Flat velocity makes jungle edits sound programmed in a bad way.

    Fix: lower ghost notes and vary repeated hits by a few velocity points.

    4) Overusing reverb

    Too much reverb can wash out the snare and kill the drive.

    Fix: use short sends, automate reverb only on selected hits, and keep the main groove dry.

    5) Stereo widening on low drums

    Wide low-end drums can collapse in clubs and mono systems.

    Fix: keep kick and sub centered; use width on hats, breaks, or FX instead.

    6) Filling every gap

    DnB needs space to hit hard.

    Fix: let some bars breathe. A few well-placed ghost notes are better than constant clutter.

    ---

    Pro Tips for Darker / Heavier DnB

  • Use Drum Buss in moderation for extra knock and grime. A little drive goes a long way.
  • Add a very quiet texture layer: vinyl noise, jungle ambience, rain, or distant room tone to sell the “moonlit” mood.
  • Try reverse break slices before a snare or fill to create tension without making the drop too busy.
  • For heavier character, duplicate the break and process the copy with more saturation, then blend it low underneath the clean version.
  • Use Auto Filter movement on a break bus for subtle progression across 8 bars.
  • If the edit feels too polite, add one late snare drag or extra kick pickup near the phrase end. That tiny bit of instability is often what makes jungle feel alive.
  • Keep the sub simple and focused so the drum edit can sound more aggressive without masking the mix.
  • In darker rollers, less is often more: one strong fill, one atmosphere hit, one short reverb tail can feel bigger than a crowded FX stack.
  • ---

    Mini Practice Exercise

    Spend 10–20 minutes making a mini Moonlit Jungle edit using only stock Ableton tools.

    Goal

    Build a 2-bar amen variation that feels dark, rolling, and club-ready.

    Exercise

    1. Import one amen or break loop.

    2. Slice it to a new MIDI track.

    3. Build a 2-bar pattern with:

    - one strong kick anchor

    - one main snare on 2

    - one main snare on 4

    - at least 3 ghost notes

    4. Add one small fill or reverse slice in bar 2.

    5. Put EQ Eight and Drum Buss on the break group.

    6. Use one automation move: reverb send, filter, or Drum Buss Drive.

    7. Duplicate the pattern and change only 2–3 hits so the second loop feels like a variation.

    8. Play it with a simple sub note underneath and listen for space.

    Challenge

    Can you make it feel like a real drop loop with only:

  • the break
  • one bass note
  • one subtle atmosphere layer?
  • If yes, you’re thinking like a Drum & Bass editor, not just a loop arranger.

    ---

    Recap

  • A strong jungle amen variation is built from anchor hits, ghost notes, and selective chops
  • In Ableton Live 12, Slice to New MIDI Track, Drum Rack, EQ Eight, Drum Buss, Saturator, and Utility are your core tools
  • Keep the groove clear for the snare, tight in the low end, and alive with small rhythmic changes
  • Use bar-to-bar variation so the loop feels like a phrase, not a copy-paste
  • Leave space for the sub and bassline so the drums and bass can work together
  • For darker DnB, aim for weight, tension, grit, and discipline — not just more elements

Master this, and you’ll have a reusable building block for jungle drops, rollers, and darker DnB edits that sound intentional every time.

Ask GPT about this lesson

Chat with the lesson tutor, get follow-up help, or use quick actions.

Bigup 👽 Ask me anything about this lesson and I’ll answer in context.

Narration script

Show spoken script
Welcome to this beginner Ableton Live 12 lesson on designing a Moonlit Jungle amen variation from scratch.

In this session, we’re building that classic jungle energy, but with a darker, more controlled, moonlit feel. Think rolling drum and bass, shadowy break movement, little ghost notes, a few sharp chops, and just enough tension to make the bassline feel huge when it comes in. This is the kind of drum edit that does real work in a track. It is not just a loop. It is the personality of the drop.

If you get this right, your drums will feel alive, your arrangement will move, and your bass will have space to answer the rhythm. That is the whole game in a good DnB edit.

Let’s keep it beginner-friendly and use only Ableton stock tools.

Start by setting up a new project and pushing the tempo into Drum and Bass territory. A good starting point is 174 BPM. If you want something a little heavier and darker, you can sit around 170 to 172 BPM. Either way, we want that fast, rolling momentum.

Create a few tracks so the session stays organized. You want one track for drums or break, one for any drum layers or one-shots, one for bass, and one for atmospheres or effects. For this lesson, the main focus is the drum break track.

Now drag in a clean amen loop or any break with good transient detail. If you do not have an amen specifically, any solid break will work as long as it has clear kick, snare, and hat hits. Keep it short if possible, ideally one or two bars. If the loop is not perfectly on the grid, turn Warp on and use Beats mode to keep the transients punchy. You want the break to stay sharp, not smeared. That snap is important in jungle.

Here is the first big move. Right-click the break clip and choose Slice to New MIDI Track. This is one of the fastest ways to turn a break into something you can perform and rearrange. Ableton will create a Drum Rack with the slices mapped out across pads. Now you can trigger little chunks of the break like individual drum hits.

At this stage, do not try to use every slice. That is a common beginner trap. A good amen edit is about choosing the right fragments, not stuffing every gap full of audio. Focus on the useful stuff: strong kick chunks, main snare hits, a few ghost notes, some hat fragments, and maybe one or two interesting tails or reversed pieces if the break gives you those options.

Now let’s build the core groove. Open a MIDI clip and sketch in a simple one-bar pattern. The main idea is to keep the classic DnB anchor points while letting the break do the rest of the talking.

A good starting logic is this: put a strong kick on beat one, a snare hit on beat two, and another snare or snare variation on beat four. Between those anchors, add a few ghost notes and tiny break fragments to create motion. In jungle, those little in-between details are what make the groove feel human and urgent.

So try this in practice. Place one kick slice on beat one. Place a snare slice or a strong break snare on beat two. Add a quieter ghost note just before or just after that snare if it helps the groove breathe. Put a hat or small break tail before beat four, and finish with a snare or snare variation on beat four.

Use velocity to make it breathe. Keep your main hits strong, maybe around 100 to 127. Bring ghost notes down much lower, somewhere around 35 to 80. Hats and small fragments can sit in the middle. That variation in velocity is a huge part of what makes jungle feel alive instead of robotic.

Now we move into variation. A great DnB edit usually works by saying one thing in the first bar, then answering it in the second bar. That is the call-and-response idea. Bar one establishes the groove. Bar two adds the twist.

So in bar one, keep it clean and readable. Then in bar two, add one or two small changes. Maybe a snare drag into the main hit. Maybe a quick double kick to push the momentum. Maybe a reverse slice leading into beat four. Maybe a tiny fill at the end of the bar. Even one small change can make the phrase feel designed instead of looped.

A useful beginner rule is simple: bar one establishes, bar two answers. That alone will improve your edits fast.

Now let’s shape the break so it sits in a modern mix. On the break track or the group, add EQ Eight first. Use it gently. We are not trying to over-process the loop, just clean up the parts that fight the mix. If there is too much rumble, you can high-pass very lightly around 25 to 35 Hz. If the break feels boxy or muddy, try a small cut somewhere around 200 to 400 Hz. If it gets harsh on top, reduce a little around 6 to 9 kHz. Make small moves and listen in context.

Next add Drum Buss. This is great for adding punch, tone, and a little grit. Start with modest Drive, maybe around 5 to 15 percent. Keep Crunch fairly low to moderate. Boom should usually stay low unless you specifically want extra low-end thump from the break itself. If the break needs more snap, a little positive Transient can help.

If the break still feels too polite, add Saturator after EQ or before Drum Buss. Turn Soft Clip on and try a few dB of Drive. This can bring out that gritty darker jungle edge without destroying the transient shape. The goal is not to crush it. The goal is to make it sound like it has attitude.

If the break is carrying too much of the low-end weight, this is also the moment to clean it up further so your sub has room later. In DnB, the break and the bass need to share space intelligently. If they both compete for the same area, the whole drop gets cloudy.

Now, if the break feels too thin, you can layer a tight kick or a snare one-shot under it. This is very common in modern drum and bass edits. Use a stock sample in Simpler or Drum Rack and keep the layer subtle. It should reinforce the groove, not replace it.

If you layer a kick, use it to add weight under the main kick moments. If you layer a snare, use it for extra crack and presence. Keep the low end of the snare layer cleaned up with EQ so it does not muddy the mix. A kick layer should add punch, not turn into a whole new pattern.

Now let’s bring the bass into the picture, because the drum edit has to work with the bass, not against it. Even though this lesson is focused on the amen variation, the drums need to leave space for the sub and any midrange bass movement.

For a simple placeholder, use Operator for a sub or Wavetable for a basic reese-style layer. Keep it simple. One sustained note can be enough for now. The important thing is to leave room for the drum accents. If you need to, mute or thin out the bass briefly before a fill. That space makes the drum edit feel bigger. In drum and bass, silence is part of the groove.

Now we can add some movement and make the section feel like an actual arrangement rather than a static loop. This is where automation starts doing a lot of the heavy lifting.

You can automate a few useful things: a reverb send on a selected snare hit, a little delay on a final fill hit, an Auto Filter sweep for intro or transition movement, or a small increase in Drum Buss Drive to push tension before the next phrase.

For a moody moonlit vibe, keep the atmosphere subtle. A quiet pad, a vinyl texture, some rain, or a distant ambient layer can work really well if it stays tucked behind the drums. The edit should still be the star. We are just helping the mood land.

If you want to make the phrase feel more developed, build it into an eight-bar structure. Bars one and two can be your main amen variation. Bars three and four can get slightly busier with one extra ghost note or fill. Bars five and six can strip back a little and feel cleaner. Bars seven and eight can build tension with a snare roll, a reversed slice, or some filter movement. This kind of phrasing makes a loop feel like it is progressing instead of simply repeating.

At this point, do a quick mix check, especially in mono. Drum and bass lives or dies on low-end discipline. Keep your sub mostly centered. Keep the break’s low end controlled. Make sure the kick and sub are not both dominating the same space. Utility is really useful here for checking mono compatibility.

A simple way to think about it is this: the sub lives in the middle, the main kick and snare stay focused, and the width goes into hats, textures, and small break details. If the break has too much low rumble, cut it. Let the bass breathe.

Let’s talk about common mistakes, because these are the things that usually trip people up early on.

First, do not over-chop the break. If every little beat is chopped into tiny pieces, you can lose the human feel that makes jungle exciting. Keep some anchor hits intact and use chops as accents.

Second, do not leave too much low end in the break. A big break and a big sub will fight each other instantly. Clean the break with EQ and protect the sub space.

Third, vary your velocities. Flat velocity makes the whole thing sound programmed in a boring way. Ghost notes should be softer. Main hits should be stronger. That contrast matters.

Fourth, do not drown the whole thing in reverb. A little reverb on a chosen hit can sound magical. Too much can wash out the groove and kill the drive.

Fifth, be careful with stereo widening on low drums. Keep the bottom end centered and let the width live in the top textures.

And finally, do not fill every empty space. DnB needs room to hit. A few well-placed ghost notes are usually more effective than constant clutter.

Here are a few pro-style ideas you can use to make the edit feel darker and more intentional.

Think in contrasts, not constants. A great amen variation usually works because it alternates between open space and busy detail. If everything is busy all the time, nothing feels exciting.

Keep one home version of the loop. Build a simple, reliable main pattern first, then create variations from that. That way you always have a strong base to return to.

Trust the context, not just the solo sound. A tiny chop might feel underwhelming by itself, but once the bass and atmosphere come in, it can be exactly the right size.

Use fewer elements than you think. This is a big one for beginners. Often the edit gets better when you remove one or two busy hits and let the groove breathe.

Make changes with purpose. Ask yourself if a new hit is adding momentum, surprise, or tension. If not, maybe it is not needed.

One of the best beginner-to-intermediate tricks is to only micro-edit the last quarter of the bar. Instead of rewriting the whole loop, just change the final beat or the last two eighth notes. You could add a doubled snare pickup, drop out a kick on the last beat, or add a quick hat rush into the loop restart. Small change, big impact.

You can also alternate between two snare personalities. Use one cleaner snare in bar one and a rougher, more chopped snare in bar two. That contrast makes the phrase feel like it is evolving. It does not need to be dramatic. Even a tiny difference in slice choice or velocity can be enough.

Another nice trick is to add tiny timing offsets to ghost notes or hat fragments. If a chop is nudged a few milliseconds late, it can feel more human. Use this sparingly. It is great for small details, but do not mess up your main kick and snare anchors.

You can also use one silent gap on purpose. Removing one expected hit can create more tension than adding another one. That missing kick before the snare, or that brief pause before the loop resets, can be incredibly effective.

Now, if you want to turn this into a real arrangement practice, think in versions. Make a clean version, a darker version, and a busier version of the same two-bar amen edit.

For the clean version, keep it simple with anchor hits and minimal ghost notes.

For the dark version, add a reversed slice, a little more saturation, and maybe a short reverb tail on one snare.

For the busy version, bring in more ghost notes, one pickup fill, and a changed ending to the second bar.

The important thing is that all three versions still feel like the same track. That is how you start thinking like an arranger instead of just a loop maker.

So here is the quick recap.

A strong Moonlit Jungle amen variation is built from anchor hits, ghost notes, and selective chops. In Ableton Live 12, Slice to New MIDI Track, Drum Rack, EQ Eight, Drum Buss, Saturator, and Utility are your core tools. Keep the groove clear for the snare, keep the low end disciplined, and use small rhythmic changes to keep the loop alive. Make bar-to-bar variation so the pattern feels like a phrase. Leave space for the bass and sub. And remember, darker DnB is not about adding more and more layers. It is about weight, tension, grit, and control.

If you want to practice this properly, spend ten to twenty minutes making a two-bar edit using only stock Ableton tools. Import one break, slice it, build a pattern with one strong kick anchor, a snare on two, a snare on four, and at least three ghost notes. Add one small fill or reverse slice in bar two. Put EQ Eight and Drum Buss on the break group. Automate one thing, like a filter, reverb send, or Drum Buss Drive. Then duplicate it and change only two or three hits so the second loop feels like a variation. If you can make that feel like a real drop loop with just the break, one bass note, and a subtle atmosphere, you are thinking like a proper drum and bass editor.

Alright, that is the Moonlit Jungle amen variation workflow. Build it clean, keep it moving, and let the groove breathe.

mickeybeam

Go to drumbasscd.com for +100 drum and bass YouTube channels all in one place - tune in!

Generating PDF preview…