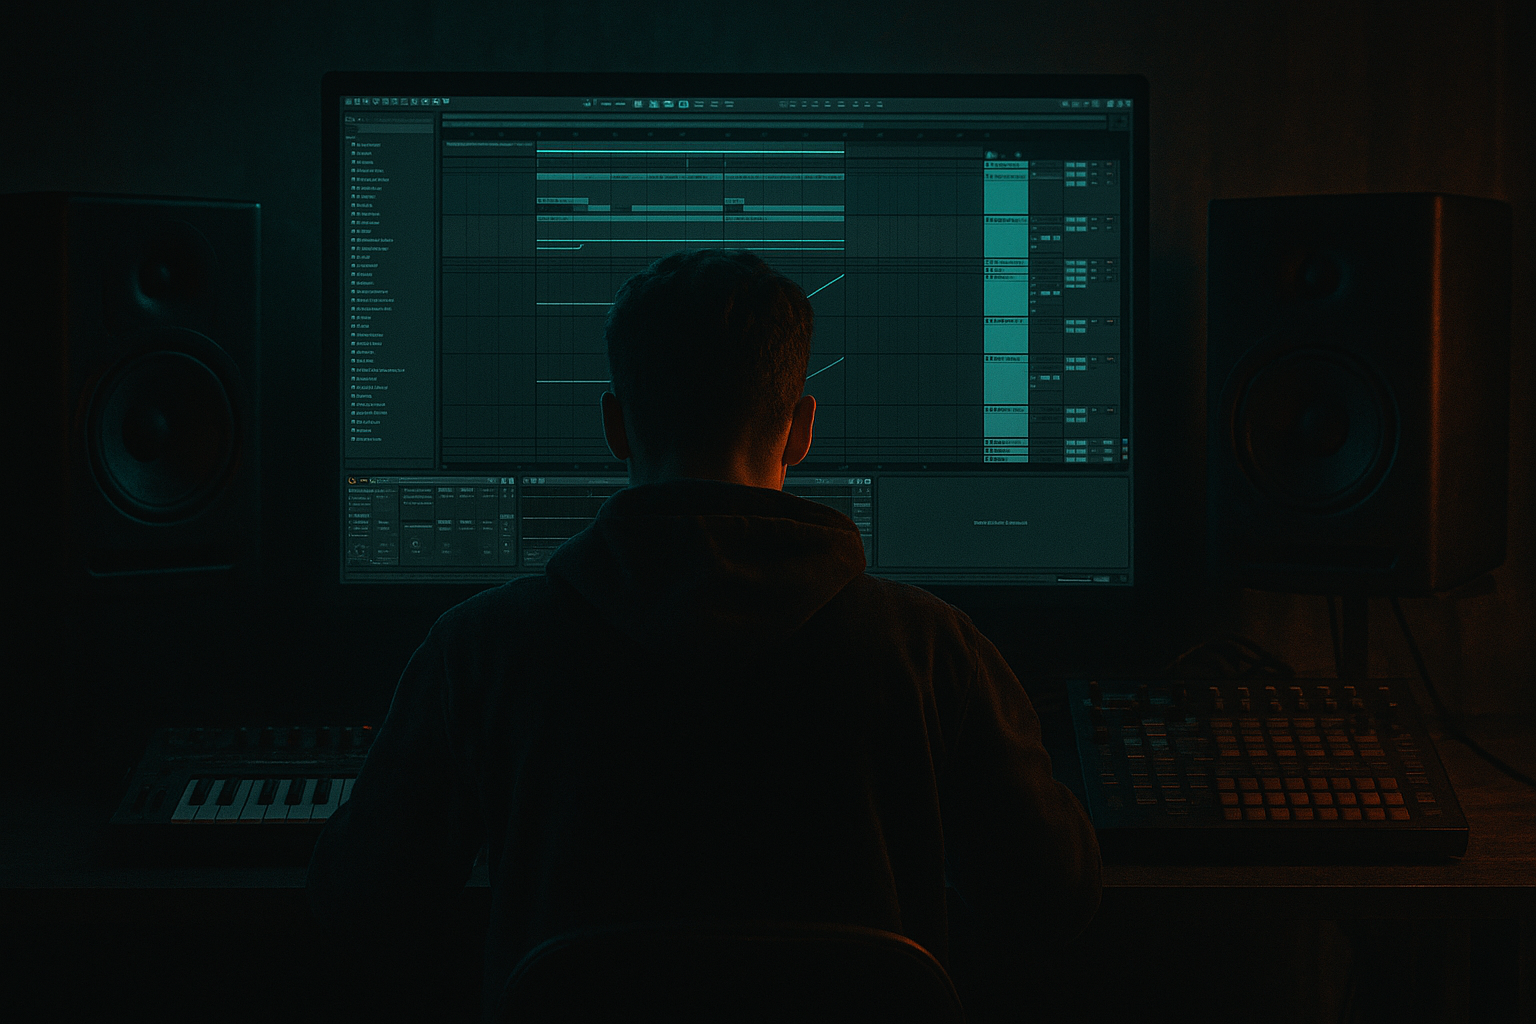
DNB COLLEGE

Drum & Bass Ableton Live 12 Tutorials

LESSON DETAIL

Method for breakbeat with chopped-vinyl character in Ableton Live 12 (Beginner)

An AI-generated beginner Ableton lesson focused on Method for breakbeat with chopped-vinyl character in Ableton Live 12 in the Mastering area of drum and bass production.

Back to lessons
Method for breakbeat with chopped-vinyl character in Ableton Live 12 (Beginner) cover image

Narrated lesson audio

The voice track includes the tutorial plus extra teacher commentary.

Open audio file

Main tutorial

Method for Breakbeat with Chopped-Vinyl Character in Ableton Live 12

1. Lesson overview

In this lesson, you’ll learn how to turn a clean breakbeat into something that feels like it came off a battered jungle dubplate or a chopped-up vinyl loop, while still sounding tight and modern in Ableton Live 12. This is a huge part of drum and bass, jungle, and rolling bass music—especially when you want that gritty, human, slightly unstable energy that makes a beat feel alive. 🥁

We’ll focus on a practical workflow:

  • slicing a break into playable pieces
  • re-ordering and re-grooving the hits
  • adding vinyl-style movement, grit, and pitch wobble
  • shaping the loop so it still hits hard in a DnB mix
  • preparing it for arrangement like an actual track, not just a loop
  • This is a beginner-friendly mastering lesson, but the actual goal is to make your break sound like a finished, characterful element rather than a plain sample.

    ---

    2. What you will build

    By the end, you’ll have:

  • a chopped breakbeat loop with vinyl-style feel
  • subtle pitch drift, noise, and saturation
  • a tight low-end that works around a kick and bassline
  • a loop that can be used in:
  • - intro sections

    - drop layers

    - breakdown textures

    - fill sections and switch-ups

    You’ll be using stock Ableton tools like:

  • Simpler
  • Drum Rack
  • Audio Effects Rack
  • Saturator
  • Drum Buss
  • Auto Filter
  • Redux
  • EQ Eight
  • Utility
  • Groove Pool
  • Warp
  • Echo or Delay
  • optionally Vinyl Distortion if available in your pack/library
  • ---

    3. Step-by-step walkthrough

    Step 1: Choose the right break

    Start with a break that already has movement and transient detail.

    Good choices for DnB/jungle:

  • classic amen-style breaks
  • funky drummer-style breaks
  • dusty soul breaks with ghost notes
  • any loop with snare swing and hi-hat chatter
  • Important: don’t start with a super-clean modern loop if you want chopped-vinyl character. You want a break that already has some personality.

    #### What to listen for:

  • strong snare hits
  • interesting ghost notes
  • some room tone or tape noise
  • a groove that feels “played,” not robotic
  • ---

    Step 2: Warp the break properly

    Drag the break into an audio track.

    1. Double-click the clip.

    2. Turn on Warp.

    3. Set the first downbeat correctly.

    4. Choose a warp mode:

    - Beats for punchy drum loops

    - Complex or Complex Pro if the break has lots of tonal room sound

    5. Set the loop length to a musical bar length, usually:

    - 1 bar for tight loop work

    - 2 bars for more natural phrasing

    #### Recommended warp settings:

  • Preserve: 1/16 or 1/8 for transient-heavy breaks
  • Transient Loop Mode: On if the break is looping and you want movement preserved
  • Seg. BPM: match the project tempo properly
  • For DnB, start around:

  • 170–174 BPM for rolling / modern DnB
  • 165–172 BPM for more classic jungle feel
  • ---

    Step 3: Slice the break into a Drum Rack

    This is where the chopped character starts to appear.

    1. Right-click the audio clip.

    2. Choose Slice to New MIDI Track.

    3. Slice by:

    - Transient if you want intelligent hit-based chopping

    - 1/8 or 1/16 if you want strict rhythmic control

    For beginner workflow, I recommend:

  • Slice to Drum Rack by Transient
  • This gives you each hit on its own pad.

    #### Why this helps:

  • you can re-order hits fast
  • you can layer hits
  • you can mute, duplicate, or retrigger parts
  • you can add effects per hit if needed
  • ---

    Step 4: Program a chopped-vinyl pattern

    Now write a MIDI clip with a deliberately “edited” feel.

    Instead of looping the break straight through, try this structure:

  • start with the original groove
  • repeat one snare hit
  • cut a kick early
  • place a hi-hat pickup before the snare
  • leave tiny gaps for vinyl-like tension
  • #### Example 1-bar DnB chop idea:

  • kick on 1
  • ghost snare on 1e
  • snare on 2
  • chopped hi-hat on 2a
  • kick on 3
  • snare on 4
  • extra break fill into the next bar
  • This creates that “someone manually edited a break on turntables” feel.

    #### Key idea:

    Do not make it perfect.

    A vinyl-chop character comes from:

  • slight irregularity
  • micro-gaps
  • hit repeats
  • changing velocity
  • tiny timing offsets
  • ---

    Step 5: Add groove, not just quantization

    A lot of beginners over-quantize breaks and accidentally remove the whole vibe.

    Use Ableton’s Groove Pool.

    1. Drag a groove from:

    - an MPC-style swing

    - a drum loop groove from your library

    2. Apply it lightly to your MIDI clip

    3. Start with subtle settings:

    - Timing: 10–30%

    - Random: 0–10%

    - Velocity: 5–20%

    - Base: usually keep at 1/16 unless needed

    #### For jungle flavor:

    Try a slightly late snare feel and looser hats.

    #### For rolling DnB:

    Keep the kick/snare grid tighter, but let hats and ghost notes move.

    ---

    Step 6: Humanize the slice velocities

    A chopped-vinyl break should breathe.

    In MIDI view:

  • vary note velocity between repeated hits
  • make ghost notes quieter
  • make lead snare hits stronger
  • lower a few hat hits to create a natural lilt
  • #### Rough starting point:

  • main kick/snare hits: 90–127 velocity
  • ghost notes: 25–70 velocity
  • hat chatter: 40–90 velocity
  • If every note is the same level, it starts sounding like a machine loop rather than a break.

    ---

    Step 7: Add pitch movement for vinyl character

    Vinyl chops often feel slightly unstable in pitch.

    You can do this in a few ways:

    #### Option A: Simpler pitch variation

    If your slices are in Simpler:

  • activate Transposition per pad or note
  • slightly detune a few chops:
  • - -1 to -5 semitones for darker hits

    - +1 to +3 semitones for accidental lifted bits

  • use tiny variations, not huge jumps
  • #### Option B: Clip envelopes

    Use clip envelopes or automation to:

  • subtly dip pitch on a repeat
  • pitch down the end of a fill
  • create “turntable drag” style moments
  • #### Option C: Chorus-style drift

    You can fake instability with:

  • Chorus-Ensemble
  • very subtle Frequency Shifter
  • tiny Auto Pan movement
  • Keep it subtle. The goal is character, not seasickness.

    ---

    Step 8: Build a vinyl-style effects chain

    Now let’s process the break so it feels older, dirtier, and more physical.

    A solid stock Ableton chain:

    #### 1. EQ Eight

    Use EQ to clean and shape:

  • high-pass very low rumble if needed
  • cut muddy low mids around 200–400 Hz
  • tame harsh top if the break is too sharp
  • #### Suggested starting points:

  • High-pass at 30–40 Hz
  • Small cut at 250–350 Hz if boxy
  • Gentle shelf cut above 10–12 kHz if too crisp
  • ---

    #### 2. Saturator

    Adds harmonic density and grime.

    Suggested settings:

  • Drive: 2–6 dB
  • Soft Clip: On
  • Base: default is fine
  • If you want a more tape/vinyl feel, don’t overdo it.

    Just enough to thicken the transients.

    ---

    #### 3. Drum Buss

    Excellent for DnB breaks.

    Suggested starting settings:

  • Drive: 5–15%
  • Boom: low or off if the break is already busy
  • Transient: slightly up for snap
  • Crunch: subtle, around 5–20%
  • Use this carefully. Too much Drum Buss can make the break lose its chopped detail.

    ---

    #### 4. Redux

    This is great for a more lo-fi chopped-vinyl edge.

    Suggested settings:

  • Downsample: low to moderate
  • Bit Reduction: subtle, not extreme
  • blend in lightly
  • Try mixing it in parallel if your break gets too crushed.

    ---

    #### 5. Auto Filter

    Use this for DJ-style movement and old-record shaping.

    Ideas:

  • automate a gentle low-pass sweep into fills
  • slightly darken intro sections
  • open the filter on drops
  • Set:

  • Low-pass
  • resonance low to moderate
  • keep movement musical
  • ---

    #### 6. Utility

    Use Utility for clean gain staging:

  • trim the break to sit properly in the mix
  • optionally reduce stereo width if the break is too wide
  • keep low end centered
  • ---

    Step 9: Add noise and “record” texture

    Vinyl character isn’t only about the drums. It’s also about the background texture.

    You can add a very quiet noise layer:

    #### Option A: Use a separate audio track

    Add:

  • vinyl crackle
  • record hiss
  • room noise
  • dusty ambience
  • Low-pass it so it doesn’t fight the hats.

    #### Option B: Make your own with stock devices

    Create a return or utility chain with:

  • Operator noise
  • Auto Filter
  • Saturator
  • Utility
  • Keep it subtle and tucked behind the break.

    ---

    Step 10: Use timing tricks to fake a chopped sample feel

    One reason chopped-vinyl breaks feel good is because they’re slightly imperfect.

    Try these tricks:

  • move one snare a few milliseconds late
  • nudge a kick slightly early
  • duplicate a hat hit for a stutter effect
  • insert a short gap before a fill
  • In Ableton:

  • zoom in and manually shift notes by tiny amounts
  • use clip start markers for chopped entry points
  • add short rests before key hits
  • Even tiny changes can make a big difference.

    ---

    Step 11: Arrange it like a DnB record

    Now place the break in a real arrangement.

    A strong structure might be:

    #### Intro

  • filtered break loop
  • vinyl noise
  • minimal bass tease
  • one chopped snare repeat
  • #### Build

  • increase break intensity
  • bring in ghost notes
  • open the filter
  • add a fill every 8 bars
  • #### Drop

  • full break chops
  • bassline in call-and-response
  • extra snare layers or ghost percussion
  • slight variation every 4 or 8 bars
  • #### Breakdown

  • strip the break back
  • use only hats, noise, and a few chopped hits
  • reintroduce the main snare for tension
  • #### Second drop

  • new chop pattern
  • stronger saturation
  • extra fills or reversed snippets
  • A chopped-vinyl break becomes much more effective when it evolves across the track.

    ---

    Step 12: Bounce and resample for extra character

    This is a classic DnB trick.

    Once your chopped break feels good:

    1. Freeze and flatten, or

    2. Resample it to audio

    Then:

  • re-slice the bounced version
  • reverse a few pieces
  • pitch one fill down
  • add new edits
  • This workflow helps the break feel more “found” and less programmed.

    ---

    4. Common mistakes

    1. Over-quantizing everything

    If every hit is locked perfectly to the grid, the break loses its vinyl feel.

    Fix: keep some hits slightly late/early and use light groove only.

    ---

    2. Making it too dirty

    A chopped-vinyl break should feel gritty, but still punch in a DnB mix.

    Fix: use saturation and reduction subtly. If the snare disappears, you’ve gone too far.

    ---

    3. No dynamic contrast

    If all slices are the same velocity and the same length, the break feels flat.

    Fix: vary velocities, leave gaps, and create quieter ghost notes.

    ---

    4. Too much low end in the break

    In DnB, the break and bassline must coexist.

    Fix: high-pass the break carefully, and leave the sub to the bass and kick system.

    ---

    5. Using a break that’s too clean

    A pristine loop may not naturally deliver the vinyl vibe.

    Fix: choose a break with some dust, room, or old-school swing already in it.

    ---

    6. Ignoring arrangement

    A great loop repeated for 2 minutes still sounds like a loop.

    Fix: change the chop pattern every 4, 8, or 16 bars.

    ---

    5. Pro tips for darker/heavier DnB

    Tip 1: Darken the break without killing the attack

    Use:

  • EQ Eight to soften harsh highs
  • Auto Filter low-pass automation
  • Saturator for body
  • This helps the break sit under dark bass design without sounding brittle.

    ---

    Tip 2: Layer a crisp top break with a dirty mid break

    A strong DnB drum sound often comes from layering:

  • one chopped break for body and movement
  • one tight top percussion layer for attack
  • Use Utility and EQ to keep layers separated:

  • low-passed dusty layer
  • high-passed crisp layer
  • ---

    Tip 3: Put your heavy fills at phrase endings

    For darker DnB, make fills happen:

  • bar 8
  • bar 16
  • before the drop
  • at the end of a 4-bar phrase
  • This gives the track that intense “next section incoming” energy.

    ---

    Tip 4: Use reverse chops and ghost reverses

    Reverse one or two slices before a snare or crash.

    This works especially well for:

  • ominous jungle intros
  • tense build-ups
  • halftime-to-DnB switch sections
  • ---

    Tip 5: Sidechain the break lightly to the bass

    If your bass is powerful, a tiny bit of sidechain ducking can help the break breathe.

    Use:

  • Compressor with sidechain
  • or Glue Compressor if that feels better
  • Keep it subtle. The break should still feel natural.

    ---

    Tip 6: Try parallel crunch

    Duplicate the break or use a return track with:

  • Saturator
  • Redux
  • Drum Buss
  • Blend it under the clean break.

    This gives you heaviness without destroying the detail.

    ---

    6. Mini practice exercise

    Exercise: Build a 4-bar chopped-vinyl DnB loop

    #### Goal:

    Create a 4-bar break loop with:

  • 1 main kick-snare phrase
  • 3 chopped variations
  • 1 fill at the end
  • #### Steps:

    1. Load a break into Ableton.

    2. Slice it to a Drum Rack.

    3. Program a 1-bar loop with:

    - main snare on beat 2 and 4

    - at least 2 ghost notes

    - 1 duplicated hat chop

    4. Copy it across 4 bars.

    5. In bars 2–4:

    - move one hit slightly off-grid

    - change one velocity

    - add one reverse or muted slice

    6. Add:

    - EQ Eight

    - Saturator

    - Drum Buss

    - a light groove

    7. Bounce it and listen in context with a bassline.

    #### Challenge:

    Make bar 4 sound like a “vinyl edit” that naturally leads back to bar 1.

    ---

    7. Recap

    You’ve now got a practical method for making a breakbeat with chopped-vinyl character in Ableton Live 12 for drum and bass:

  • pick a break with natural personality
  • warp it cleanly
  • slice it to a Drum Rack
  • rebuild it with edits, gaps, and repeats
  • humanize velocity and timing
  • add subtle saturation, reduction, and filtering
  • arrange it like a real DnB track
  • resample and refine for extra grit 🎛️

The main idea is simple:

don’t just loop the break—edit it like a performance.

That’s what gives you the classic chopped-vinyl energy that works so well in jungle and DnB. If you want, I can also turn this into a screen-by-screen Ableton Live 12 workflow or give you a specific drum rack chain for this sound.

Ask GPT about this lesson

Chat with the lesson tutor, get follow-up help, or use quick actions.

Bigup 👽 Ask me anything about this lesson and I’ll answer in context.

Narration script

Show spoken script
Welcome to this beginner lesson on making a breakbeat with chopped-vinyl character in Ableton Live 12.

If you’re into drum and bass, jungle, or rolling bass music, this sound is a huge part of the vibe. We’re talking about breaks that feel dusty, human, slightly unstable, and full of movement, like they were pulled from an old dubplate and edited by hand. The goal here is not just to loop a break. The goal is to make it feel performed.

In this lesson, I’m going to walk you through a practical workflow using Ableton’s built-in tools. We’ll choose the right break, warp it properly, slice it into a Drum Rack, rebuild it with chops and timing changes, then add grit, wobble, and character without killing the punch. By the end, you should have a break that feels ready for a real DnB arrangement, not just a loop on its own.

First, choose the right break.

This matters a lot. If you want chopped-vinyl energy, start with a break that already has personality. A classic amen-style break is perfect. Funky drummer-style breaks work well too. Even dusty soul breaks with ghost notes can sound amazing. What you want is movement. Strong snare hits, interesting hat chatter, a little room tone, maybe some tape noise. That already gives you a head start.

Try not to begin with a super-clean modern loop if your goal is old-school character. Clean can be useful, but for this sound, personality wins. Listen for a break that feels played rather than programmed.

Next, drag the break into an audio track and get the warping right.

Open the clip, turn Warp on, and make sure the first downbeat is aligned correctly. This is important because if the timing is off here, everything later will feel messy. For most drum loops, Beats warp mode is a great starting point because it preserves the punch and transient feel. If the break has a lot of tonal room sound, Complex or Complex Pro can work better.

Set the loop length to something musical, usually one bar or two bars. For DnB, you’ll usually be working around 170 to 174 BPM. If you want a more classic jungle feel, a slightly lower or looser range can work too, but the big thing is that the break sits cleanly in the grid before you start chopping it up.

Now comes the fun part: slicing the break into a Drum Rack.

Right-click the audio clip and choose Slice to New MIDI Track. For a beginner-friendly workflow, slice by Transient. That way, Ableton gives each hit its own pad, and you can play the break like an instrument. This is where the chopped character starts to appear, because now you’re not just hearing the original loop. You’re controlling the hits individually.

Once the break is in the Drum Rack, start writing a MIDI pattern instead of just letting the original loop repeat.

This is the key mindset shift. Don’t think, “How do I keep the loop going?” Think, “How do I edit this like a breakbeat performance?” Start with the original groove as a reference, then make small changes. Repeat a snare hit. Cut a kick early. Drop a tiny gap before a snare. Add a hat pickup. Let the loop breathe.

A simple one-bar idea might be a kick on beat one, a ghost snare just after it, a main snare on beat two, a chopped hi-hat pickup before the next snare, another kick on beat three, then a snare on beat four, followed by a little fill into the next bar. That kind of pattern gives you that hand-edited, vinyl-chopped feel.

And here’s an important tip: do not make it perfect.

The charm comes from little imperfections. Slight irregularity. Micro-gaps. Hit repeats. Tiny timing shifts. That’s what makes the break sound like it was pulled from a real record and cut up on a sampler.

Now let’s talk groove.

A lot of beginners over-quantize everything, and that can flatten the life out of a break. Ableton’s Groove Pool is really useful here. You can drag in an MPC-style swing or a groove from another drum loop and apply it lightly. Start subtle. You don’t need extreme swing. A little timing movement goes a long way.

A good starting point is to keep timing adjustments around 10 to 30 percent, with small amounts of velocity variation. For jungle flavor, you might let the snares sit a little late and keep the hats a bit looser. For a more modern rolling DnB feel, keep the kick and snare tighter, but let the ghost notes and hats breathe.

That leads into velocity shaping, which is huge.

If every hit has the same velocity, the loop will feel flat and mechanical. So go into MIDI view and vary those note velocities. Make the ghost notes softer. Give the main snare more weight. Let a few hats fall back a little. This alone can transform a rigid loop into something that feels alive.

As a rough guide, your main kick and snare hits might sit somewhere around 90 to 127 velocity, while ghost notes could live in the 25 to 70 range. Hats can move around in between. You’re not trying to make it random. You’re trying to make it breathe.

Now let’s add pitch movement for that vinyl instability.

Old chopped records often feel a little unstable in pitch, and you can fake that in a few ways. If your slices are in Simpler, you can slightly detune certain chops. Maybe one hit goes down a semitone or two. Maybe another lifts up just a little. Keep it subtle. The goal is character, not a weird wobble that distracts from the groove.

You can also automate little pitch dips at the end of a fill or on a repeated hit, which can suggest a turntable slowing down slightly. Another nice trick is using very subtle Chorus-Ensemble, Frequency Shifter, or Auto Pan movement to create a gentle drift effect. Again, the key word is subtle.

Now we build a processing chain to make the break feel older, dirtier, and more physical.

Start with EQ Eight. Use it to shape the tone and clean up anything that doesn’t need to be there. A gentle high-pass around 30 to 40 Hz can clear out useless rumble. If the break feels boxy, a small cut around 250 to 350 Hz can help. If the top end is too bright or crispy, a soft shelf down above 10 or 12 kHz can warm things up.

Next, try Saturator. A little drive here adds harmonic density and grime. You don’t need to slam it. A few dB of drive with Soft Clip on can make the transients thicker and help the break feel more like it’s coming off a piece of hardware rather than a clean sample file.

Drum Buss is another great one for this style, especially in DnB. A bit of drive, a little transient enhancement, and maybe a touch of crunch can make the break hit harder. But be careful. If you overdo it, you’ll smear the chopped detail. The break should still feel clear, even while it’s dirty.

Redux is useful when you want a more lo-fi chopped-vinyl edge. A little downsampling or bit reduction can give the break a rougher texture. I’d recommend blending it in lightly, maybe even in parallel, so you keep the attack while adding a dusty edge underneath.

Auto Filter is great for movement. You can use it to darken intros, open things up in drops, or sweep into fills like a DJ working the filter on a mixer. A low-pass filter with gentle resonance is a classic move here.

And don’t forget Utility. Utility is simple, but it’s important. Use it for clean gain staging, and if the break feels too wide, you can narrow it a bit. Keeping the low end centered is especially important in drum and bass, where the bassline needs space.

Let’s add texture now, because vinyl character is not just the drums. It’s also the background.

A very quiet noise layer can make a huge difference. You could use actual vinyl crackle, record hiss, room noise, or dusty ambience. Keep it low in the mix and filter it so it doesn’t fight the hi-hats. If you want to make your own, you can build a texture layer with Operator noise, Auto Filter, Saturator, and Utility. Tuck it behind the break so it feels like atmosphere, not noise clutter.

Another big part of the sound is timing tricks.

Move one snare a few milliseconds late. Nudge a kick a tiny bit early. Duplicate a hat for a quick stutter. Leave a short gap before a fill. These little edits make the break feel sampled and handled, rather than drawn on a grid. Zoom in and make small moves. Tiny timing changes can completely change the attitude of the loop.

Now let’s think about arrangement, because this is where the break stops being a loop and starts feeling like a record.

In the intro, you might only show a filtered version of the break with some vinyl noise and just a hint of bass. Then in the build, bring in more ghost notes, open the filter, and add a fill every few bars. At the drop, let the full chop pattern hit with the bassline answering it. In the breakdown, strip the drums back again and maybe leave just hats, noise, and a few chopped hits. Then in the second drop, change the pattern, add a stronger saturation layer, or throw in a reversed slice to keep it moving.

That evolution matters. A chopped-vinyl break sounds much more convincing when it changes over time.

A really useful workflow trick is to bounce and resample once you’ve got something you like. Freeze and flatten, or resample the break to audio. Then re-slice it and edit it again. You can reverse a few bits, pitch down a fill, or rearrange the pieces in a new way. This makes the result feel more found and less programmed.

Now let’s cover a few common mistakes.

First, don’t over-quantize everything. If every hit is locked perfectly, the break loses the vinyl feel. Second, don’t get too dirty too fast. If the saturation or reduction is so heavy that the snare disappears, the groove will suffer. Third, don’t forget dynamics. Same velocity on every hit equals flat energy. And finally, don’t ignore arrangement. A great loop repeated over and over still feels like a loop. Change it every four, eight, or sixteen bars.

Here are a few pro-style tips if you want the break to feel darker and heavier.

Try darkening the break without killing the attack. Use EQ to soften the harsh top end, then add just enough saturation to keep body in the sound. You can also layer a dirty mid break with a cleaner top percussion layer. That contrast between rough and controlled is really powerful.

For tension, use reverse chops before a snare or crash. That works especially well in jungle intros and dark build-ups. And if the bass is really heavy, a tiny bit of sidechain ducking can help the break breathe without making it feel unnatural.

Parallel crunch is another great move. Duplicate the break or send it to a return with Saturator, Redux, and Drum Buss. Blend that crushed version underneath the clean one. That gives you weight without losing detail.

Here’s a quick practice challenge you can try right away.

Build a four-bar chopped-vinyl DnB loop. Load a break, slice it to a Drum Rack, and program a one-bar pattern with a main snare on two and four, at least two ghost notes, and one duplicated hat chop. Copy that across four bars. Then in bars two through four, move one hit slightly off-grid, change one velocity, and add one reverse or muted slice. Finish with EQ Eight, Saturator, Drum Buss, and a light groove. Then bounce it and listen with a bassline underneath it.

If you want to push it further, make bar four sound like a vinyl edit that naturally loops back into bar one.

So let’s recap.

Pick a break with personality. Warp it cleanly. Slice it to a Drum Rack. Rebuild it with chops, gaps, repeats, and timing edits. Humanize the velocities. Add subtle pitch movement, saturation, filtering, and texture. Arrange it like a real drum and bass record. Then resample and refine it until it feels like a performance instead of a static loop.

That’s the real secret here. Don’t just loop the break. Edit it like it was played.

That’s how you get that chopped-vinyl energy that feels alive, gritty, and ready for a DnB mix in Ableton Live 12.

mickeybeam

Go to drumbasscd.com for +100 drum and bass YouTube channels all in one place - tune in!

Generating PDF preview…