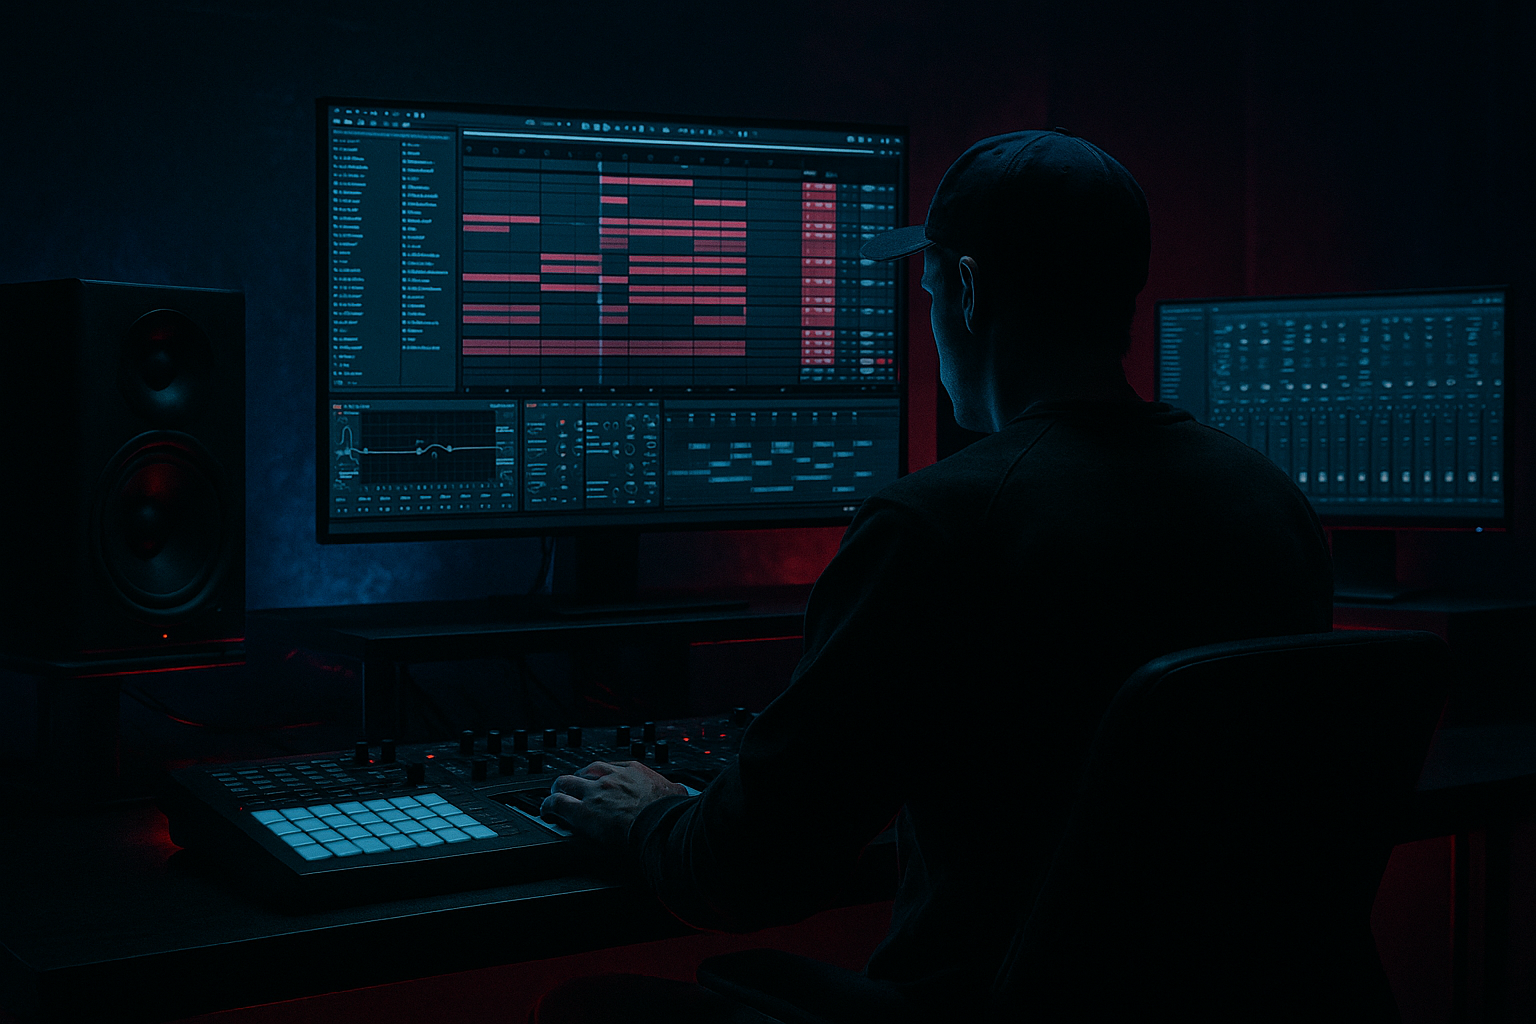
DNB COLLEGE

Drum & Bass Ableton Live 12 Tutorials

LESSON DETAIL

Macro mapping for speed using Arrangement View (Intermediate)

An AI-generated intermediate Ableton lesson focused on Macro mapping for speed using Arrangement View in the Workflow area of drum and bass production.

Back to lessons
Macro mapping for speed using Arrangement View (Intermediate) cover image

Narrated lesson audio

The voice track includes the tutorial plus extra teacher commentary.

Open audio file

Main tutorial

```markdown

Macro Mapping for Speed Using Arrangement View (DnB Workflow) 🚀🥁

1) Lesson overview

Macro mapping is one of the fastest ways to turn “fiddly” sound design into performance-ready controls. In drum and bass—where you’re constantly shaping drum punch, bass movement, and build tension across an arrangement—Macros let you automate musical changes quickly without drawing 12 automation lanes.

In this lesson you’ll use Ableton Live’s Instrument/Drum/Bass Racks + Macros + Arrangement View automation to build a few “DnB control hubs” that make your tracks evolve fast and clean.

Skill level: Intermediate

Goal: Speed up arrangement decisions by automating a small set of meaningful Macros instead of dozens of parameters.

---

2) What you will build

You’ll build three macro-driven “control systems” designed for rolling DnB/jungle:

1. Drum Rack Macro Hub

- One knob to push “More Punch”, another for “Break Crunch”, another for “Room/Space”.

2. Reese/Bass Macro Hub

- One knob to control movement (filter + chorus/unison + distortion mix), one for sub safety, one for growl intensity.

3. Build/Drop FX Macro Rack (on a group bus)

- One knob to sweep tension (HP filter + reverb + delay send-style), plus a “Drop Cut” macro for instant impact.

Then you’ll arrange a 32–64 bar DnB structure and automate only these Macros to get professional transitions quickly.

---

3) Step-by-step walkthrough

Step A — Set up the DnB arrangement skeleton (Arrangement View)

1. Tempo: set to 174 BPM (classic modern DnB range: 172–176).

2. Create locators for a fast working structure:

- `1` Intro (8–16 bars)

- `17` Build (8–16 bars)

- `33` Drop A (16 bars)

- `49` Break / Variation (8–16 bars)

- `65` Drop B (16 bars)

3. Group your core elements now (this matters later for macro control):

- Group 1: `DRUMS` (kick, snare, hats, breaks)

- Group 2: `BASS`

- Group 3: `MUSIC/ATMOS`

- Group 4: `FX/RISE`

> Workflow tip: Put a Utility at the end of each group early. You’ll thank yourself when gain staging and automating later.

---

Step B — Build a Drum Rack Macro Hub 🥁

You’ll map a few high-impact parameters that you typically automate during builds and drops.

#### 1) Create/prepare the drum chain

1. On a MIDI track, load Drum Rack.

2. Add your core DnB kit:

- Kick on C1

- Snare on D1 (layered if you like)

- Hats/percs on F#1–A#1

- Optional: a break slice (Simpler) on another pad for “jungle glue”.

#### 2) Put a “Drum Bus chain” inside an Audio Effect Rack

1. On the Drum Rack track, after the Drum Rack, add Audio Effect Rack.

2. Inside it, add these stock devices in this order (solid starting point):

- Drum Buss (punch/drive)

- Saturator (harmonics)

- EQ Eight (cleaning + presence)

- Glue Compressor (tighten)

- Utility (final trim)

#### 3) Map key parameters to Macros

Click Map on the Audio Effect Rack and map:

Macro 1: “Punch”

  • Drum Buss: Drive (e.g. map from 0 to ~25)
  • Drum Buss: Boom Amount (optional, keep subtle: 0–20)
  • Glue Compressor: Threshold (small range: e.g. -10 to -18 dB depending on material)
  • Macro 2: “Crunch”

  • Saturator: Drive (0 to ~8 dB)
  • Saturator: Dry/Wet (0% to 40–60%)
  • EQ Eight: a gentle high shelf gain (e.g. +0 to +2.5 dB around 8–10 kHz)
  • Macro 3: “Break Bite” (if you’re using a break layer)

  • On the break channel (inside Drum Rack): add Auto Filter
  • Map Auto Filter Frequency (e.g. 200 Hz → 5 kHz)
  • Optional: map Resonance lightly (0.7 → 1.2)
  • Macro 4: “Room”

  • Add Hybrid Reverb (or Reverb) on the drum track
  • Map Dry/Wet (0% → 15–25%)
  • If Hybrid Reverb: map Decay Time a little (0.8s → 1.8s)
  • Macro 5: “Hat Air”

  • EQ Eight: high shelf + Auto Filter on hats track (if separated)
  • Or easier: map drum-bus EQ shelf + Saturator color.
  • > Practical DnB target: Keep the Room macro low during the drop, higher in intros/breakdowns for contrast.

    #### 4) Rename and color

  • Rename the rack: `DRUM MACRO HUB`
  • Rename macros clearly: `PUNCH`, `CRUNCH`, `ROOM`, `BREAK BITE`, `HAT AIR`
  • This is about speed—your future self should instantly understand what each knob does.

    ---

    Step C — Build a Reese/Bass Macro Hub 🔊

    We’ll make a bass rack that can go from “clean rolling sub+reese” to “mean, moving, distorted” via a few Macros.

    #### 1) Create a bass instrument rack

    1. On a MIDI track, load:

    - Wavetable (or Operator) for the reese layer.

    2. Create an Instrument Rack and use 2 chains:

    - Chain 1: `SUB`

    - Chain 2: `REESE`

    SUB chain

  • Instrument: Operator (Sine)
  • Utility after it:
  • - Width = 0% (mono)

    - Gain for staging

    REESE chain

  • Wavetable:
  • - Osc 1: Saw / Basic shapes

    - Unison: 2–4 voices (don’t overdo)

  • Add:
  • - Auto Filter

    - Chorus-Ensemble (or Phaser-Flanger for movement)

    - Saturator (or Roar if you use newer Live versions)

    - EQ Eight

    - Utility

    #### 2) Map bass movement macros

    In the Instrument Rack, map:

    Macro 1: “MOVE”

  • Auto Filter Frequency (e.g. 200 Hz → 2.5 kHz)
  • Auto Filter Resonance (0.7 → 1.4)
  • Chorus-Ensemble Amount (0% → 25%)
  • Saturator Dry/Wet (0% → 35%)
  • Macro 2: “GROWL”

  • Saturator Drive (0 → 10 dB)
  • Optional: add Amp device and map Gain lightly
  • EQ Eight: boost low-mids slightly (e.g. 200–400 Hz +0 → +2 dB) careful, can get boxy
  • Macro 3: “SUB SAFE” (super important in DnB)

  • On REESE chain: EQ Eight low-cut frequency (e.g. 20 Hz → 120 Hz)
  • On SUB chain: Utility Gain (e.g. -6 dB → 0 dB)
  • This macro helps you keep the low-end controlled during intense sections.

    Macro 4: “WIDTH (MID)”

  • Utility on REESE chain: Width (80% → 140%)
  • Optional: map a subtle chorus width or mix.
  • Keep SUB mono—always.

    ---

    Step D — Build a “Build/Drop FX” Macro Rack on a Group Bus 🌪️

    Now we’ll create something you can automate during transitions without clutter.

    1. On your DRUMS group (or master drum bus), add an Audio Effect Rack named:

    `TRANSITION FX RACK`

    2. Add devices inside (order matters):

    - Auto Filter (for HP sweeps)

    - Echo (for throws)

    - Hybrid Reverb (for wash)

    - Utility (for quick dips)

    Map:

    Macro 1: “TENSION”

  • Auto Filter: Frequency (e.g. 30 Hz → 300 Hz with HP mode)
  • Reverb: Dry/Wet (0% → 20–35%)
  • Echo: Feedback (0% → 25%)
  • Echo: Dry/Wet (0% → 15–25%)
  • Macro 2: “DROP CUT”

  • Utility Gain: map from 0 dB → -inf (or -30 dB)
  • This gives you a tight “suck-out” right before the drop.

    Macro 3: “THROW”

  • Echo Dry/Wet: 0% → 35%
  • Echo Time: set to 1/8 or 1/4 dotted (DnB throw classic)
  • Optional: map a filter inside Echo to keep throws clean.
  • > If you want the throw only on the last snare: duplicate the snare hit to an audio track and put the throw rack only there. Faster and cleaner than over-automating the whole bus.

    ---

    Step E — Automate Macros in Arrangement View (the speed part) ✍️

    Now the payoff: you’ll automate just a few lanes.

    #### 1) Show automation lanes

  • Press A to toggle Automation Mode.
  • In the track’s automation chooser, select your rack and macro (e.g. `DRUM MACRO HUB → PUNCH`).
  • #### 2) Use DnB-friendly automation shapes

    Build into drop (last 8 bars before drop):

  • `TENSION`: ramp up smoothly over 8 bars.
  • `ROOM`: ramp up slightly (don’t drown drums).
  • `MOVE` on bass: ramp up for more motion.
  • One bar before drop:

  • Quick “pre-drop suck”:
  • - `DROP CUT`: dip for 1/4 to 1/2 bar right before bar 33.

    - `ROOM`: snap down at the drop (contrast).

    - `SUB SAFE`: ensure reese lows are trimmed if you go heavy.

    During the drop (16 bars):

  • Don’t keep everything maxed.
  • Make 4-bar phrases:
  • - Bars 33–37: moderate `PUNCH`, medium `MOVE`

    - Bars 37–41: increase `CRUNCH` slightly and reduce `ROOM`

    - Bars 41–45: automate a quick `THROW` on the last snare of the phrase

    - Bars 45–49: pull `MOVE` down slightly to reset the ear

    > Arrangement idea: A classic rolling DnB trick is “increase aggression every 8 bars, then reset”. Macros make that instant.

    #### 3) Keep automation lanes readable

  • Only automate what changes the song: typically 3–6 macro lanes total per section.
  • If you have too many lanes: you didn’t make the right macros yet.
  • ---

    Step F — Save for reuse (so you actually get faster) 💾

  • Save your racks to your User Library:
  • - `DRUM MACRO HUB.adg`

    - `BASS MACRO HUB.adg`

    - `TRANSITION FX RACK.adg`

  • Next track, drag-and-drop and you’re immediately arranging.
  • ---

    4) Common mistakes

    1. Mapping too many parameters to one Macro

    Result: the knob feels chaotic. Keep it musical: 2–4 parameters per macro, max.

    2. Huge parameter ranges

    If your Macro goes from “nothing” to “completely destroyed,” you’ll fight it. Tighten ranges so the whole travel is usable.

    3. Automating devices instead of Macros

    That defeats the workflow goal. If you find yourself automating raw device parameters, stop and remap.

    4. Ignoring gain staging

    Distortion + compression macros can add level fast. Put Utility at the end and keep headroom.

    5. Widening the sub

    Never map width to your sub chain. Keep sub mono and stable.

    ---

    5) Pro tips for darker/heavier DnB 🖤

  • Map “Dirt” as parallel, not serial
  • Use an Audio Effect Rack with two chains:

    - `CLEAN` (straight)

    - `DIRT` (Saturator + Drum Buss + EQ)

    Map a macro to chain volumes for a controlled blend.

  • Create a “Fog” macro for atmosphere
  • On pads/atmos group: Hybrid Reverb Dry/Wet + Auto Filter LP frequency.

    Automate it up in breakdowns, down at drops.

  • Use multiband discipline on bass
  • Create 3 chains (SUB / LOWMID / HIGH) and map:

    - LOWMID distortion amount

    - HIGH fizz level

    Keep SUB chain clean and consistent.

  • Macro map a notch filter “hollow”
  • Dark rollers often have a moving hollow mid.

    Map EQ Eight notch frequency (e.g. 300–900 Hz) with mild Q.

  • Phrase your aggression
  • Heavy doesn’t mean constant. Use macros to breathe every 4 or 8 bars.

    ---

    6) Mini practice exercise (15–25 minutes) ⏱️

    1. Take an existing 16-bar drop loop (drums + bass).

    2. Build one macro rack:

    - Either Drum Macro Hub or Bass Macro Hub (don’t do both yet).

    3. Create exactly 4 macros and name them clearly.

    4. In Arrangement View, automate:

    - One 8-bar build (macro ramp)

    - One pre-drop dip (1/4–1/2 bar)

    - Two 4-bar phrase changes inside the drop

    5. Bounce a quick audio preview and listen on low volume:

    - Can you feel the structure without adding new notes?

    - If not, adjust macro ranges (not more plugins).

    ---

    7) Recap

  • Macro mapping is about turning complex sound design into a few arrangement-ready controls.
  • In DnB, prioritize macros that shape:
  • - Punch / Crunch / Space (drums)

    - Move / Growl / Sub safety / Width (bass)

    - Tension / Throw / Drop cut (transitions)

  • In Arrangement View, automate macros, not scattered device parameters.
  • Save racks so every new tune starts fast and consistent. ✅

If you tell me your current drum/bass plugin choices (Wavetable vs Serum, breaks vs pure one-shots, etc.), I can suggest a macro set tailored to your sound.

```

Ask GPT about this lesson

Chat with the lesson tutor, get follow-up help, or use quick actions.

Bigup 👽 Ask me anything about this lesson and I’ll answer in context.

Narration script

Show spoken script
Alright, let’s do a very “Ableton fast” kind of lesson today: macro mapping for speed using Arrangement View, specifically with drum and bass in mind.

The big idea is simple. Drum and bass arrangement moves fast: you’re constantly changing punch, crunch, space, bass movement, and tension. If you automate every individual plugin parameter, your set turns into a spaghetti bowl of automation lanes. Macros let you turn all that fiddly sound design into a few performance-ready controls, so you can write the arrangement with maybe three to six automation lanes instead of twelve to twenty.

By the end of this, you’ll have three little control hubs:
A Drum Macro Hub for punch, crunch, and space.
A Bass Macro Hub for movement, growl, sub safety, and width.
And a Transition FX Rack on a group bus for tension sweeps, throws, and a drop cut.

And then we’ll actually automate those macros in Arrangement View to build a clean 32 to 64 bar structure quickly.

First: set up your arrangement skeleton.

Go to Arrangement View. Set your tempo to 174 BPM. Anywhere from 172 to 176 is home base for modern DnB, but 174 is a great default.

Now drop in a few locators so you’re not guessing where you are. Here’s a fast structure you can use:
Intro starting at bar 1, 8 to 16 bars.
Build at bar 17, 8 to 16 bars.
Drop A at bar 33, 16 bars.
Break or variation at bar 49, 8 to 16 bars.
Drop B at bar 65, 16 bars.

Even if your final tune ends up different, this gives you a map, and your automation becomes intentional instead of random.

Next, group your core elements now, before you get precious about details. Make groups for DRUMS, BASS, MUSIC or ATMOS, and FX or RISE.

And here’s a workflow tip that saves you later: put a Utility at the end of each group right now. Seriously. When you start adding saturation and compression, levels creep up. Utility at the end is your “keep me sane” trim.

Cool. Now we build the Drum Macro Hub.

On a MIDI track, load a Drum Rack. Put in a classic DnB layout: kick on C1, snare on D1, hats and percs around F sharp 1 to A sharp 1. And if you like that jungle glue, add an optional break slice on another pad using Simpler.

Now, after the Drum Rack on the same track, add an Audio Effect Rack. This rack is where the macros will live. Inside it, add devices in this order as a solid starting chain:
Drum Buss, then Saturator, then EQ Eight, then Glue Compressor, then Utility at the end.

Now we map the high-impact stuff you actually adjust while arranging. And quick coach note here: treat macros like mix decisions, not plugin remotes. Before you map, think: what decisions do I really make in a DnB drop? More punch. More crunch. Less room. More break bite. More hat air. Those are outcomes. That’s what your brain can automate quickly.

Click Map on the Audio Effect Rack.

Macro 1 is PUNCH.
Map Drum Buss Drive from about 0 up to around 25. Adjust depending on your drum material, but keep it musical.
Optionally map Boom Amount from 0 to 20, and keep it subtle because too much boom can wreck the kick-bass relationship.
Then map Glue Compressor Threshold with a small range. You’re aiming for “tighten and smack,” not “destroy the transients.” Something like minus 10 down to minus 18 dB, depending on your gain staging.

Macro 2 is CRUNCH.
Map Saturator Drive from 0 to about 8 dB.
Map Saturator Dry/Wet from 0 up to maybe 40 or 60 percent.
And map a gentle high shelf on EQ Eight: maybe 0 to plus 2.5 dB around 8 to 10k. That gives you that crispy top without turning it into white noise.

Macro 3 is BREAK BITE, if you’re using a break layer.
Go inside the Drum Rack, find the break chain, add Auto Filter, and map Auto Filter Frequency from around 200 Hz up to about 5 kHz. Optional: a tiny bit of resonance mapping, like 0.7 to 1.2, just enough to give it attitude.

Macro 4 is ROOM.
Add Hybrid Reverb or Reverb on the drum track, and map Dry/Wet from 0 up to around 15 to 25 percent. If it’s Hybrid Reverb, map Decay a little too, like 0.8 seconds up to 1.8 seconds.
Key DnB guideline: keep ROOM low during the drop, and let it come up in intros and breakdowns for contrast. That contrast is what makes the drop feel more in-your-face.

Macro 5 can be HAT AIR.
You can do this a few ways. If your hats are separated, map a shelf or filter on the hat chain. If not, keep it simple and map a drum-bus shelf or a subtle saturator color. The goal is “air,” not “more harsh.”

Now rename the rack DRUM MACRO HUB. Rename the macros PUNCH, CRUNCH, ROOM, BREAK BITE, HAT AIR. Make it obvious. When you’re arranging, you don’t want to translate tech in your head. You want instant meaning.

Also, set safe zones. This is huge. You want most of your automation to live in the middle, where it always sounds good. Make the first 20 percent of each macro travel subtle, and save the last 10 percent for “moment moves,” like the end of a phrase or a fill.

And calibrate these ranges while the loudest part of the song is playing. Put on your drop loop and then adjust ranges. If you set macro ranges during the intro, you’ll hit the drop and everything will be way too intense.

Alright. Bass Macro Hub time.

On a MIDI track, load an Instrument Rack. We’re going to use two chains: SUB and REESE.

On the SUB chain, use Operator on a sine wave. Put a Utility after it and set width to 0 percent. Mono sub, always. Set gain so it’s stable and not clipping.

On the REESE chain, use Wavetable or Operator, whatever you’re comfortable with. A saw-based wave works great. Use unison, but don’t overdo it. Two to four voices is usually plenty for a reese.

Then add, on the reese chain: Auto Filter, Chorus-Ensemble or Phaser-Flanger for movement, Saturator or Roar if you’re on a newer Live, then EQ Eight, then Utility.

Now we map the bass macros.

Macro 1 is MOVE.
Map Auto Filter Frequency from around 200 Hz up to maybe 2.5 kHz. Map resonance from 0.7 to 1.4.
Map Chorus-Ensemble amount from 0 up to about 25 percent.
Map Saturator Dry/Wet from 0 up to about 35 percent.
So as MOVE increases, the bass opens, gets more animated, and gains harmonics. That’s a very “DnB arrangement” move.

Macro 2 is GROWL.
Map Saturator Drive from 0 up to around 10 dB. Keep an ear on level.
Optionally add an Amp device and map its gain lightly for extra bite.
And you can map a small low-mid boost, like 200 to 400 Hz, 0 to plus 2 dB. Careful though: this area can get boxy fast, especially when the drums are busy.

Macro 3 is SUB SAFE. This one is non-negotiable if you want clean low-end.
On the reese chain, map an EQ Eight low cut frequency from 20 Hz up to maybe 120 Hz. This is how you stop the reese from fighting the sub.
On the sub chain, map Utility gain from minus 6 dB up to 0 dB.
So when things get heavy, you can clean the low end and rebalance without rewriting the patch.

Macro 4 is WIDTH, but only for the mids.
Map Utility width on the reese chain from about 80 percent up to 140 percent. Keep the sub chain mono and don’t map width there.

Extra pro move: if your bass sounds huge in stereo but collapses in mono, do a little “self-defense” mapping. When MOVE is high, pull width down slightly. Basically: when modulation gets busy, reduce width a touch so the center stays solid.

Now we build the Transition FX Rack, and this is where arrangement speed really kicks in.

Put this on a group bus, usually your DRUMS group is a great place to start. Add an Audio Effect Rack and name it TRANSITION FX RACK.

Inside, add Auto Filter for high-pass sweeps, then Echo for throws, then Hybrid Reverb for wash, then Utility for quick dips.

Map Macro 1 as TENSION.
Map Auto Filter frequency in high-pass mode from around 30 Hz up to around 300 Hz. That sweep clears low end and creates lift.
Map Reverb Dry/Wet from 0 up to maybe 20 to 35 percent.
Map Echo feedback from 0 up to about 25 percent.
Map Echo Dry/Wet from 0 up to 15 to 25 percent.

Here’s a cleaner build FX trick so you don’t wash your drums: instead of only raising reverb mix, also map reverb pre-delay from 0 up to about 25 milliseconds, and map a high-pass inside the reverb from about 150 up to 500 Hz. You get perceived size without burying transients.

Macro 2 is DROP CUT.
Map Utility gain from 0 dB down to minus infinity, or at least down to around minus 30 dB. This is your tight “suck-out” right before the drop.

Macro 3 is THROW.
Map Echo Dry/Wet from 0 up to around 35 percent.
Set Echo time to 1/8 or 1/4 dotted, classic DnB throw timing.
Optionally map Echo’s internal filter so the throw stays clean and doesn’t muddy the low mids.

And teacher note: if you only want the throw on the last snare, don’t over-automate the whole drum bus. Duplicate that snare hit to audio and put the throw rack on just that hit. Cleaner, faster, and you’ll avoid accidental echoes on everything.

Now, the speed part: automating macros in Arrangement View.

Hit A to toggle automation mode.

Instead of selecting random device parameters, choose the rack and macro in the automation chooser. For example, DRUM MACRO HUB then PUNCH. Or TRANSITION FX RACK then TENSION. The whole point is you’re working at the “decision” level.

Let’s do some DnB-friendly automation shapes.

In the last 8 bars before the drop, ramp TENSION up smoothly. This is your lift.
Bring ROOM up slightly too, but don’t drown the drums.
And on the bass, ramp MOVE up so the bass feels like it’s waking up and getting restless.

One bar before the drop, do the pre-drop suck.
Use DROP CUT and dip it for a quarter bar to half a bar right before the downbeat of the drop.
At the same moment, snap ROOM down at the drop for contrast.
And consider pushing SUB SAFE a bit higher right before the drop, meaning: trim reese lows slightly so the drop hits cleaner. At 174 BPM, that half-bar of clarity makes a huge difference.

Now, during the drop, don’t just pin everything at max. That’s how drops get tiring. Think in four-bar phrases.

Example:
Bars 1 to 4 of the drop: moderate PUNCH, medium MOVE.
Bars 5 to 8: increase CRUNCH a bit, reduce ROOM so it’s tighter.
Bars 9 to 12: do a quick THROW on the last snare of the phrase.
Bars 13 to 16: pull MOVE down slightly to reset the ear.

That reset is not weakness. That’s arrangement psychology. A tiny pullback makes the next hit feel bigger even if the peak level is the same.

Now keep your automation readable. This is another place people accidentally slow themselves down.
Aim for three to six macro lanes total per section. If you have too many lanes, it’s not that you need more automation. It’s that your macros aren’t doing the right jobs yet.

A practical hack: add locators every four bars inside the drop labeled A1, A2, A3, A4. Decide one feature per locator, like A2 equals more crunch, A3 equals bass move peak, A4 equals throw plus reset. That keeps you intentional.

Let’s talk about a couple common mistakes before we wrap.

First, mapping too many parameters to one macro. If you turn the knob and it feels chaotic, reduce it. Two to four parameters per macro is usually the sweet spot.

Second, huge parameter ranges. If the macro goes from “nothing” to “completely destroyed,” you’ll fight it constantly. Tighten the range so the whole travel is usable.

Third, automating devices instead of macros. If you catch yourself drawing automation on Saturator drive directly, pause. Ask: should this be a macro decision instead?

Fourth, ignoring gain staging. Distortion plus compression will sneak your level up. Use those Utilities at the end of groups. And if you want an extra layer of safety, create a tiny “Macro Governor” rack at the end of your DRUMS and BASS groups: Utility plus Limiter, mapped to one macro called SAFE. Then when the track gets densest, you automate SAFE up instead of rebalancing everything manually.

And the classic: widening the sub. Don’t do it. Keep the sub mono and stable. Width is for mid information.

Now, save your work so you actually get faster next time.
Save your DRUM MACRO HUB, your BASS MACRO HUB, and your TRANSITION FX RACK into your User Library. Next track, you drag and drop and you’re immediately in arrangement mode.

Mini practice to lock this in, about 15 to 25 minutes:
Take a 16-bar drop loop you already have. Drums and bass.
Build only one macro rack today, either drums or bass, not both.
Create exactly four macros and name them by outcomes.
Then automate: one 8-bar build ramp, one pre-drop dip, and two four-bar phrase changes inside the drop.
Bounce a quick preview and listen at low volume. That low-volume check is brutal in a good way: if the structure still reads, your macro system is doing its job. If it doesn’t, don’t add more plugins. Adjust macro ranges.

Recap.
Macro mapping is about converting complex sound design into a few arrangement-ready controls.
For DnB, focus on punch, crunch, and space for drums; move, growl, sub safety, and width for bass; and tension, throw, and drop cut for transitions.
In Arrangement View, automate macros, not scattered device parameters.
And save your racks so every new tune starts fast and consistent.

If you tell me your setup—are you mostly one-shots or breaks, and are you using Wavetable, Operator, or something like Serum for bass—I can suggest a tighter set of macro targets that fits your exact palette.

mickeybeam

Go to drumbasscd.com for +100 drum and bass YouTube channels all in one place - tune in!

Generating PDF preview…