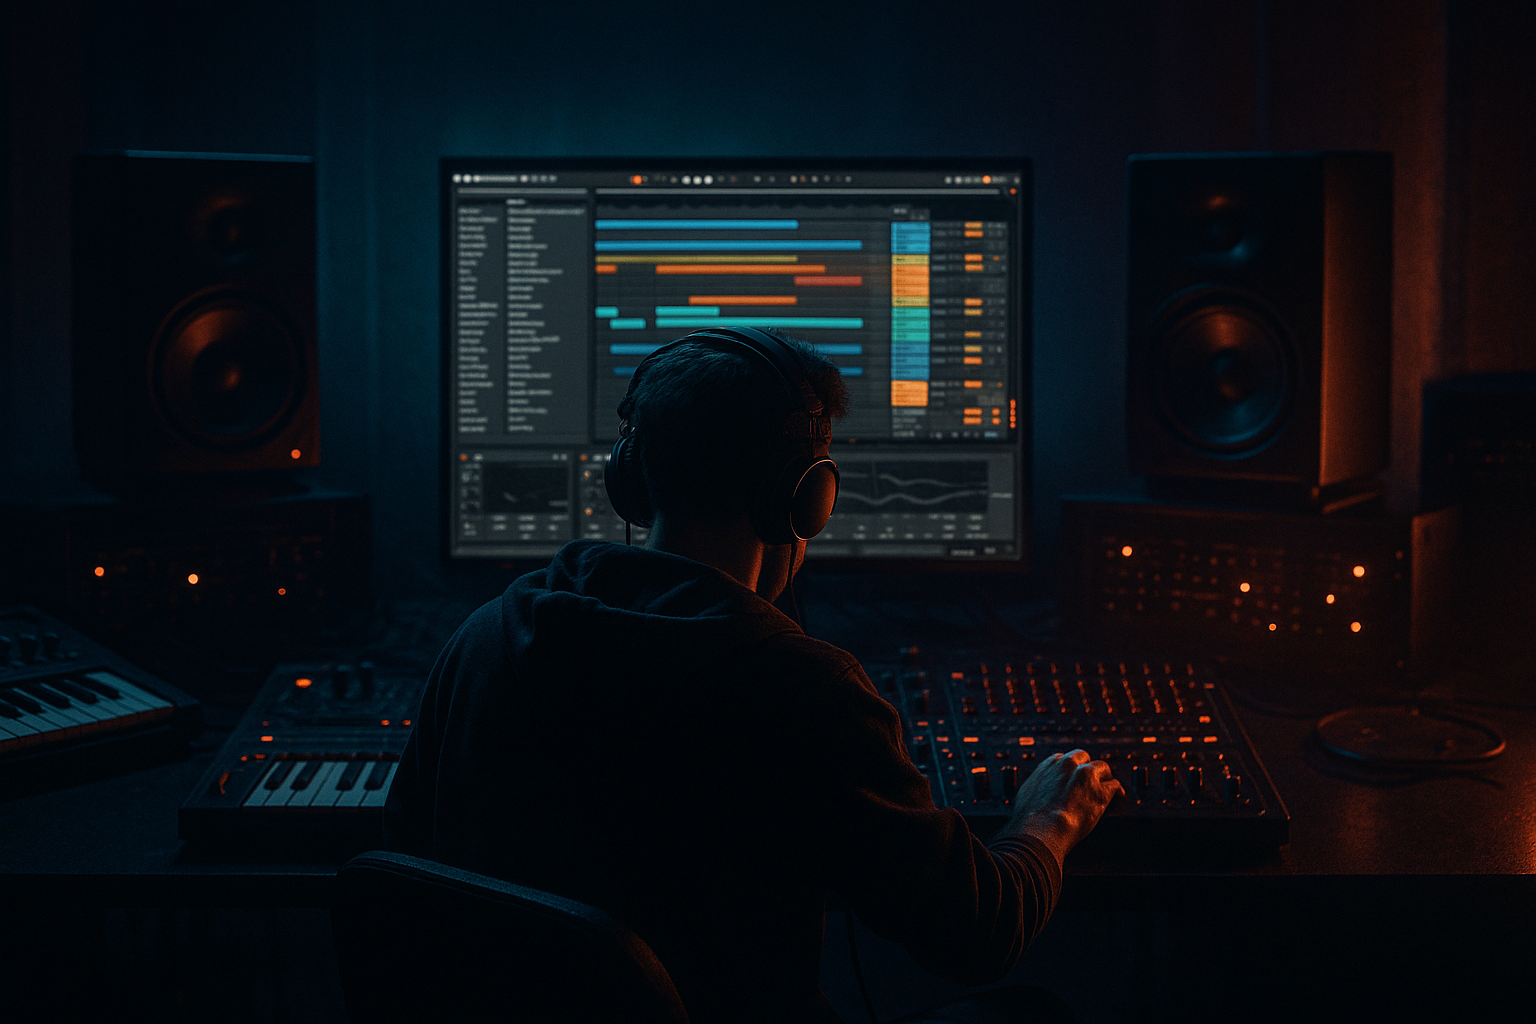
DNB COLLEGE

Drum & Bass Ableton Live 12 Tutorials

LESSON DETAIL

Impact balance breakdown with jungle swing in Ableton Live 12 (Intermediate)

An AI-generated intermediate Ableton lesson focused on Impact balance breakdown with jungle swing in Ableton Live 12 in the DJ Tools area of drum and bass production.

Back to lessons
Impact balance breakdown with jungle swing in Ableton Live 12 (Intermediate) cover image

Narrated lesson audio

The voice track includes the tutorial plus extra teacher commentary.

Open audio file

Main tutorial

Impact Balance Breakdown with Jungle Swing in Ableton Live 12 (DJ Tools) 🥁⚡

1) Lesson overview

This lesson is about building a DJ-friendly “impact balance breakdown” for drum & bass: a breakdown that keeps energy and perceived loudness without full drums, then slams back into the drop—all while maintaining that jungle swing (shuffled, rolling, forward-pushing groove).

You’ll learn how to:

  • Preserve impact when the kick/snare disappear
  • Use jungle swing correctly (without making it sloppy)
  • Control low-end, transients, and stereo so the breakdown feels big, not empty
  • Set up arrangement “DJ tools” (8/16/32 bar phrasing, risers, fills, cutdowns)
  • ---

    2) What you will build

    A 32-bar breakdown + 8-bar build designed for DnB sets:

  • Bars 1–16: “Impact-balanced” breakdown (sub controlled, groove implied, tension rising)
  • Bars 17–32: More elements teased (ghost drums, fills, vocals/FX), swing stays alive
  • Build (8 bars): Snare roll / percussion lift + filtered bass tease
  • Drop return: Clean re-entry with a pre-drop vacuum (micro-silence) for maximum punch
  • You’ll end with a template you can reuse for rollers, jungle-influenced minimal, or heavy neuro-ish DnB.

    ---

    3) Step-by-step walkthrough

    A) Session setup (tempo, swing, routing) 🎛️

    1. Set tempo: 172–176 BPM (we’ll use 174 BPM).

    2. Create groups:

    - DRUMS (kick, snare, hats, breaks)

    - BASS

    - MUSIC (pads, stabs, vocals)

    - FX

    3. Return tracks:

    - A: Short Room (Hybrid Reverb, small room)

    - B: Long Verb (Hybrid Reverb, plate/hall)

    - C: Delay (Echo)

    4. Sidechain utility bus (optional but clean):

    - Create an Audio Track named `SC Trigger`

    - Place a short click/kick sample on every beat (muted output), used only for sidechain timing consistency across sections.

    ---

    B) Nail the jungle swing foundation (without derailing the grid) 🏁

    You want swing that pulls the groove forward, not swing that makes the drop feel late.

    #### Option 1: Groove Pool (classic jungle feel)

    1. Open Groove Pool.

    2. Try these grooves (built-in):

    - Swing 16-57 or Swing 16-63 (start here)

    - For more jungle-like shuffle: MPC 16 Swing 58–64 (if available in your pack)

    3. Apply groove to:

    - Hats, shakers, ghost snares

    - NOT the main kick/snare initially (keep anchor tight)

    4. Groove settings (starting point):

    - Timing: 40–70%

    - Velocity: 10–25% (adds life)

    - Random: 2–8% (micro variation)

    5. Commit when it feels right:

    - Select MIDI clip → Commit Groove (only once you’re sure)

    #### Option 2: Breakbeat swing (more authentic jungle)

    1. Add a break loop (Amen-style or tight break) in Simpler (Slice mode):

    - Simpler → Slice by: Transients

    2. Program your own pattern using slices, then apply Groove Pool to slice MIDI.

    3. Keep the snare backbeat solid—use swing mainly on ghost hits and hats.

    ---

    C) The “impact balance” concept (what to preserve in the breakdown) 💥

    When drums drop out, impact usually collapses because you lose:

  • Transient spikes (kick/snare attack)
  • Low-end weight
  • Rhythmic density
  • Forward motion
  • So we replace them with controlled, mix-friendly elements:

  • Sub “ghost pulse” (quiet, sidechained, filtered)
  • Noise/transient layers (very short, not harsh)
  • Percussion ghosts with swing (low in level but rhythmically informative)
  • Reverb/delay tails that carry momentum
  • Automation (filters, width, density)
  • ---

    D) Build the breakdown drums: “implied drums” that still groove 🥁

    In your breakdown section (32 bars), do this:

    #### 1) Remove main kick/snare (but keep the feel)

  • Mute your main kick and snare tracks in breakdown.
  • Keep:
  • - A shuffled hat loop or programmed hats

    - A ghost snare (low velocity)

    - A tiny “tick” transient (optional)

    #### 2) Create a Ghost Drum Rack (stock devices)

  • Add a Drum Rack named `Ghost Kit`.
  • Sounds (examples):
  • - Slot 1: tight closed hat

    - Slot 2: rim/woodblock tick

    - Slot 3: low ghost snare (short)

    - Slot 4: filtered break slice (quiet)

  • Processing chain on the Ghost Kit group:
  • 1. EQ Eight

    - High-pass at 180–250 Hz (24 dB/oct)

    - Small dip around 3–5 kHz if it gets spitty

    2. Drum Buss

    - Drive: 5–15%

    - Crunch: 0–10%

    - Transients: +5 to +15 (keep it crisp)

    - Boom: OFF (don’t fake low-end here)

    3. Utility

    - Width: 120–150% (subtle widen, but watch mono)

    #### 3) Program jungle swing ghosts (practical pattern)

    In 1 bar at 174 BPM:

  • Hats: 16th notes, but remove a few for breath
  • Ghost snare: add a hit just before beat 3 (classic push)
  • Rim/tick: syncopated off-beats
  • Apply groove (Timing 55–70%) to these.

    Level target: ghosts should be felt when soloed, but in full mix they’re barely there.

    ---

    E) Keep low-end “present” without a full drop bass 🧱🔊

    This is the most important part of impact balance.

    #### 1) Make a Sub Pulse track (Operator)

  • Create `Sub Pulse` MIDI track → Operator
  • Osc A: Sine
  • Add Amp Envelope:
  • - Attack: 0 ms

    - Decay: 120–250 ms

    - Sustain: -inf (or very low)

    - Release: 80–150 ms

  • MIDI pattern: simple 1/2 notes or off-beat pulses that imply movement.
  • #### 2) Control it like a pro

  • Auto Filter
  • - Type: Low-pass

    - Cutoff: 90–140 Hz

    - Resonance: low (0.5–1.0)

  • Compressor (Sidechain)
  • - Sidechain input: Kick or `SC Trigger`

    - Ratio: 4:1

    - Attack: 2–10 ms

    - Release: 80–140 ms

    - Gain reduction: 2–6 dB

  • Utility
  • - Width: 0% (mono)

  • EQ Eight
  • - Roll off below 25–30 Hz

    - Optional small dip at 60–90 Hz if it fights your reverb/bloom

    This gives you weight in the breakdown without stepping on the eventual drop.

    ---

    F) Add “impact replacements”: noise hits + reverb throws 🌫️✨

    Impact comes from contrast and transient cues.

    #### 1) Noise downlifters / uplifters (Operator or Wavetable)

  • Create `Noise FX` with Operator (Noise oscillator) or Wavetable noise.
  • Add Auto Filter:
  • - Automate cutoff rising over 8–16 bars.

  • Add Hybrid Reverb (on Return B or insert):
  • - Big plate/hall, decay 3–7s

    - High-pass in reverb (keep lows clean)

    #### 2) Snare “throw” moments

    Pick 2–4 snare hits in the breakdown and do:

  • Send them hard to Return B (Long Verb) and/or Echo
  • Automate send up briefly (a “throw”) then back down
  • This creates perceived space and drama without new instruments.

    ---

    G) Arrangement blueprint: 32-bar breakdown + 8-bar build 📏

    Here’s a practical DnB phrasing grid (DJ-friendly):

    #### Bars 1–8: Strip + establish swing

  • Ghost hats + light FX
  • Sub pulse very low
  • Filtered pad/vocal chop (optional)
  • #### Bars 9–16: Add tension

  • Introduce ghost snare/rim syncopation
  • More noise riser automation
  • Slight increase in reverb throws
  • #### Bars 17–24: Tease the drop rhythm

  • Bring in a filtered break slice (high-passed)
  • Increase rhythmic density
  • Add a tiny “pre-snare” fill at the end of 24
  • #### Bars 25–32: “Impact balance peak”

  • Slightly louder sub pulse (still controlled)
  • Shorter reverb (tighten up to feel closer)
  • Start removing long tails near bar 32 to prepare the slam
  • #### Build (8 bars): clear signal that drop is coming

  • Snare roll (or tom/ride roll) with increasing velocity
  • Automation:
  • - Master Auto Filter (very subtle) or Utility gain micro lift (0.5–1 dB)

    - Reduce stereo width slightly near the end (creates “tunnel” → drop feels wide)

    ---

    H) The pre-drop “vacuum” for maximum slam 🕳️➡️💥

    Right before the drop (last 1/4 or 1/2 bar):

    1. Mute:

    - Sub pulse

    - Reverb returns (or automate return track volume down)

    2. Add a tiny silence (even 1/8 bar can work)

    3. Optional: a single short reverse cymbal into the first kick/snare

    This contrast is the “impact” you’re balancing for.

    ---

    I) Transition back into drop: keep swing consistent ✅

    When the drop returns:

  • Keep swing on hats/ghosts, but keep main kick/snare mostly straight.
  • If your drop uses breaks, align the snare backbeat with the grid—use swing on inner hits.
  • Check phase/mono on low end:
  • - Bass below ~120 Hz should be essentially mono (Utility width 0%).

    ---

    4) Common mistakes 🚫

  • Swinging the main snare so the backbeat feels late and weak. Keep the anchor solid.
  • Too much reverb low end in breakdown (mud city). High-pass your reverbs.
  • No sub management: either zero low end (feels small) or uncontrolled sub (kills headroom).
  • Overcrowding: adding too many “cool” FX layers instead of one clear tension device.
  • Forgetting DJ phrasing: random 12-bar breakdowns confuse mixing; aim for 8/16/32.
  • ---

    5) Pro tips for darker/heavier DnB 🖤🔩

  • Distorted air layer (controlled):
  • Add a very quiet noise layer with Roar (or Saturator if you want simpler). High-pass at 4–6 kHz so it adds menace without harshness.

  • Mid-bass tease without full bassline:
  • Duplicate your drop bass, then:

    - Auto Filter LP around 200–500 Hz

    - Turn it way down

    - Sidechain heavily

    This hints at the drop tone without giving it away.

  • Tighten the breakdown near the end:
  • Reduce reverb decay and stereo width in the last 4 bars. Dark DnB drops feel heavier when the pre-drop is “claustrophobic.”

  • Drum Buss on ghosts sparingly:
  • A touch of transient and drive can make tiny elements feel “expensive” without being loud.

  • Use Spectral Resonator subtly for eerie tension:
  • On a pad/vocal, mix 5–15%, tuned to the track key. Dark vibe instantly.

    ---

    6) Mini practice exercise 🎯

    Goal: Build a 16-bar impact-balanced breakdown that still grooves.

    1. Create a 16-bar breakdown after a drop.

    2. Mute kick + main snare.

    3. Add:

    - Ghost hats (swinged)

    - Sub pulse (sidechained, mono)

    - One riser (noise + filter automation)

    4. At bar 16:

    - Add a 1/8-bar silence

    - Add one reverb throw on a snare or vocal chop

    5. Bounce a quick audio export and listen on:

    - Headphones

    - Small speakers

    Check: do you still feel “movement” and “weight” without full drums?

    ---

    7) Recap ✅

  • Impact balance means replacing lost punch in the breakdown with controlled sub pulses, implied drums, and smart FX—not just removing drums and hoping it’s “atmospheric.”
  • Jungle swing works best when applied to hats/ghosts/break inner hits, while keeping the backbeat stable.
  • Use Ableton stock tools like Groove Pool, EQ Eight, Drum Buss, Utility, Auto Filter, Hybrid Reverb, Echo, Compressor (sidechain) to make breakdowns that are DJ-ready and drop-proof.
  • The pre-drop vacuum (micro silence + tail control) is your cheat code for heavier returns.

If you want, tell me the subgenre you’re aiming for (rollers, jungle, neuro, minimal, foghorn) and I’ll give you a breakdown template with exact bar-by-bar automation moves and a recommended groove value.

Ask GPT about this lesson

Chat with the lesson tutor, get follow-up help, or use quick actions.

Bigup 👽 Ask me anything about this lesson and I’ll answer in context.

Narration script

Show spoken script
Impact balance breakdown with jungle swing in Ableton Live 12. Intermediate. DJ tools for drum and bass.

Alright, let’s build a breakdown that doesn’t feel like somebody just muted the drums and hoped for “vibes.” We’re going for an impact-balanced breakdown: it stays loud in a useful way, it keeps forward motion, it keeps that jungle swing, and then it makes the drop return hit harder than it would have otherwise.

The big idea is this: when you remove kick and snare, you usually lose four things at once. You lose transient spikes, you lose low-end weight, you lose rhythmic density, and you lose that forward push that keeps dancers locked. So instead of leaving a hole, we replace those functions in a controlled, mix-friendly way.

Open Ableton Live 12 and set your tempo to 174 BPM. That’s a sweet spot for modern DnB and it makes your phrasing easy.

Now do a quick routing setup like a DJ tools template. Create groups: one called DRUMS, one BASS, one MUSIC, and one FX. This isn’t just neatness. It lets you automate “density” and “space” as a single move later, which is what DJs and editors love.

Add three return tracks. Return A is Short Room, something like Hybrid Reverb in a small room. Return B is Long Verb, a plate or hall, three to seven seconds, but we’re going to high-pass it later so it doesn’t turn into mud. Return C is Delay, use Echo.

Optional but really clean: make a sidechain timing track. Create an audio track called SC Trigger. Put a short click or kick sample on every beat, but set its output so you can’t hear it. This track exists only to drive sidechains consistently, so your breakdown pumps the same way every time, even if you’ve muted the real kick.

Before we arrange anything, let’s get the jungle swing foundation right, because if you mess this up, your breakdown will feel late and your drop will feel weak.

Open the Groove Pool. Start with Swing 16-57 or Swing 16-63. If you’ve got MPC swing grooves available, MPC 16 Swing around 58 to 64 can feel really jungle-friendly.

Here’s the rule: apply swing to hats, shakers, ghost snares, and the inner details. Do not swing your main kick and main snare at first. Your kick and snare are the anchor. The shuffle lives around them.

Set the groove as a starting point: Timing around 55 percent, Velocity maybe 15 percent, Random two to six percent. Timing is the swing amount, Velocity gives life, Random adds micro-variation, but keep it subtle. You want forward push, not drunken wobble.

If you’re using audio loops for breaks or foley, be careful: if a loop already has swing, and you apply swing again, you can get double-shuffle. That’s where things get flammy. For loops, consider Warp Mode set to Beats, Transient Loop off, and Envelope around 70 to 90 so it stays crisp.

Cool. Now the actual breakdown we’re building is 32 bars, plus an 8-bar build, and then a drop return with a pre-drop vacuum. The vacuum is your cheat code. We’ll get there.

Start your breakdown by muting the main kick and the main snare in that section. Don’t delete them, just mute or automate them down so you can A/B quickly.

But don’t go empty. We’re going to build implied drums: the listener feels a groove even though the main drums are gone.

Create a new Drum Rack and name it Ghost Kit. Put in a tight closed hat, a rim or woodblock tick, a very short ghost snare, and optionally one filtered break slice that’s quiet.

Now process the Ghost Kit group with stock devices. First, EQ Eight. High-pass it around 180 to 250 hertz with a steep slope. The point is, this ghost kit is not allowed to carry low-end. If anything gets spitty, dip a little around three to five k.

Then Drum Buss. Drive maybe five to fifteen percent. Crunch zero to ten. Push Transients up, like plus five to plus fifteen, so tiny elements read as “expensive” without being loud. Keep Boom off. We’re not faking low-end here.

Then Utility. Add a touch of width, maybe 120 to 150 percent. But keep an eye on mono. If you’re widening, you’re widening mostly hats and ticks, not anything that pretends to be low-end.

Now program a simple one-bar loop at 174. Hats on 16th notes, but remove a few hits so it breathes. Add a ghost snare just before beat three, that classic push that makes jungle feel like it’s leaning forward. Put the rim tick on syncopated offbeats.

Then apply your groove to this MIDI clip. Bring Timing up into that 55 to 70 range if you want more shuffle. Here’s the key level note: when the ghost kit is soloed, it should feel clear and groovy. In the full mix, it should be barely there, like a skeleton that tells your body where to move.

Now the main event: low-end presence without a full drop bass.

Create a new MIDI track called Sub Pulse and load Operator. Oscillator A is a sine wave. On the amp envelope, set Attack to zero, Decay around 120 to 250 milliseconds, Sustain all the way down, and Release around 80 to 150 milliseconds. This gives you a pulse, not a sustained note.

For the MIDI pattern, keep it simple: half notes or offbeat pulses. You’re not writing a bassline here. You’re creating weight and motion.

Then control it like a pro. Add Auto Filter, low-pass, cutoff around 90 to 140 hertz, low resonance. This keeps it feeling like sub, not bass.

Add Compressor with sidechain from your kick, or better, from SC Trigger. Ratio around four to one, attack two to ten milliseconds, release 80 to 140, and aim for two to six dB of gain reduction. That’s enough to make it breathe and leave headroom for the eventual return.

Add Utility and set width to zero percent. Mono. Always. And then EQ Eight: roll off below 25 to 30 hertz so you’re not wasting headroom on rumble. If you get buildup, you can dip a little around 60 to 90, but don’t overdo it.

Teacher note: this is where people either lose the club entirely, or they ruin their drop. If the breakdown has no sub, it feels small on a system. If it has uncontrolled sub, your limiter works harder, your breakdown gets loud in the wrong way, and your drop returns and… doesn’t feel like a jump. So keep the sub pulse quiet, steady, and ducked.

Now we replace impact cues. Because impact isn’t only kick and snare. It’s transients, contrast, and the brain recognizing punctuation.

Make a Noise FX track using Operator’s noise, or Wavetable noise. Add Auto Filter and automate the cutoff rising over eight to sixteen bars. Then send it to Return B, your Long Verb, so it blooms.

On Return B, do the thing everyone forgets: high-pass the reverb. Put EQ Eight after Hybrid Reverb and high-pass around 200 to 400 hertz. If it gets splashy, dip a bit around 2.5 to 4.5k.

Extra trick: sidechain the reverb return itself. Put a Compressor after the EQ on Return B, sidechain it from SC Trigger, and duck it one to three dB. That makes the space breathe in time. Your swing stays readable because the reverb isn’t smearing over every transient.

Now add a couple of “throw” moments. Pick two to four snare or vocal hits during the breakdown and automate their send to Long Verb or Echo way up just for that hit, then back down. That creates drama without adding new instruments.

Now let’s lay out the DJ-friendly phrasing. Think like someone mixing this in a set. We want clean 8, 16, and 32 bar logic.

Bars one to eight: strip down and establish swing. Ghost hats and light FX. Sub pulse very low. Optional pad or vocal chop, filtered.

Bars nine to sixteen: add tension. Introduce the ghost snare and rim syncopation more clearly. Increase the noise riser automation. Add one or two reverb throws.

Bars seventeen to twenty-four: tease drop rhythm. Bring in that filtered break slice, but high-passed and quiet. Increase density. At the end of bar 24, add a tiny pre-snare fill or a micro impact so it feels like the section is turning.

Bars twenty-five to thirty-two: impact balance peak. Bring the sub pulse up slightly, still controlled. Start tightening the space. Shorten reverb, reduce delay feedback, and begin narrowing widths slightly. This is the “tail audit.” You’re cleaning sustained audio so the drop transient has space to feel huge.

Now the build: eight bars where you clearly tell the listener the drop is coming. Do a snare roll or percussion lift with increasing velocity. If you want a modern feel, add a subtle master movement: maybe a very gentle Auto Filter, or a Utility gain lift of half a dB to one dB. Subtle. You’re not mastering, you’re guiding attention.

And now the pre-drop vacuum. Right before the drop, last quarter bar or half bar, mute the sub pulse. Also mute or pull down the return tracks for reverb and delay. Create a tiny silence, even an eighth note can do it. Optional: one reverse cymbal into the first hit.

That little void is what makes the drop slam. Because impact is contrast. If you let tails spill over the downbeat, you blur the punch. If you clear the air, the first kick and snare feel like they’re twice as loud even if they aren’t.

When the drop returns, keep your swing philosophy consistent. Keep swing on hats and inner ghosts. Keep the main backbeat stable. If you’re using breaks in the drop, make sure the snare backbeat lands where it should, and let swing live in the in-between hits.

Now, quick calibration advice so you’re not guessing. Put Spectrum on the Drum Group and on the Master. In the breakdown, you want a stable low shelf from about 30 to 90 hertz that moves gently, not random spikes. And you want repeatable transient ticks around two to six k, from your ghost kit or micro impacts. If the breakdown feels loud but the drop doesn’t hit, you probably kept too much average energy in the breakdown, usually sustained mids or long reverb tails. Tighten tails, lower sustained layers, keep the motion.

One more DJ tool: make a muted cue track. A MIDI track with a rimshot on bar one of every eight bars. Keep it muted in export, but use it while editing. It’s a visual and rhythmic ruler so your micro-cuts and vacuums don’t drift off phrase boundaries.

And check mono at the worst moment: the vacuum. Put Utility on the Master, hit Mono temporarily, and listen to the last half bar before the drop. If the energy disappears, your width is coming from phasey effects. Fix the reverb and delay, don’t compensate by making the drop louder.

Common mistakes to avoid: don’t swing the main snare so it feels late. Don’t let reverb low end build up. Don’t turn the breakdown into an FX collage with no clear tension device. And don’t break DJ phrasing with weird 12-bar sections unless you really mean it.

Mini exercise to lock this in: make a 16-bar breakdown after a drop. Mute kick and main snare. Add swinged ghost hats, a mono sidechained sub pulse, and one noise riser with filter automation. At bar 16, add an eighth-note silence and one reverb throw. Export and listen on headphones and small speakers. You’re checking: do you still feel movement and weight without full drums?

Once you’ve got that working, duplicate the section and try two versions. Version A: Groove Pool on MIDI ghosts. Version B: break slices in Simpler with minimal extra groove. A/B them like a DJ would, and pay attention to which one makes the drop feel bigger.

If you tell me what you’re aiming for, rollers, jungle, neuro, minimal, foghorn, I can suggest an exact groove range and a bar-by-bar density automation plan so you can reuse this as a template in every track.

mickeybeam

Go to drumbasscd.com for +100 drum and bass YouTube channels all in one place - tune in!

Generating PDF preview…