Main tutorial
Lesson Overview
This lesson is about making a Hot Pants-style air horn hit arrangement that slams over a floor-shaking low end in Ableton Live 12 for oldskool jungle / early DnB vibes. The goal is not just to drop a loud horn sample on top of a beat — it’s to arrange the horn like a musical weapon: something that acts as a call, a hook, a tension builder, and a crowd-movement trigger without wrecking the sub or masking the drums.
In classic jungle and rave-inflected DnB, air horn hits work because they bring instant recognition and attitude. They shout “reload energy,” but in a modern production context you want them to sit inside a controlled arrangement: short enough to punch, shaped enough to avoid harshness, and placed so they interact with the bassline rather than fighting it. That’s especially important when the track has a heavy low end, because the horn has to live above the kick/sub system while still feeling like part of the same record.
Why this matters in DnB:
- The sub needs uninterrupted space in the drop.
- The drums need transient clarity.
- The horn hit needs to read as a powerful accent, not a muddy midrange blob.
- The arrangement should create tension/release so the horn feels like a payoff, not random decoration.
- A short, aggressive air horn hit arranged as a recurring motif in a DnB drop
- A call-and-response structure between horn phrases, bass phrases, and drum edits
- A clean low-end system where the horn does not smear the sub or kick
- An Ableton Live 12 workflow that uses grouping, resampling, automation, and Return tracks to speed up finishing
- A drop section that feels like oldskool jungle energy with modern weight:
- Putting the horn on every bar
- Letting the horn sit too low in frequency
- Over-distorting until it becomes harsh noise
- Using too much reverb
- Ignoring the bassline when placing hits
- Not checking mono
- Creating a great horn sound but no arrangement logic
- Use pitch variation for tension
- Layer a short noise burst under the horn
- Automate the horn’s filter on the lead-in
- Pair the horn with a bass dropout
- Use reverb only as a transition device
- Print the horn and chop it like a break
- Use clip gain instead of mastering it louder
- Let the horn answer the reese
- Treat the air horn as a phrase element, not a constant effect.
- Keep it above the low end with EQ, saturation, and tight dynamics.
- Use 4-bar and 8-bar phrasing so the arrangement feels like DnB, not random samples.
- Build call-and-response between horn, bass, and drums.
- Resample and chop the horn for faster, more musical workflow.
- Always check mono, headroom, and drum/bass balance so the horn adds impact without killing the mix.
We’ll build a workflow that uses Ableton’s stock tools to create a tight horn stab arrangement, a supporting response layer, and a low-end-safe mix structure that works for jungle, rollers, and darker bass music. This is advanced territory: you’ll be making decisions like a writer, mixer, and DJ all at once 🎛️
What You Will Build
By the end of this lesson, you’ll have:
- heavy half-bar pressure
- horn call on the off-beat or on phrase endings
- bass dropouts for impact
- drum fills and break chops leading into each horn hit
Musically, imagine this in a 174 BPM track: a 16-bar intro with filtered break tension, then a drop where the horn hits every 4 bars, but the exact timing changes: one hit lands as a pickup, one lands after a bass stop, one is doubled with a reverse tail into a snare fill, and one is chopped shorter for a more sinister “stab” effect. That variation is what keeps the groove alive.
Step-by-Step Walkthrough
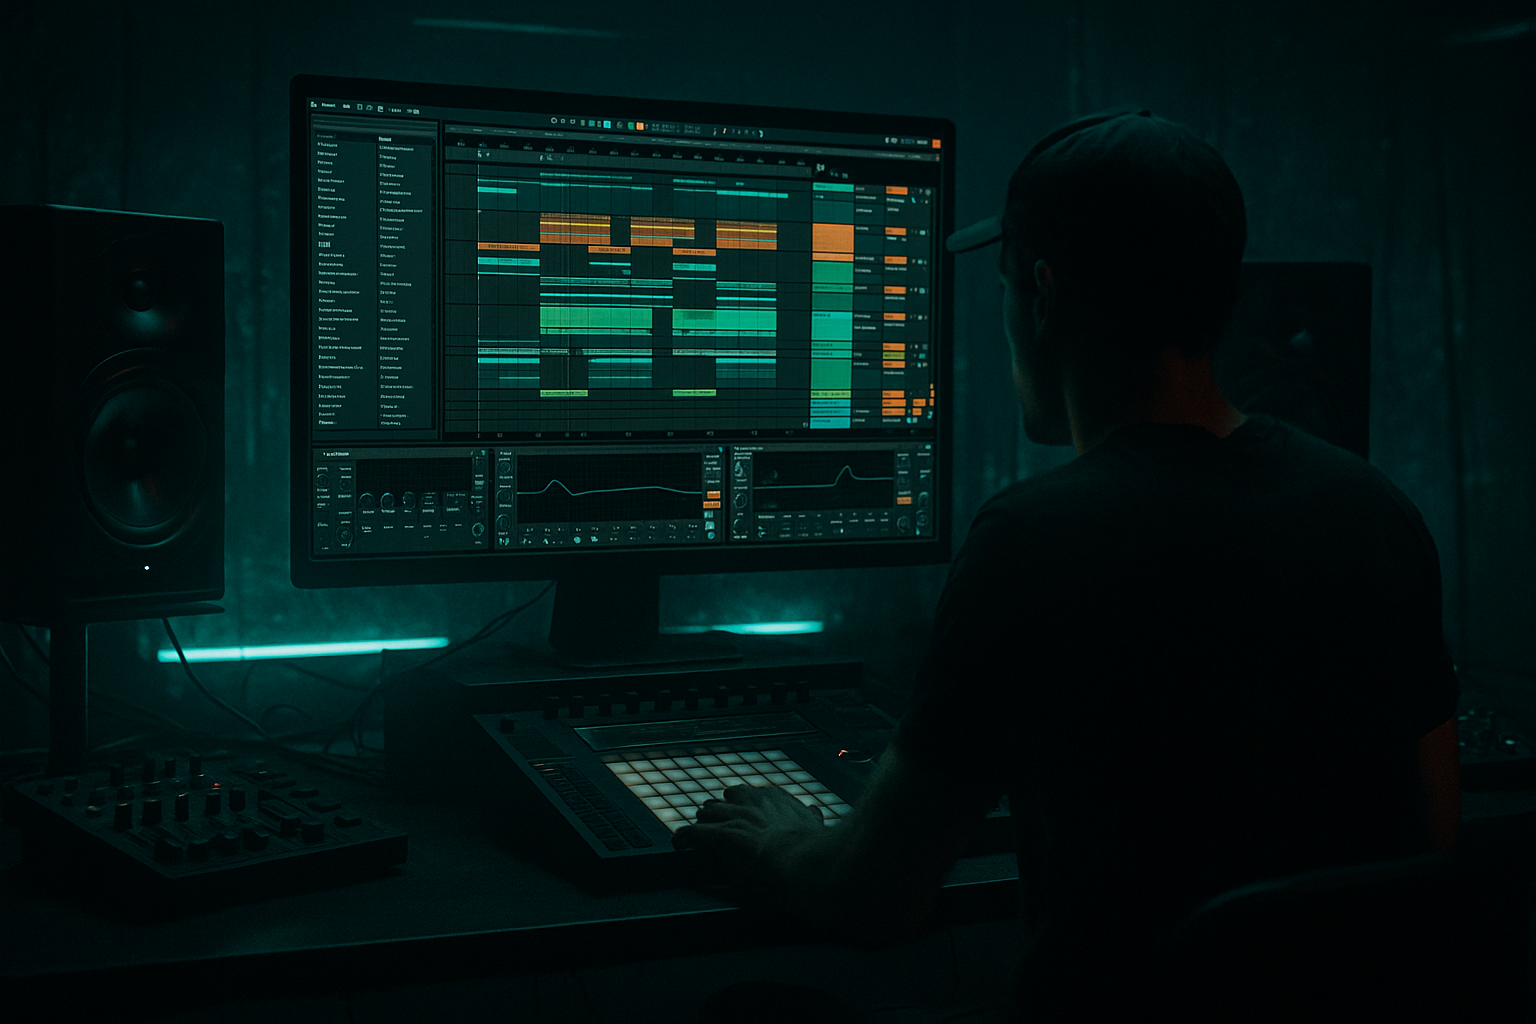
1. Set up a dedicated horn workflow in a Group track
Create a new Group called Horns / FX and keep it separate from drums and bass. Inside it, make at least two tracks:
- Track 1: Horn Main
- Track 2: Horn Support / Choke
If you’re using an air horn sample, drop it into an Audio track. If you want a synthesized version, create it with Operator or Wavetable, but for this lesson the sample-based route is fastest and most authentic for oldskool DnB.
On the Horn Main track:
- Add EQ Eight
- Add Saturator
- Add Compressor or Glue Compressor
- Add Utility
Suggested starting settings:
- EQ Eight: low cut around 180–250 Hz
- Saturator: Drive 2–6 dB, Soft Clip on if needed
- Utility: Width 0–30% if the horn is too wide or phasey
- Compressor: light control, 2:1 to 4:1, attack 5–20 ms, release 50–120 ms
Why this works in DnB: the horn’s job is to cut through the midrange without stealing the sub lane. Putting it in a dedicated group makes it faster to automate, process, and mute against the bass arrangement later.
2. Shape the horn sample so it behaves like a musical stab, not a full-length effect
In the Clip View, trim the horn so the attack is immediate and the tail is controlled. For jungle and oldskool pressure, you usually want a horn that feels like a short hit, not a long, comical blast.
Do this in the clip:
- Start the sample right at the transient
- Use Warp only if needed to sync timing
- Try Complex Pro if the sample pitch shifts badly, but for short hits, Beats or even warp off may be cleaner
- If the sample has too much tail, fade it shorter in the waveform editor
Then duplicate the clip and make 2–3 versions:
- Full Hit
- Short Hit
- Pitch-Down Hit
Concrete pitch ideas:
- Full hit: original pitch
- Short hit: same pitch, reduced clip length
- Pitch-down hit: -3 to -7 semitones for a darker, more menacing version
Workflow win: having multiple horn versions ready lets you compose the arrangement instead of repeating one identical stab.
3. Build the horn’s tone with stock devices so it sits above a heavy bassline
The horn must read on small speakers and still not stab your ears on a club system. Use EQ and saturation as tone-shaping tools, not just cleanup.
In EQ Eight:
- High-pass between 180–250 Hz
- If there’s harshness, make a narrow cut around 2.5–4.5 kHz
- If it’s dull, add a small boost around 700 Hz–1.2 kHz
- If the sample is too hissy, reduce 8–12 kHz slightly
In Saturator:
- Drive 2–4 dB for subtle body
- Try Analog Clip or Soft Clip for a tighter edge
- If the sample needs more bite, push Drive to 5–8 dB but monitor harshness
In Compressor:
- Aim for 1–3 dB gain reduction
- Faster attack if the transient is too spiky
- Slightly slower attack if you want more snap through the mix
Optional texture move:
- Add Redux very lightly after Saturator
- Reduce Downsample or Bit Reduction just enough to roughen the horn
Be careful: too much distortion makes the horn louder but less readable. The point is to help the horn speak in a dense DnB arrangement, not to flatten it into white noise.
4. Place the horn around the drum/bass phrase structure, not randomly on the grid
Advanced DnB arrangement lives in phrases. If your track is 174 BPM, think in 4-bar and 8-bar phrases. Horn hits work best at structural moments:
- end of a 4-bar cycle
- bar 4 pickup into bar 5
- after a bass dropout
- on the last half-beat before a snare fill
- as a response to a drum fill
Example arrangement context:
- Bars 1–4: stripped drums and filtered break
- Bar 5: full drop enters with sub and main break
- Bar 7: bass phrase cuts for one beat; horn hit lands
- Bar 9: horn doubles with a snare fill
- Bar 13: horn answers a reese bass variation
- Bars 15–16: horn is filtered and delayed into a transition
Place the horn deliberately:
- Use one-hit calls at the end of phrases
- Use pickup hits just before the downbeat
- Leave some hits empty so the audience feels the absence and the next hit lands harder
Why this works in DnB: the groove comes from contrast. A horn every bar becomes cartoonish; a horn that appears after space feels like a proper reload moment.
5. Create call-and-response with the bassline and drum edits
This is where the track starts feeling like a real record. Your horn should respond to the bass, or the bass should respond to the horn. In oldskool jungle, that dialogue is part of the excitement.
Make a bass phrase using one of these Ableton-native approaches:
- Operator for a clean sub layer
- Wavetable for a moving reese
- Analog if you want a rougher, simple bass texture
Bass system suggestion:
- Sub track: sine or near-sine under 100 Hz
- Mid bass / reese: high-passed above 80–120 Hz
- Keep the sub mono with Utility
- Let the reese move in stereo, but check mono compatibility
Then arrange the horn like a response:
- Horn on bar 4 after a bass phrase
- Bass re-enters on bar 5 with a new note pattern
- Horn answers again on bar 8, but shorter
- On bar 12, remove a bass note so the horn lands harder
Use MIDI note phrasing or audio clip placement to create tension:
- Shorten bass notes under horn hits
- Drop out sub for a single 1/8 or 1/4 note before the hit
- Add a snare flam or break chop leading into the horn
The trick is to let the horn feel like part of the groove machinery, not an overlay.
6. Use automation to make each horn hit evolve across the arrangement
Repetition is dangerous here. A static horn hit can become tiring fast. Automation keeps it alive while preserving the motif.
Automate these parameters in Ableton:
- Auto Filter cutoff on the horn group
- Saturator Drive
- Utility Width
- Reverb Send to a Return track
- Delay Send for rare throw moments
Practical automation ideas:
- First horn hit: dry and direct
- Second hit: slight low-pass open from 2 kHz to 6 kHz
- Third hit: more saturation, narrower width
- Fourth hit: brief reverb throw into transition
If using Auto Filter:
- Use a high-pass to thin the horn before the drop
- Open the filter sharply on the hit
- For darker DnB, use a low-pass on the lead-in so the horn “appears” out of the murk
Send effect ideas:
- Reverb: short decay, small room, low dry/wet on the Return
- Echo: 1/8 or dotted 1/8 for rare throw-ins, filtered aggressively
- Hybrid Reverb if you want a more cinematic tail, but keep it controlled
Workflow move: draw automation once, then duplicate the arrangement and tweak only the last hit in each 8-bar phrase. That keeps the track coherent without sounding copy-pasted.
7. Make the horn interact with the kick and sub using sidechain and transient discipline
In heavy DnB, the horn can steal perceived punch from the kick if it lands right on top of the transient. You don’t always need full sidechain pumping, but you do need space management.
On the horn group, add Compressor and sidechain it from the kick or a dedicated drum bus:
- Ratio: 2:1 to 4:1
- Attack: 1–10 ms
- Release: 40–120 ms
- Aim for just a few dB of reduction when the kick hits
For tighter control, also use:
- Utility to reduce gain by a couple dB if the horn is too forward
- EQ Eight to remove any low-mid buildup that collides with the bass body
- Gate if the sample has noisy tails or room bleed
If the horn lands with a snare, check the transient stacking:
- Snare transient first
- Horn a tiny bit later, or vice versa depending on your groove
- Use clip timing nudges of a few milliseconds if needed
This is one of the biggest differences between a decent demo and a proper DnB arrangement: the horn must feel powerful without flattening the drum impact.
8. Resample the horn into a new audio track for arrangement speed
Advanced workflow move: once the horn chain is working, resample it. This gives you a committed audio version that’s easier to chop, reverse, and automate.
Create a new Audio track called Horn Print and record the processed horn output:
- Print a few versions with different automation
- Capture the exact interaction with delay/reverb throws
- Then slice the audio into new clips
From there, do DnB-style edits:
- Reverse one horn tail into a snare fill
- Slice the first 100–200 ms and use it as a micro-stab
- Duplicate one hit and offset it by a 1/16 for a stutter effect
- Use the final tail as transition noise into the next 8-bar section
Ableton workflow advantage: once it’s printed, you can treat it like break editing. That’s huge for jungle-style arrangement because your horn becomes part of the chop culture, not just a static sample.
9. Lock the mix balance with reference-minded gain staging
Don’t let the horn bully the low end. In a club-oriented DnB mix, the sub and kick need to dominate the physical energy while the horn adds attitude in the upper mids.
Quick balance targets:
- Horn peaks should sit clearly above the drums in the midrange, but not dominate the master
- Keep master headroom around -6 dB peak while writing
- Check the horn in mono with Utility
- Compare the drop with and without the horn to make sure the groove still works
Use Spectrum on the master or horn bus to watch if the horn creates a spike around 2–5 kHz. If that area becomes painful, tame it before the mix gets loud.
Also listen at low volume:
- If you still hear the horn, it’s strong
- If the sub disappears when the horn plays, the arrangement is overloaded
Common Mistakes
- Fix: use it as punctuation. Leave space so each hit feels intentional.
- Fix: high-pass it around 180–250 Hz so it doesn’t cloud the kick/sub lane.
- Fix: back off Saturator/Redux and rely on arrangement timing for impact.
- Fix: keep the horn mostly dry and use short throws only at transitions.
- Fix: make the bass phrase leave room for the horn, or shorten bass notes underneath it.
- Fix: use Utility on the horn group and make sure it still punches when narrowed.
- Fix: place hits around 4-bar and 8-bar milestones, not randomly.
Pro Tips for Darker / Heavier DnB
- Alternate original horn hits with -3 semitone or -5 semitone versions for a darker, more threatening feel.
- A filtered white-noise tick or short impact can help the hit read on smaller systems, but keep it very short and high-passed.
- Low-pass the horn in the bar before the drop, then open it fast on impact. That “appears from the fog” move works brilliantly in darker DnB.
- Removing the sub for a 1/8 or 1/4 note before the horn makes the hit feel heavier than just turning it up.
- Short room or plate tails can create space without turning the horn into an ambient wash.
- For underground character, resample the processed horn and slice tiny bits between drum hits. That gives you a raw, vinyl-era feel.
- A horn that’s 2 dB quieter but better placed will hit harder than one that’s overcooked.
- In neuro-leaning or darker rollers, the bass can “ask” with a movement phrase and the horn “answers” at the end of the cycle. That creates narrative in the drop.
Mini Practice Exercise
Spend 10–20 minutes building a 4-bar horn/bass call-and-response loop:
1. Load a horn sample and create three versions: full, short, pitched down.
2. Put them in a Group with EQ Eight, Saturator, Compressor, Utility.
3. Write a simple 174 BPM drum loop with a break and kick/snare backbone.
4. Add a sub and a reese or mid-bass phrase using stock Ableton instruments.
5. Place horn hits only on:
- the last beat of bar 2
- the pickup before bar 3
- the end of bar 4
6. Automate one horn hit with a short filter open and a tiny reverb send.
7. Resample the result and slice one printed horn into two micro-edits.
8. Check mono and trim any horn that fights the kick or sub.
Goal: make the loop feel like a real drop section, not just a horn sample over drums.
Recap
The big takeaway: in jungle and oldskool DnB, the horn is strongest when it feels like it belongs to the arrangement logic of the track. Place it with intent, shape it for clarity, and let the low end stay king.

