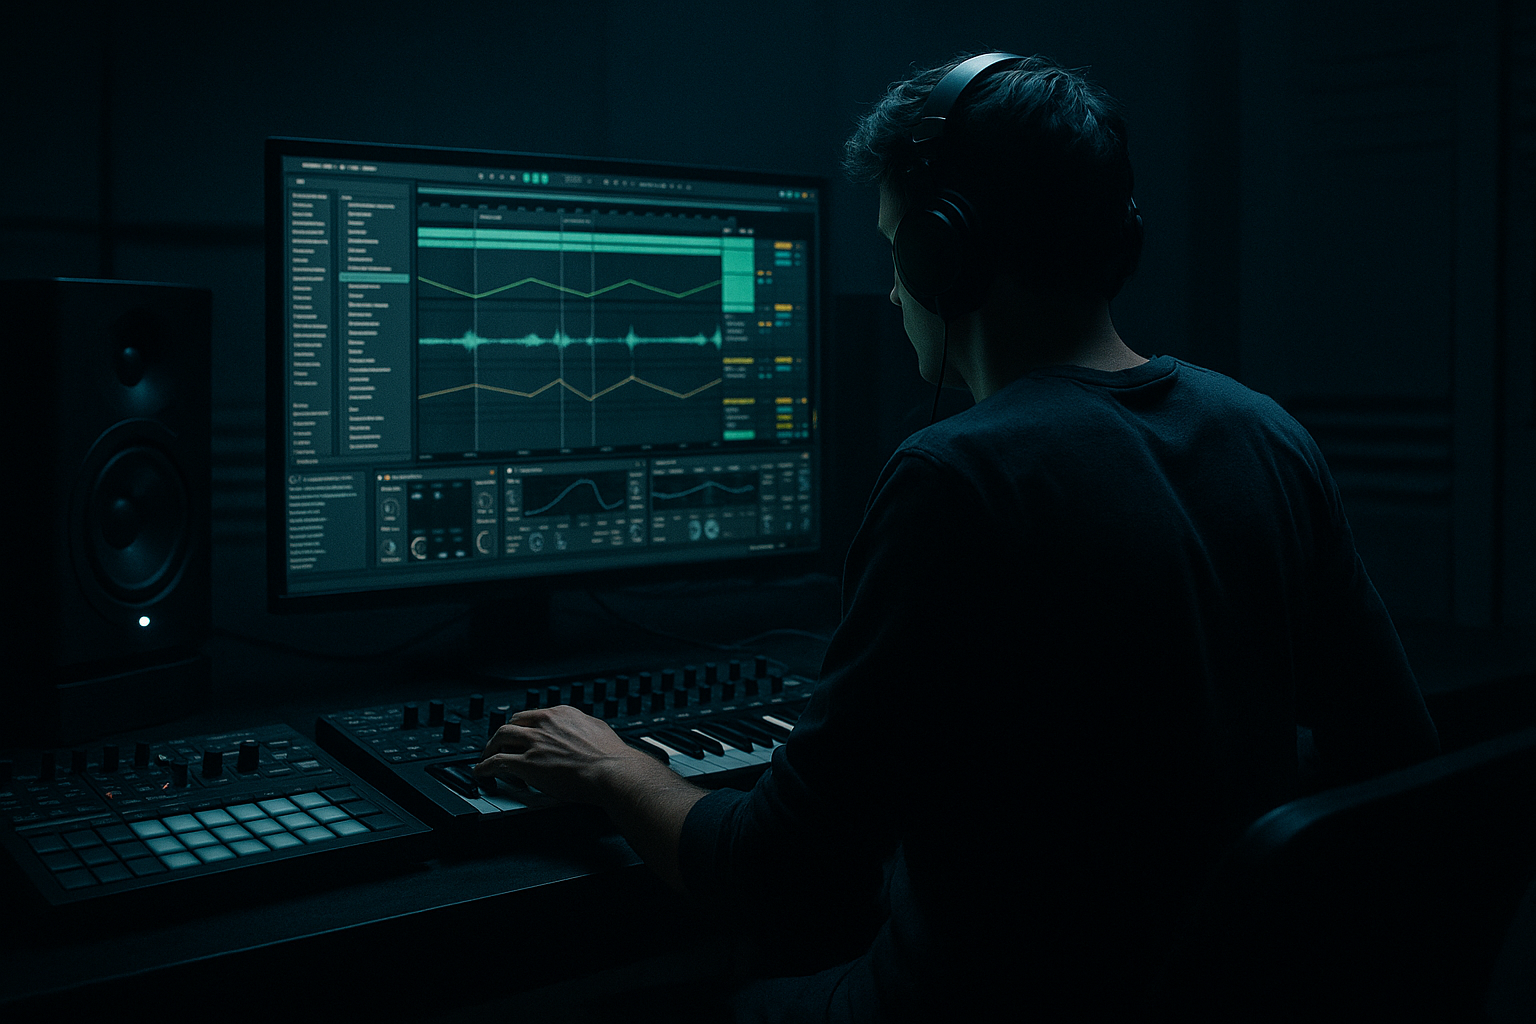
DNB COLLEGE

Drum & Bass Ableton Live 12 Tutorials

LESSON DETAIL

Heatwave: ride groove stack with automation-first workflow in Ableton Live 12 for jungle oldskool DnB vibes (Intermediate)

An AI-generated intermediate Ableton lesson focused on Heatwave: ride groove stack with automation-first workflow in Ableton Live 12 for jungle oldskool DnB vibes in the DJ Tools area of drum and bass production.

Back to lessons
Heatwave: ride groove stack with automation-first workflow in Ableton Live 12 for jungle oldskool DnB vibes (Intermediate) cover image

Narrated lesson audio

The voice track includes the tutorial plus extra teacher commentary.

Open audio file

Main tutorial

```markdown

Heatwave: Ride Groove Stack (Automation‑First) in Ableton Live 12 — Jungle/Oldskool DnB DJ Tool 🔥🥁

1. Lesson overview

This lesson is about building a DJ‑friendly “heatwave” ride groove stack: a layered ride/shaker/hat engine that evolves via automation and locks to jungle/oldskool DnB swing without you constantly editing MIDI notes.

Key idea: make automation the main performance control, and let MIDI stay simple. You’ll end up with a rack you can drop into any tune, automate in Arrangement, and use like a “movement fader” during breakdowns, drops, and 32‑bar transitions.

We’ll focus on Ableton Live 12 stock devices and workflows that fit 170–175 BPM rolling/jungle vibes.

---

2. What you will build

A single track called RIDE GROOVE STACK that includes:

  • 3 layers (Ride / Shaker / Air Hat) inside an Instrument Rack (or Drum Rack-style layering)
  • Automation-first macros:
  • - Heat (brightness + drive)

    - Push (swing/late feel illusion)

    - Spray (density via gated/filtered noise + subtle random)

    - Space (reverb send/size control)

    - Duck (sidechain intensity)

  • A clean arrangement automation template for 64 bars:
  • - low energy intro → teasing build → full “ride wash” in the drop → controlled pullback every 16/32 bars

    This is a DJ tool: it’s designed to sit behind breaks and bass, lift energy, and “glue” transitions.

    ---

    3. Step-by-step walkthrough

    Step 0 — Project setup (DnB defaults)

    1. Set tempo to 172 BPM (classic rolling sweet spot).

    2. Create a group called DRUMS (optional), and inside it create a MIDI track:

    RIDE GROOVE STACK

    3. Turn on Arrangement view for automation work.

    Routing tip (DJ tool mindset): keep this as one track you can reuse across projects and control with 6–8 macros.

    ---

    Step 1 — Choose your source sounds (oldskool-friendly)

    You can do this with samples (Simpler) or with Drum Rack. For fast layering + macro control, use an Instrument Rack with multiple chains.

    1. Drop an Instrument Rack on RIDE GROOVE STACK.

    2. Create 3 chains:

    - Chain A: Ride

    - Chain B: Shaker

    - Chain C: Air Hat

    Sound selection guidelines (jungle/oldskool):

  • Ride: slightly trashy/metallic, not too clean. Short/medium decay.
  • Shaker: noisy, mid‑forward, not overly bright.
  • Air Hat: tight closed hat with top-end fizz.
  • Device choice (stock): Put a Simpler in each chain and load samples (from Packs, samples, or your library).

    ---

    Step 2 — Program minimal MIDI (let automation do the heavy lifting)

    Create a simple repeating MIDI clip of 1 bar (we’ll loop it).

    Clip settings:

  • Length: 1.0.0
  • Launch/loop: on
  • Quantization: 1 bar
  • MIDI pattern (classic rolling bed):

  • Ride (Chain A): 8ths or 16ths depending on taste
  • - Start with 8ths: hits on 1.1, 1.2, 1.3, 1.4

  • Shaker (Chain B): 16ths but lower velocity
  • - hits every 1/16, velocity around 40–70, vary slightly

  • Air Hat (Chain C): sparse “tickle”
  • - hits on offbeats (1.2.2, 1.3.2, 1.4.2) or very occasional 16ths

    Velocity is key: keep it dynamic, not maxed. Oldskool grooves breathe.

    ---

    Step 3 — Groove without over-editing (Groove Pool + subtle randomness)

    We want swing, but not a cheesy shuffle.

    1. Open Groove Pool.

    2. Add a groove like Swing 16 (start subtle).

    3. Apply to the clip:

    - Timing: ~10–20%

    - Velocity: ~5–15%

    - Random: ~5–10%

    4. Keep it subtle: jungle rides should feel urgent and forward, not drunken.

    Note: Groove Pool is great, but we’ll also create a “push/drag” illusion with filter envelopes + transient control later.

    ---

    Step 4 — Build the processing chain inside each layer

    Now we shape each chain to sit like a proper DnB topper without eating your snare.

    #### Chain A (Ride) device chain

    1. Auto Filter

    - Mode: Band-Pass or High-Pass

    - Start HP around 250–400 Hz (remove low junk)

    2. Saturator

    - Drive: 2–6 dB

    - Soft Clip: On

    3. EQ Eight

    - Dip harshness: -2 to -4 dB around 4–7 kHz if needed

    - Add “air” shelf: +1 to +3 dB at 10–12 kHz (careful)

    #### Chain B (Shaker)

    1. Auto Filter (High-Pass)

    - Cut: 600–1200 Hz (shakers live higher)

    2. Drum Buss

    - Drive: 5–15%

    - Crunch: 0–10%

    - Boom: 0% (usually off for toppers)

    3. Utility

    - Width: 120–160% (keep ride more central, shaker can be wider)

    #### Chain C (Air Hat)

    1. EQ Eight

    - High-pass: 2–4 kHz

    2. Redux (optional, subtle oldskool grit)

    - Downsample a touch (very light, don’t destroy it)

    3. Auto Pan

    - Amount: 10–25%

    - Rate: 1/8 or 1/16

    - Phase: 180° (creates stereo movement)

    ---

    Step 5 — Add “Heatwave” macro controls (automation-first)

    We’ll map key parameters to macros so you automate one curve instead of 15.

    In the Instrument Rack, create 8 macros:

    1. HEAT 🔥

    Map to:

    - Ride Saturator Drive (2→8 dB)

    - Ride EQ shelf gain (0→+3 dB @ ~12k)

    - Shaker Drum Buss Drive (5→20%)

    2. TONE (Bright/Dark)

    Map to:

    - Auto Filter cutoff on each chain (linked)

    - Keep ranges musical:

    - Ride HP: 200→600 Hz

    - Shaker HP: 700→1500 Hz

    - Air Hat HP: 2k→5k

    3. SPRAY (Density/Noise) 💨

    Add a fourth chain Noise Spray:

    - Add Operator (or Analog) generating noise:

    - Operator: set oscillator to Noise

    - Add Auto Filter band-pass (around 6–10k)

    - Add Gate

    - Sidechain from itself (or use threshold to chop)

    - Map:

    - Gate Threshold (more threshold = less noise)

    - Noise chain volume

    4. PUSH (Late/Forward feel illusion)

    We can’t “swing” globally with one knob perfectly, but we can create perceived push:

    - Map Auto Filter Envelope Amount (if using envelope follower style movement)

    - Or simpler: map Transient emphasis:

    - Add Drum Buss on Ride chain and map Transient (0→+20)

    More transient = feels more forward.

    5. SPACE 🌌

    Add Reverb (or Hybrid Reverb) after the rack:

    - Decay: 0.8–2.5s (map)

    - Dry/Wet: 3–18% (map)

    - High Cut: ~7–10k

    Map Dry/Wet + Decay to SPACE.

    6. DUCK (Sidechain amount)

    Add Compressor after reverb:

    - Sidechain input: your Kick/Snare bus (or full drums bus)

    - Ratio: 4:1

    - Attack: 2–10 ms

    - Release: 80–180 ms

    - Threshold: map so it goes from subtle to obvious pumping.

    7. WIDTH

    - Map Utility width on Shaker + Air Hat (100→170%)

    - Keep Ride closer to mono (100–120%)

    8. LEVEL

    - Map Rack output (or Utility Gain after rack) for quick balancing.

    Why this works: In DnB, topper movement is mostly brightness, density, space, and ducking—exactly what these macros automate.

    ---

    Step 6 — Automation template (the “Heatwave” arrangement)

    Create a 64-bar section and automate like this (very usable in intros and drops):

    #### Bars 1–16 (intro / low energy)

  • TONE: darker (lower cutoff)
  • HEAT: low
  • SPACE: low (almost dry)
  • DUCK: medium (keeps it tucked under)
  • #### Bars 17–32 (build / tease)

  • Gradually raise TONE and SPRAY
  • Add a small lift in WIDTH
  • Tiny bumps of HEAT at phrase ends (bar 24, 32)
  • #### Bars 33–48 (drop / full wash)

  • TONE: high
  • HEAT: medium-high
  • SPACE: slightly up (but still controlled)
  • DUCK: tuned so the snare still dominates
  • (If the ride masks the snare crack, increase duck or reduce 4–7k in ride.)

    #### Bars 49–64 (variation / DJ transition)

  • Pull back SPACE and SPRAY
  • Do a 1-bar “heat flash” at bar 63→64:
  • - HEAT quick rise then snap down on the 1 (classic energy trick)

    DnB phrasing note: Think in 16s and 32s. Your ride stack should “breathe” at phrase boundaries.

    ---

    Step 7 — Make it DJ-tool ready (resampling + export options)

    To use it as a tool across sets/edits:

    Option A: Keep it MIDI + macros (best for your own productions)

  • Save the rack as Heatwave Ride Stack.adg
  • Drop into any project, route sidechain, automate macros.
  • Option B: Print to audio loops (great for DJ edits / stems)

    1. Freeze + Flatten, or resample to a new audio track.

    2. Print 8 or 16-bar loops at different intensities:

    - Low / Mid / Full / Full+Space

    3. Consolidate, name clearly (e.g., `HeatwaveRide_172_Full_16b`).

    ---

    4. Common mistakes

  • Too bright, too early: If the ride is sizzling at 12k from bar 1, you’ve got nowhere to go. Start darker.
  • Masking the snare: Jungle/DnB snare needs to crack. If your ride sits in 4–7 kHz, carve it or duck harder.
  • Over-wide toppers: Wide hats can smear mono compatibility and weaken impact. Keep Ride near center, widen supporting layers.
  • Randomization chaos: A little randomness adds life; too much makes it sound sloppy at 172 BPM.
  • Reverb washing the groove: Too much tail will blur your breaks. Use SPACE as a performance move, not a permanent state.
  • ---

    5. Pro tips for darker/heavier DnB 🖤

  • Add a “Rust” parallel:
  • Create a return track with Saturator → EQ Eight (bandpass) → Compressor and send only Ride/Shaker into it. Automate send for gritty lift.

  • Make the ride “talk” around the snare:
  • Use sidechain Compressor keyed from Snare only (not kick). Fast attack, medium release. This keeps snare dominance while ride stays energetic.

  • Use Hybrid Reverb for metallic space:
  • Short convolution + small algorithmic tail = oldskool rave shimmer without drowning the loop.

  • Don’t fear midrange grime:
  • A controlled bump around 2–3.5 kHz on the shaker can add urgency (but watch harshness).

  • Phrase-based automation beats constant motion:
  • DnB energy comes from changes at 8/16/32 bars, not nonstop LFO wobble.

    ---

    6. Mini practice exercise (15–20 minutes) 🎯

    1. Build the rack with 3 chains and the 8 macros.

    2. Write a 1-bar MIDI clip and loop it for 64 bars.

    3. Automation challenge:

    - Automate TONE as a long ramp from bars 1→32.

    - Automate HEAT with quick spikes at bars 16, 32, 48, 64.

    - Automate SPACE only in the last 2 beats before bar 33 (pre-drop lift).

    4. Bounce a 64-bar audio render and listen:

    - Does the snare still win?

    - Does the groove feel like it “levels up” every 16 bars?

    ---

    7. Recap ✅

  • You built a ride groove stack that fits jungle/oldskool DnB and behaves like a DJ tool.
  • The workflow is automation-first: macros control tone, heat, density, space, and ducking.
  • You arranged movement in 16/32-bar phrases so the topper evolves with the track—without rewriting MIDI.
  • You now have a reusable Ableton Live 12 rack you can drop into any roller and instantly get that rave heatwave lift.

If you want, tell me your typical drum bus setup (or share a screenshot), and I’ll suggest exact sidechain points + EQ pockets so the ride stack locks perfectly with your breaks and bass.

```

Ask GPT about this lesson

Chat with the lesson tutor, get follow-up help, or use quick actions.

Bigup 👽 Ask me anything about this lesson and I’ll answer in context.

Narration script

Show spoken script
Heatwave: Ride Groove Stack with an automation-first workflow in Ableton Live 12 for jungle and oldskool DnB DJ tool vibes. Intermediate level. Let’s build something you can drop into any roller at 172, automate like a performance, and instantly get that “rave heatwave” lift without endlessly rewriting MIDI.

First, here’s the mindset. In drum and bass, especially jungle and oldskool flavors, your toppers do a few key jobs. They add urgency. They glue transitions. They lift energy at phrase changes. And they stay out of the way of the snare. The trick is: let MIDI stay simple, and make automation your main instrument. We’re building one track that behaves like a DJ tool: you pull it in, you push it out, you brighten it, you dirty it, you make it breathe on 16s and 32s.

Step zero. Project setup. Set your tempo to 172 BPM. That’s a classic rolling sweet spot. If you like 170 or 174, fine, but build it at 172 so the feel is right while you’re dialing in groove and ducking.

Create a MIDI track called RIDE GROOVE STACK. Optional, but nice: put it inside a DRUMS group so you can route sidechain and keep the session tidy. And switch to Arrangement View because this whole lesson is about writing automation that you can reuse.

Now we choose our sound sources. We’re doing oldskool-friendly layering: three layers inside one Instrument Rack. Drop an Instrument Rack on that track, then create three chains. Chain A is Ride. Chain B is Shaker. Chain C is Air Hat.

For sound selection, don’t overthink it, but do be intentional. The ride should be a little trashy, slightly metallic, not super clean. Think “rave hardware,” not pristine modern top loops. Short to medium decay. Shaker should be noisy and mid-forward, not insanely bright. And the air hat is your tight, fizzy tickle on top, like a closed hat with that little sizzle.

In each chain, drop a Simpler and load a sample. Stock packs are fine. Your own library is fine. The main rule is: choose samples that already live close to where you want them, so you’re not forcing them with EQ.

Next, program minimal MIDI. One bar. Loop it. This is important: we are not writing a masterpiece hat pattern. We are writing a stable engine that automation will perform.

Make a 1-bar MIDI clip, looping. For the ride layer, start with 8ths. Hits on each beat: 1, 2, 3, 4. If you want more intensity later, we’ll create it with density and brightness, not by instantly going to constant 16ths everywhere.

For the shaker layer, put in 16ths across the whole bar, but lower velocities, and vary them. Aim roughly 40 to 70 velocity, and do small differences so it breathes. This is where oldskool swing lives: not in perfect grid hats at max velocity, but in dynamic movement.

For the air hat, keep it sparse. Put a few offbeats. For example, little ticks in between the beats, or occasional 16ths. Think of it like seasoning. If you overdo this layer, it becomes that modern brittle hat thing, and we want jungle energy, not a hi-fi hiss.

Now let’s add groove without getting lost in micro-editing. Open the Groove Pool and grab a Swing 16 groove. Keep it subtle. Apply it to the clip, and start with timing around 10 to 20 percent, velocity around 5 to 15, random around 5 to 10. The goal is urgent and forward, not drunken shuffle. At 172, too much swing just feels sloppy.

At this point, we’re ready to shape each layer so it sits like a proper DnB topper, meaning it lives up top, it doesn’t clutter the break, and it doesn’t steal the snare’s crack.

On the Ride chain, start with an Auto Filter. High-pass is your friend here, or band-pass if you want it more nasal and controlled. Set the high-pass somewhere around 250 to 400 Hz to get rid of low junk that will just smear with your break and bass.

Then add Saturator. Drive in the 2 to 6 dB range, soft clip on. This is part of the “heatwave” identity: saturation gives you presence and excitement without just boosting EQ.

Then add EQ Eight. If the ride is harsh, dip around 4 to 7 kHz, maybe 2 to 4 dB, because that’s snare-crack territory and also where ears fatigue. And if you want air, use a gentle shelf around 10 to 12 kHz, but be careful. Jungle hats get bright fast.

On the Shaker chain, high-pass more aggressively. Start 600 to 1200 Hz. Shakers live higher. Then add Drum Buss. Drive maybe 5 to 15 percent, crunch low. Boom usually off for toppers, because we don’t want low-end resonance. After that, add Utility and widen it. Something like 120 to 160 percent width. The ride stays more central; shaker can be wider for movement.

On the Air Hat chain, EQ Eight with a high-pass around 2 to 4 kHz. Optional: Redux very lightly for grit. Subtle downsampling can make it feel sampled, less modern. Then Auto Pan with a small amount, maybe 10 to 25 percent, rate at 1/8 or 1/16, phase at 180 degrees for stereo movement. Again: subtle. We want motion, not seasickness.

Now we turn this into the DJ tool by building macros. This is the heart of the automation-first workflow: one or two automation lanes can create what would otherwise take ten device tweaks.

Open Macro mappings in the Instrument Rack and create eight macros.

Macro one: HEAT. Map it to the Ride Saturator drive, something like 2 dB at the low end up to 8 dB at the high end. Also map it to that air shelf gain on the ride EQ, from 0 up to maybe plus 3 dB. And map it to the shaker Drum Buss drive, like 5 up to 20 percent. HEAT should feel like “more excitement and edge,” not “everything is painfully loud.” So keep ranges controlled.

Macro two: TONE, bright to dark. Map it to filter cutoffs on all three chains. Keep musical ranges: ride high-pass maybe 200 to 600 Hz. Shaker high-pass 700 to 1500. Air hat high-pass 2k to 5k. That sounds counterintuitive at first, because you’re moving high-pass filters, but it works as a “thinner to brighter” tilt. When TONE goes up, the toppers sit more on top and feel cleaner; when it goes down, they feel thicker and more present but can get in the way. You’ll use TONE constantly in automation.

Macro three: SPRAY. This is density and noise. Create a fourth chain called Noise Spray. Put Operator on it, set it to Noise. Then band-pass it with Auto Filter somewhere around 6 to 10 kHz so it’s just airy dust. Add a Gate to chop it. Map the Gate threshold so you can go from almost nothing to a steady hissy spray, and also map the Noise chain volume. This is your “riser dust” and “wash” control, and when you automate it for one bar before a drop, it feels like the track is lifting without adding a new instrument.

Macro four: PUSH. This is the forward feel illusion. One easy way: add Drum Buss on the Ride chain and map the Transients control from 0 up to maybe plus 20. More transient gives you more forward push. Less transient feels smeared and laid back. This is psychoacoustics: you’re not changing timing, but you’re changing what the ear perceives as the front edge of the groove.

Macro five: SPACE. After the rack, add Reverb or Hybrid Reverb. Map Dry/Wet from about 3 to 18 percent, and map Decay from around 0.8 seconds up to 2.5 seconds. Then keep the reverb controlled with a high cut around 7 to 10k so it doesn’t fizz forever. SPACE is a performance move, not a permanent state.

Macro six: DUCK. After reverb, add Compressor and sidechain it from your main drums, or specifically your kick and snare bus. Ratio around 4:1, attack 2 to 10 ms, release 80 to 180 ms. Map the threshold so you can go from subtle tuck to obvious pumping. The goal is: the ride stack moves with the groove, but the snare stays the boss.

Macro seven: WIDTH. Map the Utility width on the shaker and air hat, maybe 100 to 170 percent. Keep ride closer to mono, like 100 to 120. Wide toppers can sound huge in headphones and then disappear or phase out in mono systems. So width is a spice, not the meal.

Macro eight: LEVEL. Map rack output or a Utility gain after the rack. This is your safety and your quick blend.

Now I want to add a coach move that saves hours. Calibrate this stack against a real breakbeat right now. Drop in a break loop you actually like, loop eight bars, and bring the ride stack up until it just starts to announce itself. Not dominate. Just announce. Then set your LEVEL macro so your “default” position is slightly below that threshold. Why? Because later when you automate HEAT and TONE up, you won’t accidentally end up with toppers that are wildly too loud.

Let’s make it even more mix-proof. Create a “snare window” instead of just cranking ducking. After the rack, add an EQ Eight and make a bell around 4.5 to 6.5 kHz, Q around 1.2 to 2.0. Map that bell gain to a macro called SNARE GAP if you have space, or replace a macro you use least. Range from 0 down to about minus 4 dB. When the drop gets busy, automate SNARE GAP down a bit more, and the snare will pop through without you having to pump everything to death.

Now the automation template. We’re thinking in 16s and 32s because that’s how DnB breathes. Make a 64-bar section in Arrangement and automate the macros like a DJ performing an energy curve.

Bars 1 to 16: intro, low energy. Keep TONE darker. HEAT low. SPACE almost dry. DUCK medium so the toppers stay tucked behind the break and don’t steal attention. This is important: if you start too bright, you have nowhere to go.

Bars 17 to 32: build and tease. Gradually raise TONE and introduce SPRAY. A little lift in WIDTH can make it feel like the track is opening up. Then do tiny HEAT bumps at phrase ends, like around bar 24 and bar 32. Those little end-of-phrase pushes are where jungle excitement lives.

Bars 33 to 48: the drop, full wash. TONE high. HEAT medium to medium-high. SPACE slightly up but controlled. DUCK set so the snare still dominates. Here’s a listening check: if your ride stack is masking the snare crack, you have two immediate fixes. One, increase DUCK a touch. Two, carve a little 4 to 7k on the ride, or automate SNARE GAP.

Bars 49 to 64: variation and transition. Pull back SPACE and SPRAY so it doesn’t stay at maximum intensity forever. And here’s a classic move: a one-bar “heat flash” going into the end. Around bar 63 into 64, ramp HEAT up quickly, then snap it down right on the 1. That snap creates the perception of impact and control, like a DJ riding a filter and slamming it back.

A quick automation style tip: don’t draw only smooth curves everywhere. Use momentary shapes. Half-bar ramps up, quick snaps down. Two beats of space swelling right before the drop, then immediately dry on the downbeat. That’s performance realism.

Now, a couple advanced variations if you want to level this up.

One DJ-friendly upgrade is to build an A and B ride inside the same rack: Rider versus Washer. Duplicate your Ride chain. Ride A is tight, punchy, less reverb, more transient. Ride B is longer, noisier, more smeary and spaced out. Then map the Chain Selector to a macro called MODE, so you can morph between articulation and wash without changing your automation lanes. That’s huge for arrangement speed.

Another spicy trick is micro-flam without editing notes. Put a Delay device, not Echo, on only the Air Hat chain. Set the time super short, like 1 to 6 milliseconds. Feedback at zero. Dry/Wet 100 percent so it’s basically a micro delay. Map the delay time to a FLAM macro with a tiny range. Automate it just at the end of an 8 or 16 to create tension, like a double-hit illusion.

And if you want actual push and pull without touching MIDI, automate Track Delay on the entire Ride Groove Stack. Push feel can be a slightly negative delay, like minus 5 to minus 15 milliseconds, and maybe a touch more duck to keep it clean. Pull feel is plus 5 to plus 15 milliseconds with reduced transient. This is subtle at 172, but very effective. If you worry about phase or latency relationships, resample it.

Speaking of resampling, let’s make this a real DJ tool you can reuse.

Option A: keep it as MIDI plus macros. Save the rack as Heatwave Ride Stack, and in new projects you just drop it in, route the sidechain, and copy your automation shapes.

Option B: print to audio loops. Freeze and flatten, or resample onto a new audio track. Print 8 or 16-bar loops at different intensities: low, mid, full, full plus space. Consolidate and name them clearly, like HeatwaveRide_172_Full_16b. This becomes instant ammo for DJ edits, stems, and fast arrangement.

Before we wrap, let’s quickly hit common mistakes so you can avoid them.

Mistake one: too bright too early. If it’s already sizzling at 12k in bar one, your “build” automation does nothing.

Mistake two: masking the snare. Your snare needs to crack. Protect that 4 to 7k zone, use SNARE GAP, and use ducking with intent.

Mistake three: over-wide toppers. If you push width and autopan too far, mono compatibility collapses and the groove loses impact. Keep ride central, and widen supporting layers gently.

Mistake four: randomization chaos. A little random adds life. Too much makes it sloppy, especially at 172.

Mistake five: constant reverb. Reverb is a move. If you leave SPACE high all the time, you blur the break and the groove loses punch.

Now your mini practice. Set a timer for 15 to 20 minutes.

Build the rack with three chains and the macros. Write a one-bar MIDI clip and loop it for 64 bars. Then automate TONE as a long ramp from bar 1 to 32. Automate HEAT as quick spikes at bars 16, 32, 48, and 64. Automate SPACE only in the last two beats before bar 33, like a pre-drop lift, and then snap it back.

Then bounce a 64-bar render and listen like a DJ, not like a producer staring at a screen. Does the snare still win? Does the groove level up every 16 bars? Does it feel like it’s performing, not just playing hats?

Final recap. You now have a Heatwave ride groove stack: a layered ride, shaker, and air hat engine built for jungle and oldskool DnB. The workflow is automation-first: macros handle brightness, drive, density, space, width, and ducking. You’re arranging movement in 16 and 32 bar phrases, so you get energy and evolution without rewriting MIDI. Save it, reuse it, and treat it like a performance channel.

If you tell me what break you’re using and whether your snare is bright or mid-heavy, I can suggest an exact SNARE GAP frequency and a duck release time so this locks perfectly with your drums.

mickeybeam

Go to drumbasscd.com for +100 drum and bass YouTube channels all in one place - tune in!

Generating PDF preview…