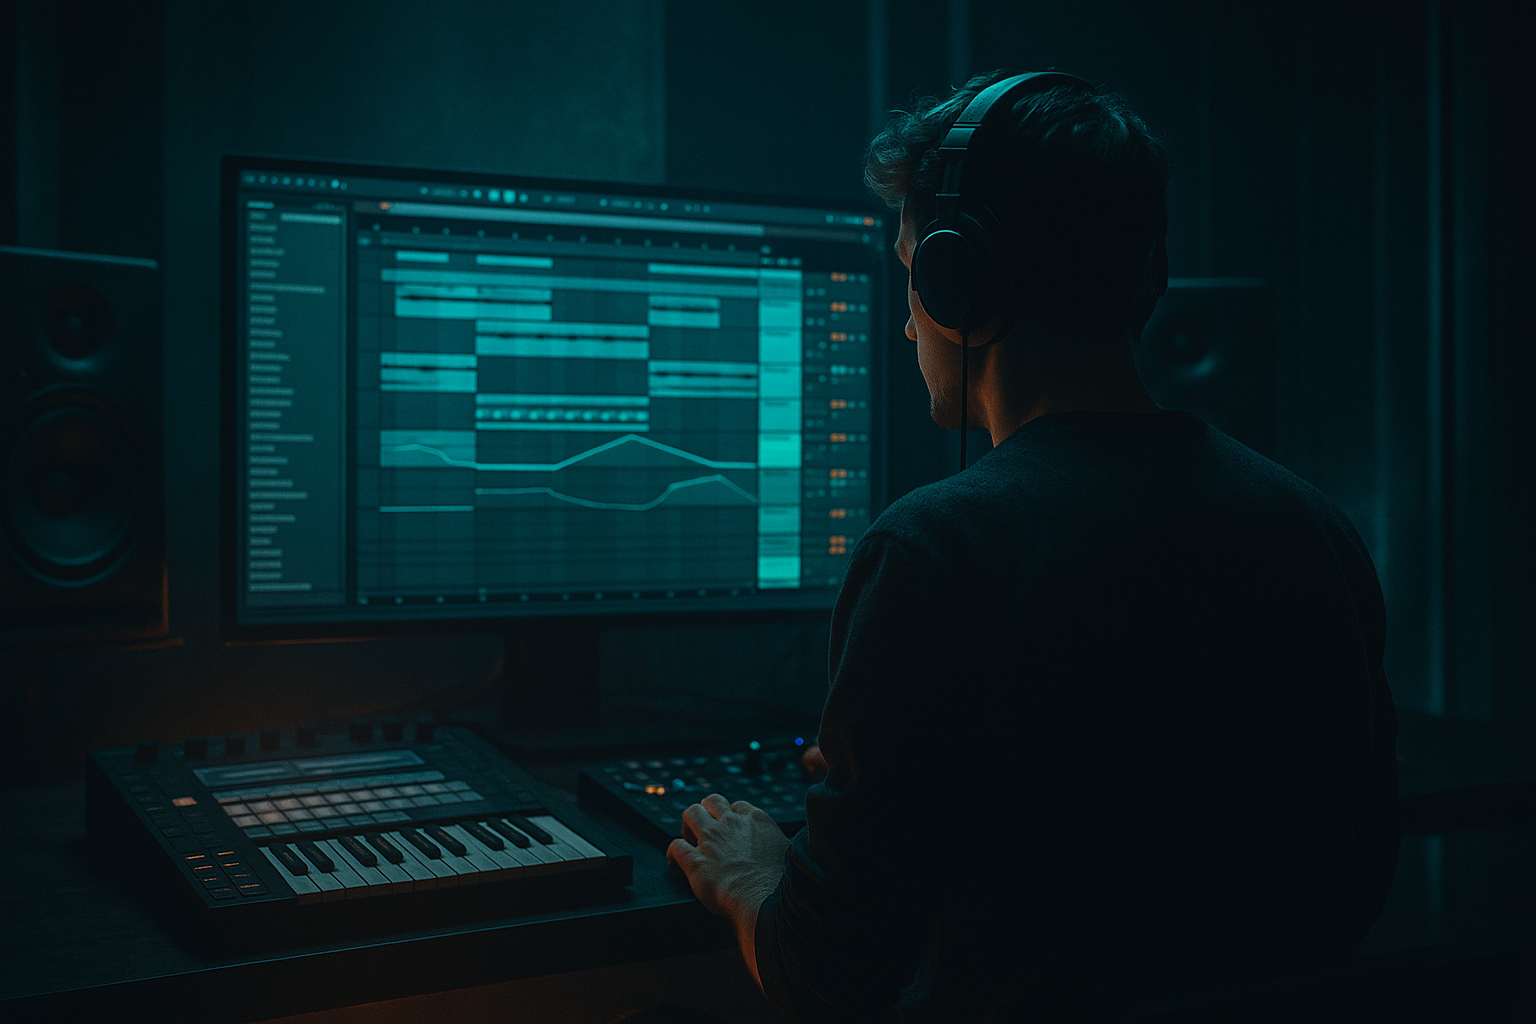
DNB COLLEGE

Drum & Bass Ableton Live 12 Tutorials

LESSON DETAIL

Heatwave Ableton Live 12 rewind moment lab with automation-first workflow for jungle oldskool DnB vibes (Advanced)

An AI-generated advanced Ableton lesson focused on Heatwave Ableton Live 12 rewind moment lab with automation-first workflow for jungle oldskool DnB vibes in the Workflow area of drum and bass production.

Back to lessons
Heatwave Ableton Live 12 rewind moment lab with automation-first workflow for jungle oldskool DnB vibes (Advanced) cover image

Narrated lesson audio

The voice track includes the tutorial plus extra teacher commentary.

Open audio file

Main tutorial

Heatwave Ableton Live 12 Rewind Moment Lab

Automation-first workflow for jungle / oldskool DnB vibes 🔥🎛️

1. Lesson overview

In this lesson, you’ll build a rewind moment—that classic DnB / jungle “pull the track back, hype the drop, then slam forward” transition—using an automation-first workflow in Ableton Live 12.

We’re not treating the rewind as an afterthought. Instead, we’ll design it like a performance moment:

  • tempo-feel manipulation
  • filter movement
  • pitch-down / stop-start tension
  • impact tail shaping
  • drum and bass arrangement logic
  • controlled chaos that still lands cleanly
  • This approach is ideal for:

  • oldskool jungle
  • rollers with a retro edge
  • dark DnB
  • break-heavy tracks
  • live-set-friendly arrangement
  • high-energy breakdown-to-drop transitions
  • The goal: create a rewind moment that feels like it belongs in a proper DnB set, not a generic EDM riser. Think crowd energy, vinyl-era reference, and tight modern Ableton control.

    ---

    2. What you will build

    You’ll create a short 8–16 bar arrangement section featuring:

  • a main drum loop with break edits
  • a bassline groove
  • a rewind transition using automation
  • a tape-stop style slowdown
  • filter sweep + reverb wash
  • a reverse hit / impact moment
  • a clean re-entry into the next drop
  • Core Ableton stock devices used

  • Auto Filter
  • Utility
  • EQ Eight
  • Reverb
  • Echo
  • Saturator
  • Drum Buss
  • Simple Delay or Delay
  • Resonators or Corpus for texture
  • Audio Effect Rack for macro-controlled transition layers
  • Envelope automation in Arrangement View
  • You can build this with audio or MIDI, but for authentic jungle / oldskool DnB energy, audio-based break manipulation is especially effective.

    ---

    3. Step-by-step walkthrough

    Step 1: Set up the arrangement like a DJ would think 🧠

    Open a project around 160–175 BPM. For oldskool jungle, 165–172 BPM is a sweet spot.

    Create these tracks:

    1. Drums / Break

    2. Kick + Snare Layer

    3. Sub Bass

    4. Reese / Mid Bass

    5. Atmos / Texture

    6. Impact / FX

    7. Rewind Bus (optional group for transition processing)

    Arrangement layout suggestion

    Use an 8-bar section before the drop and a 2-bar rewind moment.

    Example:

  • Bars 1–4: full groove
  • Bars 5–6: stripped groove + tension
  • Bar 7: rewind trigger
  • Bar 8: silence / reverse pull / re-entry prep
  • If you want a more classic jungle vibe, make the rewind happen just before the drop lands, not too early.

    ---

    Step 2: Build a strong break foundation

    Use a classic breakbeat loop or chopped break in audio.

    #### Practical break processing chain:

    On your Break track, try:

    1. EQ Eight

    - High-pass: around 25–35 Hz

    - Small cut around 250–400 Hz if muddy

    - Gentle boost around 6–9 kHz if the hats need air

    2. Drum Buss

    - Drive: 5–15%

    - Boom: keep subtle unless you want extra chest hit

    - Transients: slight positive if you want more snap

    3. Saturator

    - Soft Clip: ON

    - Drive: 1–4 dB for warmth

    For jungle, the break should feel alive and slightly unstable. Don’t over-quantize every chop. Let the groove breathe.

    ---

    Step 3: Design the rewind as an automation event

    The rewind moment works best when several things happen in sync:

  • drums thin out
  • bass loses weight
  • filter narrows
  • delay/reverb increases
  • pitch or playback feel suggests pulling backward
  • impact lands after a short empty space
  • #### Automation targets to use:

  • Master or group filter
  • Break track filter
  • Bass volume
  • Reverb wet/dry
  • Echo feedback
  • Utility gain
  • Clip transpose or warping behavior
  • Track activator mute
  • Return track sends
  • ---

    Step 4: Create the “pull back” using filter automation

    Insert Auto Filter on your Drum Group or Rewind Bus.

    #### Suggested settings:

  • Filter type: Low-pass
  • Slope: 24 dB
  • Resonance: moderate, around 10–25%
  • Drive: small amount if needed
  • #### Automation move:

    Over 1–2 bars, automate the cutoff:

  • Start around 18–20 kHz
  • Sweep down to 300 Hz or lower
  • Then snap or pause before the rewind hit
  • This creates the classic “everything gets sucked backward” feeling.

    For an even more dramatic moment, automate:

  • Filter resonance up slightly near the end of the sweep
  • Dry/wet reverb up
  • Delay feedback up
  • Utility gain down by 3–6 dB before the rewind
  • That makes the rewind feel like it’s collapsing into itself.

    ---

    Step 5: Use a tape-stop style slowdown, the Ableton way

    Ableton doesn’t have a classic vinyl rewind button stock, but you can emulate the effect very convincingly.

    #### Option A: Clip automation + warping

    On an audio clip:

  • Set Warp mode to Complex Pro or Beats depending on source
  • Automate clip transpose down by 1–3 semitones
  • Shorten the final note tail
  • Add a tiny reverse sample behind it
  • This gives a pitch-sag effect.

    #### Option B: Utility + Sample playback manipulation

    For a more dramatic stop:

  • Automate Utility gain to fade
  • Follow with a reverse cymbal / reverse break hit
  • Then drop to silence for a fraction of a beat
  • #### Option C: Echo freeze-style illusion

    Use Echo:

  • Feedback: automate toward 80–95%
  • Time: 1/8 or 1/4
  • Modulation: low to moderate
  • Enable Freeze very briefly if useful
  • This works brilliantly on snare hits, vocal chops, or a small break fragment.

    ---

    Step 6: Build the rewind sound design layer

    A rewind moment usually needs a signature audio cue, not just automation.

    #### Good rewind layers:

  • reverse snare
  • reverse crash
  • vinyl stop sample
  • short pitched-down drum hit
  • crowd-style FX
  • scrape / rewind tape noise
  • sub drop with volume fade
  • #### Stock Ableton methods:

  • Take a snare or rimshot audio clip, reverse it
  • Add Reverb with long decay, then freeze/bounce if needed
  • Bounce to audio, reverse again if you want a more washed rewind tail
  • Use Corpus on a metallic hit for a hollow, oldskool mechanical vibe
  • A very effective chain on the rewind FX track:

    EQ Eight → Saturator → Auto Filter → Reverb → Utility

    Settings idea:

  • EQ: high-pass at 150–250 Hz
  • Saturator: mild drive
  • Auto Filter: low-pass automation
  • Reverb: decay 3–6s, dry/wet automation
  • Utility: automate gain down at the moment of the rewind
  • This keeps the rewind cue high and dramatic without cluttering the low end.

    ---

    Step 7: Make the bass disappear in a musical way

    DnB rewind moments are stronger when the bass is controlled rather than hard-cut.

    On your Sub Bass and Mid Bass tracks:

    #### Sub Bass:

  • Use Utility before the instrument or audio chain
  • Automate gain down over 1 bar
  • Optionally automate a low-pass filter on the synth itself
  • #### Mid Bass / Reese:

  • Add Auto Filter
  • Sweep low-pass cutoff from open to narrow
  • Increase resonance slightly as it closes
  • Add Echo or Delay for a very short smear before cutoff
  • If your bass is MIDI-based, consider automating:

  • filter envelope amount
  • oscillator detune
  • unison width
  • amp volume
  • For a proper oldskool feel, let the bassline feel like it’s being physically dragged out of the mix.

    ---

    Step 8: Create the silence / vacuum moment

    The rewind lands harder if you create a tiny void.

    #### Do this:

  • Mute the kick and snare for 1/8 to 1/4 beat
  • Let a reverb tail or reverse sound hang for a moment
  • Drop a very short stop-hit or vinyl noise
  • This vacuum creates anticipation. In jungle and DnB, even a tiny gap can feel huge if the groove was locked beforehand.

    Tip: Don’t overdo the silence. A full bar of nothing may kill the momentum unless it’s a dramatic breakdown. Usually, a micro-pause is enough.

    ---

    Step 9: Re-enter with impact

    After the rewind, your re-entry should feel like the track “snaps” back into motion.

    #### Re-entry options:

  • Full drum drop
  • Half-time sub hit into full-time break
  • Snare flam into kick
  • Reese bass returning with wider stereo
  • Extra top-loop layering for lift
  • Use one of these tricks:

  • Add a white-noise burst into the drop
  • Put a short delay ping on the first snare
  • Automate Utility width from narrow to wide as the drop lands
  • Add a Drum Buss transient hit to the first break bar
  • If the rewind is strong, the next drop doesn’t need to be overpacked. Let the contrast do the work.

    ---

    Step 10: Convert it into a reusable Live 12 workflow

    This is the real automation-first win: make the rewind moment reusable as a template.

    #### Build an Audio Effect Rack on your Rewind Bus

    Map macros to:

    1. Global Low-pass

    2. Reverb Send

    3. Delay Send

    4. Output Gain

    5. Stereo Width

    6. Saturation Drive

    Now you can create your rewind in one lane of automation instead of drawing everywhere individually.

    #### Suggested macro behavior:

  • Macro 1: opens/closes filter
  • Macro 2: increases reverb tail
  • Macro 3: increases delay smear
  • Macro 4: ducks overall level
  • Macro 5: narrows stereo image before the stop
  • Macro 6: adds grit on the rewind cue
  • This is especially useful if you’re doing multiple breaks or arranging a full tune with repeated rewind-style transitions.

    ---

    4. Common mistakes

    1. Making the rewind too long

    A rewind moment should usually be tight. If it drags on too long, it loses impact and can interrupt dancefloor momentum.

    2. Killing the low end too early

    If the sub disappears too soon, the transition feels weak. Let the bass hold until the last moment, then pull it out cleanly.

    3. Overusing full silence

    A little space is powerful. Too much silence can feel like a mistake unless it’s intentionally dramatic.

    4. Using generic EDM risers

    DnB rewind moments need character. Reversed breaks, tape-stop cues, filtered ambience, and snare roll tension are usually more authentic than big festival uplifters.

    5. No contrast between sections

    If your drop and rewind sound too similar, the moment won’t land. Make sure the rewind strips back energy before the re-entry.

    6. Automation that moves too slowly

    Rewinds are often physically abrupt. Long, graceful automation can sound polished, but it may miss the aggressive oldskool energy.

    ---

    5. Pro tips for darker/heavier DnB

    Use distortion strategically

    For a darker rewind, add:

  • Saturator
  • Pedal if you want heavier drive
  • Drum Buss
  • mild overdrive on the break bus
  • Don’t distort everything equally. Focus grit on:

  • snare
  • break crack
  • rewind FX
  • mid bass layers
  • Narrow the stereo image before the hit

    Automate Utility Width down to 50–70% before the rewind. Then reopen width on the drop.

    This makes the drop feel bigger and more intentional.

    Use pitch and formant movement

    If you have vocal chops or melodic bits:

  • pitch them down briefly before the stop
  • reverse them
  • hit them with delay tail
  • Dark DnB loves unstable, disorienting motion.

    Add sub pressure after the gap

    After the rewind, bring in:

  • a clean sine sub
  • or a sub hit with a short decay
  • A clean low-end punch after the vacuum makes the drop feel massive.

    Make the break stutter before rewinding

    Try cutting the break into:

  • 1/2 beat
  • 1/4 beat
  • 1/8 beat slices
  • Then automate the final slice into the rewind. That “chopped but controlled” feel is very jungle.

    ---

    6. Mini practice exercise

    Goal

    Create a 4-bar rewind transition from a DnB groove into a drop reset.

    Exercise steps

    1. Make a 165 BPM project.

    2. Place a 2-bar breakbeat loop on Audio Track 1.

    3. Add a sub bass and a mid bass.

    4. Create a Rewind Bus with:

    - Auto Filter

    - Reverb

    - Echo

    - Utility

    5. Automate:

    - filter cutoff down over 1 bar

    - bass volume down over 1 bar

    - reverb wet up in the last 1/2 bar

    - echo feedback up on the final snare hit

    - utility gain drop right before the rewind cue

    6. Add a reversed snare or crash into the last beat.

    7. Leave a tiny gap.

    8. Re-enter with a full drum hit and sub.

    Challenge version

    Do it twice:

  • once as a clean oldskool jungle rewind
  • once as a darker heavier DnB rewind
  • Then compare:

  • which one has more dancefloor pull?
  • which one sounds more aggressive?
  • which one supports the drop better?
  • ---

    7. Recap

    A strong DnB rewind moment is not just a novelty effect—it’s a transition strategy.

    Key takeaways:

  • Build the rewind with automation first
  • Use filter, gain, reverb, and delay as your main movement tools
  • Keep the low end controlled until the last moment
  • Add a signature rewind cue: reverse snare, stop hit, vinyl noise, or echo freeze
  • Re-enter with contrast and impact
  • Package the whole thing into an Ableton rack workflow for speed and consistency

If you think like a DJ and arrange like a producer, your rewind moments will feel intentional, hype, and fully rooted in jungle / oldskool DnB culture.

That’s the vibe. That’s the move. 🚀

If you want, I can also turn this into a step-by-step Ableton Live 12 project template, including exact tracks, macro mappings, and an automation lane checklist.

Ask GPT about this lesson

Chat with the lesson tutor, get follow-up help, or use quick actions.

Bigup 👽 Ask me anything about this lesson and I’ll answer in context.

Narration script

Show spoken script
Welcome to Heatwave, the Ableton Live 12 rewind moment lab, where we’re building that classic jungle and oldskool DnB transition that pulls the whole track back, hypes the room, and then slams straight into the next drop.

This is an advanced workflow lesson, but the big idea is simple: we are not treating the rewind like a random effect at the end of the arrangement. We’re designing it like a performance gesture. Something physical. Something deliberate. Something that feels like a DJ moving the crowd, not just a producer drawing automation.

So think about the emotional arc first. Energy comes in, then it collapses, then it snaps back harder.

In this lesson, you’re going to build a short transition section, usually eight to sixteen bars, with a strong breakbeat groove, bass movement, a rewind cue, a vacuum moment, and a clean re-entry. The vibe is jungle, oldskool rave pressure, dark DnB tension, and controlled chaos that still lands perfectly on the downbeat.

Let’s start by setting the project up like a DJ would think.

A good tempo range is around 160 to 175 BPM, and for classic jungle energy, 165 to 172 is a sweet spot. That gives the drums enough pace to feel urgent, but still leaves space for the rewind to breathe.

Create a few key tracks: drums or break, kick and snare layer, sub bass, mid bass or reese, atmosphere or texture, impact and FX, and optionally a rewind bus for the transition processing. That rewind bus is a big deal, because one master control track often feels more intentional than ten tiny automation moves scattered everywhere.

Now let’s build the foundation.

For the break, use a classic chopped breakbeat or an audio loop with some life in it. Jungle sounds better when it breathes a little. Don’t over-quantize every single hit. Let it wobble just enough to feel human and slightly unstable.

On the break track, a solid starter chain is EQ Eight, Drum Buss, and Saturator. High-pass the low rumble around 25 to 35 hertz, carve a little mud if needed around 250 to 400 hertz, and add a touch of air if the hats need it. Drum Buss can add punch and glue, but keep it subtle unless you want extra bite. Saturator with soft clip on, and just a little drive, can warm the loop up without flattening it.

Now here’s the main lesson: the rewind should be designed as an automation event.

We want multiple layers moving together. Level drops first. Then low end gets removed. Then transient energy softens. Then the space opens up with reverb and delay. Then the cue sound hits. That order matters, because it matches how the ear experiences the collapse.

A very effective move is to put Auto Filter on your drum group or rewind bus. Set it to low-pass, use a fairly steep slope, and automate the cutoff from fully open down to something much narrower over one to two bars. Start wide open, then sweep down to around 300 hertz or even lower by the end. As the filter closes, the track starts to feel like it’s being sucked backward.

If you want more drama, automate the resonance up slightly near the end of the sweep, bring the reverb up, push the delay feedback up, and duck the utility gain by a few dB before the rewind cue. That combination makes the whole section feel like it’s collapsing into itself.

Now let’s talk about the tape-stop or rewind feel. Ableton doesn’t have a classic vinyl rewind button built in, but you can absolutely fake the movement in a convincing way.

If you’re working with audio clips, try automating clip transpose down by one to three semitones near the end of the phrase. Pair that with warp mode that suits the source, like Beats or Complex Pro, and let the last tail sag downward. You can also make the final note shorter, then tuck a tiny reverse sample behind it so the ear hears a pullback.

Another approach is to use Utility for the gain fade, then follow it with a reverse crash or reverse snare. That kind of simple stop-start treatment can be incredibly effective in jungle because the genre already loves sharp edits and chopped energy.

Echo is another secret weapon here. Automate feedback up toward 80 to 95 percent on a snare hit, vocal chop, or short break fragment, and briefly freeze if it works musically. That creates a smeared memory of the groove right before the drop disappears.

Now the rewind needs a signature sound cue. This is where the personality comes in.

A rewind cue could be a reverse snare, a reverse crash, a vinyl stop sample, a short pitched-down drum hit, a scrape, tape noise, or a sub drop with a quick fade. One memorable detail is way more effective than stacking five generic effects.

A good stock Ableton chain for the cue might be EQ Eight, Saturator, Auto Filter, Reverb, and Utility. High-pass the low end so it doesn’t clutter the mix, add a little grit, close the filter down, give it some long decay in the reverb, and then pull the level down at the moment of impact. That keeps the rewind FX high, dramatic, and clean.

And do not forget the bass.

A DnB rewind sounds much better when the bass is withdrawn musically, not just chopped off. On the sub bass, use Utility or volume automation and pull it down over about one bar. On the mid bass or reese, add Auto Filter and sweep it narrower as the section closes. If it’s a synth, you can also automate filter amount, detune, stereo width, or amp level.

The trick is to make the bass feel like it’s being physically dragged out of the mix. That’s the oldskool energy. It’s not just a fade. It’s a movement.

Then create the vacuum moment.

This is where a lot of rewinds get their power. Mute the kick and snare for a tiny moment, maybe an eighth note to a quarter beat. Let the reverb tail or reverse sound hang in the air. Then leave a micro-pause before the next hit.

That little void makes the whole room lean forward. Don’t overdo it. You usually want just enough silence to create tension, not so much that the momentum dies.

After that, the re-entry has to hit with contrast.

You can come back with a full drum drop, or a half-time sub hit into a full-time break, or a snare flam into the kick. Another great trick is to widen the stereo image as the drop lands, so the rewind feels narrow and collapsed, and the drop feels huge by comparison.

A white-noise burst, a short delay ping on the first snare, or a Drum Buss transient hit on the first bar back can make the return feel explosive without overcrowding the mix.

Here’s a really useful advanced coaching note: think in layers of importance.

First, the level drop. Second, the low-end removal. Third, the transient softening. Fourth, the spatial wash. Fifth, the cue sound. If you organize your automation this way, the transition will feel more convincing because you’re matching the way people actually hear the collapse.

You can also make the rewind feel more physical by narrowing the stereo width before the hit, then reopening it on the drop. Even a move from, say, 70 percent width down to 50 percent can make the rewind feel tighter and more intentional.

If you want to go deeper, build an Audio Effect Rack on the Rewind Bus and map macros to the main transition controls. For example: global low-pass, reverb send, delay send, output gain, stereo width, and saturation drive. That way, you can shape the entire rewind with one automation lane or a small set of macro moves instead of drawing everything manually on every track.

This is the real automation-first workflow advantage. It’s faster, cleaner, and easier to reuse later in the arrangement.

Now let’s talk about variation.

You can do a classic rewind with a quick pullback and a reverse snare. Or you can make it darker and more mechanical by narrowing the stereo image, adding a little more distortion, and making the bass withdrawal feel heavier and less flashy. Or you can do a minimalist DJ-style reset, where the whole thing is mostly level and filter movement with just one signature cue.

A really cool advanced trick is the fake rewind using micro-edits. Instead of a smooth slowdown, cut the last one or two beats into tiny slices and reorder them. Try alternating slice lengths like quarter beat, eighth note, sixteenth note, then stop. That stuttered pull-back can feel extremely oldskool, especially on break tails, snare echoes, and vocal chops.

Another variation is the rewind through negative space. That means you remove the obvious FX and let the transition be mostly about absence. Strip the kick first, remove the bass second, leave a hat loop or ghost percussion, then let a single reverse texture carry the moment into the drop. That approach is especially strong in darker or more serious DnB, where too much flashy FX can feel too playful.

You can also use a dual-rewind setup. One layer is the drum and bass pullback. The other is a high FX or texture rewind. If you automate them slightly out of phase, the second layer trails behind the first, and the whole transition feels deeper and wider without simply getting louder.

A nice arrangement trick is to make the section before the rewind feel slightly too full. Add one extra percussion layer, a bit more top-end activity, maybe a snare ghost note or bass variation. Then strip it away fast. The contrast makes the rewind feel much more dramatic.

Now, if you want a clean workflow, here’s a great practice exercise.

Set a project around 165 BPM. Place a two-bar breakbeat loop on the first audio track. Add a sub bass and a mid bass. Build a Rewind Bus with Auto Filter, Reverb, Echo, and Utility. Then automate the filter cutoff down over one bar, the bass volume down over one bar, the reverb wet up in the last half bar, the echo feedback up on the final snare hit, and the utility gain down right before the cue. Add a reversed snare or crash on the last beat, leave a tiny gap, then re-enter with a full drum hit and sub.

Do that twice if you can. Once as a classic oldskool jungle rewind, and once as a darker, heavier DnB rewind. Compare the results. Which one feels more like a dancefloor move? Which one feels more aggressive? Which one supports the drop better?

That comparison will teach you a lot about arrangement psychology.

One last important point: watch out for common mistakes. Don’t make the rewind too long, because it can kill momentum. Don’t remove the sub too early, or the transition loses weight. Don’t rely on huge silence unless you really mean to. And don’t default to generic EDM risers when the style calls for reverse breaks, tape wobble, filtered ambience, and drum edits with character.

Also, be careful with warp artifacts if you’re stretching audio to create stop-start movement. Always audition on multiple systems if you can, because something that sounds slick in headphones can get smudged on a club rig.

So to recap: a strong rewind moment is not just a special effect. It’s a transition strategy.

Build it with automation first. Use filter, gain, reverb, and delay as your main motion tools. Hold the low end until the last moment. Add one signature cue like a reverse snare, stop hit, or echo freeze. Leave a tiny vacuum. Then bring the drop back with contrast.

If you think like a DJ and arrange like a producer, your rewind moments will feel intentional, hype, and fully rooted in jungle and oldskool DnB culture.

That’s the vibe. That’s the move.

mickeybeam

Go to drumbasscd.com for +100 drum and bass YouTube channels all in one place - tune in!

Generating PDF preview…