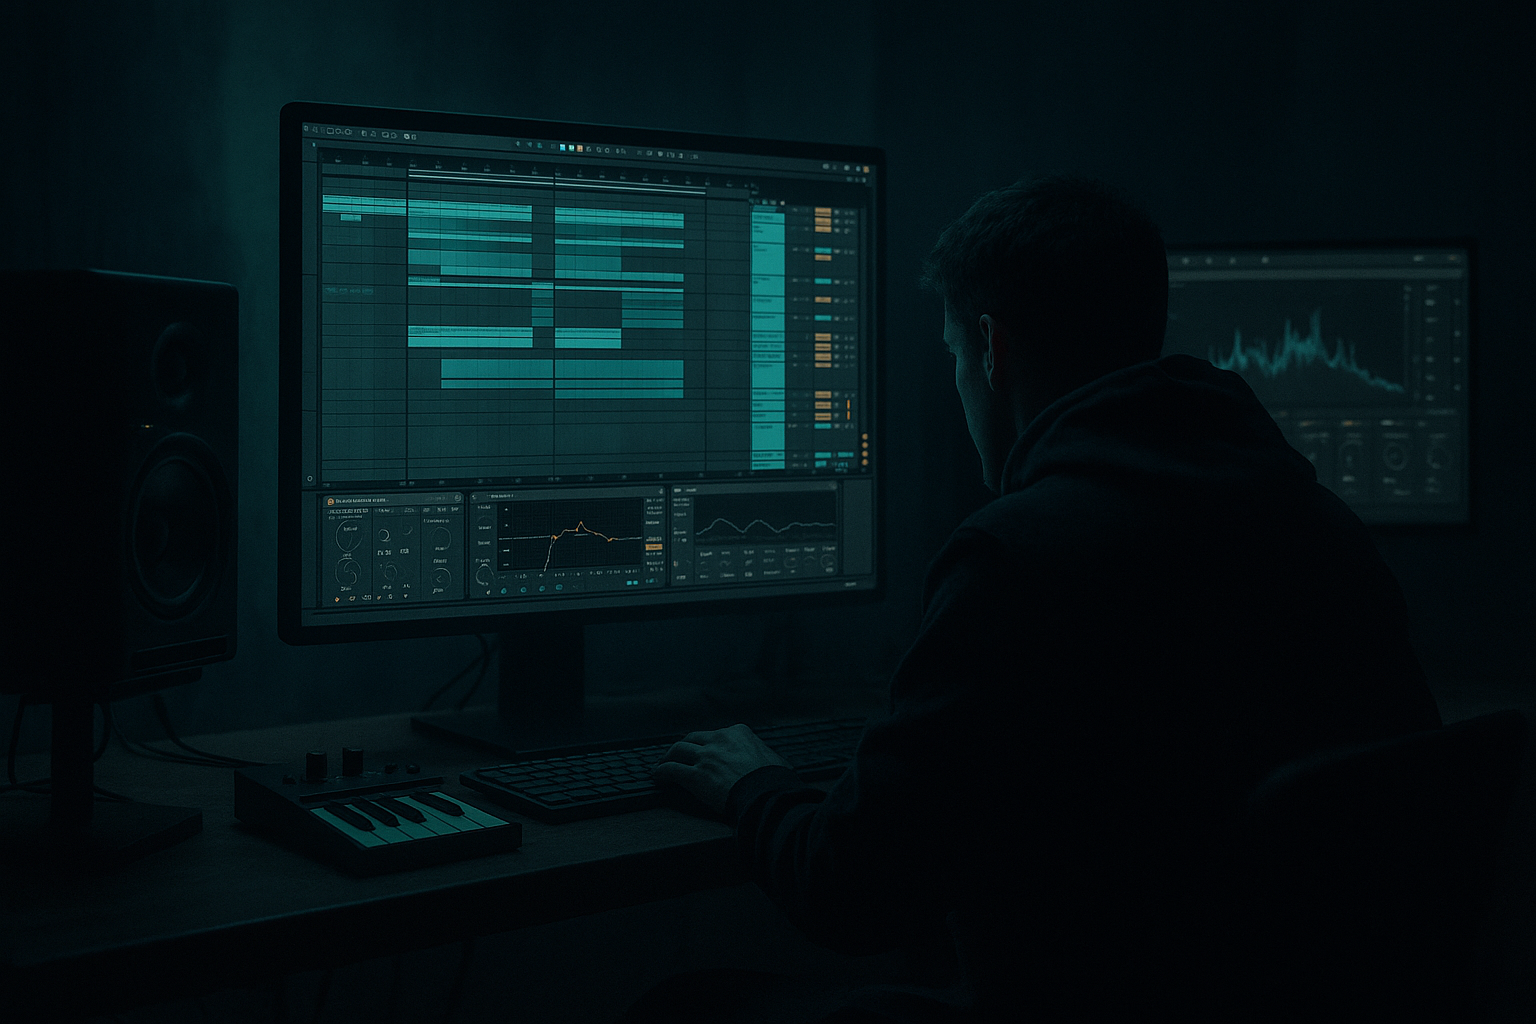
DNB COLLEGE

Drum & Bass Ableton Live 12 Tutorials

LESSON DETAIL

FX chain sequence blueprint with breakbeat surgery in Ableton Live 12 (Beginner)

An AI-generated beginner Ableton lesson focused on FX chain sequence blueprint with breakbeat surgery in Ableton Live 12 in the Automation area of drum and bass production.

Back to lessons
FX chain sequence blueprint with breakbeat surgery in Ableton Live 12 (Beginner) cover image

Narrated lesson audio

The voice track includes the tutorial plus extra teacher commentary.

Open audio file

Main tutorial

FX Chain Sequence Blueprint with Breakbeat Surgery in Ableton Live 12

1. Lesson overview

In drum and bass, automation is one of the fastest ways to make a loop feel alive, aggressive, and arranged like a full track. Instead of just dropping random effects on a break, we’ll build a repeatable FX chain sequence blueprint in Ableton Live 12 that you can use on:

  • breakbeats
  • drum fills
  • build-ups
  • drop transitions
  • jungle-style slice edits
  • rolling DnB drums that need movement without losing punch
  • We’re going to take a clean breakbeat, slice it up, and then automate an FX chain so the loop evolves in a musical, controlled way. Think:

  • filtered intro
  • punchy break-in
  • glitchy fill
  • heavy drop movement
  • short breakdown moments
  • This is a beginner-friendly workflow, but it sounds pro if you follow the steps carefully 🎚️

    ---

    2. What you will build

    By the end of this lesson, you’ll have a 4-bar automation sequence for a breakbeat in Ableton Live 12 that uses:

  • Auto Filter for tension and frequency movement
  • Beat Repeat for controlled stutter/glitch edits
  • Redux for crunchy jungle-style degradation
  • Saturator or Drum Buss for weight
  • Reverb and/or Delay for transition moments
  • Utility for clean level control and mono checks
  • optional Echo for dubby throws and space
  • You’ll learn how to:

  • slice a break into MIDI
  • place the right FX in the right order
  • automate device on/off and key parameters
  • create a sequence blueprint that you can reuse across tracks
  • The result: a breakbeat that feels like it’s being “performed” by the arrangement, not just looped.

    ---

    3. Step-by-step walkthrough

    Step 1: Start with the right breakbeat

    Choose a break that has clear transients and movement. Good beginner choices:

  • classic amen-style breaks
  • funky drummer-style breaks
  • any 2-bar sampled drum loop with kick/snare accents
  • If your break is already in audio, drag it into an Audio Track.

    #### Quick prep:

    1. Set your project tempo around:

    - 170 BPM for standard DnB

    - 160–174 BPM depending on style

    2. Turn Warp on if needed.

    3. In the clip, make sure the break is timing well with your project grid.

    #### If the break feels messy:

  • Use Complex Pro only if needed for a more musical sample
  • For drums, Beats mode is often better
  • Adjust transient preservation so the kick/snare hits stay sharp
  • ---

    Step 2: Slice the break for surgical control

    For true breakbeat surgery, slicing is your best friend.

    #### Method:

    1. Right-click the break audio clip

    2. Choose Slice to New MIDI Track

    3. Slice by:

    - Transient for flexible break surgery

    - or 1/16 if you want strict rhythmic control

    Ableton will create:

  • a Drum Rack
  • a MIDI clip with the break slices assigned
  • This is powerful because now you can:

  • rearrange hits
  • mute individual hits
  • create fills
  • retrigger slices
  • automate effects on top of the edited break
  • #### Beginner tip:

    Keep the original break audio muted but available. That way you can compare the chopped version with the source.

    ---

    Step 3: Build the FX chain in a useful order

    For DnB, FX order matters a lot. Here’s a practical beginner chain blueprint:

    Recommended chain order:

    1. Utility

    2. Auto Filter

    3. Saturator

    4. Beat Repeat

    5. Redux

    6. Reverb or Echo

    7. Compressor / Glue Compressor if needed at the end

    Let’s break that down.

    ---

    Step 4: Set up the base tone

    #### Device 1: Utility

    Place Utility first.

    Use it to:

  • control overall gain before FX
  • switch to mono if needed for low-end checking
  • reduce level before distortion or stutter effects
  • Suggested starting point:

  • Gain: -3 to -6 dB
  • Width: 100%
  • Mono: off for now
  • This is important because DnB breaks can get loud fast once you add distortion and reverb.

    ---

    #### Device 2: Auto Filter

    Add Auto Filter next.

    This is your core motion tool.

    Suggested settings:

  • Filter type: Low-Pass 12 or Low-Pass 24
  • Frequency start: around 150–300 Hz for an intro section
  • Resonance: 10–25%
  • Drive: light, if needed
  • Now automate the filter cutoff over 4 bars:

  • Bar 1: dark and filtered
  • Bar 2: opening up
  • Bar 3: mostly open
  • Bar 4: full brightness or a quick drop to create a transition
  • #### Why this works in DnB:

    Filtered breaks create tension before a drop and help separate sections without needing a huge arrangement.

    ---

    Step 5: Add grit and body

    #### Device 3: Saturator

    Add Saturator after the filter.

    This gives the break more density and helps it cut through a busy bassline.

    Suggested starting settings:

  • Drive: 2–6 dB
  • Soft Clip: On
  • Output: reduce if needed to match gain
  • For heavier jungle/DnB:

  • try Analog Clip
  • keep the drive moderate so the snare still punches
  • Automation idea:

  • automate Drive up slightly during fills
  • reduce it during breakdown moments for contrast
  • ---

    Step 6: Add Beat Repeat for controlled break surgery

    #### Device 4: Beat Repeat

    This is one of the most useful devices for drum and bass glitch edits.

    Place it after saturation.

    Suggested starter settings:

  • Interval: 1 Bar or 1/2 Bar
  • Grid: 1/16
  • Offset: 0
  • Chance: 10–30%
  • Variation: 0–20
  • Gate: 100%
  • Mix: start low, around 10–20%
  • You do not want Beat Repeat constantly destroying the break. You want it as a performance effect.

    #### Automate Beat Repeat:

  • turn it on only for the last beat of a phrase
  • use it for a drum fill before the drop
  • automate Chance higher for one short moment
  • automate Interval to 1/8 for a quick stutter burst
  • #### Good DnB use:

    On bar 4 of an 8-bar section, automate Beat Repeat to catch a snare or kick-snare fragment and create a fill into the next phrase.

    ---

    Step 7: Add crunchy digital texture

    #### Device 5: Redux

    Add Redux after Beat Repeat.

    Redux is great for:

  • lo-fi crunch
  • jungle-style degradation
  • noisy edits
  • sharper, more aggressive transient character
  • Suggested settings:

  • Downsample: start around 2–6
  • Bit Reduction: subtle, around 12–16 bits or slightly lower
  • Dry/Wet: 5–20%
  • For darker, heavier DnB, don’t overdo it. A little Redux goes a long way.

    #### Automation idea:

  • automate Dry/Wet upward only in transition bars
  • automate Downsample briefly on a fill for a “bitcrushed hit”
  • ---

    Step 8: Add space carefully

    #### Device 6: Reverb or Echo

    Use either:

  • Reverb for wash and smear
  • Echo for delay throws and dubby movement
  • For beginner DnB, Echo is often easier to control on drums.

    ##### Echo starter settings:

  • Delay Time: 1/8 or 1/4
  • Feedback: 10–25%
  • Filter: low-cut and high-cut to keep it tight
  • Dry/Wet: 5–15%
  • ##### Reverb starter settings:

  • Decay: 1.2–2.5 s
  • Size: medium
  • Dry/Wet: 3–12%
  • Low cut: raise it so the low end stays clean
  • #### Automation tip:

    Use space effects only on selected moments:

  • final snare before drop
  • chopped break fill
  • breakdown snare rolls
  • intro atmosphere
  • In DnB, too much reverb can smear your groove fast.

    ---

    Step 9: Control the result at the end

    #### Device 7: Compressor or Glue Compressor

    If the chain becomes too wild, place Glue Compressor at the end to tighten it.

    Suggested settings:

  • Attack: 10 ms
  • Release: Auto or 0.3 s
  • Ratio: 2:1
  • Gain reduction: just a few dB
  • This helps the break stay punchy after effects.

    #### Optional: Utility at the end

    You can also use a second Utility at the end for:

  • output trimming
  • mono checking
  • quick mix balance adjustments
  • ---

    Step 10: Create your automation blueprint

    Now we turn the chain into a sequence.

    Think in phrases. A beginner-friendly structure:

    4-bar automation idea

    Bar 1: Intro tension

  • Auto Filter cutoff low
  • Beat Repeat off
  • Redux off
  • Reverb low
  • Saturation moderate
  • Bar 2: Energy rises

  • Filter opens gradually
  • Saturation increases slightly
  • Beat Repeat still off
  • Echo very subtle
  • Bar 3: Pre-fill movement

  • Filter nearly open
  • Beat Repeat activates on final 1/2 bar
  • Redux turns on briefly
  • Echo throw on snare hit
  • Bar 4: Transition into drop

  • Beat Repeat chance rises temporarily
  • Redux wet increases for a short burst
  • Reverb/Echo blooms slightly
  • then everything pulls back as the drop lands
  • This gives you a clean FX chain sequence blueprint:

    dark → open → glitch → release

    ---

    Step 11: Automate device on/off and macro-style movement

    You can automate:

  • device activator buttons
  • Dry/Wet knobs
  • filter cutoff
  • Beat Repeat chance
  • Redux amount
  • Echo feedback
  • #### Best beginner workflow:

    1. Enter Automation Mode (`A`)

    2. Select the clip or track you want to automate

    3. Click the parameter you want to move

    4. Draw automation points over 4 or 8 bars

    #### Keep it simple:

    Don’t automate 12 things at once. Start with:

  • Auto Filter cutoff
  • Beat Repeat on/off or Mix
  • Redux Dry/Wet
  • Echo Dry/Wet
  • That’s enough to make the break feel professionally arranged.

    ---

    Step 12: Arrange the sequence in the song

    Here’s a practical DnB arrangement use:

    #### 8-bar section plan:

  • Bars 1–2: filtered break, low intensity
  • Bars 3–4: open filter, add saturation
  • Bars 5–6: Beat Repeat fill + light Redux
  • Bars 7–8: space effect throw + transition to next section
  • Use this blueprint across:

  • intro
  • build-up
  • pre-drop
  • breakdown
  • turnaround fill
  • This is how you turn one loop into a full arrangement system.

    ---

    Step 13: Save it as a reusable chain

    If you build a chain that works, save it.

    #### Options:

  • save the whole track as a template
  • save the FX chain as an Audio Effect Rack
  • map key controls to Macros
  • Suggested Macro mappings:

  • Macro 1: Filter Cutoff
  • Macro 2: Beat Repeat Mix
  • Macro 3: Redux Amount
  • Macro 4: Echo/Reverb Wet
  • Macro 5: Saturator Drive
  • Macro 6: Output Level
  • This makes it much faster to build more DnB sections later.

    ---

    4. Common mistakes

    1. Overusing effects all the time

    If Beat Repeat, Redux, and Reverb are always on, the break loses impact.

    Fix: automate them only in key phrase moments.

    ---

    2. Killing the snare punch

    Too much reverb, saturation, or downsampling can flatten the snare.

    Fix: keep effects subtle and compare with bypass often.

    ---

    3. Not controlling gain

    FX chains get loud quickly.

    Fix: use Utility and keep gain staging sane at every stage.

    ---

    4. Automating too many parameters at once

    Beginners often make automation confusing and messy.

    Fix: start with just 2–4 key parameters.

    ---

    5. Using Beat Repeat randomly

    It can sound like an accident if not timed well.

    Fix: place it at the end of 4-bar or 8-bar phrases for musical stutter fills.

    ---

    6. Forgetting the low end

    Breaks can compete with the bassline.

    Fix: filter and trim the low end in the break FX chain, especially if your sub is strong.

    ---

    5. Pro tips for darker/heavier DnB

    Use darker filter moves

    Try a Low-Pass 24 and automate cutoff slowly from dark to bright. This works great for ominous intros and tension builds.

    Keep the break tight before the drop

    Before heavy drops, reduce reverb and delay so the drums feel dry and aggressive.

    Add dirt in layers

    Instead of one huge distortion, use:

  • light Saturator
  • tiny bit of Redux
  • maybe Drum Buss for extra smack
  • This sounds more controlled than one extreme effect.

    Try Drum Buss on breaks

    Drum Buss is excellent for DnB punch.

    Useful settings:

  • Drive: subtle
  • Crunch: low to medium
  • Boom: careful, especially if the bass is already heavy
  • Transients: slightly up for attack
  • Use automation to fake fills

    You don’t need a new drum pattern every time. A quick automated:

  • Beat Repeat hit
  • Echo throw
  • filter dip
  • can make a loop feel brand new.

    Make the break leave space for the bass

    If your bass is rolling hard, use automation to pull the break back in the low mids during busy bass sections.

    ---

    6. Mini practice exercise

    Build a 4-bar break FX sequence in Ableton Live 12 using any break sample.

    Your task:

    Create this progression:

  • Bar 1: filtered break, dry and tight
  • Bar 2: filter opens slightly, add a touch of Saturator
  • Bar 3: automate Beat Repeat on for the final beat
  • Bar 4: add a short Echo throw and a brief Redux hit, then return to dry
  • Rules:

  • Use at least 3 stock Ableton devices
  • Automate at least 2 parameters
  • Keep the break punchy
  • Aim for a sound that could fit a 170 BPM rolling DnB track
  • Challenge version:

    Duplicate the chain onto a second break and make one version:

  • cleaner / modern
  • and the other:

  • darker / jungle / more damaged
  • Compare them and listen for which one works better in an intro versus a drop.

    ---

    7. Recap

    You’ve now built a practical FX chain sequence blueprint for breakbeat surgery in Ableton Live 12.

    Key takeaways:

  • Use slice-to-MIDI for control over break edits
  • Build your FX chain with purpose:
  • - Utility

    - Auto Filter

    - Saturator

    - Beat Repeat

    - Redux

    - Echo/Reverb

    - Compressor/Glue Compressor

  • Automate effects in phrases, not randomly
  • Keep DnB drums punchy by controlling gain and low-end buildup
  • Save your chain as a reusable rack for faster future sessions

If you apply this workflow, your breakbeats will stop sounding like loops and start sounding like arranged DnB performances 🔥

If you want, I can also turn this into:

1. a visual Ableton device chain diagram, or

2. a 4-bar automation template with exact parameter values for jungle / neuro / liquid DnB.

Ask GPT about this lesson

Chat with the lesson tutor, get follow-up help, or use quick actions.

Bigup 👽 Ask me anything about this lesson and I’ll answer in context.

Narration script

Show spoken script
Welcome to this beginner Ableton Live 12 lesson on FX chain sequence blueprint with breakbeat surgery for drum and bass.

Today we’re going to take a plain breakbeat and turn it into something that feels arranged, alive, and performance-driven. The big idea here is automation. Instead of just loading a bunch of effects and leaving them on all the time, we’re going to build a repeatable FX chain that moves in a musical way across a four-bar phrase. That means you’ll get tension, release, glitch, crunch, and space, all without losing the punch of the drums.

This is especially useful in drum and bass, where the break often needs to do more than just loop. It needs to build energy before the drop, support the groove during the main section, and create those little transition moments that make a track feel pro.

A good way to think about this lesson is contrast management. Every effect should either create tension, reveal detail, or make the next section hit harder. If it’s not doing one of those three things, it’s probably just extra.

Let’s start with the source break.

Choose a breakbeat with clear kicks and snares. Something like an amen-style break, a funky drummer-style loop, or any two-bar drum sample with strong transients will work well. Drag it into an audio track in Ableton Live 12. Set your project tempo around 170 BPM for a classic drum and bass feel, though anywhere between 160 and 174 can work depending on the style.

If needed, turn Warp on and make sure the break lines up with the grid. For drum loops, Beats mode is often the easiest starting point because it preserves the transients nicely. If the sample feels a little messy, take a second and clean up the timing before you start processing. That small step saves a lot of frustration later.

Now here’s the key move for breakbeat surgery: slicing.

Right-click the break audio clip and choose Slice to New MIDI Track. For slicing mode, you can use Transient for more flexible break surgery, or 1/16 if you want a stricter rhythmic grid. Ableton will build a Drum Rack and a MIDI clip with the slices mapped out. That means you can rearrange hits, mute individual notes, retrigger slices, and create fills with much more control than you’d have with a single audio clip.

This is where the break stops being just a loop and starts becoming material you can perform with arrangement. Keep the original audio muted, but don’t delete it. It’s useful to A/B against the sliced version, because sometimes the original feels more natural and gives you a good reference for punch and groove.

Now let’s build the FX chain in a sensible order.

The first device is Utility. Put it at the front of the chain. Utility is your level control and safety tool. Lower the gain a little, maybe minus three to minus six dB, so you have room for processing. Keep width at 100 percent for now, and leave mono off unless you’re checking the low end. This is a simple step, but it matters because breakbeats can get loud very fast once you start adding saturation, stutter effects, and reverb.

Next comes Auto Filter. This is going to be one of your main movement tools. Set it to a low-pass filter, either 12 or 24 dB slope, and start with the cutoff fairly low, maybe around 150 to 300 Hz if you want a dark intro feel. Add a little resonance if you want the filter to speak more clearly, but don’t overdo it. Now automate that cutoff over four bars. Start dark, then slowly open it up. By bar three, the break should feel mostly open, and by bar four you can either let it go fully bright or dip it again for a transition.

This kind of filter movement is a classic drum and bass trick because it creates tension without needing a totally different drum pattern. It makes the loop feel like it’s moving toward something.

After that, add Saturator. This gives the break weight, density, and a bit of grit so it cuts through a busy bassline. Start with a moderate drive, maybe two to six dB, and turn Soft Clip on. If you want a more aggressive flavor, you can try Analog Clip, but keep it controlled. The snare still needs to punch through. You can automate the drive a little higher during fills and bring it back down during breakdown moments. That way the groove gets a little more attitude right when it needs it.

Now comes one of the most fun tools in this lesson, Beat Repeat.

Place Beat Repeat after Saturator. This is your controlled glitch and stutter device. Set the interval to one bar or half a bar, keep the grid at 1/16, and start with the chance pretty low, maybe around 10 to 30 percent. The mix should also start low, around 10 to 20 percent. You do not want this effect on all the time. The goal is not to destroy the break. The goal is to use Beat Repeat like a performance accent.

For example, you can turn it on for the last beat of a phrase, or automate it for a fill right before the drop. You can even automate the interval shorter for a quick burst of stutter. In drum and bass, a well-timed Beat Repeat move at the end of a four-bar phrase can make the transition feel massive.

After that, add Redux. Redux gives you digital crunch and a little bit of jungle-style degradation. It can make the break feel more damaged and urgent, which is often exactly what you want in darker DnB. Start with downsampling around two to six, bit reduction kept subtle, and dry wet around five to twenty percent. A little Redux goes a long way, so don’t smash the sample too hard unless you want a really broken texture. Use it briefly during fills or transition bars for a special effect.

Next, add a space effect. You can use Reverb or Echo, but for beginners, Echo is often easier to control on drums. Set a short delay time like one-eighth or one-quarter, keep feedback low, and filter the delay so it stays tight. Use low dry wet amounts and automate the send or the wet amount only on selected hits. Reverb can also work well, but keep it short and controlled so you don’t smear the groove. Drum and bass needs clarity, especially around the snare.

At the end of the chain, consider a Compressor or Glue Compressor if the processing has made the break too wild. You’re just trying to tighten things up a little, not crush it. A small amount of gain reduction can help the break stay punchy after all the FX. Another Utility at the end can also be useful for final level trimming or mono checking.

Now let’s turn this chain into a four-bar automation blueprint.

Think in phrases, not random movements.

In bar one, keep the break filtered and fairly dry. This gives you intro tension. Beat Repeat stays off, Redux stays off or barely audible, and the reverb or echo is minimal. Saturation can be present, but only enough to give the break some body.

In bar two, start opening the filter. Let the energy rise naturally. You can add just a touch more saturation here, but still hold back the more dramatic effects. This keeps the listener leaning forward.

In bar three, start your pre-fill movement. The filter should be nearly open now. This is a great place to turn on Beat Repeat for the last half of the bar or just the final beat. You can also bring in a brief Redux moment, or a small Echo throw on a snare hit. This is where the break starts to sound like it’s being performed.

In bar four, create the transition into the drop. Let Beat Repeat get a little more active for a moment, increase Redux wet amount briefly, and let the delay or reverb bloom just enough to add excitement. Then pull everything back right as the drop lands. That contrast is what makes the impact hit.

A really useful beginner habit is to keep one effect focused on one job per phrase. For example, the intro can be about tone shaping, the mid phrase can be about movement, the transition can be about emphasis, and the landing can be about cleanup. That keeps your automation musical instead of cluttered.

When you’re drawing automation in Ableton, keep it simple. Press A to enter Automation Mode, choose the parameter you want to move, and draw your points over the clip or track. You do not need to automate everything at once. In fact, for your first version, just automate a few core things: Auto Filter cutoff, Beat Repeat mix or on/off, Redux wet amount, and Echo or Reverb wet amount. That alone can make the break feel fully arranged.

A really strong arrangement trick is to use the same FX sequence across an eight-bar section. For example, bars one and two can be filtered and low intensity, bars three and four can open up, bars five and six can add a glitch fill and some crunch, and bars seven and eight can add space and prepare the transition. This approach works great in intros, build-ups, pre-drops, breakdowns, and turnaround fills.

Here’s another important teacher tip: always audition in context. A break can sound huge when soloed, but once the bassline, synths, and vocals come in, it may be too busy. Use short loops while you work, and keep checking the bypass on and off. If the effect makes the break louder but not better, it’s probably not doing useful work. You want energy, not just volume.

Also, watch the kick and snare relationship. If a device blurs the snare, reduce the wet amount or move that device later in the chain. In drum and bass, the snare is a big part of the groove’s identity. If that gets softened too much, the whole loop can lose its authority.

A few pro-style extras can take this even further.

You can split the chain into clean and dirty lanes by duplicating the track or using an Audio Effect Rack. Put a mild, clean version on one chain and a more damaged version on the other with Beat Repeat, Redux, and heavier saturation. Then automate the blend between them. That gives you precise control over when the break gets destroyed and when it stays clean.

You can also use sends and returns instead of inserting all your delay and reverb directly on the track. That keeps the dry break punchy and lets the effect bloom only when you want it. It’s a great trick for snares and fill hits.

Another great move is to automate tiny accents instead of giant changes. One snare with extra delay, one kick with a filter dip, or one ghost note with a touch of crunch can feel more musical than a whole chain moving at once. Small gestures like that make the loop feel human and intentional.

If you want to push the sound darker, try a low-pass 24 filter and automate it slowly from dark to bright. Use a little Drum Buss if you want more punch. Keep the Boom careful, especially if your bass is already heavy, but the Drive and Transients controls can be excellent for giving the break more attack. You can also add a tiny bit of parallel grit on a duplicate track, or band-limit your FX returns so the low end stays clean.

A great beginner practice is to build two versions of the same break. Make one version clean and controlled, with subtle filter movement, light saturation, and short delay throws. Make the other version more damaged, with heavier Beat Repeat, more Redux, and a stronger transition effect. Compare them and listen for which one works better in an intro, and which one works better in a drop. That exercise teaches you a lot about contrast and arrangement.

So here’s the big recap.

You started with a breakbeat, sliced it into MIDI for more control, built a smart FX chain, and then automated that chain in a four-bar sequence so the break could evolve over time. The basic chain was Utility, Auto Filter, Saturator, Beat Repeat, Redux, Echo or Reverb, and then a compressor or Glue Compressor if needed. The important part is not just the devices themselves. It’s the order, the timing, and the intention behind the movement.

Once you save this chain as a rack or a template, you can reuse it in future tracks and build new sections faster. That’s the real power of a blueprint. It gives you a repeatable system for turning a loop into an arranged performance.

If you follow this workflow, your breakbeats will stop sounding like static loops and start sounding like they’re being played inside the arrangement.

Now go build that four-bar sequence, keep the snare punchy, and let the automation do the heavy lifting.

mickeybeam

Go to drumbasscd.com for +100 drum and bass YouTube channels all in one place - tune in!

Generating PDF preview…