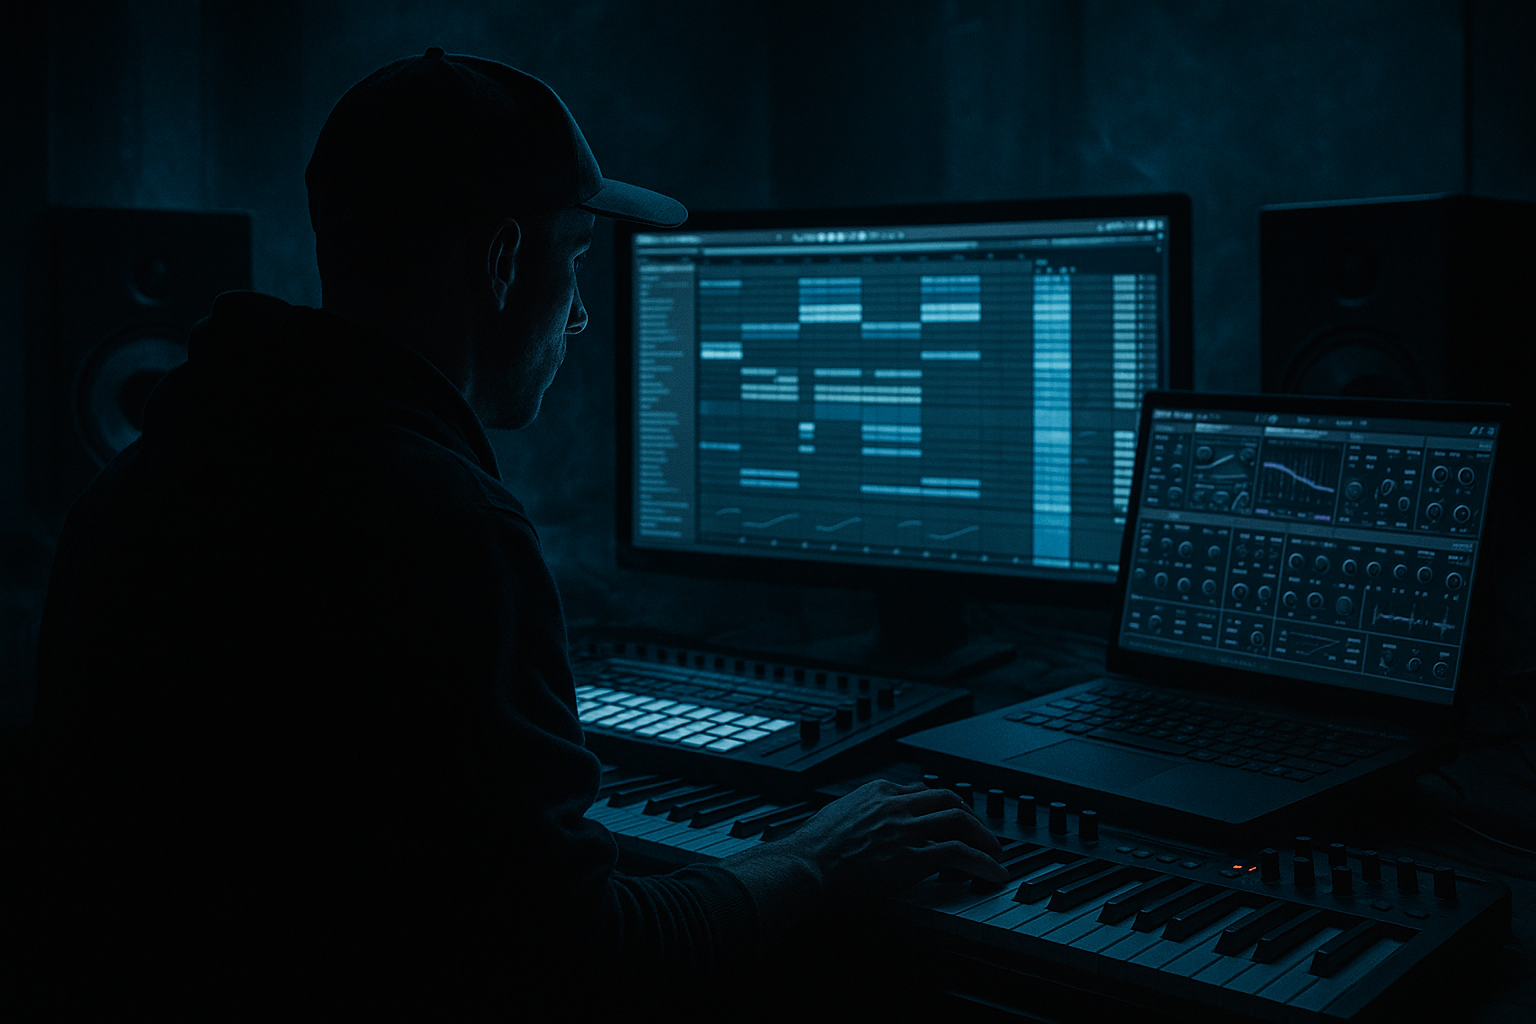
DNB COLLEGE

Drum & Bass Ableton Live 12 Tutorials

LESSON DETAIL

Future Jungle Ableton Live 12 switch-up deep dive for VHS-rave color (Intermediate)

An AI-generated intermediate Ableton lesson focused on Future Jungle Ableton Live 12 switch-up deep dive for VHS-rave color in the Breakbeats area of drum and bass production.

Back to lessons
Future Jungle Ableton Live 12 switch-up deep dive for VHS-rave color (Intermediate) cover image

Narrated lesson audio

The voice track includes the tutorial plus extra teacher commentary.

Open audio file

Main tutorial

```markdown

Future Jungle Ableton Live 12 Switch-Up Deep Dive (VHS-Rave Color) 📼⚡

Skill level: Intermediate

Category: Breakbeats / Drum & Bass Production (Ableton Live 12)

---

1) Lesson overview

In modern future jungle, the “switch-up” isn’t just a fill—it’s a micro-drop that resets momentum without killing the roll. Think: the break suddenly flips into half-time, gated VHS grit, rave stabs, then snaps back into the main groove harder.

In this lesson you’ll learn how to build two switch-up types in Ableton Live 12:

  • Switch-Up A: Break re-cut + pitch/time artifacts + tape wobble
  • Switch-Up B: Half-time fakeout + gated reese smear + rave stab hit
  • You’ll use mostly stock devices: Drum Rack, Simpler, Beat Repeat, Auto Filter, Saturator, Roar, Redux, Echo, Hybrid Reverb, Compressor, Glue Compressor, Utility, and Live 12’s MIDI/Audio editing + automation.

    ---

    2) What you will build

    A 16-bar DnB loop (170–174 BPM) with:

  • A main jungle break groove (think chopped Amen / Think / Hot Pants style)
  • A rolling sub + mid bass foundation
  • A 2-bar switch-up every 8 or 16 bars:
  • - VHS-rave “color” (wow/flutter, aliasing, noise, tape smear)

    - A controlled “hole” in the drums (space) + a strong re-entry

    End result: a section that feels authentic jungle, but future-facing in sound design and arrangement.

    ---

    3) Step-by-step walkthrough

    Step 0 — Session setup (fast + clean)

    1. Tempo: set to 172 BPM (classic sweet spot).

    2. Create groups:

    - DRUMS (breaks + one-shots)

    - BASS

    - MUSIC (stabs/pads/atmos)

    - FX

    3. On the Master, keep it simple for now:

    - Limiter (Ceiling -0.3 dB, leave it mostly idle)

    - Optional: Glue Compressor (2:1, Attack 10 ms, Release Auto, 1–2 dB GR) only later

    ---

    Step 1 — Build a tight jungle break base (so the switch-up has impact)

    Goal: one “main break” that is punchy, balanced, and easy to chop.

    1. Drag a breakbeat audio clip to an audio track (Amen/Think/any clean jungle break).

    2. In the clip view:

    - Warp: ON

    - Warp Mode: Complex Pro (good default)

    Later for crunchy VHS moments we’ll use Beats.

    - Set Seg. BPM correctly, then warp markers minimally.

    3. Right-click clip → Slice to New MIDI Track

    - Slice preset: Built-in

    - Slicing: Transient

    4. You now have a Drum Rack with slices. Program a 2-bar pattern:

    - Keep original vibe, but tighten:

    - Add extra kick hits on 1 and “&” of 2 occasionally

    - Ghost snares (very low velocity) before the main snare

    5. Drum Rack processing (inside rack):

    - On the Snare slice chain:

    - Saturator: Drive 2–5 dB, Soft Clip ON

    - EQ Eight: slight dip around 300–500 Hz if boxy

    - On the Kick slice chain:

    - Drum Buss: Drive 5–15%, Boom 0–20% (tune Boom to the key if used)

    6. On the break track (post rack):

    - Glue Compressor: 2:1, Attack 3 ms, Release Auto, GR 2–4 dB

    - EQ Eight:

    - HP around 25–35 Hz

    - tiny shelf down if harsh at 8–12 kHz

    ✅ Now you’ve got a stable groove to “mess up” in the switch-up.

    ---

    Step 2 — Create a dedicated “Switch-Up Bus” (clean routing = pro workflow)

    You want switch-ups to be repeatable and easy to automate.

    1. Duplicate your break MIDI track:

    - Name one: BREAK MAIN

    - Name one: BREAK SWITCH

    2. Route both to a DRUMS Group.

    3. On BREAK SWITCH, keep it muted for now.

    Why? You’ll build your switch-up processing on the SWITCH channel without destroying the main groove.

    ---

    Step 3 — Switch-Up A: VHS time-warp + chopped re-entry (2 bars)

    This is the classic “future jungle VHS flip”: time artifacts, crunchy top, tiny pitch chaos, but still dancefloor.

    #### A1) Program the switch MIDI (2 bars)

    1. In the arrangement, choose bars 15–16 (or any 2-bar window before a drop).

    2. On BREAK SWITCH, copy your main break MIDI.

    3. Edit the MIDI:

    - Remove the main snare on bar 16 beat 2 (create a “hole”)

    - Add stutters on hats/ghost slices in the last 1/2 bar

    - Add a reverse hit: easiest method:

    - Find a cymbal or snare slice → resample it to audio (freeze/flatten or record output)

    - Reverse that audio and place it as a pickup into bar 17

    #### A2) VHS Color Device Chain (BREAK SWITCH track)

    Put these devices in this order:

    1. Auto Filter

    - Mode: Lowpass

    - Freq: start ~ 9–12 kHz

    - Resonance: 0.7–1.2

    - Automate Freq to sweep down into the switch-up and open back up at re-entry.

    2. Redux (for aliasing/grit)

    - Downsample: 2.0–6.0 (automate higher for more crunch)

    - Bit Reduction: keep mild 10–12 (too low kills drums)

    - Tip: automate only in the switch-up bars.

    3. Echo (tape smear)

    - Mode: Repitch or Fade (try Repitch for VHS vibes)

    - Time: 1/8 or 1/4

    - Feedback: 20–35%

    - Filter: HP ~200 Hz, LP ~6–8 kHz

    - Dry/Wet: 10–25% (automate up near the end)

    4. Roar (modern distortion with character)

    - Style: Tube or Warm

    - Drive: 3–8

    - Tone: slightly dark

    - Mix: 30–60%

    - Keep low end controlled (use Roar’s EQ if needed).

    5. Utility

    - Width: 80–110% (don’t go super wide on breaks)

    - Gain automation: drop -1 to -3 dB in switch-up if effects add loudness

    #### A3) Beat Repeat “moment” (the money move)

    Add Beat Repeat after Auto Filter but before heavy distortion.

    Settings:

  • Interval: 1 Bar
  • Grid: 1/16
  • Variation: 0
  • Gate: 1/8 (short)
  • Chance: 0% (we’ll turn it on with automation)
  • Mix: 0% default
  • Automation idea:

  • For the last 1/2 bar, automate:
  • - Mix to 20–40%

    - Chance to 100% briefly

    This creates a controlled glitch/stutter without random chaos.

    #### A4) Re-entry punch (don’t let the switch-up weaken the drop)

    On bar 17 (return to main):

  • Hard mute BREAK SWITCH exactly at re-entry.
  • Unmute BREAK MAIN and add a single crash + sub drop.
  • Optional: a very short reverb tail cut:
  • - Put Reverb or Hybrid Reverb on a return

    - Automate return send down to 0 at the exact re-entry so it snaps back clean.

    ---

    Step 4 — Switch-Up B: Half-time fakeout + gated reese smear (2 bars)

    This one is darker and more “DnB club”: it feels like the tune is about to go halftime, then it slams back into 2-step jungle energy.

    #### B1) Make the drums feel half-time without changing tempo

    Create a new MIDI clip on BREAK SWITCH for the switch section:

  • Keep kick on 1
  • Put snare only on beat 3 (half-time feel)
  • Add sparse hat ticks (every 1/4 or 1/8)
  • Then add a single fast amen roll in the last 1/2 bar to signal “we’re coming back.”

    #### B2) Bass smear (resample your bass for controllable chaos)

    1. Create a new audio track: BASS RESAMPLE

    2. Set Audio From = your BASS group (post-fx)

    3. Arm and record 4–8 bars of bass.

    4. Pick a juicy 1-bar segment, duplicate it to cover the switch-up.

    Now process that resampled bass with:

    1. Auto Filter (Bandpass)

    - Freq: 200–1.5k (automate sweep upward)

    - Resonance: 1.0–1.5

    2. Corpus (metallic rave edge, subtle)

    - Mode: Tube or Membrane

    - Decay: short

    - Mix: low 5–15%

    3. Gate (for rhythmic chopping)

    - Sidechain input: your break/snare or a dedicated ghost trigger

    - Threshold: adjust until it pumps rhythmically

    - Return: fast

    4. Saturator or Roar (darker drive)

    - Keep low end stable; drive mids.

    Result: the bass becomes a textural “VHS rave smear” behind the halftime drum fakeout.

    #### B3) Rave stab hit (instant identity)

    Add a stab (chord hit) on beat 1 of the switch-up:

  • Use Simpler with a classic rave stab sample or make one:
  • - Wavetable: saw stack → short amp decay → lowpass filter

  • Process:
  • - Chorus-Ensemble (subtle width)

    - Hybrid Reverb (Plate, short)

    - EQ Eight: cut lows below 150–250 Hz so it doesn’t fight bass

    ---

    Step 5 — Arrangement blueprint (how to place switch-ups like a pro)

    Here’s a reliable 32-bar structure:

  • Bars 1–8: Main groove establishes (no switch)
  • Bars 9–16: Variation + Switch-Up A in bars 15–16
  • Bars 17–24: Return + add extra percussion layer
  • Bars 25–32: Switch-Up B in bars 31–32 → bigger drop or next phrase
  • Automation checklist:

  • Filter down in last 2 bars
  • Echo send up in last bar
  • Hard cut returns at re-entry (tightness matters in DnB)
  • ---

    4) Common mistakes

    1. Over-warping the break → transients get mushy. Use minimal warp markers; prefer slicing to MIDI for control.

    2. Switch-up too loud → distortion + echo often adds RMS. A/B with Utility gain.

    3. Too much Redux/bitcrush → you lose snare snap. Keep it as a moment, not the whole sound.

    4. Reverb tails masking the re-entry → automate sends to kill tails at the drop.

    5. No “hole” in the drums → if everything keeps playing, it doesn’t feel like a switch-up. Remove a snare/kick intentionally.

    ---

    5) Pro tips for darker/heavier DnB 🖤

  • Make the switch-up “darker” than the drop, so the return feels brighter and more aggressive.
  • Use Roar in multiband (if you like):
  • - Distort mids/highs more than lows to keep sub clean.

  • Add a sub-only dip right before re-entry:
  • - On sub track: automate Utility Gain -2 to -6 dB for the last 1/4 bar → then snap back.

  • Layer a rim/clave very quietly in the switch-up for tension (classic jungle trick).
  • For menace: add noise floor (VHS vibe) with Analog (noise) or a sample, then:
  • - Auto Filter LP around 6–10k

    - Sidechain it to snare so it breathes.

    ---

    6) Mini practice exercise (15–25 minutes) 🎯

    1. Pick one break and slice it to Drum Rack.

    2. Write a 4-bar main loop.

    3. Duplicate the track and create a 2-bar switch-up at bars 3–4:

    - Remove one main snare hit

    - Add Beat Repeat stutter in the last 1/2 bar

    4. Add VHS chain: Auto Filter → Redux → Echo.

    5. Print (resample) the switch-up to audio and:

    - Fade out the last 1/16 before the drop

    - Add a reversed cymbal into the re-entry

    Goal: The switch-up should feel like a “tape glitch moment” but the drop should feel cleaner and heavier after.

    ---

    7) Recap

  • A great future jungle switch-up is arrangement + sound design: create space, then return with authority.
  • Use duplicate routing (MAIN vs SWITCH) to experiment safely.
  • Key Ableton tools for VHS-rave color: Auto Filter, Redux, Echo, Beat Repeat, Roar, plus tight automation.
  • Always protect the fundamentals: snare crack, sub stability, and clean re-entry.

If you want, tell me your BPM and what break you’re using (Amen/Think/etc.) and I’ll suggest a specific 2-bar MIDI slice pattern + automation lanes for a signature switch-up.

```

Ask GPT about this lesson

Chat with the lesson tutor, get follow-up help, or use quick actions.

Bigup 👽 Ask me anything about this lesson and I’ll answer in context.

Narration script

Show spoken script
Welcome in. Today we’re doing an intermediate deep dive in Ableton Live 12: future jungle switch-ups with that VHS-rave color. We’re in the breakbeats side of drum and bass, around 170 to 174 BPM, and the goal is really specific: make a switch-up that feels like a micro-drop. Not a random fill, not a “look at my effects” moment. It resets momentum, creates a hole, adds character, and then snaps back into the main groove even harder.

We’re building a 16-bar loop at 172, with a main jungle break, a bass foundation, and then a two-bar switch-up that happens every eight or sixteen bars. And we’ll build two different switch-up types.

Switch-Up A is the classic future jungle VHS flip: chopped break re-cut, pitch and time artifacts, tape wobble, aliasing, and a very controlled stutter right before you slam back in.

Switch-Up B is more of a club fakeout: halftime feel in the drums, a gated reese smear behind it, and a rave stab hit for identity.

And the big promise is this: most of what we’re doing is stock Ableton. Drum Rack, Simpler, Beat Repeat, Auto Filter, Saturator, Roar, Redux, Echo, Hybrid Reverb, compressors, Utility, and good editing plus automation.

Alright, let’s set up the session fast.

Set your tempo to 172 BPM. That’s a sweet spot for jungle that still feels modern and tight.

Now make a few groups so you don’t lose your mind later: a DRUMS group for breaks and one-shots, a BASS group, a MUSIC group for stabs, pads, atmos, and an FX group.

On your master, keep it boring. Put a Limiter with the ceiling at minus 0.3 dB. Don’t slam into it yet. If you want, later you can add a Glue Compressor doing one to two dB of gain reduction, but seriously, don’t start by mastering. Start by getting the groove and the switch-up feeling right.

Now Step 1: build a tight jungle break base. This matters because the switch-up only hits if the main loop is stable. If your main break is already messy, your switch-up just sounds like more mess.

Drag in a breakbeat audio clip. Amen, Think, Hot Pants, whatever you’ve got that’s clean enough to slice well.

In the clip view, turn Warp on. Set warp mode to Complex Pro as a safe default. And here’s a big teacher note: don’t “over-warp” breaks. If you place warp markers everywhere, you’ll turn transients into wet cardboard. Use the minimum warp markers needed to get it in time.

Set the segment BPM correctly, then do minimal adjustments.

Now right-click the clip and choose Slice to New MIDI Track. Use the built-in slicing preset, and slice by transient.

Now you’ve got a Drum Rack full of slices. Program a two-bar pattern that keeps the original vibe but tightens it. A few common moves: add an extra kick occasionally on beat 1, and sometimes on the “and” of 2, depending on the break. Add ghost snares at low velocity just before the main snare to get that shuffle and urgency without changing the main backbeat.

Now process inside the rack a little.

On the snare slice chain, add Saturator. Drive it maybe two to five dB, turn Soft Clip on. Then EQ Eight, and if it sounds boxy, dip around 300 to 500 Hz. You’re not trying to “fix” the snare into a modern pop snare. You’re just carving space and adding bite.

On the kick slice chain, add Drum Buss. Drive five to fifteen percent. If you use Boom, keep it subtle and tune it to the key if it’s actually contributing pitch. Otherwise Boom can quickly turn into “why is my mix farting.”

Then on the break track after the rack, add Glue Compressor. Two to one ratio, attack around three milliseconds, release auto, two to four dB of gain reduction. That’s just to glue slices back together and make the break feel like one instrument again.

Add EQ Eight after that. High-pass around 25 to 35 Hz, just to remove junk. And if the top end is tearing your head off, a tiny high shelf down around eight to twelve kHz can help.

At this point, you should have a stable main break that hits. Good. Now we can mess it up on purpose.

Step 2: create a dedicated switch-up bus. This is workflow, but it’s also sound design safety.

Duplicate your break MIDI track. Name one BREAK MAIN, name the other BREAK SWITCH. Route both into your DRUMS group. And mute BREAK SWITCH for now.

This is huge, because now your main groove is protected. You can go wild on BREAK SWITCH, automate like crazy, resample it, destroy it, and your main groove is still sitting there ready to come back clean.

Before we design, here’s one concept that will level up your switch-ups: think in contrast pairs, not effects stacks.

A switch-up hits hardest when you contrast at least two things at the same time. You can contrast density, like lots of hits to fewer hits. Or spectral tilt, bright to dark and lo-fi. Or stereo, wide to narrow. Or rhythmic certainty, straight to jittery stutter.

Pick two, commit, then return to normal abruptly. That’s how it feels intentional.

Now Switch-Up A: VHS time-warp plus a chopped re-entry, two bars long.

First, program the switch MIDI.

In arrangement, pick bars 15 and 16, or any two-bar window before a drop or phrase reset.

On BREAK SWITCH, copy your main break MIDI into that two-bar section. Now edit it.

Remove the main snare on bar 16 beat 2. That’s your hole. That empty space is what makes the return feel like it punches harder.

Then add some stutters on hats or ghost slices in the last half bar. Don’t stutter the whole thing. One concentrated moment near the end reads as “switch-up,” not “the groove fell apart.”

Add a reverse hit into the re-entry. A practical way: grab a cymbal or snare slice, resample it to audio by freezing and flattening or recording the output, reverse that audio, and place it as a pickup into bar 17. Keep it short and controlled. You want a pull into the drop, not a washy reverse that smears all over your downbeat.

Now the VHS color chain on the BREAK SWITCH track. Put these in order, and I’ll tell you why.

First, Auto Filter. Set it to low-pass. Start around nine to twelve kHz. Resonance around 0.7 to 1.2. Automate the frequency to sweep down as you enter the switch-up, then open back up right at re-entry. This gives you the “spectral tilt” contrast: darker in the switch, brighter when you slam back.

Next, Redux. This is your aliasing and grit. Downsample around 2.0 to 6.0, and automate it higher for more crunch. Bit reduction, keep it mild, like 10 to 12. If you go too low, you’ll lose the snare crack and the break starts sounding like a broken speaker. Remember: momentary color, not permanent damage.

Next, Echo for tape smear. Try Repitch mode for that VHS vibe, or Fade if you want it smoother. Time at one-eighth or one-quarter. Feedback around 20 to 35 percent. Filter it: high-pass around 200 Hz, low-pass around six to eight kHz. Dry/wet 10 to 25 percent, and automate it up near the end of the switch-up so it “pulls” you into the drop.

Then Roar. Use Tube or Warm. Drive three to eight. Keep the tone slightly dark. Mix maybe 30 to 60 percent. And the teacher warning: breaks get harsh fast. If Roar adds too much fizz, back off the drive, darken the tone, or control it with EQ. The point is “tape deck pain,” not “digital sandpaper.”

Finally, Utility. Set width around 80 to 110 percent. Don’t go ultra-wide on breaks or they lose punch and the snare stops feeling centered. Also, effects chains often add loudness, so automate a gain drop of minus one to minus three dB during the switch-up if it’s inflating RMS.

Now the money move: Beat Repeat, but controlled.

Place Beat Repeat after Auto Filter but before heavy distortion. You want the stutter to be clean enough to read, then you dirty it up afterward.

Set Interval to one bar. Grid to one-sixteenth. Variation zero. Gate one-eighth, so it’s short. Chance at zero percent. Mix at zero percent.

Now automate it only in the last half bar of the switch. Bring Mix up to 20 to 40 percent, and bring Chance to 100 percent briefly.

This is how you get that “glitch moment” without the randomness ruining the groove. It’s basically a performance move you can repeat every time.

Now re-entry punch. This is where most switch-ups fail: they sound cool, but then the drop feels smaller because the switch-up was louder or wetter.

At bar 17, hard mute BREAK SWITCH exactly at the re-entry. Unmute BREAK MAIN right on the downbeat. Add a single crash and maybe a sub drop. And here’s a pro trick: use a dedicated re-entry transient. Even if the main break returns, add a tiny rimshot, crash tick, or short noise click. Ten to sixty milliseconds, high-passed, just to re-anchor the downbeat like a thumbtack.

Also, if you used reverb or long echo, kill the tail right at the re-entry. Put Hybrid Reverb on a return, and automate that send down to zero at the exact moment you come back. The snap back to dryness is part of the impact.

Quick coach check: A good Switch-Up A should feel darker, crunchier, and slightly unstable in the mids and highs, but the low end should not be wobbling around randomly. Keep sub fundamentals boring during the trick. Let the midrange do the chaos.

Cool. Now Switch-Up B: halftime fakeout plus gated reese smear, two bars.

First, halftime drums without changing tempo.

In the switch-up section, make a new MIDI clip on BREAK SWITCH. Keep a kick on beat 1. Put the snare only on beat 3. That alone implies halftime even though the tempo is still 172.

Add sparse hat ticks, like every quarter note or eighth note. You’re reducing density. That’s one contrast pair right there.

Then, in the last half bar, add a single fast amen roll or slice roll to signal, “we’re coming back.” This is like the drummer doing a quick fill before everyone slams into the groove again.

Now the bass smear. This is where it gets “future.”

Create a new audio track called BASS RESAMPLE. Set Audio From to your BASS group, post-FX, arm it, and record four to eight bars.

Then pick a juicy one-bar segment, duplicate it to cover the switch-up.

Process that resampled bass like this.

Auto Filter in band-pass mode. Sweep somewhere between 200 Hz and 1.5 kHz, automate it upward, resonance around 1.0 to 1.5. We’re basically carving the bass into a midrange texture so it can do weird stuff without wrecking the sub.

Then Corpus, subtle. Tube or Membrane, short decay, mix low, like five to fifteen percent. This adds a metallic rave edge, but if you overdo it, it turns into a ringing science project. Keep it as flavor.

Then Gate for rhythmic chopping. Sidechain it from your break or snare, or better: use a ghost trigger track. That’s a secret weapon.

A ghost trigger track is just a MIDI track with a tight rimshot or closed hat sample playing a simple rhythm. You can keep it muted, but still feed it to sidechains depending on your routing. Use it to key your Gate on the bass smear and even duck noise and reverb. It keeps everything locked even while your actual break is being mangled.

After the Gate, add Saturator or Roar and drive the mids darker. Again: keep the low end stable. If you want the smear to be gnarly without ruining sub, duplicate the bass resample. On the duplicate, high-pass around 120 to 200 Hz, then distort, chorus, reverb, whatever. Blend that under your clean sub bass. That’s how you get “VHS rave” without the club system turning into mud.

Now add the rave stab hit. This gives the switch-up instant identity.

Put a stab on beat 1 of the switch-up. You can use Simpler with a classic rave stab sample. Or synth it: Wavetable with a saw stack, short amp decay, low-pass filter.

Process it with Chorus-Ensemble for subtle width, Hybrid Reverb with a short plate, and EQ Eight cutting lows below 150 to 250 Hz so it doesn’t fight the bass.

Now, arrangement blueprint. Here’s a reliable 32-bar structure you can repeat like a pro.

Bars 1 to 8: main groove establishes, no big switch.

Bars 9 to 16: variation, and put Switch-Up A in bars 15 to 16.

Bars 17 to 24: return, add an extra percussion layer, maybe a ride tick or shaker that keeps time for DJ-friendliness.

Bars 25 to 32: Switch-Up B in bars 31 to 32, then a bigger drop or the next phrase.

Pre-plan your automation lanes so you’re not reinventing the wheel every time. In Live 12, set up lanes you reuse: on BREAK SWITCH, filter frequency, Redux downsample, Echo dry/wet, Beat Repeat mix. On the DRUMS group, Utility width, maybe a group high-pass filter, and a group gain trim. This turns switch-ups into performance moves.

And if you resample your switch-up to audio, check the groove after printing. Zoom in on the first kick after the switch-up. If it lands late because of processing latency or rendering, nudge the clip a few milliseconds. Future jungle loves “sloppy-tight,” not “late-mushy.” There’s a difference.

Let’s talk common mistakes, because these are the ones that quietly ruin a good idea.

Over-warping the break: your transients get mushy. Slice to MIDI for control.

Switch-up too loud: distortion and echo inflate the level. Use Utility and A/B against your main loop. The drop should still feel like the biggest moment.

Too much Redux: you lose snare snap. Keep it as a two-bar event, sometimes even just the last bar.

Reverb tails masking re-entry: automate your sends down to zero at the drop.

And the biggest structural mistake: no hole in the drums. If everything keeps playing, it doesn’t feel like a switch-up. Intentionally remove one important hit, usually a main snare, sometimes a kick, and let the listener feel that missing floor for a second.

Before we wrap, a couple advanced ideas you can try once you’ve got the basics working.

Metric misdirection: create a false barline. Put a strong snare on beat 4 like it’s beat 2, then remove the real snare on the next bar’s beat 2. The floor tilts, then you slam back on the real 1.

Triplet injection: add a one-beat-only roll in eighth-note triplets or sixteenth-note triplets near the end. One flash. Not two full bars. It reads as “smart” instead of “messy.”

And one sound design extra: DIY VHS warble without third-party plugins. Try Chorus-Ensemble very subtly, rate around 0.1 to 0.6 Hz, mix five to fifteen percent, and put it before your distortion and bit reduction. The wobble imprints into the grit, which feels much more like tape.

Finally, a mini practice exercise you can do in 15 to 25 minutes.

Pick one break and slice it to Drum Rack. Write a four-bar main loop. Duplicate the track and create a two-bar switch-up at bars three to four. Remove one main snare hit. Add Beat Repeat stutter in the last half bar. Add the VHS chain: Auto Filter into Redux into Echo. Then resample the switch-up to audio, fade out the last one-sixteenth before the drop, and add a reversed cymbal into the re-entry.

The goal: the switch-up feels like a tape glitch moment, but the drop feels cleaner and heavier after.

Recap to lock it in.

A great future jungle switch-up is arrangement plus sound design. Create space, then return with authority.

Use duplicate routing: MAIN versus SWITCH. That’s how you experiment safely and stay professional.

Your key devices for VHS-rave color are Auto Filter, Redux, Echo, Beat Repeat, and Roar, plus tight automation.

And protect the fundamentals: snare crack, sub stability, and a clean re-entry.

If you tell me your BPM and which break you’re using, Amen, Think, whatever, and whether your bass is sub-heavy or reese-forward, I can suggest a specific two-bar slice pattern and the exact automation lanes to make a signature switch-up that’ll read on a club system.

mickeybeam

Go to drumbasscd.com for +100 drum and bass YouTube channels all in one place - tune in!

Generating PDF preview…