Main tutorial
Lesson Overview
This lesson is about building a future jungle ragga vocal layer in Ableton Live 12 that feels like it belongs in a real DnB tune — not just a loop with a chant over it. The goal is to create a vocal texture that can sit above breaks and bass with club-ready timing, DJ-friendly phrasing, and enough grit to sound authentic in a jungle or rollers context.
This technique lives in the intro, pre-drop, drop top-line support, switch-ups, and outro of a track. In future jungle, the vocal layer is often doing more than “being a hook”: it acts like a rhythmic percussion element, a scene-setter, and a tension device. When done right, it can make the track feel instantly playable in a set because the intro gives DJs something to mix into, and the drop gives the crowd a recognisable human anchor without smearing the drums or low end.
Musically, this matters because ragga vocals bring identity, swing, and pressure. Technically, it matters because these samples can destroy a mix fast: they can be too wide, too boxy, too sibilant, or too busy against a fast break pattern. The whole game is to shape the vocal into a layer that reads clearly in bursts, leaves space for kick/snare impact, and still feels alive across 16- and 32-bar phrases.
Best fit: future jungle, modern ragga jungle, dark rollers with vocal callouts, and heavier dancefloor DnB with old-school DNA.
By the end, you should be able to hear a vocal layer that feels:
- rhythmically locked to the groove
- rough enough to sound urgent
- filtered and edited enough to stay out of the way
- arranged with DJ-friendly lift and release
- ready to bounce into a drop without sounding tacked on
- a dry, upfront centre
- a filtered wider support bed
- controlled grit from saturation and resampling
- enough air and presence to cut through breaks
- no uncontrolled sub energy and no stereo wobble in the low end
- an 8- or 16-bar intro for mixing
- a pre-drop push
- a drop-top call-and-response
- a second-drop variation that keeps it fresh
- Keep the core vocal drier than you think. Dark DnB often needs the human element to feel close and threatening, not distant and dreamy. A dry centre plus a dirty halo is usually stronger than one big wet vocal.
- Use contrast between “speak” and “shout.” One short, intelligible phrase can hit harder if the next response is chopped, filtered, or lower in level. That contrast is especially effective in rollers and future jungle where repetition is part of the weapon.
- Let the vocal interact with the snare, not the kick. In many DnB mixes, the snare is the anchor for the vocal. If the vocal phrase lands around the snare backbeat or just before it, the track feels tighter and more MC-like.
- Print a gritty version and a cleaner version. Use the cleaner one for the intro and the dirtier one for the drop or second drop. This gives you arrangement lift without changing the musical identity.
- Make the second drop more ruthless. Keep the same vocal source but change the treatment: more filtering movement, shorter gaps, or a broken-up response line. The goal is evolution, not rehash.
- Protect the mono centre. If the vocal carries a hook, keep the most important syllables in mono or near-mono. Wider upper harmonics can live outside the centre, but the main statement should survive club mono translation.
- Use the vocal as a transition tool. A reversed tail, a chopped shout, or a filtered repeat right before a fill can make the arrangement feel intentional without adding more drums.
- Use only one vocal sample source.
- Use no more than two Audio Tracks for the main vocal layers.
- Use only Ableton stock devices.
- Make one section DJ-friendly for mixing.
- a 16-bar loop with:
- Does the snare still feel dominant?
- Can you hear the vocal clearly in mono?
- Does the phrase make the section feel bigger without making the mix cloudy?
- If you mute the bass, does the vocal still feel rhythmically intentional?
What You Will Build
You will build a layered ragga vocal system inside Ableton Live 12: one main vocal chop line, one supporting texture layer, and one transition layer for arrangement punctuation. The finished result should sound raw, commanding, and groove-aware, with the vocal acting like a percussive hook rather than a full lead that fights the drums.
Sonically, the layer should have:
Rhythmically, it should feel like it is playing against the break but landing with the snare in the right moments. The vocal should breathe in short phrases, with gaps that let the drums punch. In the arrangement, it should help define:
Success sounds like this: the vocal feels embedded in the tune, not pasted on top of it. You can mute the drums for a moment and the vocal still has shape, but when the drums return, the whole section feels bigger and more dangerous.
Step-by-Step Walkthrough
1. Choose the right source and commit to one character fast
Start by finding a ragga vocal phrase, chant, or spoken line that already has movement and attitude. In this style, the source matters more than pristine quality. You want something with clear consonants, strong midrange shape, and natural rhythmic punctuation.
In Ableton, drag the sample into an Audio Track and immediately decide whether you are building around:
- A. a phrase-led hook: a recognisable line that can carry the drop top
- B. a texture-led chant: chopped fragments that act like rhythmic hype and atmosphere
A versus B decision point:
- Choose A if your track needs a memorable vocal identity, more direct crowd payoff, and cleaner DJ intro logic.
- Choose B if your track is heavier, more minimal, or you want the vocal to behave like a percussive layer that can sit under busy drums and bass.
For future jungle, B often wins on the first pass because it gives you more room for break edits and bass pressure. But if the tune has a big, open drop, A can work beautifully if you keep it short.
What to listen for: the vocal should already have a natural swing or accent pattern that can lock to the break without lots of surgery. If it sounds too flat or too polished, it often won’t give the right grime.
2. Slice the vocal into performance-sized pieces
Use Ableton’s sample view to chop the source into usable fragments. Don’t over-slice into tiny syllables unless the phrase truly demands it. For ragga future jungle, the sweet spot is usually short phrase chunks, 1/4-bar to 1-bar units, plus a few single-word hits.
If the sample has strong transients, use Slice to New MIDI Track only if you want finger-drum style performance. If you want tighter control over arrangement, keep it as audio and manually place slices on the timeline.
Practical target:
- main chop: 2–6 useful phrases
- support chops: 3–5 smaller fragments
- transitions: 1–2 tail or shout hits
Tighten the start points so the consonants hit cleanly. Leave a tiny bit of natural tail where it helps the groove. For aggressive DnB, a vocal that starts too late feels lazy; one that starts too early can smear into the snare.
What to listen for: the first consonant should speak before or with the beat, not after it. If the phrase loses attitude when trimmed, you cut too deep.
3. Build the rhythm against the drums, not in isolation
Load your drum loop or programmed break first, then place the vocal on top. In future jungle, the vocal should often answer the snare or land just before it, not simply sit on the grid like a pop topline.
Start with a 2-bar loop. Place vocal hits in one of these patterns:
- on the upbeat before the snare for momentum
- on the back half of the bar for call-and-response
- after a break fill to create a payoff moment
A very effective phrasing format is:
- bars 1–2: sparse intro tease
- bars 3–4: vocal lands on the turnaround
- bars 5–8: fuller call-and-response
- bar 8 end: leave a gap for the drop or restart
If your break is busy, reduce vocal density. In jungle, too many syllables can flatten the drum swing. The vocal should feel like it is riding the break, not bulldozing it.
What to listen for: the vocal should increase perceived momentum without making the snare feel smaller. If the snare loses authority, your vocal rhythm is too constant or too long.
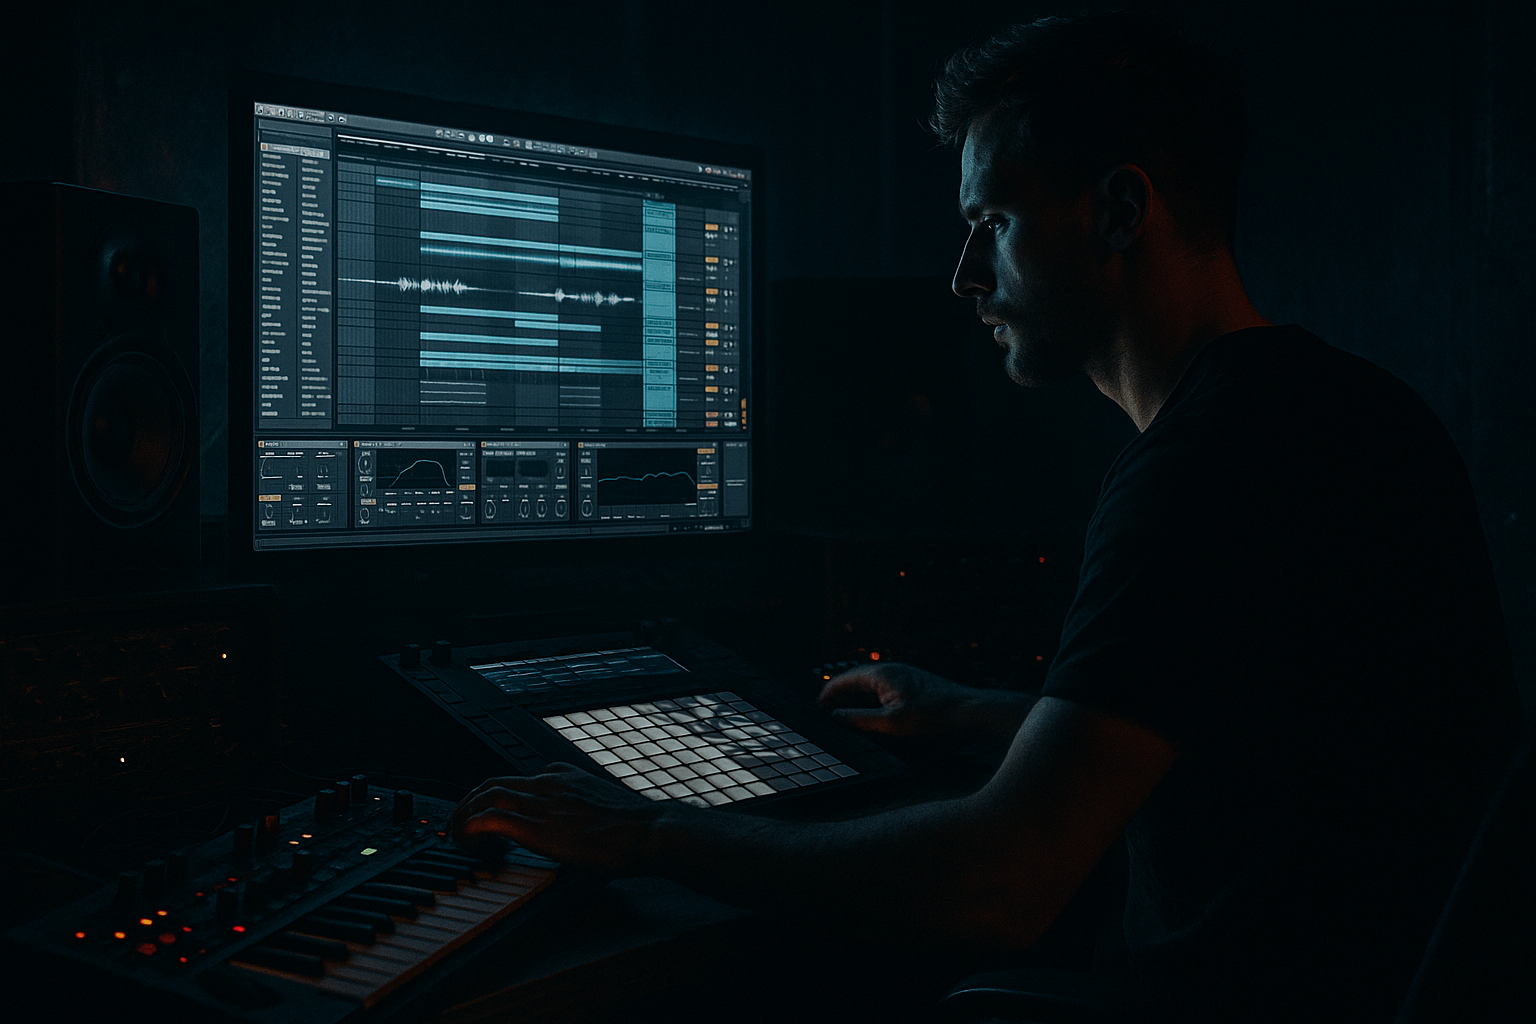
4. Shape the vocal with a stock-device chain that fits DnB
Start with a practical processing chain using stock Ableton devices:
Chain Example 1: Clean-ragged main layer
- EQ Eight: high-pass around 120–180 Hz to remove low junk; notch any ugly boxiness around 300–600 Hz if needed
- Saturator: mild drive, often around 2–6 dB, to thicken midrange density and help the vocal survive on club systems
- Compressor or Glue Compressor: light control, just enough to keep peaks from jumping out
- Auto Filter: use a band-pass or low-pass movement to automate tension into transitions
Chain Example 2: Dirtier texture layer
- Drum Buss: use lightly for bite and density, not full-on destruction
- Erosion: subtle high-frequency grit for grit and age
- EQ Eight: trim lows aggressively and shape presence so it doesn’t compete with the main vocal
- Utility: narrow the width if it starts wandering
Keep the main vocal relatively intelligible and let the support layer carry grime. This separation is crucial in DnB because the drums and bass already occupy so much of the attention span.
Suggested starting points:
- EQ high-pass: 120–180 Hz
- Saturator drive: 2–6 dB
- Compressor attack: 10–30 ms for a bit of edge, or faster if the vocal is too spiky
- Compressor release: 50–150 ms depending on phrase length
- Auto Filter cutoff movement: around 500 Hz to 6–8 kHz for build-and-release effects
5. Design two layers: one centre, one halo
This is where the vocal becomes a proper DnB element. Duplicate the main vocal and split the roles:
- Layer 1: centre core
- keep it dry-ish
- mono or near-mono
- focused in the midrange
- carries the phrase intelligibility
- Layer 2: halo / atmosphere
- filtered more heavily
- slightly delayed or widened only in the upper mids/highs
- lower in level
- supports the vibe without clouding the mix
In Ableton, use Utility on the halo layer to manage width, and keep any stereo effect away from the low mids. If the vocal has reverb or delay, make sure the tail is not fattening the 200–500 Hz zone.
A very strong DnB move is to print the halo layer to audio after processing. Commit it once it works. That lets you edit the tail, reverse bits, or place single-word echoes with precision.
Stop here if the vocal already feels like a musical event in the loop. If it does, commit the strongest processed take to audio now. In this style, overworking vocal layers often removes the raw impact that made them good in the first place.
6. Use delay and reverb as punctuation, not constant wash
For future jungle, ambience should be event-based. Don’t leave large reverb on the vocal the whole time unless the arrangement is intentionally foggy. Use sends or automate device amounts so the vocal can punch dry in the drop and bloom in the turnaround.
Practical choices:
- Simple Delay with short, synced echoes can give a callout a trailing tail without softening the front edge too much
- Reverb should be shorter and darker for most of the track; long bright verbs can blur the break patterns
- Automate mix amount or send level on the last word of a phrase only
Good starting feel:
- Delay time: 1/8 or 1/8 dotted depending on groove
- Reverb decay: around 0.8 to 2.2 seconds for controlled spaces
- Reverb low cut: keep it fairly high so the tail doesn’t cloud the kick/snare zone
What to listen for: the vocal should feel larger at the ends of phrases, but the center of the groove should stay dry enough to keep the snare crisp.
7. Create DJ-friendly phrasing and section logic
This is where the blueprint becomes useful in real sets. A strong future jungle vocal layer is not just a loop; it’s structured for mixing. Build at least one of these arrangement shapes:
- 16-bar intro: filtered vocal fragments only, enough for DJs to blend
- 8-bar pre-drop: increasing vocal density, with one short gap before the drop
- 16-bar drop A: full vocal callouts, but leave space every 2 bars
- 16-bar drop B: same core phrase, but with a new rhythm or reversed fragment
- 8-bar outro: reduce to one or two chants and filter down
A practical future jungle phrasing example:
- Bars 1–4: one chopped line repeating, low-passed
- Bars 5–8: second phrase enters on bar 7 turnaround
- Bars 9–12: full-intensity callouts with drum fills
- Bars 13–16: strip back one layer so the second drop can mutate
Don’t fill every bar. The DJ-friendly version of this sound needs breathing room so it can be layered against another tune, especially if that other tune also has a busy break.
8. Check the vocal in context with drums and bass
Now loop the actual drop or a representative section with bass in place. This is the real test. The vocal must survive the full spectrum fight without making the mix feel smaller.
Check three things:
- does the vocal clash with snare energy around 180–250 Hz or feel boxy around 300–600 Hz?
- does the bass mask the vocal’s rhythm if both are active in the same bar?
- does the vocal stay readable when the kick and break hit together?
If the vocal and bass are both busy, either:
- simplify the vocal rhythm
- move the vocal chop slightly earlier/later by a few milliseconds for pocket
- thin the support layer during bass-heavy bars
This is where tiny timing nudges matter. A vocal moved 10–20 ms can suddenly sit in the pocket instead of fighting the snare crack. That’s not random nudging — it’s groove correction.
What to listen for: the vocal should feel like it sits on top of the drums without flattening them. If you turn the drums down and the vocal suddenly sounds huge, that usually means it was too wide, too wet, or too mid-heavy.
9. Automate tension and variation instead of repeating the same loop
A future jungle vocal layer becomes real when it evolves across the section. Use automation to keep the phrase alive without adding extra clutter.
Good automation targets in Ableton:
- Auto Filter cutoff for intro build-up
- Send amount to delay/reverb on turnaround words
- Saturator drive slightly higher in the second 8 bars for attitude
- Utility width narrower in the intro, wider only on selected accents
- Volume automation to push specific shouts forward by 1–2 dB
If the drop is 16 bars, make bars 1–8 slightly more restrained and bars 9–16 more aggressive. That gives the arrangement a second-wave lift without needing a new sample every eight bars.
A useful trade-off:
- More automation = more movement and hype
- Less automation = more rawness and DJ usability
For darker sets, keep automation deliberate. Too much animated processing can make the vocal feel like a plugin demo instead of a ragga weapon.
10. Finalize with a resampling pass for control and speed
Once the arrangement works, resample the processed vocal layers to audio. This is one of the fastest ways to finish a DnB vocal blueprint because it gives you full control over trims, reverse tails, and placement.
After resampling:
- cut away dead space
- keep only useful tails
- reverse a few atmosphere fragments into fills
- place a single vocal hit just before a drop for tension
This also helps workflow efficiency: you stop fiddling with endless live processing and start making arrangement decisions. That matters in DnB, where getting out of loop mode is half the battle.
If the vocal loses too much edge when printed, revisit the chain and add slightly more presence before the bounce rather than boosting it later. A printed vocal that already speaks clearly is easier to place than one that needs rescue EQ.
Commit this to audio if the vocal now has the right attitude, the right amount of roughness, and still leaves the kick and snare feeling bigger than the vocal itself.
Common Mistakes
1. Making the vocal too continuous
- Why it hurts: constant vocal density smothers the break and removes drop impact.
- Fix in Ableton: cut phrases into shorter callouts and leave one bar or half-bar of negative space before key snare hits.
2. Leaving too much low mid in the sample
- Why it hurts: 200–600 Hz clutter makes the vocal fight the snare body and bass harmonics.
- Fix in Ableton: use EQ Eight high-pass around 120–180 Hz, then narrow-cut boxiness around 300–600 Hz if needed.
3. Using too much stereo widening on the main vocal
- Why it hurts: wide low mids can collapse in mono and smear the centre image.
- Fix in Ableton: keep the core vocal mono with Utility, reserve width for the high-frequency halo only, and check mono regularly.
4. Over-reverberating the drop vocal
- Why it hurts: a washed vocal reduces punch and makes the drum/bass relationship feel soft.
- Fix in Ableton: automate reverb sends only on phrase ends, or shorten decay and darken the return.
5. Ignoring groove offset
- Why it hurts: even a strong sample can feel stiff if every chop lands dead on the grid.
- Fix in Ableton: move key vocal hits by 10–20 ms, especially around snare-answer phrases, until it sits in the pocket.
6. Processing every layer the same way
- Why it hurts: if main and support layers share the same EQ, reverb, and saturation, they blur into one muddy blob.
- Fix in Ableton: give the main layer clarity and the support layer dirt; use separate chains and different width treatment.
7. Not checking the vocal against bass movement
- Why it hurts: what sounds great in solo can mask bass phrasing or lose intelligibility once the drop is full.
- Fix in Ableton: audition the vocal with the bassline and drums together, then simplify either the vocal rhythm or the bass phrase in the same bar.
Pro Tips for Darker / Heavier DnB
Mini Practice Exercise
Goal: build a 16-bar future jungle ragga vocal layer that can sit on top of a break and bassline without masking the groove.
Time box: 15 minutes.
Constraints:
Deliverable:
- one main vocal phrase
- one filtered support layer
- one transition/tension moment
- at least one bar of negative space before the drop
Quick self-check:
Recap
A strong future jungle ragga vocal layer in Ableton is about role, rhythm, and restraint. Build a core phrase, give it a dirty support layer, keep the low end out of the way, and arrange it so DJs can actually use it. The best result sounds raw but controlled: human, percussive, and dangerous, while the drums and bass still own the floor.

