DNB COLLEGE

Drum & Bass Ableton Live 12 Tutorials

LESSON DETAIL

Framework for top loop with chopped-vinyl character in Ableton Live 12 for jungle oldskool DnB vibes (Beginner)

An AI-generated beginner Ableton lesson focused on Framework for top loop with chopped-vinyl character in Ableton Live 12 for jungle oldskool DnB vibes in the DJ Tools area of drum and bass production.

Back to lessons
Framework for top loop with chopped-vinyl character in Ableton Live 12 for jungle oldskool DnB vibes (Beginner) cover image

Narrated lesson audio

The voice track includes the tutorial plus extra teacher commentary.

Open audio file

Main tutorial

Lesson Overview

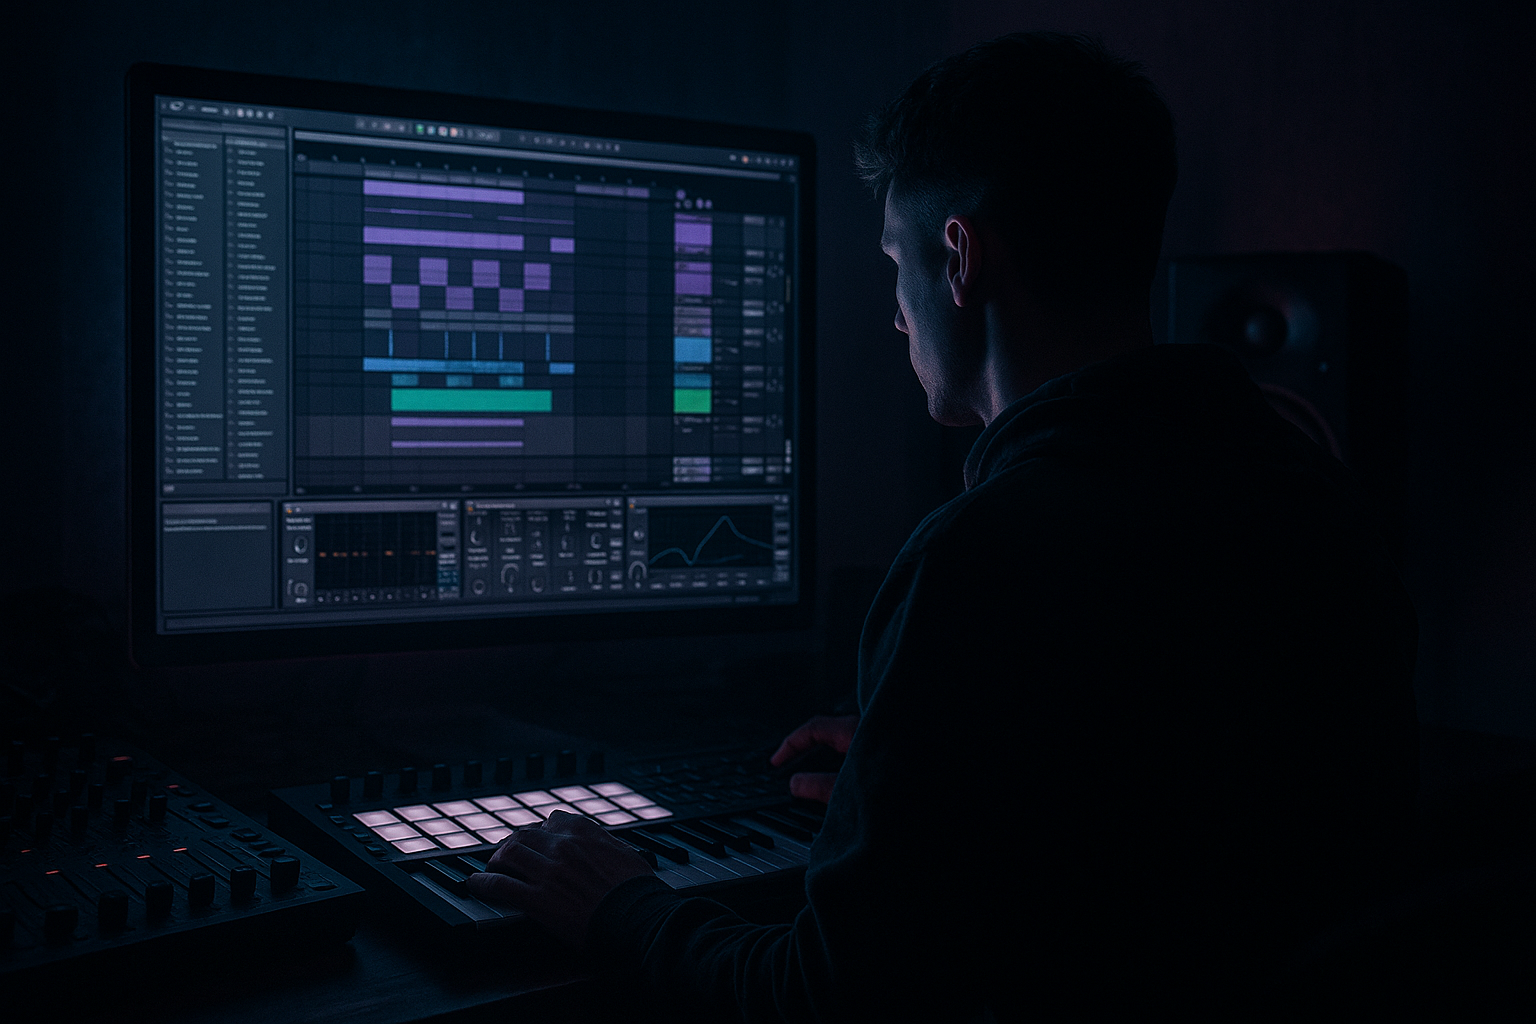
In this lesson, you’ll build a top loop with chopped-vinyl character in Ableton Live 12 that feels right at home in oldskool jungle, early rave DnB, and DJ-friendly roller intros. The goal is to make a loop that sounds like it came from a worn record being cut up on a sampler: dusty, swung, punchy, and full of movement, without becoming messy.

This technique matters because in DnB, the top loop is often the glue between the break, bassline, and arrangement. It keeps the groove alive during intros, breakdowns, and switch-ups, especially when you want that vinyl-digged, chopped break energy instead of a clean modern drum loop. For DJ tools specifically, a strong top loop gives you something that works as:

  • an intro layer before the main drop
  • a breakdown texture under atmospheres
  • a transition loop for mix-outs and build-ups
  • a human-feeling groove bed above heavy subs and rollers
  • We’ll keep this beginner-friendly and use Ableton stock devices only, mostly built around Drum Rack, Simpler, Saturator, EQ Eight, Auto Filter, and Glue Compressor.

    What You Will Build

    By the end, you’ll have a 4- or 8-bar top loop with:

  • chopped break-style hits placed in a loose but controlled groove
  • vinyl-like grit, slight pitch variation, and filtered tone
  • layered hats/shakers for sparkle and motion
  • a little swing and micro-groove so it doesn’t feel grid-locked
  • DJ-friendly arrangement that can sit under an intro or a drop
  • enough headroom to work with sub weight and a reese later
  • Musically, think of a loop that could sit under a 16-bar jungle intro, then stay alive under a half-time bass switch or an 8-bar roller section. It should feel raw and rhythmic, not over-produced.

    Step-by-Step Walkthrough

    1. Set up a clean loop workspace in Ableton Live 12

    Start with a blank audio or MIDI track setup in Session View or Arrangement View. Set your project tempo to a DnB-friendly range:

    - 170 BPM for classic jungle / oldskool energy

    - 174–176 BPM for modern DnB / rollers

    Create a new MIDI track called Top Loop. Drop a Drum Rack onto it. This gives you a fast way to organize chopped hits by pad. If you prefer audio chopping, you can do that later, but for beginners the Drum Rack approach is easier to control.

    Keep the loop length at 4 bars to start. That’s long enough to feel musical, but short enough to loop and refine. In DnB, 4 bars is a great starting point for a DJ tool because it reveals whether the groove is working without getting lost.

    2. Load a break and isolate the top-end feel

    Drag a classic break, break loop, or any drum break sample onto a pad in Drum Rack using Simpler. If you’re using a full break, you don’t need the whole thing for this lesson. We’re building a top loop, so focus on the hats, snare air, and shuffled percussion feel rather than the full kick-heavy break.

    In Simpler:

    - set mode to Slice if you want to chop the break quickly

    - or keep it in Classic mode if you’re just using a short audio hit

    For a beginner-friendly workflow, use one break sample chopped into 4–8 useful slices:

    - a light snare ghost

    - a hat tick

    - a ride or cymbal edge

    - a small open hat

    - a bit of noisy tail

    Why this works in DnB: top loops in jungle often feel alive because the ear hears small rhythmic details more than huge drum hits. The sub and kick may be doing their job elsewhere, so the top loop can focus on motion, swing, and texture.

    3. Program a basic chopped rhythm first, then make it human

    In the MIDI clip, place your slices on a simple 4-bar pattern. Don’t overcomplicate it yet. Start with:

    - hats on off-beats

    - a snare ghost before key backbeats

    - one or two extra chopped hits near bar ends

    - occasional gaps for breathing room

    A good beginner pattern idea:

    - put a hat slice on 1.2, 1.4, 2.2, 2.4, 3.2, 3.4, 4.2, 4.4

    - add a ghost snare or light chop on 1.3.3 and 3.3.3

    - place a small fill chop in the last half-beat of bar 4

    Then open the MIDI clip and add slight velocity variation. Keep most hits around 70–100 velocity, but drop a few ghost chops to 30–55. This stops the loop from sounding robotic.

    If the pattern feels too straight, use a little Groove Pool swing. Start with something subtle:

    - MPC 16 Swing or a similar groove

    - 15–30% groove amount

    Don’t overdo swing. In DnB, too much swing can make the loop feel lazy instead of driving.

    4. Shape the chopped-vinyl character with Simpler and Warp-style thinking

    For each sliced hit, give it a slightly worn-record vibe. In Simpler, try these beginner-safe settings:

    - Start/End: tighten the sample so the attack is clean

    - Fade: small fade to avoid clicks

    - Pitch: shift some slices down by -1 to -3 semitones

    - Transpose: vary a few hits slightly for character

    If you’re using audio clips instead of MIDI slices, try small pitch changes directly in the clip:

    - one hit at -2 semitones

    - another hit at +1 semitone

    - keep most hits unchanged

    That slight pitch drift is part of the chopped-vinyl feel. Real sampled breaks often sound imperfect because of old gear, re-recording, and resampling.

    Add a little Saturator after the Drum Rack:

    - Drive: 2–6 dB

    - turn on Soft Clip if needed

    - keep it subtle so the top loop gets edge without turning harsh

    This gives you the gritty, slightly crushed top-end that helps the loop sit in jungle and darker DnB.

    5. Build the top loop layers: hat noise, texture, and a touch of air

    A good top loop is usually more than just break slices. Add one or two layers for motion. Use separate Drum Rack pads or extra MIDI tracks:

    - a closed hat on off-beats

    - a shaker with low velocity

    - a very quiet noise hit or vinyl-style tick

    - a soft ride texture for lift in the second half of the loop

    Keep these layers light. You want them to support the break, not steal the show.

    On the hat layer, use Auto Filter:

    - set to High-Pass

    - cutoff around 250–600 Hz

    - resonance low, around 0.20–0.40

    On the texture layer, use EQ Eight to remove unnecessary low end:

    - high-pass around 200–400 Hz

    - gently reduce any harshness around 6–9 kHz if needed

    This protects your kick and sub space later. Top loops in DnB should live mostly above the low-mid range.

    6. Create groove with timing, not just sound

    This is where the loop starts to feel like real jungle rather than a drum sample pasted on grid. Nudge a few hits slightly late or early using Ableton’s MIDI editor. Very small moves are enough:

    - move a ghost hit 10–20 ms late

    - push a hat slightly ahead of the beat

    - leave a gap before a key snare chop

    Don’t move everything. Just the supporting hits. That tiny push-pull creates the oldskool “played” feel.

    If you want extra movement, add note length variation:

    - shorter notes for tight hat chops

    - slightly longer notes for noisy tails

    - leave room around the snare ghosts

    A lot of jungle energy comes from how empty space frames the chopped hits. The loop should breathe, not fill every slot.

    7. Shape the loop with drum bus processing

    Route all your top-loop elements to a single Group or Drum Bus so you can shape them together. On that bus, use:

    - Glue Compressor

    - EQ Eight

    - optional Saturator

    Good starting points:

    - Glue Compressor: 1.5:1 to 2:1 ratio

    - Attack: 10–30 ms

    - Release: Auto or around 0.1–0.3 s

    - Gain reduction: just 1–3 dB

    This tightens the chopped hits without killing the transient snap.

    Then use EQ Eight:

    - high-pass around 120–180 Hz if the loop has stray low junk

    - small cut around 300–500 Hz if it sounds boxy

    - gentle shelf boost around 8–10 kHz only if it needs air

    Keep an eye on headroom. Your top loop should be strong, but it should not fight the kick and sub. In DnB, low-end clarity is everything.

    8. Add vinyl-style movement and DJ-tool utility

    To make the loop feel like a DJ tool, think in terms of intro/outro usefulness. You want parts you can bring in and out with filters, mutes, and automation.

    Automate Auto Filter on the top-loop group:

    - start with a low-pass around 1.5–3 kHz for intro tension

    - open it up to 8–12 kHz by the drop or second 8 bars

    You can also automate:

    - Reverb send for a short wash at bar ends

    - Utility gain for quick level dips before fills

    - Saturator drive slightly higher in the second half of the phrase

    A useful arrangement example:

    - Bars 1–4: filtered top loop, no full brightness

    - Bars 5–8: open hats and extra chop

    - Bars 9–12: small fill and a removed hit for tension

    - Bars 13–16: full energy leading into the drop or bass switch

    This is classic DJ-friendly phrasing: it lets the loop function as an intro layer, then escalates in energy without needing a full new part.

    9. Check against the bass and kick space

    Even though this lesson is about the top loop, it must work in a real DnB context. Place a simple kick and sub underneath, or load a reference loop from a similar tune.

    Then listen for:

    - does the top loop mask the snare crack?

    - are any chopped hits clashing with the kick transient?

    - is the high end harsh when the bass comes in?

    - does the loop still work in mono?

    Use Utility on the top loop group and hit Mono briefly to check phase and compatibility. If the loop collapses badly, simplify the stereo effects and focus on cleaner samples.

    If the loop feels crowded, remove one layer rather than boosting everything. In darker DnB, fewer parts with better groove usually hit harder than a busy loop.

    10. Resample if you want more oldskool grime

    A very practical oldskool trick in Ableton Live is to resample your own loop. Route the top loop to a new audio track set to record from Resampling or from the top-loop group output. Record 4 or 8 bars, then chop that audio again.

    Why this works: resampling introduces a more “printed” feel. You can then:

    - re-chop a few hits

    - reverse one small slice

    - warp a tail slightly

    - add tiny fades and manual edits

    This is a classic jungle workflow mindset: make something, print it, then chop it again until it has its own identity.

    Common Mistakes

  • Making the loop too busy
  • - Fix: remove one or two hits. A top loop should support the groove, not fight it.

  • Leaving too much low end in the loop
  • - Fix: high-pass the top loop group around 120–180 Hz and clean individual samples if needed.

  • Overusing swing
  • - Fix: keep groove subtle, around 15–30%. Too much swing can make DnB lose forward motion.

  • Using one static hat sample for everything
  • - Fix: layer at least two sources, or vary velocity and pitch so the loop feels alive.

  • Distorting the loop until it becomes harsh
  • - Fix: use Saturator gently, and check the high end with EQ Eight instead of just adding more drive.

  • Ignoring arrangement
  • - Fix: mute or filter parts every 4 or 8 bars so the loop can function as a DJ tool, not just a looped file.

    Pro Tips for Darker / Heavier DnB

  • Use darker filtering on the intro
  • - Start the loop low-passed, then open it as the drop approaches. That builds tension without needing extra sounds.

  • Add tiny pitch shifts to one or two chops
  • - A few slices pitched down -1 to -3 semitones can give the loop that worn, sample-based edge.

  • Pair the loop with a reese later
  • - The top loop should leave space for a moving reese bass. If the bass is wide and aggressive, keep the loop cleaner and more mono-focused.

  • Use ghost notes to imply energy
  • - Quiet snare ghosts and hat ticks create momentum without clutter. This is especially effective in rollers and dark jungle.

  • Keep transients controlled
  • - A little Glue Compressor and a touch of Saturator helps the loop feel glued together, but don’t smash it. You want punch, not mush.

  • Automate tiny mutes for tension
  • - Cutting a single hat or ghost hit for half a bar can make the next bar feel bigger. This is great before a drop or bass variation.

  • Reference classic jungle phrasing
  • - Think in 4-bar questions and answers. Maybe bars 1–2 are sparse, bars 3–4 answer with extra chops. That keeps the loop musical.

    Mini Practice Exercise

    Spend 10–20 minutes making two versions of the same top loop.

    1. Build a 4-bar chopped top loop using one break sample and one hat layer.

    2. Make Version A:

    - more filtered

    - fewer hits

    - softer velocities

    3. Make Version B:

    - slightly brighter

    - one extra fill in bar 4

    - a touch more saturation

    4. Place both under a simple kick and sub.

    5. Compare which one feels more like:

    - intro/DJ tool

    - drop support

    - roller energy

    Goal: learn how tiny changes in chopping, filtering, and velocity completely change the feel of a DnB loop.

    Recap

  • Build the top loop around chopped break slices, hats, and light texture.
  • Keep it swingy but controlled, with small velocity and timing changes.
  • Use Ableton stock devices like Drum Rack, Simpler, Saturator, EQ Eight, Auto Filter, Glue Compressor, and Utility.
  • Protect space for kick, sub, and reese bass by cleaning low end and keeping the top loop focused.
  • Use automation and bar-by-bar changes so the loop works as a DJ tool for intros, transitions, and drop support.
  • For oldskool jungle vibes, resample, re-chop, and keep some imperfections — that’s where the character lives.

Ask GPT about this lesson

Chat with the lesson tutor, get follow-up help, or use quick actions.

Bigup 👽 Ask me anything about this lesson and I’ll answer in context.

Narration script

Show spoken script
Today we’re building a top loop with chopped-vinyl character in Ableton Live 12, and we’re aiming straight for that oldskool jungle, early rave DnB, DJ-tools vibe. So think dusty, swung, punchy, and alive, but still controlled enough to sit under a proper bassline later on.

The big idea here is simple: in drum and bass, the top loop is often the glue. It’s the movement, the attitude, the little bit of shimmer and shuffle that keeps the energy flowing while the kick, sub, and main break do their thing. If you get this right, you’ve got something that works for intros, breakdowns, transitions, and mix-outs. Basically, a loop that can do actual work in an arrangement, not just sound cool on its own.

We’re going to keep this beginner-friendly and stick to Ableton stock devices. So we’ll be using Drum Rack, Simpler, Saturator, EQ Eight, Auto Filter, Glue Compressor, and Utility. No fancy extras needed.

First, set yourself up with a clean project. Start with either Arrangement View or Session View, whichever feels easier to you. Set the tempo somewhere in the DnB zone. If you want that classic jungle feel, go around 170 BPM. If you want something a little more modern and rolling, 174 to 176 BPM is a great range.

Now create a new MIDI track and call it Top Loop. Drop a Drum Rack on that track. This is the easiest way to build a chopped loop because you can map different hits to different pads and keep everything organized. For this lesson, start with a 4-bar loop. Four bars is long enough to hear the groove develop, but short enough that you can loop it, tweak it, and actually hear what’s working.

Next, bring in a break sample. It can be a classic break, a break loop, or any drum sample with some character. Drop it onto a Drum Rack pad and let Simpler handle it. Since we’re building a top loop, we’re not trying to use the whole break in a huge full-drum way. We want the top end: hats, snare air, little ticks, noisy tails, that kind of thing.

If you want to work quickly, switch Simpler into Slice mode so Ableton can chop the sample for you. If you’re using short hits instead of a full break, Classic mode is fine too. For a beginner, I’d suggest using one break sample and finding about four to eight useful slices. Look for pieces like a light snare ghost, a hat tick, a ride edge, a small open hat, and a bit of noisy tail. Those are the kinds of sounds that give the loop motion without crowding it.

Now let’s program the rhythm. Start simple. Don’t try to make it sound like a finished record in the first minute. Just lay down a basic chopped pattern over four bars. A good starting point is to place hat slices on the off-beats, add a ghost snare before some of the backbeats, and leave a few small gaps so the loop can breathe.

A nice beginner pattern could be something like this: hats on 1.2, 1.4, 2.2, 2.4, 3.2, 3.4, 4.2, and 4.4. Then drop in a ghost snare or light chop around 1.3.3 and 3.3.3. Add a tiny fill chop near the end of bar 4. That’s enough to create a groove that feels musical without getting messy.

Once the pattern is in place, go into the MIDI editor and work on velocity. This matters a lot. If everything hits at the same level, it’ll sound machine-like. Keep most of the stronger hits around 70 to 100 velocity, and pull a few ghost chops down to around 30 to 55. That contrast gives the loop a more human, sampled feel.

If the rhythm feels too stiff, use a little Groove Pool swing. Something subtle works best here. Try a light MPC-style 16 swing and keep the groove amount around 15 to 30 percent. The key word there is subtle. In DnB, too much swing can make things feel lazy instead of driving.

Now let’s make it sound a little more like chopped vinyl and less like a clean digital loop. In Simpler, tighten the start point so the transient is clean, and add a tiny fade to avoid clicks. Then experiment with pitch. You don’t need to do this to every slice, just a few. Try dropping one hit down by one or two semitones, maybe another by three semitones at most. You can also shift a couple of hits slightly up or down for variation. That tiny instability is a big part of the old sampled-break character.

If you’re working with audio clips instead of MIDI slices, you can do the same thing by transposing individual hits in the clip. One at minus two semitones, one at plus one, most of them unchanged. That little bit of drift helps the loop feel worn in, like it came off a dusty record or a resampled sampler chain.

To add some grit, drop a Saturator after the Drum Rack. Keep it gentle. You’re not trying to destroy the loop, just give it a bit of edge. A Drive setting around 2 to 6 dB is a solid starting point, and you can turn on Soft Clip if needed. If it starts sounding harsh, back it off. The goal is crunchy character, not ugly distortion.

At this point, the loop should have some chopped-break energy, but we can make it feel more complete by layering in a few extra top-end elements. Add a closed hat layer, maybe a soft shaker, maybe even a very quiet vinyl-style tick or noise hit. Keep these layers light. They’re there to add motion and air, not to take over the groove.

For the hat layer, use Auto Filter and set it to high-pass. Cut low frequencies aggressively, somewhere around 250 to 600 Hz, depending on the sound. Keep the resonance low so it doesn’t whistle out. For any texture or noise layer, use EQ Eight to clean out the low end, maybe high-pass around 200 to 400 Hz. If the top gets a bit sharp or fizzy, you can gently ease back the 6 to 9 kHz area. That helps keep the loop smooth enough to sit with bass later.

Now let’s talk about groove, because this is where the loop starts feeling like jungle instead of a loop pasted to the grid. Nudge a few hits slightly off the exact timing. Not everything, just a few supporting notes. Push a hat a touch ahead of the beat, or move a ghost hit a little late, maybe 10 to 20 milliseconds. Leave a small gap before a snare chop if the phrase needs breathing room. Those tiny timing moves create that push-and-pull feel that makes oldskool drum programming so alive.

You can also vary note length. Shorten some hat chops so they feel tight and crisp. Let a few noisy tails ring out just a little longer. Again, it’s all about contrast and movement. A top loop should feel like it’s breathing, not like every grid slot is packed full.

Once the parts are playing nicely together, group them into a single bus so you can shape the whole top loop as one unit. On that group, add Glue Compressor, EQ Eight, and maybe a little more Saturator if needed. For Glue Compressor, keep the ratio low, around 1.5 to 2 to 1. Use an attack somewhere between 10 and 30 milliseconds, and let the release be auto or fairly quick. You only want a couple dB of gain reduction, maybe 1 to 3 dB. Just enough to tighten the loop and glue the chopped pieces together.

Then use EQ Eight to clean things up. High-pass the group around 120 to 180 Hz if there’s any stray low junk hanging around. If the loop sounds boxy, make a small cut around 300 to 500 Hz. If it needs a little air, add a gentle shelf around 8 to 10 kHz. But be careful here: this top loop is supposed to leave room for kick and sub. In DnB, low-end clarity is everything.

Now let’s make it useful as a DJ tool. A good top loop shouldn’t just sound cool in one static state. It should work as part of an arrangement. So automate the Auto Filter on the group. Start with the loop a bit dark, maybe low-passed down around 1.5 to 3 kHz for intro tension. Then gradually open it up to around 8 to 12 kHz as you get closer to the drop or the main section. That simple move can make the whole phrase feel like it’s building without needing more sounds.

You can also automate a few other things for arrangement movement. Maybe send a little bit of reverb at the end of a bar for a wash. Maybe dip the level with Utility before a fill. Maybe push the Saturator drive a tiny bit higher in the second half of the phrase. These are small moves, but they make the loop feel like it’s evolving instead of just repeating.

A really useful phrase idea is this: bars 1 to 4, keep it filtered and intro-friendly. Bars 5 to 8, open it up a bit and add a little more hat brightness. Bars 9 to 12, pull out one hit or drop in a small fill for tension. Bars 13 to 16, go full energy and lead into the drop or bass switch. That’s classic DJ-friendly phrasing, and it’s exactly the kind of thing that makes a loop useful in a real track.

Before you call it done, check it against a kick and sub. Even though this lesson is focused on the top loop, you always want to hear it in context. Listen for clashes. Is the top loop masking the snare crack? Are any of the chopped hits stepping on the kick transient? Does the high end get harsh when the bass comes in? And does the loop still feel solid in mono?

Use Utility on the top loop group and switch to mono briefly to check phase and compatibility. If it falls apart badly, simplify it. Reduce stereo effects, clean up the samples, and focus on the strongest parts of the groove. A lot of the time, less is more. In darker DnB, a few well-placed hits can hit harder than a busy loop full of clutter.

If you want even more oldskool grime, resample the loop. Record the top loop to a new audio track, then chop that audio again. This is a great jungle-style workflow because it bakes in some of the character. Once it’s printed, you can reverse a tiny slice, trim a tail, or re-chop the best moments and make them feel even more intentional. That printed, resampled quality often has more personality than endlessly tweaking MIDI notes.

A few important things to watch out for: don’t make the loop too busy, don’t leave too much low end in it, and don’t overdo the swing. Also, don’t use one static hat over and over and expect it to feel alive. Vary the velocity, pitch, and sample choice. And don’t smash it with saturation until it sounds harsh. A gritty loop is great. A painful loop is not.

Here’s a simple practice idea. Make two versions of the same top loop. Version A should be more filtered, with fewer hits and softer velocities. Version B should be a little brighter, with one extra fill in bar 4 and a touch more saturation. Then drop both under a basic kick and sub and listen to which one feels more like an intro tool, which one feels better for the main groove, and which one gives you more roller energy. That’s a great way to train your ear, because tiny changes in chopping, filtering, and velocity completely change the vibe.

So to wrap it up: build your top loop from chopped break slices, hats, and light texture. Keep the groove swingy but controlled. Use Ableton’s stock devices to shape the tone, the movement, and the space. Leave room for the kick, sub, and reese later on. And if you want that real oldskool jungle personality, don’t be afraid to resample and keep a little imperfection. That’s where the character lives.

If you want, I can also give you a super practical 4-bar chop placement example next, so you can build the pattern faster.

mickeybeam

Go to drumbasscd.com for +100 drum and bass YouTube channels all in one place - tune in!

Generating PDF preview…