DNB COLLEGE

Drum & Bass Ableton Live 12 Tutorials

LESSON DETAIL

Flip an Amen-style intro using stock devices only in Ableton Live 12 (Intermediate)

An AI-generated intermediate Ableton lesson focused on Flip an Amen-style intro using stock devices only in Ableton Live 12 in the Groove area of drum and bass production.

Back to lessons
Flip an Amen-style intro using stock devices only in Ableton Live 12 (Intermediate) cover image

Narrated lesson audio

The voice track includes the tutorial plus extra teacher commentary.

Open audio file

Main tutorial

Flip an Amen-style intro using stock devices only in Ableton Live 12

1. Lesson overview

In this lesson you’ll take a classic Amen-style break intro and turn it into a tight, modern drum and bass / jungle opening using only stock Ableton Live 12 devices. The focus is on groove, so we’re not just chopping drums randomly — we’re shaping pocket, swing, accents, and arrangement tension so the intro lands hard before the drop.

You’ll learn how to:

  • Slice an Amen break into playable parts
  • Rebuild it into a rolling intro groove
  • Add ghost notes, fills, and reverses
  • Process the break for weight, grit, and movement
  • Make it work as a proper DnB intro instead of sounding like a raw sample loop 🎛️
  • This approach is ideal for:

  • jungle intros
  • DnB breakdowns
  • halftime-to-fulltime transitions
  • dark rolling intros before a bass drop
  • ---

    2. What you will build

    By the end, you’ll have a 16-bar intro with:

  • Bars 1–4: filtered, atmospheric break tease
  • Bars 5–8: full Amen-style rhythm introduced
  • Bars 9–12: added fill variations, extra snare pushes, and tension
  • Bars 13–16: a build into the drop with automation and a final drum break
  • Core elements

  • Ableton Simpler or Drum Rack for slicing the Amen
  • Drum Buss for punch and saturation
  • Auto Filter for intro shaping
  • Glue Compressor or Compressor for drum cohesion
  • EQ Eight to clean low end and harshness
  • Reverb / Echo for space and transition effects
  • Utility for gain staging and mono control
  • ---

    3. Step-by-step walkthrough

    Step 1: Find or import your Amen break

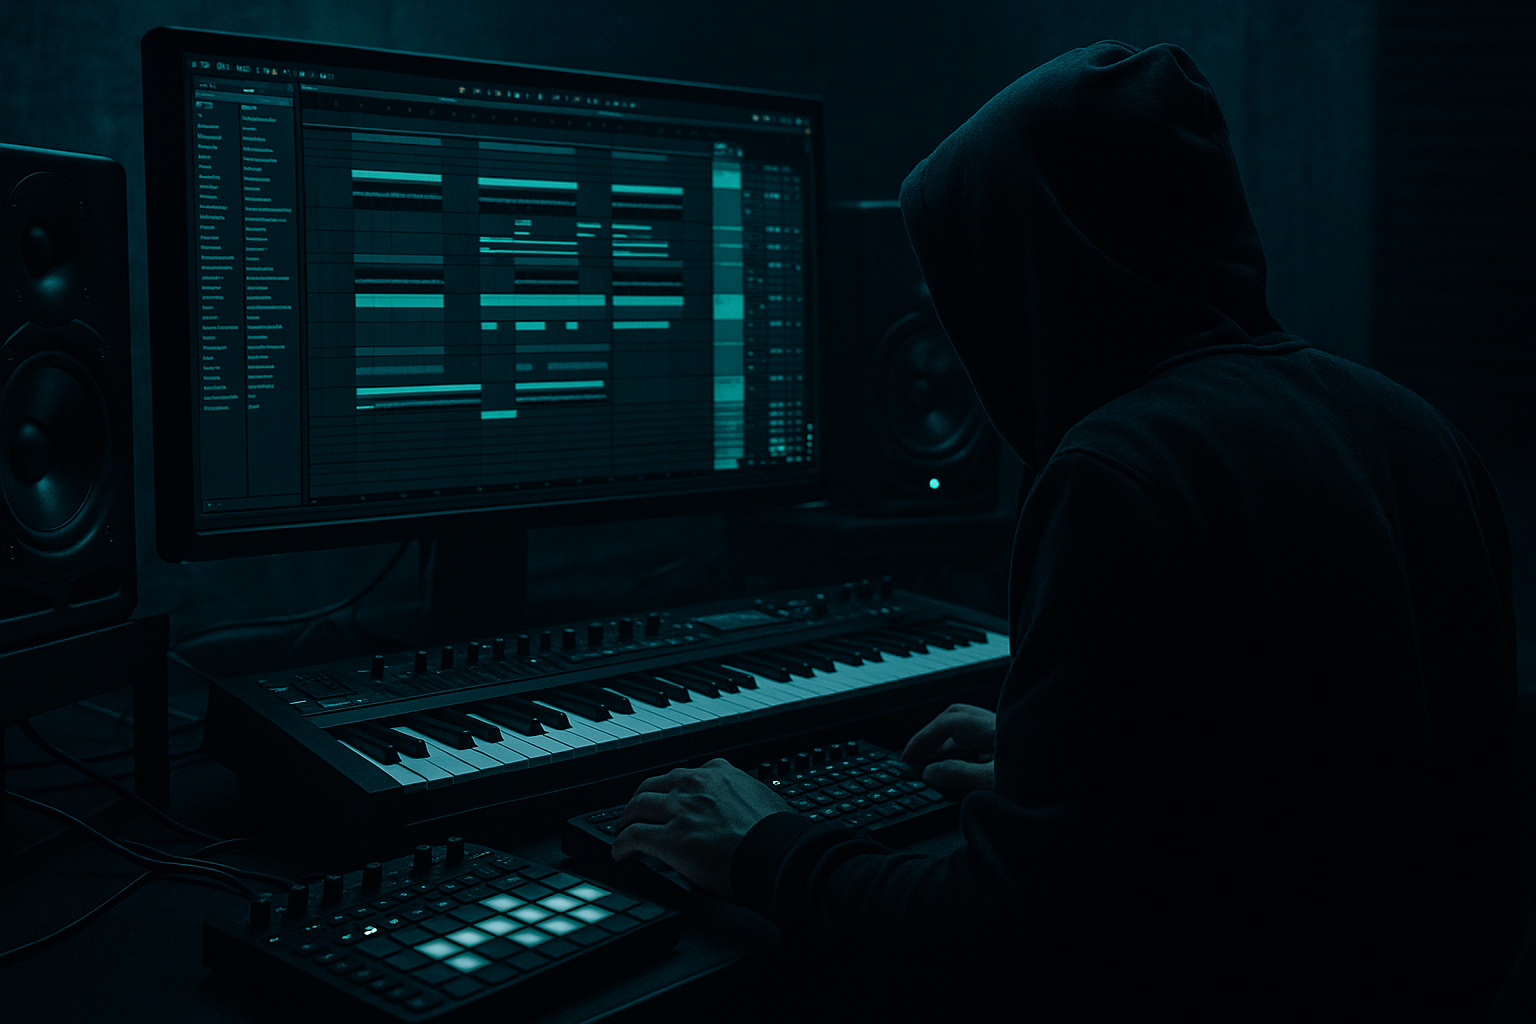
    Drag an Amen-style break into an audio track. Any classic break source works, but the process is the same whether it’s a clean Amen recording or a gritty derivative break.

    #### Good starting points

  • A clean Amen loop at 170–174 BPM
  • A slightly dusty jungle break if you want a heavier vibe
  • A short 1-bar phrase with strong kick/snare definition
  • #### Set project tempo

    For a modern DnB intro, set your project to:

  • 174 BPM for classic energy
  • 172 BPM for slightly darker, heavier swing
  • 170 BPM if the bassline is dense and you want more room
  • ---

    Step 2: Warp the break properly

    Double-click the audio clip and open Clip View.

    #### Warp settings

  • Turn Warp on
  • Use Complex Pro if you want to preserve texture
  • Use Beats if you want sharper transient control
  • For Amen breaks, Beats is usually best for punchy drum reconstruction
  • #### Suggested Beats mode settings

  • Transient: 1/16 or 1/32 depending on the break’s movement
  • Preserve: 100%
  • Gain: adjust so the loop sits comfortably
  • If the original break has a lot of natural swing, avoid over-stretching. You want the groove to breathe, not smear.

    ---

    Step 3: Slice the break into a Drum Rack

    Right-click the clip and choose:

    Slice to New MIDI Track

    #### Slicing settings

  • Slice by: Transients
  • Create one slice per: 1/16 note or Transient
  • Preset: Built-in Drum Rack
  • This gives you individual hits mapped across pads. Now the Amen is playable like an instrument, which is exactly what you want for a DnB intro.

    ---

    Step 4: Build a 4-bar intro groove

    Create a MIDI clip and start placing slices manually.

    #### Basic structure to aim for

    Use the break’s natural identity:

  • Kick hits to anchor the groove
  • Snare backbeats on 2 and 4, but don’t keep them too rigid
  • Ghost notes around the snares
  • Mini fills at the end of every 2 or 4 bars
  • #### Practical approach

    Instead of copying the break exactly, build a version that feels:

  • tighter
  • more controlled
  • more arrangement-friendly
  • Try this:

  • Bar 1: sparse break fragments
  • Bar 2: add snare responses
  • Bar 3: fuller groove with ghost hats
  • Bar 4: fill with snare flam or kick pickup
  • This makes the intro feel like it’s evolving, not looping aimlessly.

    ---

    Step 5: Humanize the groove

    Open the MIDI clip and adjust timing and velocity.

    #### Timing

  • Nudge some ghost notes slightly late
  • Push key snare accents slightly ahead for urgency
  • Keep the kick more solid and consistent
  • Use Groove Pool if you want a swing template:

  • Try a MPC-style swing
  • Or extract groove from the original break if it has good feel
  • #### Velocity suggestions

  • Main snare hits: 100–127
  • Ghost snares: 35–75
  • Light hats/shuffles: 20–60
  • Accent hits: 85–110
  • DnB lives and dies on velocity contrast. If every hit is the same weight, the break becomes flat fast.

    ---

    Step 6: Shape the drum chain

    Now process the drum rack or break group with stock devices.

    Suggested drum chain

    1. EQ Eight

    Use this first or after Drum Buss depending on the source.

    Typical starting moves:

  • High-pass around 25–35 Hz to remove rumble
  • Slight cut at 250–400 Hz if the break is muddy
  • Gentle dip around 4–7 kHz if hats get harsh
  • 2. Drum Buss

    This is excellent for DnB breaks.

    Suggested starting settings:

  • Drive: 5–20%
  • Crunch: low to moderate
  • Boom: use carefully; maybe off at first
  • Damp: adjust to tame fizz
  • Transients: slightly positive for extra snap
  • If you want darker jungle energy, push Drive a little harder and keep the top end controlled with EQ after.

    3. Compressor or Glue Compressor

    Use this to glue the chopped hits together.

    Suggested settings:

  • Ratio: 2:1 or 4:1
  • Attack: 10–30 ms
  • Release: Auto or 100–200 ms
  • Gain reduction: 1–4 dB
  • You want punch, not squashing.

    4. Saturator

    If you need more edge:

  • Drive: 1–5 dB
  • Use Soft Clip on if needed
  • Keep output matched
  • This helps the break sit in a dense DnB mix without disappearing.

    ---

    Step 7: Add intro filtering and movement

    For the first 4–8 bars, you want tension.

    #### Use Auto Filter

    Place Auto Filter on the drum group.

    Suggested automation idea:

  • Bars 1–4: low-pass around 300 Hz to 1.2 kHz
  • Bars 5–8: open gradually to 8–12 kHz
  • Bars 13–16: fully open or automate a quick sweep before the drop
  • #### Filter style

  • Low Pass 24 for a strong intro build
  • Add a touch of resonance if you want that classic rave tension
  • Keep resonance moderate so it doesn’t whistle too much
  • This makes the intro sound like it’s being “revealed” rather than just playing.

    ---

    Step 8: Add parallel space and atmosphere

    DnB intros often feel bigger because of contrast between the drums and the space around them.

    #### Create a Return track with Reverb

    Stock Reverb settings:

  • Decay: 1.2–2.5 s
  • Pre-delay: 10–25 ms
  • Low cut: 200–400 Hz
  • High cut: 6–10 kHz
  • Keep it subtle
  • Send only:

  • snare hits
  • fills
  • reverse hits
  • occasional percussion accents
  • #### Add Echo for transition tails

    Use Echo on a return or directly on a hit:

  • Short feedback
  • Filtered repeats
  • High cut to keep it dark
  • Modulation lightly on for movement
  • This is especially useful on the last snare before the drop.

    ---

    Step 9: Create tension with reverse and fill ideas

    Now we make it feel like an intro to a real DnB tune, not just a break loop.

    #### Easy stock-device fill techniques

  • Reverse a snare hit into a phrase ending
  • Duplicate a kick and fade it into silence with automation
  • Use Echo on a snare stab and print or resample the tail
  • Automate Auto Filter opening on the final 1–2 bars
  • #### Arrangement tricks

    At the end of bar 8 or 16:

  • remove the kick for half a bar
  • leave only hats and a snare pickup
  • add a reverb swell
  • bring in the bass right after the final fill
  • That contrast is what makes the drop feel massive.

    ---

    Step 10: Make it fit a DnB arrangement

    A strong intro in drum and bass usually doesn’t stay static.

    #### Common arrangement pattern

  • Bars 1–4: filtered break + atmosphere
  • Bars 5–8: break opens up and gets more percussive
  • Bars 9–12: bass teaser or sub movement begins
  • Bars 13–16: break fill, FX sweep, then drop
  • If your track is darker/heavier, you can keep the intro more minimal:

  • less full break
  • more negative space
  • more impact on the snare and sub transition
  • ---

    4. Common mistakes

    1. Leaving the Amen loop untouched

    A raw loop can work in jungle, but for modern DnB it often sounds lazy. Slice it, reprogram it, and shape it around your arrangement.

    2. Too much low end in the break

    The break should not fight your sub bass. Clean out sub-rumble with EQ Eight or Utility + EQ.

    3. Over-compressing

    If you crush the break too much, the groove dies. Keep the transients alive.

    4. Ignoring velocity

    Flat velocities make the break sound robotic. DnB groove needs contrast and dynamic accents.

    5. No intro progression

    A good intro changes over time. If bars 1 and 9 feel identical, it won’t build tension.

    6. Too much reverb on the whole break

    That blurs the rhythm. Use sends or automate carefully instead of drowning the entire drum group.

    ---

    5. Pro tips for darker/heavier DnB

    Tip 1: Keep the break dry but the accents wet

    For a heavier sound, keep most of the break tight and dry, but send just the snare hits or fills to reverb/echo. This preserves impact.

    Tip 2: Layer with a tight top loop

    Use a very quiet top loop or hat layer under the Amen:

  • high-passed above 5–8 kHz
  • low velocity
  • very short decay
  • This adds motion without clutter.

    Tip 3: Use Drum Buss to create controlled aggression

    A little Drive and Transients on Drum Buss can make the intro hit harder in a dark neuro/rollers context.

    Tip 4: Automate a low-pass filter into the drop

    A dark intro often benefits from a “closed” sound at first. Let the filter open as the bass energy enters.

    Tip 5: Use subtle mono control

    With Utility, keep the low-mid drum body centered if the mix starts to feel wide and messy. DnB needs a strong mono core.

    Tip 6: Make the final fill more violent than the loop

    Right before the drop, exaggerate the last fill:

  • stronger snare velocity
  • short echoed tail
  • snare flam or extra kick pickup
  • quick filter open
  • That last phrase should signal: “the drop is here.” 🔥

    ---

    6. Mini practice exercise

    Exercise: Build a 8-bar Amen intro

    Use only stock devices and create an 8-bar DnB intro with this structure:

    #### Bars 1–2

  • Filtered break
  • Low-pass around 500 Hz–1 kHz
  • Minimal hits
  • Add one reverb send on the snare
  • #### Bars 3–4

  • Open the filter slightly
  • Add ghost notes
  • Add one small fill at the end of bar 4
  • #### Bars 5–6

  • Full break energy
  • Drum Buss on
  • Compress lightly
  • Add a top hat layer if needed
  • #### Bars 7–8

  • Remove one kick pattern for tension
  • Add reverse snare or echo tail
  • Automate filter opening into the drop
  • Goal

    Make each 2-bar section feel more intense than the last.

    If it doesn’t feel like a build, ask:

  • Is the filter moving?
  • Are the velocities changing?
  • Is the fill actually leading somewhere?
  • Is the final bar more dramatic than the first?
  • ---

    7. Recap

    You’ve now got a practical workflow for flipping an Amen-style intro in Ableton Live 12 using stock devices only.

    Key takeaways

  • Slice the break so you can play the groove
  • Use velocity and timing to create authentic DnB movement
  • Shape the intro with Auto Filter, Drum Buss, EQ Eight, and Compression
  • Add tension with reverb, echo, reverses, and fills
  • Arrange the intro so it evolves toward the drop

The real magic in drum and bass is not just the break itself — it’s how you reframe the break so it supports the whole track. Once you can do that, your intros will feel more like actual records and less like loops 🔥

If you want, I can also turn this into:

1. a bar-by-bar MIDI example,

2. a device chain preset recipe, or

3. a dark rollers version of the same tutorial.

Ask GPT about this lesson

Chat with the lesson tutor, get follow-up help, or use quick actions.

Bigup 👽 Ask me anything about this lesson and I’ll answer in context.

Narration script

Show spoken script
Welcome to this intermediate Ableton Live 12 lesson, where we’re going to flip an Amen-style intro using stock devices only, and make it feel like a proper drum and bass opening, not just a raw break loop.

This one is all about groove. We’re not randomly chopping drums for the sake of it. We’re shaping pocket, swing, accents, and tension so the intro evolves, breathes, and lands hard before the drop.

By the end, you’ll have a 16-bar intro that starts filtered and atmospheric, opens into a full Amen-style rhythm, adds fills and tension, and then pushes cleanly into the drop with automation and movement.

Let’s get into it.

First, bring in your Amen-style break. You can use a classic Amen recording or any break with a similar energy. The important thing is that the kick and snare feel strong enough to rebuild into something playable. For tempo, set your project somewhere in the DnB range. 174 BPM gives you that classic forward drive, 172 BPM feels a little darker and heavier, and 170 BPM gives a bit more space if your bassline is dense.

Once the sample is in the project, open the clip and turn Warp on. For this kind of work, Beats mode is usually the best starting point because it keeps the drum transients punchy. If the break has a lot of natural movement, you want to preserve that energy instead of smearing it with too much stretching. Adjust the transient settings if needed, and keep the loop sitting comfortably in the grid without flattening the feel.

Now for the fun part. Right-click the clip and choose Slice to New MIDI Track. Slice by transients, and let Ableton create a Drum Rack for you. This is the key move, because now the Amen isn’t just an audio loop anymore. It’s an instrument. That means you can play it, rephrase it, and build a real intro out of it.

At this point, create a MIDI clip and start programming a new groove from the slices. Don’t feel like you have to recreate the original break exactly. That’s not the goal. Instead, use the original break as source material and build a tighter, more arrangement-friendly version.

Think in phrases. Bar 1 can be sparse, just enough to tease the identity of the break. Bar 2 can answer with a little more snare energy. Bar 3 can open up with more ghost notes and hat movement. Bar 4 can land a small fill, maybe a snare flam or a kick pickup, so the loop feels like it’s progressing.

This is an important mindset shift: treat the break like a lead instrument. In a strong DnB intro, the drums are part of the hook. The listener should recognize the character of the rhythm, even after you’ve reshaped it.

Next, humanize the pattern. This is where the jungle character really comes alive. Not everything should be snapped perfectly to the grid. Push a few ghost notes slightly late. Let some accents hit a touch ahead for urgency. Keep the kick more solid and grounded, but allow the snares and little offbeat details to breathe.

Velocity matters a lot here. Main snares can sit high, ghost notes should be noticeably softer, and little hat or shuffle hits can stay in the lower range. If every hit has the same velocity, the break becomes flat and mechanical. The contrast between strong and soft hits is what gives the groove its pulse.

If you want to lean into swing, use the Groove Pool. A subtle MPC-style groove can help, or you can extract groove from the original break if it has a feel you want to preserve. Just don’t overdo it. You want the rhythm to move, not wobble apart.

Now let’s process the drum sound itself using stock Ableton devices. Start with EQ Eight. Clean up the low end first so the break doesn’t fight your future sub. High-pass around 25 to 35 Hz to remove rumble. If the break feels muddy, a gentle cut somewhere around 250 to 400 Hz can help. And if the hats or top end get sharp, smooth a little bit around the upper mids.

After EQ, add Drum Buss. This is one of the best stock devices for this job. It can add punch, saturation, and that slightly aggressive drum density that works so well in DnB. Start with modest Drive, keep Crunch under control, and use Transients to bring a little more snap forward. If the sound gets too bright or fizzy, tame it with EQ afterward.

If the break still needs more cohesion, use Glue Compressor or a regular Compressor. The goal is not to squash the life out of it. Just glue the chopped hits together so they feel like one performance. A medium attack, medium release, and just a few dB of gain reduction is usually enough. You want the transients to stay alive.

If the break needs extra edge, a subtle Saturator can help. A little drive with soft clipping can give the drums more presence in a dense mix. Just match the output so you’re hearing the character, not just a volume boost.

Now we shift into arrangement movement. For the first part of the intro, use Auto Filter on the drum group. This is how you create tension. Start with a low-pass filter that keeps things closed in the opening bars. Then slowly open it over time. In bars 1 to 4, the break should feel like it’s behind a curtain. In bars 5 to 8, the rhythm starts to reveal itself. By the time you reach the final bars, the filter can be nearly or fully open before the drop.

A little resonance can add that classic rave tension, but don’t overcook it. You want lift, not whistle. The overall effect should feel like the intro is being uncovered, not just filtered for the sake of it.

To make the space around the drums bigger, set up a return track with Reverb. Keep it subtle. Short to medium decay, a little pre-delay, and low and high cuts to keep it clean. Send mostly snares, fills, and little accent hits. The idea is to preserve the punch of the main groove while giving key moments a tail that helps the arrangement feel wider and more dramatic.

Echo can work beautifully too, especially on a snare hit or the last accent before the drop. Use filtered repeats, short feedback, and keep the repeats dark. This is especially effective when you want the final hit to stretch into the next section.

Now let’s build tension with fills and reverses. This is where the intro stops sounding like a loop and starts sounding like a record. Reverse a snare into a phrase ending. Drop the kick for half a bar before the break comes back in. Let a reverb tail swell into the next section. Automate the filter opening faster in the final bars. These little moves make the listener feel the arrangement shifting forward.

One really effective trick is to create contrast with density. A good intro usually alternates between busier and sparser moments. If everything is always full, nothing feels like it’s building. So in the last four bars, thin the pattern a little. Maybe remove a kick, maybe leave a gap where the ear expects a hit, then bring the full break back in just before the drop. That brief absence makes the impact hit harder.

If you want to take it further, make two versions of the break. One can be tighter and more restrained. The other can be busier, with extra ghost notes and fill ideas. Then alternate them every two or four bars. That keeps the intro moving without sounding repetitive.

You can also split the break into layers: the core kick and snare layer, the top hat and percussion layer, and an accent or fill layer. Then let those layers answer each other. That call-and-response approach makes the rhythm feel more musical and less loop-based.

Another useful trick is a fake-out bar right before the drop. Remove the expected hit, delay it slightly, or create a quick silence pocket. Then slam the real downbeat. That kind of tension works really well in dark rollers and jungle-influenced intros.

If you want even more depth, you can quietly layer a second break underneath the main one. High-pass it, keep the velocity low, and reduce the volume. It shouldn’t be obvious. It should just add texture and motion underneath the main groove.

A few mixing reminders here. Keep the break’s low end under control so it doesn’t compete with your sub. Even a small cleanup in the 120 to 250 Hz range can really help. And don’t over-compress. If you flatten the transients too much, the groove loses its life. DnB needs punch, but it also needs breath.

Also, test the intro at low volume. That’s a great reality check. If the groove still reads quietly, the rhythm is strong. If it disappears, you may be relying too much on impact and not enough on movement.

For a more dark and heavy vibe, keep the core break tight and dry, and send only the accents to reverb and echo. That keeps the center of the groove strong while still giving you atmosphere. A subtle Utility adjustment can also help keep the low-mid body centered if the mix starts to feel too wide or messy.

As you shape the arrangement, think in stages. The first four bars can be filtered and atmospheric. The next four can open up and become more percussive. The next section can hint at bass movement. Then the final four bars can push tension hard with a fill, a filter sweep, a reverb tail, and maybe a quick gap before the drop.

That progression matters. A good intro tells a story. It doesn’t just repeat the same idea over and over.

Here’s a quick practice structure you can try right away. For bars 1 and 2, keep the break filtered and minimal, with a send to reverb on the snare. For bars 3 and 4, open the filter a little and add ghost notes, then end with a small fill. For bars 5 and 6, let the break hit full energy, bring in Drum Buss and light compression, and maybe add a quiet top hat layer. For bars 7 and 8, strip one kick pattern away, add a reverse snare or echo tail, and automate the filter opening into the drop.

The goal is simple: every two-bar section should feel more intense than the one before it.

So to recap, the workflow is: import and warp the Amen-style break, slice it into a Drum Rack, reprogram it into a new groove, humanize the timing and velocity, process it with EQ, Drum Buss, compression, and saturation, then use filtering, reverb, echo, reverses, and fills to create a real DnB intro that builds toward the drop.

The big takeaway here is that the magic isn’t just the break itself. It’s how you reframe it. Once you can turn a classic Amen into a controlled, evolving intro using only stock Ableton Live 12 devices, you’re not just editing drums anymore. You’re arranging energy.

And that’s the difference between a loop and a tune.

If you want, I can also turn this into a shorter voiceover version, a bar-by-bar script with timing cues, or a more hype jungle-style narration.

mickeybeam

Go to drumbasscd.com for +100 drum and bass YouTube channels all in one place - tune in!

Generating PDF preview…