Main tutorial
DJ Intro Polish Guide Using Macro Controls Creatively in Ableton Live 12 for Jungle / Oldskool DnB Vibes
1. Lesson overview
A great DJ intro in drum and bass is not just a “few bars before the drop” — it’s a mixing tool. For jungle, oldskool DnB, and rolling bass music, the intro should give DJs:
- a clean beat grid
- enough space for beatmatching
- a controlled energy build
- a recognisable vibe without giving away the full tune too early
- easy transition points for phrase-mixing
- Audio Effects Rack / Instrument Rack
- Auto Filter
- EQ Eight
- Reverb
- Echo
- Utility
- Drum Buss
- Saturator
- Gate
- Glitch-free automation via Macros
- MIDI effect tools if you’re building from patterns
- jungle intros with chopped breaks
- oldskool DnB tension builds
- rolling intro edits
- dark halftime-to-DnB transition sections
- club-friendly extended mixes
- drum-focused opening
- subtle atmospheric movement
- filtered bass tease
- riser and tension automation
- macro-controlled transition states
- a final pre-drop lift that feels mix-ready
- Bars 1–8: kick/snare + filtered break + atmosphere
- Bars 9–16: bass hint enters, hats open slightly, reverb narrows
- Bars 17–24: more percussion, break becomes fuller, tension increases
- Bars 25–32: clean build to drop, filter opens, impact cue, mix point ready
- Low-pass filter cutoff
- Reverb amount
- Delay feedback
- Drum Buss drive
- Bass volume
- High-frequency opening
- Stereo width
- Break layer intensity
- Tempo: 170–174 BPM for jungle / oldskool DnB
- Time signature: 4/4
- Warp mode: Complex Pro for full loops, Beats for drums
- Grid: 1/16 for detail editing
- Loop length: 16 or 32 bars for the intro section
- Intro
- Build
- Drop
- Breakdown
- Mix-out
- a clean downbeat
- a countable 16 or 32 bar phrase
- a simple first 8 bars
- a clear transition into the main drop
- a sampled jungle break
- a programmed break with chops
- a break loop layered with tight kick/snare reinforcement
- Drum Rack
- Simpler
- Slice to New MIDI Track
- EQ Eight
- Drum Buss
- vinyl noise
- filtered pad
- one-shot FX
- short jungle stab
- Simpler
- Reverb
- Echo
- Auto Filter
- Hybrid Reverb if available in your Live version
- filtered Reese
- sub pulse
- rewound bass stab
- low-passed rolling bass phrase
- Operator
- Wavetable
- Analog
- Saturator
- Utility
- EQ Eight
- reversed cymbal
- noise sweep
- snare roll
- impact hit
- tape-stop style moment if appropriate
- Sampler/Simpler
- Auto Filter
- Echo
- Reverb
- Resonators if you want a more experimental edge
- Auto Filter cutoff
- slight EQ Eight low-cut point
- start around 150–250 Hz cutoff
- end around 12–16 kHz
- Reverb dry/wet
- Reverb size
- Echo dry/wet
- Reverb dry/wet: 5% to 25%
- Echo dry/wet: 0% to 15%
- Drum Buss drive
- Saturator drive
- slight EQ boost around 2–5 kHz if needed
- subtle at first
- build to a noticeable but not harsh edge
- bass track volume
- low-pass filter cutoff on the bass
- possibly a resonant peak boost
- start muted or very low
- rise to about -8 dB to -4 dB below main drop level
- Utility width
- high band of EQ Eight if you are using mid/side
- stereo amount on atmospheres only
- start at 60–80%
- end at 110–130% on non-bass material
- snare roll volume
- break layer intensity
- pitch envelope on risers
- echo feedback on selected FX
- Kick/snare or break only
- Vinyl noise or filtered texture
- Bass mostly absent
- Filter cutoff low
- Width narrow
- Space minimal
- Add hats or ghost percussion
- Introduce bass tease
- Slight increase in reverb or echo throws
- Raise filter cutoff a bit
- Add a short stab or atmospheric hook
- Bring break layer forward
- Add snare rolls or fill variations
- Increase drive slightly
- Increase width on top layers
- Bass tease becomes more obvious
- Open filter more
- Add impact cue or reverse hit
- Reduce reverb tail before the drop if needed
- Tighten the drums
- Let the last phrase feel like a cue point for the DJ
- automate the macro knobs
- keep the chain manageable
- make the intro editable and performance-friendly
- Filter open: slow curve at first, then faster near the end
- Reverb: rise gently, then pull back before the drop
- Drive: small step-ups every 8 bars
- Bass Tease: fade in only after the first phrase
- Width: narrow-to-wide on pads only
- Version A: cleaner DJ intro
- Version B: darker and more atmospheric
- Version C: heavier and more aggressive
- preserve the swing and groove
- don’t over-quantize everything
- keep ghost notes and transient detail alive
- Does the intro start with a clean downbeat?
- Is the first 8 bars too busy?
- Is the bass too full too early?
- Is the phrase length obvious?
- Are the transitions smooth enough for long blends?
- keep the sub muted in the first 8 bars
- leave space for beatmatching
- use a clear cue point at bar 1
- place a small fill at bar 8 or 16 to signal phrase change
- avoid sudden melody changes that make mixing awkward
- a short reverse reverb into the next section
- snare ghost hits before phrase changes
- tiny delay throws on one-shot stabs
- a high-pass sweep on the ambience
- a low-end tighten-up before the drop
- short delay times
- low feedback
- filtered repeats
- timing clarity
- low-end cleanliness
- whether the intro is too busy
- Can another tune sit over this?
- Is there enough room in the low end?
- Does the intro say “DJ tool” or “full drop teaser”?
- Keep the first phrase restrained
- Save the “big” elements for later
- Use macros to control related moves together
- Keep the workflow clean
- Keep sub mono
- Widen only tops, FX, and atmospheres
- Use reverb as accent, not soup
- High-pass your reverb return if needed
- Build in clear 8-bar or 16-bar progressions
- Make the arrangement easy to read
- Don’t remove all the character
- Preserve transient attack and swing
- Use minor-key drones
- Add low-passed texture with Auto Filter
- Use field recordings, industrial hums, or vinyl crackle
- Pitch down ambience by a few semitones if it suits the tune
- Route the intro drums through Drum Buss
- Add controlled saturation with Saturator
- Use short, hard snare fills
- Add a subtle sub drop before the main drop
- filter cutoff + resonance
- drive + output trim
- echo feedback + filter
- impact layer volume
- bass reintroduction amount
- 8 bars stripped beat
- 8 bars industrial tension
- 8 bars bass tease
- 8 bars pre-drop pressure
- duplicate your break
- high-pass it
- distort it lightly
- map its volume to a macro called `Grime`
- the intro starts even darker
- the bass tease is more understated
- the final 4 bars are more intense with a snare roll
- Is the intro mix-friendly?
- Does the energy increase naturally?
- Are the macro moves smooth?
- Would a DJ be able to blend over it easily?
- Build your intro in 8-bar or 16-bar phrases
- Use Ableton Live stock devices to shape tone, space, and movement
- Group related effects into an Audio Effect Rack
- Map macros to multiple parameters for clean, musical evolution
- Keep the sub mono and the intro mix-friendly
- Use automation to create tension without overcrowding the arrangement
- a sample Ableton rack macro mapping template
- a 32-bar intro arrangement blueprint
- or a darker Neuro / ragga jungle version of this lesson.
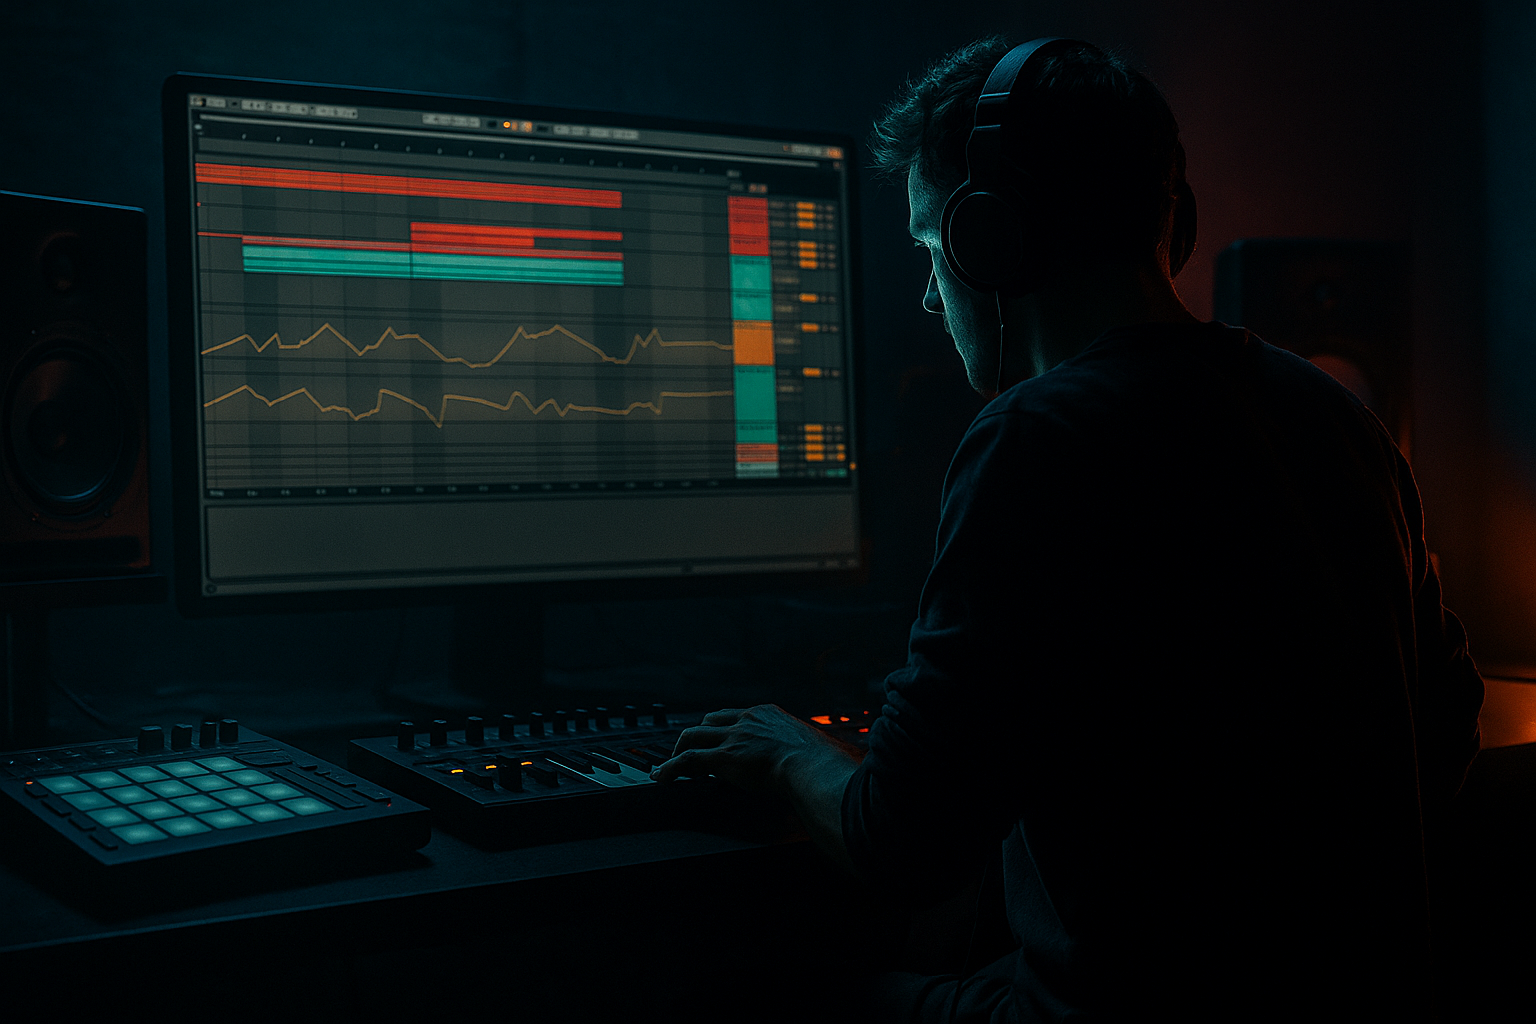
In this lesson, you’ll build a polished DJ intro section in Ableton Live 12 using macro controls creatively. The goal is to make a section that sounds like a proper release intro: stripped, musical, DJ-friendly, and easy to perform.
We’ll use stock Ableton tools such as:
This works especially well for:
---
2. What you will build
You’ll create a 16- or 32-bar DJ intro with:
Final result concept
Imagine this structure:
You’ll use macros to control things like:
This gives you one knob or a small set of knobs that can turn a static loop into a musical DJ intro progression 🔥
---
3. Step-by-step walkthrough
Step 1: Set up the project for DJ-friendly phrasing
Start with a clean Ableton Live 12 set.
Recommended starting settings
Arrangement thinking
In the Arrangement View, mark:
For DJ tools, your intro should often start with:
---
Step 2: Build the core intro layers
Create 4 basic layers:
Layer 1: Drums / breakbeat
Use either:
Good stock devices:
Layer 2: Tension atmosphere
Add:
Good stock devices:
Layer 3: Bass tease
Add a sub/bass hint rather than the full drop bass.
Use:
Good stock devices:
Layer 4: Transition FX
Use:
Good stock devices:
---
Step 3: Turn the intro into a macro-controlled rack
Now the key move: group related devices into an Audio Effect Rack and map controls to Macros.
Example rack: “DJ Intro Polish Rack”
Place this rack on your intro bus or on the intro group track.
#### Device chain example
1. EQ Eight
- High-pass very low rumble if needed
2. Auto Filter
- Main filter sweep
3. Drum Buss
- Adds punch/drive during buildup
4. Echo
- For occasional throws or more space
5. Reverb
- For atmosphere and release
6. Utility
- Width and gain control
7. Saturator
- Subtle harmonic lift
Group these into an Audio Effect Rack.
---
Step 4: Map your macros creatively
Instead of using macros as basic “more reverb” controls, make them performance-friendly DJ intro tools.
Suggested macro layout
#### Macro 1: `Intro Filter`
Map to:
Use this to open the track over time.
Suggested range:
This lets the intro begin murky and then bloom.
---
#### Macro 2: `Space`
Map to:
Use this carefully. Jungle intros often sound better when space is controlled, not washed out.
Suggested range:
Keep the beginning tight, then increase during the last 8 bars.
---
#### Macro 3: `Drive`
Map to:
This adds aggression as the intro progresses.
Suggested range:
Great for that gritty oldskool pressure.
---
#### Macro 4: `Bass Tease`
Map to:
This lets you bring in the bass very quietly, then reveal it.
Suggested range:
For DJ tools, avoid full bass too early unless it’s intentional.
---
#### Macro 5: `Width`
Map to:
For intro polish, keep the beginning narrower, then widen the pads and FX near the transition.
Suggested range:
Do not widen your sub.
---
#### Macro 6: `Tension`
Map to:
This is your “lift the room” control.
Use this macro as a phrase-based automation lane.
---
Step 5: Shape the intro arrangement in 4 phrases
To make the intro useful for DJs, think in 8-bar phrases.
Bars 1–8: Foundation
Goal: give DJs a clear mix-in section.
---
Bars 9–16: First reveal
Goal: start building identity without fully dropping.
---
Bars 17–24: Tension build
Goal: make the intro feel like it’s moving somewhere.
---
Bars 25–32: Pre-drop lift
Goal: make the drop feel inevitable.
---
Step 6: Use automation with macro moves, not endless clip tweaks
This is where Live 12 workflow becomes powerful.
Instead of automating every device separately:
How to do it
1. Click the Automation Mode
2. Select the macro you want to automate
3. Draw gradual movement across the phrase
4. Use curves, not only straight lines
Useful automation shapes
Pro workflow tip
Duplicate the intro section and make:
Then compare which one reads best in a club mix.
---
Step 7: Polish the drum mix for oldskool authenticity
Jungle and oldskool DnB intros often sound best when the drums feel tight but alive.
Drum processing chain suggestion
On the break/drum bus:
1. EQ Eight
- cut mud around 200–400 Hz if needed
- tame harshness around 5–8 kHz if the hats bite too much
2. Drum Buss
- Drive: moderate
- Transients: slightly positive
- Boom: use carefully, especially for intro tools
3. Saturator
- Soft Clip on
- Drive mild for color
4. Utility
- Keep mono compatibility strong if the break is central
Important jungle note
If you’re using classic breaks:
That “human” feel is a huge part of the vibe 🥁
---
Step 8: Make the intro DJ-friendly with clean transitions
A DJ intro must be mixable.
Practical checks
Good DJ intro choices
---
Step 9: Add release polish with small details
This is where the intro goes from “functional” to “professional.”
Add subtle details like:
Nice stock device trick
Use Echo with:
This can create that classic jungle tension without cluttering the mix.
---
Step 10: Bounce-check the intro like a DJ would
Test your intro in these ways:
Mix test 1: Headphones
Listen for:
Mix test 2: Loop the intro
Loop bars 1–16 and check whether the progression makes sense.
Mix test 3: Imagine a DJ mixing it in
Ask:
Mix test 4: Small speaker test
If the break and bass tease still read on smaller speakers, you’re in good shape.
---
4. Common mistakes
1. Making the intro too full too early
A DJ intro should not feel like the drop already started.
2. Automating too many separate parameters
This creates clutter and confusion.
3. Widening the sub bass
This is a classic low-end mistake.
4. Too much reverb on the break
Oldskool DnB needs punch.
5. No phrase logic
If your intro doesn’t change every 8 bars, DJs may feel lost.
6. Over-polishing the break
Some jungle charm comes from edge and grit.
---
5. Pro tips for darker/heavier DnB
If you want this intro to hit darker and heavier, try these moves:
Darker atmosphere
Heavier energy
Heavier macro ideas
Map a macro to:
Arrangement idea for darker DnB
Try:
That gives the DJ a long, dark runway into the drop.
One especially useful trick
Create a parallel dirt layer:
This lets you increase aggression only when needed, without ruining the main break.
---
6. Mini practice exercise
Exercise: Build a 16-bar DJ intro with 4 macro states
#### Goal
Create a short intro that evolves in four clear stages.
Step-by-step
1. Build a drum break intro with a basic loop
2. Add a vinyl/noise atmosphere
3. Add a bass tease that only enters after bar 9
4. Build an Audio Effect Rack on the intro bus
5. Create these 4 macros:
- `Filter`
- `Space`
- `Drive`
- `Bass Tease`
6. Automate each macro across 16 bars
7. Make sure bars 1–4 are sparse
8. Make bars 13–16 feel like a clean lead-in to the drop
Challenge version
Do a second version where:
What to listen for
---
7. Recap
A polished DJ intro for jungle and oldskool DnB is all about controlled energy, phrase clarity, and smart macro movement.
Key takeaways:
The big idea
A good DJ intro doesn’t just sound good on its own — it helps the next record mix in smoothly while still carrying that unmistakable jungle / DnB identity. When you control the intro with creative macro moves, you turn a simple loop into a proper performance-ready DJ tool 🎧🔥
If you want, I can also provide:

