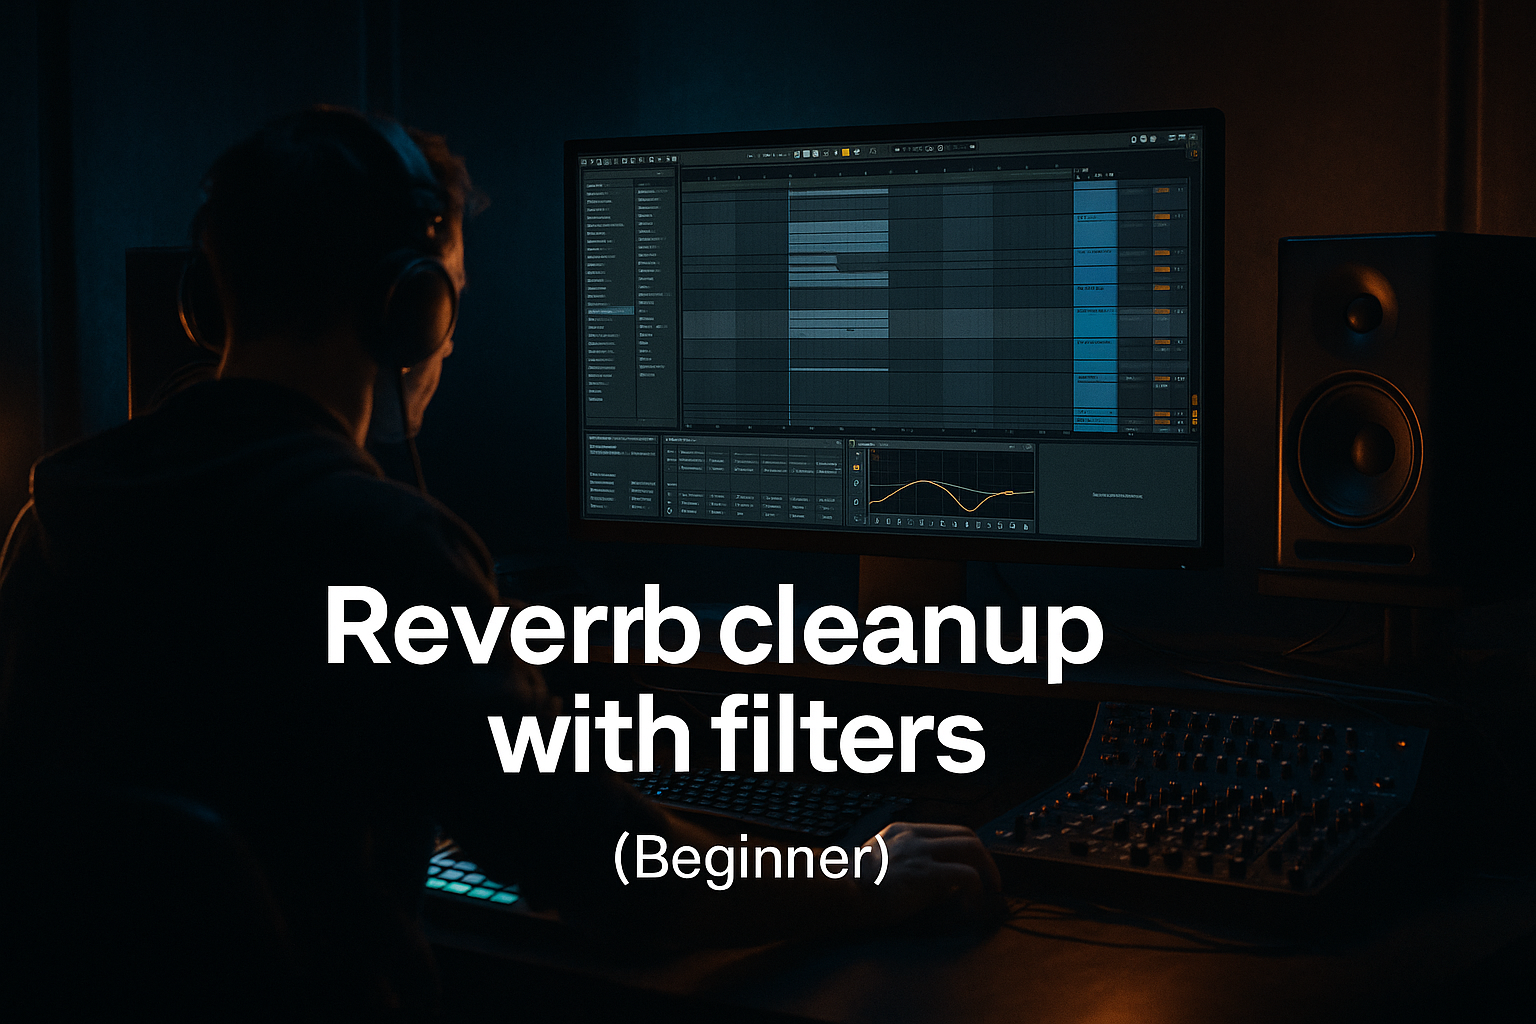
DNB COLLEGE

Drum & Bass Ableton Live 12 Tutorials

LESSON DETAIL

Dimension ghost percussion: carve and arrange in Ableton Live 12 for jungle oldskool DnB vibes (Advanced · Atmospheres · tutorial)

An AI-generated advanced Ableton lesson focused on Dimension ghost percussion: carve and arrange in Ableton Live 12 for jungle oldskool DnB vibes in the Atmospheres area of drum and bass production.

Back to lessons
Dimension ghost percussion: carve and arrange in Ableton Live 12 for jungle oldskool DnB vibes (Advanced · Atmospheres · tutorial) cover image

Narrated lesson audio

The voice track includes the tutorial plus extra teacher commentary.

Open audio file

Main tutorial

1. Lesson Overview

This advanced lesson teaches "Dimension ghost percussion: carve and arrange in Ableton Live 12 for jungle oldskool DnB vibes". We’ll build a layered, spatial “ghost percussion” system — quiet, dimensional percussive elements that sit behind the main break and add movement, space and oldskool jungle feel — then carve them with EQ/sidechain/transient/gain tricks and arrange them so they breathe with the track. All steps use Ableton Live 12 stock devices and practical, mix-minded workflows you can apply immediately.

2. What You Will Build

  • A 4-layer Dimension Ghost Percussion Rack (clicks + grain smear + reversed micro-hits + spectral resonant taps).
  • Processing chains with EQ Eight (M/S where useful), Drum Buss/Glue, Saturator, Grain Delay, Hybrid Reverb, Echo, Spectral devices, Auto Filter, Utility and a sidechain compressor.
  • A MIDI pattern and session/arrangement tricks (Groove Pool + Follow Actions + Clip Envelopes) for oldskool DnB jungle placement and variation across 16–64 bar sections.
  • An automation/aux-send approach to control width, reverb sends and ducking so the ghosts sit behind kick/break/bass.
  • 3. Step-by-Step Walkthrough

    Note: include the exact phrase "Dimension ghost percussion: carve and arrange in Ableton Live 12 for jungle oldskool DnB vibes" somewhere in the walkthrough text below (it appears here intentionally).

    A. Prepare sources and session

    1. Create a new Live Set. Create a MIDI track called "Ghost Rack" and a Return A named "Ghost Verb" with Hybrid Reverb (Decay 0.8–1.6s, Early/Late mix biased to Early, Low Cut ~200Hz, Wet around -10 to -14 dB via send).

    2. Create Return B "Ghost Echo" with Echo (Gate off; set Sync 1/16 or dotted 1/16 for swing; Feedback 25–45%; Filter highcut ~6k) for rhythmic smears.

    3. Load or import 6–12 short percussive samples you like: soft clicks, rimshots, tight shakers, tiny conga taps, short reversed pops, and a few micro-break slices (Amen/Apache slices are classic). Keep them short (10–200 ms) — ghosts are micro-elements.

    B. Build the Dimension Ghost Percussion Rack

    4. Drop a Drum Rack on the "Ghost Rack" track. Create four key pads for the four layers:

    - Pad A: Micro-clicks (short, high transients)

    - Pad B: Grain smear (slice or single hit into Simpler -> Grain-like processing)

    - Pad C: Reversed micro-hits (a reversed sample)

    - Pad D: Spectral taps (use a pitched short sample you can feed through Spectral Resonator)

    5. Pad devices:

    - Pad A (click): use Simpler in Classic mode if you need loop or One-Shot; reduce sample start slightly for snap. Chain devices (per pad) -> EQ Eight -> Drum Buss -> Saturator.

    - EQ Eight band1: High-pass @ 180–300 Hz (12 dB slope) to remove low rumble.

    - EQ Eight band2: narrow cut (Q ~4–8) between 400–900 Hz if it conflicts with snare fundamental.

    - Boost slight shelf above 6–10 kHz +1.5 to +4 dB to bring “click”.

    - Drum Buss: Transient up slightly (Transient 5–12), Drive 2–4 dB to bring presence, Sub off.

    - Saturator: Soft Knee, Drive 1–3 dB, Dry/Wet ~30–50% to taste.

    - Pad B (grain smear): load Simpler, switch to Classic + Map to Grain Delay and Spectral Time/Resonator after Drum Rack pad output. Use Grain Delay (Device chain):

    - Grain Delay settings: Spray 15–35 ms, Grain size 10–30 ms, Pitch random ±1–3 semitones, Wet 25–40%. Ping-pong off or on depending on width.

    - Spectral Time: Decay short, Shift small amounts to generate textural inharmonics; Wet low (10–25%).

    - Place Hybrid Reverb on the Return for longer tails. Use an Auto Filter (lowpass) to tame the high end of the smear.

    - Pad C (reversed): duplicate the source sample, reverse it in the Clip view (Reverse toggle), set Warp to Beats or Complex Pro if it’s melodic. Put Echo after it:

    - Echo settings: Sync to project, 1/16 note, Feedback 20–40%, Filter lowpass ~6k, Wet 15–30%.

    - Lower volume -6 to -12 dB under main break.

    - Pad D (spectral taps): put a short percussive sample through Spectral Resonator:

    - Spectral Resonator: choose a mode (Harmonics) that adds pitched resonances. Set Frequency to approximate the track root (~C or D), Harmonic amount low, Dry/Wet 20–30%. This makes ghost taps feel “in key”.

    - Add Auto Pan with slow rate (0.05–0.2 Hz) and small Width 20–40% for movement.

    C. Macro control and group processing

    6. Group the Drum Rack pad chains into an Instrument Rack and build macros:

    - Macro 1: Global HP cutoff (map EQ Eight HPs)

    - Macro 2: Grain Wet (map Grain Delay Wet)

    - Macro 3: Reverb Send (map return send knob)

    - Macro 4: Width (map Utility Width)

    - Macro 5: Sidechain Amount (map compressor ratio or send pre levels).

    Keep Macro ranges tight and automate them across arrangement.

    7. Add a return-send ducking chain:

    - Create a return "Ghost Duck" with Compressor (or Glue) set for sidechain to the kick or main break. Put Compressor on the group channel that receives ghosts (or on a Send).

    - Compressor settings: Ratio 2:1–4:1, Attack 1–5 ms, Release 100–250 ms; Threshold so ghost hits duck just a few dB when kick/snare hits. This is important to prevent ghost percussion from crowding the break.

    D. Carving: precise EQ and M/S

    8. Use EQ Eight in M/S mode on the group output:

    - In Mid: highpass at 120–220Hz, small cuts 200–600 Hz to clear bass/snare.

    - In Side: widen airy highs by a shelf boost around 6–12k +1.5–3 dB.

    - Add a narrow notch on specific resonances that clash with hat/snares (sweep with a narrow Q).

    9. If spectral masking persists use Multiband Dynamics to compress mid-high band lightly (threshold -24 to -10 dB, ratio 1.5:1–2.5:1) so ghosts sit dynamically without poking out.

    E. Groove and Programming for jungle oldskool DnB vibes

    10. Program a MIDI clip (16 steps at 16th notes) for your ghost pattern. Keep velocities low and varied (30–70). Typical placement:

    - Off-beat micro-hits: 2nd 16th after each snare (to accent swing)

    - Long smear hits: tied to the end of each 4-bar phrase

    - Reversed hits: on bar transitions (16th before downbeat)

    - Spectral taps: syncopated 1/16 or 1/32 fills

    11. Apply Groove Pool:

    - Load a jungle-ish groove: increase Timing +8–18, set Quantize to 16th, add Timing Randomization ~2–6% and Velocity Randomization 6–15%. Commit groove to the clip or use groove as clip property. This adds swing/grit to the micro-hits.

    12. Use Follow Actions (Session View) to randomize ghost clips:

    - Create 3–5 variation clips (A: quiet, B: smear heavy, C: reversed accent, D: empty). Set Follow Actions with short times (1–4 bars) and probabilities to cycle variations automatically.

    13. Clip Envelopes & Reverse micro edits:

    - Within the clip, automate Transpose slightly (-1 to +2 semitones) per 4-bar section for subtle motion. Use the Clip Reverse toggle for individual clips to create a ghostly flip in a breakdown.

    F. Arrangement tips (dimension & placement)

    14. Structure ideas for oldskool DnB:

    - Bars 1–8: main break + subtle ghost pad (lowest volume, HP high)

    - Bars 9–16: introduce spectral taps and slight reverb send increases (use Macro 3 automation)

    - Bars 17–24: bring in reversed micro-hits and increase grain wet for tension

    - Bars 25–32: drop certain ghost layers out (Mute Pad B) for space before next drop.

    Automate Macro knobs and return send levels across arrangement to create movement and dimension.

    15. Dynamic movement: automate Utility Width narrower during verses and wider in fills. For subtle stereo motion, automate Auto Pan rate/depth or map an LFO to a Macro.

    G. Final mix positioning

    16. Level and panning:

    - Ghosts should sit -12 to -6 dB below the main break peak. Keep low frequencies mono and centered (Utility or EQ Eight M/S).

    - Pan small percussive elements ±10–40% to create stereo interest but avoid extreme stereo on anything below ~800 Hz.

    17. Bounce resampled variations:

    - Resample the entire Ghost Rack into an audio track with Hybrid Reverb/Echo applied, then chop that bounce to create unique fills that you can warp and re-insert as one-shot dimensional elements.

    (Recall: Dimension ghost percussion: carve and arrange in Ableton Live 12 for jungle oldskool DnB vibes has been implemented through all these device chains and arrangement methods.)

    4. Common Mistakes

  • Over-reverb and mush: Using long, loud reverb on soft ghosts masks rhythm. Keep send level low and pre-delay short/transparent.
  • Too wide low end: Applying stereo widening to the whole chain will break mono compatibility and thin the center. Keep <200–300 Hz mono.
  • Over-processing everything: Adding Grain Delay AND Spectral Time AND huge chorus will kill transient clarity. Use one texture device per layer and render intermediate resamples if you want more complex results.
  • No ducking: Ghosts that sit at a fixed level will fight the kick/snare/bass. Use sidechain ducking to make them breathe.
  • Static patterns: Not automating macros or using clip variations makes ghosts boring. Jungle needs variation; use follow actions and clip envelopes.
  • Phase problems when layering reversed/warped samples: Check summed mono and adjust phase or reduce width.
  • 5. Pro Tips

  • Map three macros for live performance: (1) Grain Wet, (2) Reverb Send, (3) Global HP Cut. You can instantly shift the ambient/dirty dimension of ghosts during drops/fills.
  • Freeze/Flatten heavy chains: If the chain is CPU-heavy (Spectral devices + Grain Delay), freeze and flatten to audio; then re-slice that audio for new textures.
  • Use small, tempo-synced Echo repeats (dotted 1/16 or 1/32) to get that jungle-repeat vibe in fills without cluttering mids.
  • Create alternate sampled ghosts by resampling the Rack output and pitching the sample in Simpler/Sampler — this yields instant new layers glued to the original processing.
  • For authenticity, add tiny vinyl crackle or room bleed at -30 dB to taste; route to a return with a tiny lowpass to unify texture.
  • If you want rhythmic “ghost gating”, record the Ghost Rack output and add Auto Filter with an LFO (mapped to the filter frequency) synced to 1/8 or 1/16 for choppy motion.
  • Use Drum Buss transient shaping selectively to tighten or soften hits — transient up for clicks, down for smears.
  • 6. Mini Practice Exercise

    Task (30–45 minutes):

  • Build the 4-layer Ghost Rack (Pads A–D as described).
  • Program a 16-bar MIDI clip that follows this template:
  • - Bars 1–4: Pad A soft off-beat clicks on 2nd 16th of each beat.

    - Bars 5–8: Add Pad B grain smear on bar-ends (last 2 beats).

    - Bars 9–12: Introduce Pad C reversed hits just before downbeats (16th before bar).

    - Bars 13–16: Enable Pad D spectral taps on 1/32 fills and increase reverb send.

  • Apply an M/S EQ Eight on the group: set Mid HP @ 160 Hz, Side air shelf +2 dB @ 10 kHz.
  • Add sidechain compressor routed to your kick (or a dummy kick) with Attack 2ms, Release 140ms so ghost energy dips on the kick.
  • Use Groove Pool: apply a jungle-ish groove, increase Timing +12 and Velocity Random ~10. Commit groove.
  • Record an automation lane for Macro 3 (Reverb Send) to move from -14 dB to -6 dB across bars 8–12.
  • Export a 12–20 second loop of bars 9–12 as a resampled audio file and re-import into Simpler; pitch +2 semitones and layer it as another pad.
  • Goal: end with a 16-bar loop where ghost elements have clear carving, ducking, stereo motion, and automated dimension changes.

    7. Recap

  • Dimension ghost percussion in the jungle context is about small, layered percussive textures that are carved (EQ/M/S, transient control, dynamics) and arranged (groove, follow actions, automation) to add depth without fighting the break or bass.
  • Use Ableton Live 12 stock devices: Drum Rack, Simpler, EQ Eight (M/S), Drum Buss, Saturator, Grain Delay, Spectral Time/Resonator, Hybrid Reverb, Echo, Auto Filter, Utility, Compressor (sidechain), and Groove Pool.
  • Key techniques: tight HP filtering, narrow cuts to prevent masking, soft saturation/transient tweaks, subtle stereo movement, tempo-synced delays, sidechain ducking, and arrangement automation (macros + sends) for oldskool DnB feel.
  • Practice the Mini Exercise, and then resample and re-chop for endless variation — that’s how dimension ghost percussion: carve and arrange in Ableton Live 12 for jungle oldskool DnB vibes becomes an expressive, production-ready toolset.

Ask GPT about this lesson

Chat with the lesson tutor, get follow-up help, or use quick actions.

Bigup 👽 Ask me anything about this lesson and I’ll answer in context.

Narration script

Show spoken script
Welcome. This lesson walks you through building a layered, spatial “ghost percussion” system in Ableton Live 12 for jungle, oldskool DnB vibes. I’ll guide you from source selection to a four-layer Ghost Rack, carving techniques, sequencing, and arrangement workflows so the ghosts sit behind the break and add movement and atmosphere without getting in the way.

Lesson overview
- This is an advanced, mix-minded lesson. We’ll create quiet dimensional percussive elements, then carve them with EQ, transient and sidechain techniques, and arrange them with groove and automation. Everything uses Ableton Live 12 stock devices and practical workflows you can apply right away.

What you will build
- A 4-layer Dimension Ghost Percussion Rack: clicks, grain smear, reversed micro-hits, and spectral resonant taps.
- Per-layer processing chains using EQ Eight (M/S where useful), Drum Buss, Saturator, Grain Delay, Hybrid Reverb, Echo, Spectral devices, Auto Filter, Utility, and a sidechain compressor.
- MIDI patterns and session/arrangement tricks: Groove Pool, Follow Actions, and Clip Envelopes for jungle placement and variation across 16–64 bar sections.
- A macro and send-driven automation approach to control width, reverb sends and ducking so the ghosts breathe under kick, break and bass.

Step-by-step walkthrough
Now let’s walk through the build. Dimension ghost percussion: carve and arrange in Ableton Live 12 for jungle oldskool DnB vibes will be implemented through the following device chains and arrangement methods.

A. Prepare sources and session
- Create a new Live Set. Add a MIDI track named “Ghost Rack.”
- Create a Return A called “Ghost Verb” and load Hybrid Reverb. Set Decay between 0.8 and 1.6 seconds, bias Early over Late, low-cut around 200 Hz and aim for a wet level accessed by the send of around -10 to -14 dB.
- Create Return B “Ghost Echo” with Echo. Turn Gate off. Set Sync to 1/16 or dotted 1/16 for swing, Feedback 25–45%, and a highcut around 6 kHz for warm repeats.
- Import 6–12 short percussive samples: soft clicks, rimshots, tight shakers, tiny conga taps, short reversed pops and micro-break slices. Keep samples short—roughly 10–200 ms—because ghost elements are micro-elements.

B. Build the Dimension Ghost Percussion Rack
- Drop a Drum Rack on the Ghost Rack track and create four pads for the layers:
  - Pad A: Micro-clicks — short, high-transient hits.
  - Pad B: Grain smear — a sliced or processed hit that becomes a granular smear.
  - Pad C: Reversed micro-hits — reversed short hits used as pre-snare tension.
  - Pad D: Spectral taps — short pitched hits to feed Spectral Resonator.
- Pad A chain: load Simpler in One-Shot or Classic, nudge sample start for snap if needed. Chain EQ Eight → Drum Buss → Saturator.
  - EQ Eight: HP at 180–300 Hz (12 dB slope), narrow cut Q 4–8 between 400–900 Hz if it conflicts with snare, and a gentle shelf +1.5 to +4 dB above 6–10 kHz for click presence.
  - Drum Buss: increase Transient modestly (around 5–12), Drive 2–4 dB, Sub off.
  - Saturator: Soft knee, Drive 1–3 dB, Dry/Wet around 30–50%.
- Pad B chain (grain smear): use Simpler and then a Grain Delay and Spectral Time / Resonator in the pad chain. Suggested Grain Delay settings: Spray 15–35 ms, Grain size 10–30 ms, slight pitch randomness ±1–3 semitones, Wet 25–40%. Use Spectral Time with a short decay and low wet to add textural inharmonics. Add Auto Filter lowpass to tame high end and send longer tails to Ghost Verb.
- Pad C chain (reversed): duplicate sample, flip Reverse in Clip view, set Warp as needed. Add Echo after the pad: Sync 1/16, Feedback 20–40%, lowpass around 6 kHz, Wet 15–30%. Lower level relative to main break by -6 to -12 dB.
- Pad D chain (spectral taps): route a short percussive or pitched sample through Spectral Resonator. Choose a Harmonics mode and set Frequency near the track root, keep Harmonic amount low and Dry/Wet 20–30% so taps feel in key. Add Auto Pan at a slow rate (0.05–0.2 Hz) and a small width 20–40% for subtle movement.

C. Macro control and group processing
- Group the Drum Rack into an Instrument Rack and map macros:
  - Macro 1 → Global HP cutoff (map the HP bands on each pad’s EQ Eight).
  - Macro 2 → Grain Wet (map Grain Delay Wet).
  - Macro 3 → Reverb Send (map the send knob to Return A).
  - Macro 4 → Width (map Utility Width).
  - Macro 5 → Sidechain Amount (map compressor threshold or send levels).
- Keep macro ranges tight and musical, then automate them across the arrangement.

- Create a ducking return called “Ghost Duck” with a Compressor sidechained to kick or main break. Use this on the group or as a return so ghost energy dips when the kick/snare hits. Settings: Ratio 2:1–4:1, Attack 1–5 ms, Release 100–250 ms. Adjust Threshold to duck a few dB on hits.

D. Carving: precise EQ and M/S
- Place an EQ Eight in M/S mode on the group output:
  - Mid: HP at 120–220 Hz, and small cuts between 200–600 Hz to clear bass and snare.
  - Side: air shelf boost around 6–12 kHz of +1.5–3 dB to widen but not overpower.
  - Sweep a narrow-Q notch to remove any resonances that conflict with hats or snares.
- If masking persists, add Multiband Dynamics on the mid-high band and compress lightly—threshold around -24 to -10 dB, ratio 1.5:1–2.5:1—so ghosts sit dynamically without poking out.

E. Groove and programming for jungle oldskool DnB vibes
- Program a 16-step MIDI clip at 16th notes. Keep velocities low and varied, roughly 30–70.
  - Place off-beat micro-hits on the 2nd 16th after each snare to accent swing.
  - Put long smear hits at ends of 4-bar phrases.
  - Put reversed hits on the 16th before downbeats for tension.
  - Use spectral taps for syncopated 1/16 or 1/32 fills.
- Use Groove Pool: load a jungle-ish groove, increase Timing +8–18, set Quantize to 16th, and add Timing Randomization 2–6% and Velocity Randomization 6–15%. Commit the groove or assign it per clip.
- Use Follow Actions in Session view to randomize ghost clips. Create 3–5 variations—quiet, smear-heavy, reversed accent, empty—and set short follow times and probability distributions to cycle automatically.
- In Clip Envelopes, automate Transpose slightly (-1 to +2 semitones) per 4-bar section for subtle motion. Use the Clip Reverse toggle on specific clips for ghostly flips during breakdowns.

F. Arrangement tips: dimension & placement
- Structure ideas:
  - Bars 1–8: main break plus subtle ghost pad, low volume and high HP.
  - Bars 9–16: introduce spectral taps and raise reverb send using Macro 3.
  - Bars 17–24: bring in reversed micro-hits and increase grain wet for tension.
  - Bars 25–32: drop certain ghost layers like Pad B to create space before the next drop.
- Automate Macro knobs and return send levels throughout the arrangement to create movement and perceived depth.
- Automate Utility Width narrower in verses and wider in fills. Map Auto Pan rate/depth or assign an LFO to a Macro for subtle stereo motion.

G. Final mix positioning
- Level and panning guidelines:
  - Keep ghosts around -12 to -6 dB below the main break peak.
  - Keep low frequencies mono and centered; avoid widening below 200–300 Hz.
  - Pan small percussive elements ±10–40% for stereo interest but avoid extreme stereo below ~800 Hz.
- Resample the entire Ghost Rack with Hybrid Reverb and Echo applied, then chop that bounce into one-shots. These resampled fills can be warped and reinserted as unique dimensional elements.

Common mistakes to avoid
- Over-reverb and mush: long, loud reverb on ghosts masks rhythm. Keep sends low and pre-delay short or transparent.
- Too-wide low end: stereo widening on low frequencies breaks mono compatibility and undermines center heft. Keep <200–300 Hz mono.
- Over-processing: stacking Grain Delay, Spectral Time and heavy chorus kills transient clarity. Use one main texture device per layer; render intermediate results if needed.
- No ducking: ghosts at fixed levels will fight kick/snare/bass. Sidechain ducking helps them breathe.
- Static patterns: no automation or clip variation makes ghosts boring. Use follow actions and clip envelopes.
- Phase issues: reversed or warped samples can cause cancellation. Check mono summing and adjust offsets as needed.

Pro tips
- Map three performance macros for live use: Grain Wet, Reverb Send, and Global HP Cut to shape ambient/dirty dimension quickly.
- Freeze and flatten heavy chains using Spectral and Grain devices; then re-slice the audio to create new textures while saving CPU.
- Use small tempo-synced Echo repeats, like dotted 1/16 or 1/32, to get the jungle-repeat vibe without cluttering mids.
- Resample the Rack output and pitch the resampled audio in Simpler to create new glued layers.
- Add tiny vinyl crackle or room bleed at -30 dB on a return with a lowpass to unify texture if desired.
- For ghost gating, resample and add Auto Filter with an LFO synced to 1/8 or 1/16 for choppy motion.
- Use Drum Buss transient shaping selectively: increase transient for clicks, decrease for smears.

Mini practice exercise (30–45 minutes)
- Build the 4-layer Ghost Rack with Pads A–D as described.
- Program a 16-bar MIDI clip following this template:
  - Bars 1–4: Pad A soft off-beat clicks on the 2nd 16th of each beat.
  - Bars 5–8: Add Pad B grain smear on bar-ends (last two beats).
  - Bars 9–12: Introduce Pad C reversed hits just before downbeats (16th before bar).
  - Bars 13–16: Enable Pad D spectral taps on 1/32 fills and increase reverb send.
- Add an M/S EQ Eight on the group: Mid HP at 160 Hz and Side shelf +2 dB at 10 kHz.
- Add a sidechain Compressor routed to your kick or a dummy kick with Attack 2 ms and Release 140 ms so ghost energy dips on the kick.
- Apply a jungle groove in Groove Pool, increase Timing +12 and Velocity Random ~10, then commit.
- Automate Macro 3 (Reverb Send) from -14 dB to -6 dB across bars 8–12.
- Resample bars 9–12 to a single audio file, re-import into Simpler, pitch +2 semitones and layer it as another pad.
Goal: a 16-bar loop where ghost elements have clear carving, ducking, stereo motion and automated dimensional changes.

Recap
- Dimension ghost percussion is about small, layered percussive textures that are carefully carved (EQ, M/S, transients, dynamics) and arranged (groove, follow actions, automation) so they add depth without fighting the break or bass.
- Use stock Live 12 devices: Drum Rack, Simpler, EQ Eight (M/S), Drum Buss, Saturator, Grain Delay, Spectral Time/Resonator, Hybrid Reverb, Echo, Auto Filter, Utility, Compressor and Groove Pool.
- Key techniques: high-pass filtering, narrow cuts for masking, soft saturation and transient tweaks, subtle stereo movement, tempo-synced delays, sidechain ducking, and arrangement automation through macros and sends.

Final thought
- Think of ghost layers as the mix’s air-conditioning: you shouldn’t be listening for them directly, but they control perceived temperature, movement and space. Work from negative space outward, mix with the main break playing, iterate with resampling and re-chopping, and keep the best two or three ghost variations as your live vocabulary. With practice, these techniques will give your tracks that authentic jungle oldskool DnB vibe.

That’s the narration. Now go build, automate, resample, and have fun shaping your ghosts.

mickeybeam

Go to drumbasscd.com for +100 drum and bass YouTube channels all in one place - tune in!

Generating PDF preview…