DNB COLLEGE

Drum & Bass Ableton Live 12 Tutorials

LESSON DETAIL

Digital edit: resample a city ambience from scratch in Ableton Live 12 for modern punch and vintage soul (Intermediate · Automation · tutorial)

An AI-generated intermediate Ableton lesson focused on Digital edit: resample a city ambience from scratch in Ableton Live 12 for modern punch and vintage soul in the Automation area of drum and bass production.

Back to lessons
Digital edit: resample a city ambience from scratch in Ableton Live 12 for modern punch and vintage soul (Intermediate · Automation · tutorial) cover image

Narrated lesson audio

The voice track includes the tutorial plus extra teacher commentary.

Open audio file

Main tutorial

1. Lesson Overview

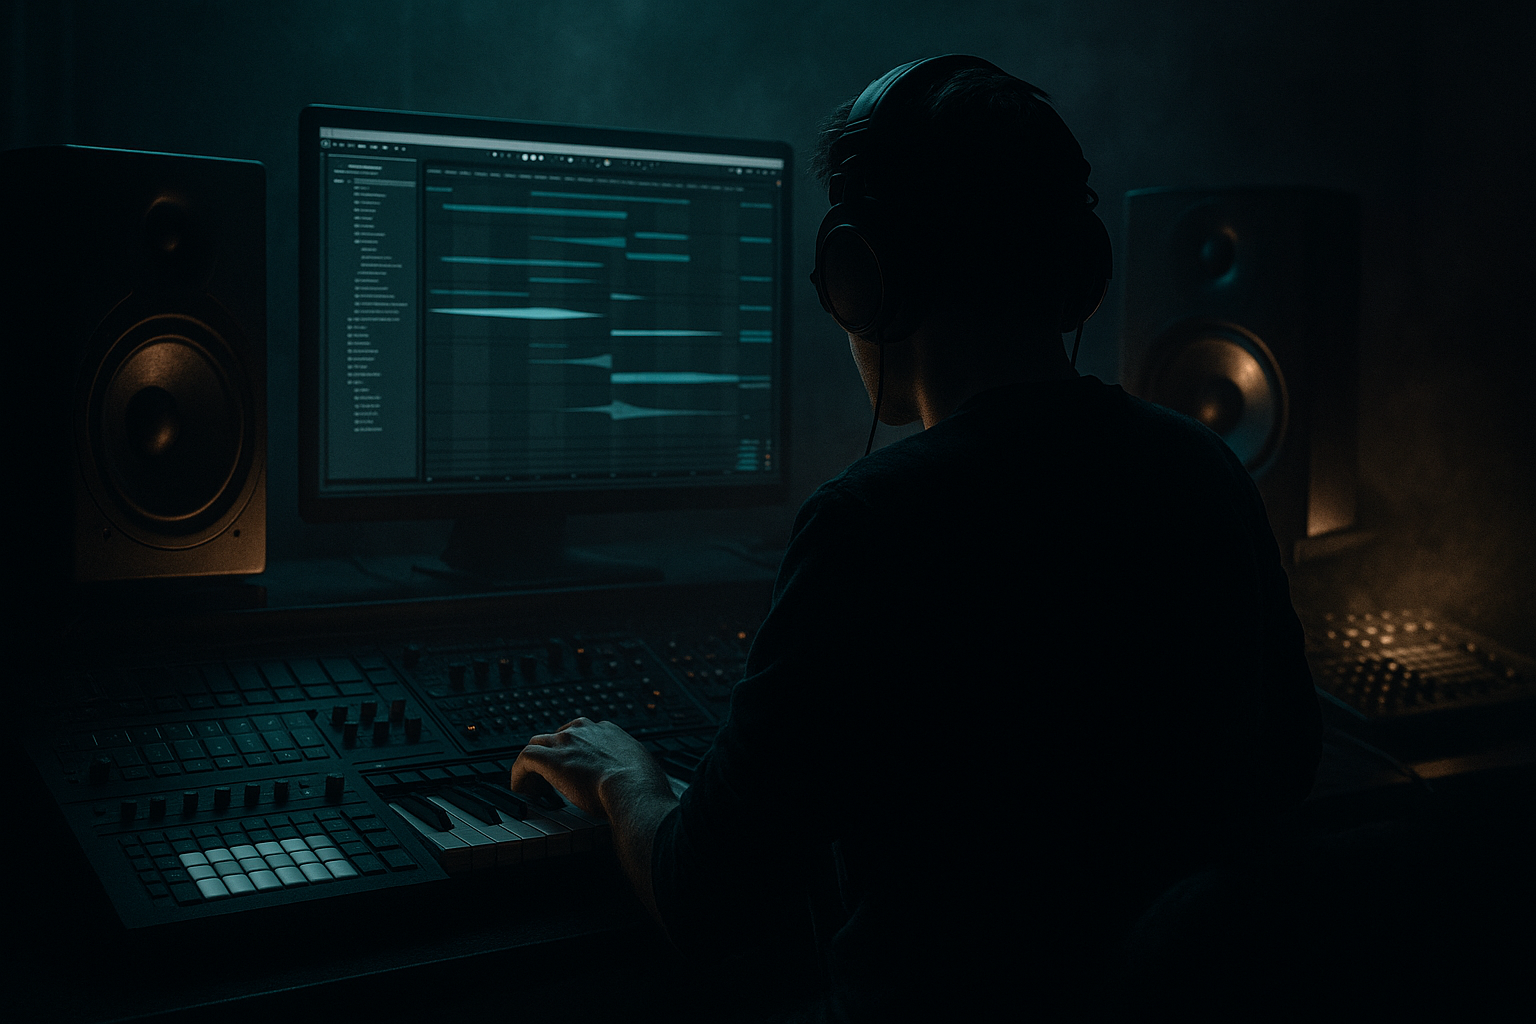
This intermediate Automation lesson teaches you how to perform a focused digital edit: resample a city ambience from scratch in Ableton Live 12 for modern punch and vintage soul. You’ll build an ambience texture inside Live using stock devices and samples, resample (print) it to audio, and then use automation (device and track/clip envelopes) to shape punch, transient presence, stereo motion, and warm vintage character suitable for Drum & Bass production.

2. What You Will Build

  • A layered city ambience (cars, distant crowd, mechanical hits, filtered hum and hiss) created inside Ableton Live 12 using stock synth/sampler/signal-processing devices.
  • A printed/resampled stereo audio file of that ambience.
  • Automation-driven processing on the resample to deliver contemporary punch (tight low-mid energy and transient clarity) plus vintage soul (tape-like warmth, subtle wow, and lo-fi charm).
  • A short workflow you can drop under a Drum & Bass loop and tweak with automation to sit with the drums and bass.
  • 3. Step-by-Step Walkthrough

    Note: The phrase "Digital edit: resample a city ambience from scratch in Ableton Live 12 for modern punch and vintage soul" describes the full workflow you’ll complete below — building the source, resampling it, and applying automation-based processing.

    A. Session Setup (5–10 minutes)

  • Create a new Live Set. Set BPM to your DnB tempo (e.g., 174 BPM).
  • Create a Group Track and name it “CITY SOURCES”. This group will hold all layers that form the ambience.
  • Create three audio or MIDI tracks inside the group:
  • 1. Traffic/Found (Audio) — import single-shot city recordings (car pass, bus idling, door slam). Use one-shots or loops.

    2. Mechanical/Metallic (Simulated) — a MIDI track with Wavetable or Operator to make low metallic thuds and distant mechanical tones (short percussive FM + sine sub).

    3. Air/Hiss/People (Synth) — Simpler/Analog/Wavetable with filtered noise for hiss, and a sparse vocal crowd sample (if you have legal samples).

    Use only Ableton stock devices: Simpler, Wavetable, Operator, Sampler (if available), EQ Eight, Saturator, Redux, Grain Delay, Echo, Auto Filter, Compressor/Glue Compressor/Drum Buss, Utility, Reverb/Echo.

    B. Sound Design — build layers “from scratch” inside Live (15–25 minutes)

  • Traffic/Found track:
  • - Import a car-pass recording. Warp to project tempo if it’s looping slightly.

    - Use Clip Transpose to pitch a few semitones down for weight.

    - Insert EQ Eight: high-pass at ~40 Hz (clean sub), gentle dip 300–500 Hz to reduce boxiness.

    - Insert Grain Delay (subtle) for random micro-movement: set Delay to 0–15 ms, Spray small, Pitch 0, Feedback 0. Automate Dry/Wet later.

  • Mechanical/Metallic track:
  • - Program short MIDI hits in Operator (sine + FM) for distant engine thumps.

    - Use Enveloper (clip or device) to make short decay.

    - Add Saturator with Soft Clip on, Drive ~2–4 dB; automate drive during certain hits to accentuate transient punch.

  • Air/Hiss/People track:
  • - Use Simpler loaded with white noise or a crowd loop at low level.

    - Put Auto Filter with low resonance and lowpass ~6 kHz to tame sibilance.

    - Add Echo (long slightly modulated delay) set very wet on a return to create spaciousness.

    C. Group Fader and Pre-Resample Balancing (5 minutes)

  • Balance levels inside CITY SOURCES group so the texture sits at a comfortable level (-6 to -12 dB RMS).
  • Insert a Glue Compressor on the group with subtle settings: Ratio 2:1, Attack 10 ms, Release 0.2 s, 1–2 dB gain reduction to glue layers.
  • Add Utility at the end of the group for quick stereo width automation later.
  • D. Resampling (printing) — two clean methods (2–3 minutes)

    Method 1: Record only the group

  • Create a new Audio Track named “AMBIENCE_RESAMPLE”.
  • Set Audio From to your CITY SOURCES group (choose the group track in the drop-down).
  • Arm the track for recording and set Monitor to “In” or “Auto”.
  • Mute everything else or solo the group then press Arrangement Record to capture a take (record 8–32 bars).
  • Method 2: Resampling the entire master (if you want master processing printed)

  • Create Audio Track “MASTER_RESAMPLE”.
  • Set Audio From to “Resampling”.
  • Solo CITY SOURCES and record in Arrangement or Session view.
  • Tip: Use punch-in recording points or set loop-record to comp multiple passes. Name your takes and drop them into a “Prints” folder.

    E. Core Automation Edits on the Resampled Audio (30–40 minutes — Automation focus)

    Load the resampled clip into the AMBIENCE_RESAMPLE track and do the following automation passes. For each step, open the track’s automation lane (A) and the Device parameter lane as needed.

    1) Cut for punch (automation target: EQ Eight & Utility)

  • Add EQ Eight after the clip.
  • Create automation for a Low-Shelf boost (or a narrow band) around 80–150 Hz: automate a gentle bump (+1.5–3 dB) during drum hits or when you need warmth. Use short rises (10–30 ms attack) on the automation curve to avoid pumping.
  • Automate a dynamic high-cut: sweep a lowpass (EQ Eight lowpass or Auto Filter) from ~14 kHz down to ~8–10 kHz during verses, and open back in drops. This removes sibilance when vocals/bass are upfront and brings back air in breakdowns.
  • 2) Transient/punch shaping (automation target: Drum Buss / Compressor / Dry/Wet)

  • Insert Drum Buss after EQ Eight; use Drive lightly for gain and push, and transient knob to emphasize attack.
  • Automate Drum Buss “Transient” or “Drive” (device parameter) in sections where the ambience should hit harder (e.g., pre-drop swells). For modern punch, raise Transient slightly before main drum hits and lower after.
  • Alternatively, automate Compressor threshold for sidechain-like ducking if you want ambience to make room for kick: set Compressor to sidechain from Kick, then automate the Compressor’s Dry/Wet or Threshold to change how much the ambience ducks.
  • 3) Vintage soul character (automation target: Saturator, Redux, Echo)

  • Add Saturator after Drum Buss and automate Drive: keep low Drive for background, briefly increase on key hits to get harmonic warmth.
  • Add Redux and automate Bitrate or Downsample Amount in small doses (0–10%) at moments to create glitchy vintage moments. Automate the Dry/Wet of Redux to make it subtle.
  • Add Echo on a send or directly; automate Feedback and Dry/Wet for tape-delay-like repeats at phrase ends.
  • 4) Stereo movement and wow/flutter (automation target: Utility, Grain Delay, Pitch)

  • Insert Utility. Automate Width from narrower (70%) for verses, to wider (120–140%) for breathy breakdowns. For subtle wobble, automate Width with long slow curves.
  • Add Grain Delay or small pitch automation on small clip slices to simulate tape flutter: automate the Grain Delay Pitch and Spray params in 8–16 bar cycles to create a vintage unstable feeling.
  • For a true wow effect, duplicate the resampled track, detune the duplicate clip by ±3–7 cents using Clip Transpose and automate its volume to crossfade in/out (simulating double-tracked tape).
  • 5) Spatial automation (automation target: Send to Reverb/Aux)

  • Create a return track with Reverb (long, warm plate or hall). Automate Send amount from the resampled track: low baseline send (10–20%), brief send spikes for washes.
  • Automate Reverb Decay (if device supports it) or send more to a separate send with longer decay for extra pronounced moments.
  • 6) Final level automation and master integration

  • Automate the AMBIENCE_RESAMPLE track volume to duck under the snare or bassline, but bump up in pre-drop fills.
  • If you resampled the MASTER, automate macro controls (Macro 1 = saturation, Macro 2 = width) to quickly morph between vintage and modern textures during arrangement sections.
  • F. Using Clip Envelopes for micro edits (optional, powerful)

  • Warp the resampled clip, enable transposition envelopes (Clip > Envelopes > Pitch), then draw small pitch bends (-5 to +5 cents) to animate motion across 8–16 bar phrases.
  • Use clip volume envelopes for rhythmic gating: set gentle rhythmic dips synced to the beat to create percussive breathing.
  • G. Bussing to drums (integration)

  • Add a sidechain compressor on the ambience track with the Drum Buss or Compressor receiving the Kick bus as the sidechain input, and automate the Amount/Threshold so the ambience breathes with the drums — punch maintained, ambience preserved.
  • 4. Common Mistakes

  • Resampling the whole master accidentally: If you only want the ambience, set Audio From to the CITY SOURCES track, not “Resampling” of the whole master, unless you intend to print master FX.
  • Over-automation clutter: Automating too many tiny parameters simultaneously can create unnatural movement. Prioritize a few key parameters (cutoff, saturation, width, send) and automate them meaningfully.
  • Heavy low-boost without cleaning: Boosting low mids for “warmth” without high-pass filtering unwanted rumble will muddy the mix. Always HPF below ~30–40 Hz.
  • Overdoing Redux/bit reduction: Too much bitcrush ruins the ambience. Automate Dry/Wet and keep it subtle.
  • Forgetting to check phase/stereo compatibility: Wide automation or detuning duplicates can cause phase issues. Check in mono and use Utility to collapse to mono for verification.
  • 5. Pro Tips

  • Automate groups, not only individual clips: For consistent movement, map macro controls on a Rack (e.g., Macro1 = Saturation, Macro2 = Width) then automate the Macros — fewer lanes, easier recall.
  • Use short automation ramps to mimic performance: 10–40 ms ramps for transient emphasis, 0.5–4 s ramps for breathing width changes.
  • Print multiple passes with different macro states: e.g., print one fully clean resample and one saturated/vintage resample, then crossfade between them using automation in the arrangement for maximum flexibility.
  • Use subtle tempo-synced Echo or Grain Delay LFOs for rhythmic texture that locks to your DnB groove.
  • For “vintage soul” warmth, low-pass slightly and add small amounts of harmonic distortion via Saturator with the “Analog Clip” curve, automated to taste.
  • Keep a “dry” version of the resample saved — you may want to reprocess later with different automation.
  • 6. Mini Practice Exercise

  • Time: 30–45 minutes

1. Create a 16-bar CITY SOURCES group with at least 3 layers (found car pass, Wavetable low hum, Simpler noise crowd).

2. Balance and glue-compress the group (1–2 dB GR).

3. Resample the group into a new audio track (record 16 bars).

4. On the resampled clip, apply:

- EQ Eight low-shelf automation: +2 dB at 100 Hz on bars 9–12.

- Saturator Dry/Wet automation: 0% -> 40% on bars 13–16.

- Utility Width automation: 80% -> 130% across bars 1–16.

- Send to Reverb automation: send spikes on bars 8 and 16.

5. Drop a simple drum loop under it and set up a sidechain compressor on the ambience track keyed to the kick. Adjust threshold so ambience ducks ~3–6 dB when the kick hits.

6. Export the finished 16-bar resample and compare how the automation changes the feel — does it sound more “modern punch” and “vintage soul”?

7. Recap

You’ve completed a targeted Automation lesson to digitally edit and resample a city ambience from scratch in Ableton Live 12 for modern punch and vintage soul. You built layered sources inside Live, printed (resampled) the group cleanly, and applied specific automation passes (EQ, saturation, stereo width, delays/reverbs, transient shaping and sidechain) to craft a texture that breathes with your Drum & Bass arrangement. Use macros and saved prints to iterate quickly, and remember: fewer, expressive automation moves beat overly complex modulation.

Ask GPT about this lesson

Chat with the lesson tutor, get follow-up help, or use quick actions.

Bigup 👽 Ask me anything about this lesson and I’ll answer in context.

Narration script

Show spoken script
Title: Digital edit — resample a city ambience from scratch in Ableton Live 12 for modern punch and vintage soul.

Welcome. In this intermediate Automation lesson you’ll build a layered city ambience inside Ableton Live 12, print it to audio, and use device and track/clip automation to shape modern punch and a warm vintage soul. The workflow covers source design with stock Live devices, clean resampling, and targeted automation passes to control punch, transients, stereo motion, and analog-like character — all ready to sit under a Drum & Bass loop.

Lesson overview:
We’ll create three source layers — traffic/found sound, mechanical metallic hits, and air/hiss/people — using only Ableton stock devices. You’ll balance and bus them, print a resampled stereo file, then perform multiple automation passes on that resample: EQ and low-shelf moves for punch, transient shaping with Drum Buss or compression, subtle bit reduction and saturation for vintage character, plus stereo-width and wow/flutter motion with Utility, Grain Delay and detuned duplicates. Finally you’ll integrate the ambience with sidechain and arrangement automation so it breathes with your drums and bass.

What you will build:
- A layered city ambience comprised of cars, distant crowd, mechanical hits, and filtered hum and hiss.
- A printed stereo audio resample of that ambience.
- Automation-driven processing that delivers tight low-mid energy and transient clarity, plus tape-like warmth and gentle lo-fi charm.
- A short workflow you can drop under a Drum & Bass loop and tweak with automation to sit with the drums and bass.

Step-by-step walkthrough.

A. Session setup — 5 to 10 minutes
Start a new Live Set and set your BPM to your DnB tempo — 174 BPM is a good example. Create a Group Track and name it CITY SOURCES. Inside that group make three tracks:

1. Traffic / Found — an audio track for single-shot city recordings like car passes, buses, or door slams.
2. Mechanical / Metallic — a MIDI track using Wavetable or Operator to create low metallic thuds and distant mechanical tones.
3. Air / Hiss / People — a Simpler or synth track with filtered noise and a sparse low-level crowd sample, if you have legal samples.

Use only stock devices: Simpler, Wavetable, Operator, Sampler (if available), EQ Eight, Saturator, Redux, Grain Delay, Echo, Auto Filter, Compressor, Glue Compressor, Drum Buss, Utility, Reverb, and Echo.

B. Sound design — 15 to 25 minutes
Traffic / Found track:
Import a car-pass recording and warp it to project tempo if needed. Use Clip Transpose to pitch a few semitones down for added weight. Insert EQ Eight: high-pass around 40 Hz to clean the sub, and a gentle dip between 300 and 500 Hz to reduce boxiness. Add Grain Delay very subtly — Delay 0 to 15 ms, small Spray, Pitch 0, Feedback 0 — to introduce micro-movement; leave Dry/Wet for later automation.

Mechanical / Metallic track:
Program short MIDI hits in Operator, combining sine and FM elements for distant engine thumps. Shape short decay with an Enveloper or clip envelope. Add Saturator with Soft Clip on and Drive around 2 to 4 dB. Plan to automate Drive on key hits to accentuate transient punch.

Air / Hiss / People track:
Load filtered white noise or a low-level crowd loop into Simpler. Use Auto Filter with low resonance and a lowpass around 6 kHz to tame sibilance. Create space with Echo on a return track, set to a long, slightly modulated delay.

C. Group fader and pre-resample balancing — 5 minutes
Balance the CITY SOURCES group so the ambience sits around -6 to -12 dB RMS. Insert a Glue Compressor on the group with gentle settings: Ratio 2:1, Attack 10 ms, Release 0.2 s, aiming for about 1 to 2 dB of gain reduction to glue the layers. Add a Utility at the end of the group for stereo-width automation later.

D. Resampling — 2 to 3 minutes
Method 1 — record only the group:
Create a new audio track named AMBIENCE_RESAMPLE. Set Audio From to the CITY SOURCES group, arm the track for recording, and set Monitor to In or Auto. Solo the group or mute everything else and press Arrangement Record. Record between 8 and 32 bars.

Method 2 — resample the entire master:
Create MASTER_RESAMPLE, set Audio From to Resampling, solo CITY SOURCES, and record. This prints master-style processing if that’s what you want.

Tip: use loop-record or punch-ins to comp multiple passes. Name your takes and save them in a Prints folder.

E. Core automation edits on the resampled audio — 30 to 40 minutes
Load your resampled clip into AMBIENCE_RESAMPLE. Open the track’s automation lanes and follow these passes.

1) Cut for punch — automate EQ Eight and Utility
Insert EQ Eight. Automate a low-shelf bump or narrow band around 80 to 150 Hz: add 1.5 to 3 dB during drum hits or sections that need warmth. Use short automation rises of 10 to 30 ms to avoid pumping. Automate a dynamic high-cut — sweep a lowpass from about 14 kHz down to 8–10 kHz during dense sections, and open it back in drops to restore air.

2) Transient and punch shaping — automate Drum Buss, Compressor, or Dry/Wet
Insert Drum Buss after EQ Eight. Use small Drive and nudge the Transient control to accent attacks. Automate Drum Buss Transient or Drive ahead of main hits for modern punch, then relax it after. Alternatively, set a Compressor to sidechain from your kick and automate the Compressor’s Dry/Wet or Threshold to vary how much the ambience ducks.

3) Vintage soul character — automate Saturator, Redux, Echo
Add Saturator after Drum Buss and keep Drive low for background warmth, raising it briefly on key hits. Add Redux and automate Bitrate or Downsample Amount in very small increments; better yet, automate Redux Dry/Wet for subtle effect. Use Echo on a send or inline and automate Feedback and Dry/Wet at phrase ends for tape-like repeats.

4) Stereo movement and wow/flutter — automate Utility, Grain Delay, and pitch
Insert Utility and automate Width from tighter (around 70–80%) in verses to wider (120–140%) in breakdowns. Use Grain Delay parameters like Pitch and Spray and automate them slowly in 8–16 bar cycles for vintage instability. For a tape double effect, duplicate the resample, detune the duplicate by ±3 to 7 cents using Clip Transpose, and automate crossfades to bring it in and out.

5) Spatial automation — automate sends to Reverb
Create a return with a warm, long reverb. Automate the resample’s send amount: keep a low baseline of 10 to 20 percent, and create send spikes for washes at phrase ends. If your reverb allows, automate Decay for dramatic tails.

6) Final level automation and master integration
Automate the AMBIENCE_RESAMPLE track volume so it ducks under the snare or bass, and lifts in pre-drop fills. If you printed a MASTER_RESAMPLE, map macros — for example Macro 1 to saturation and Macro 2 to width — and automate those to morph textures across the arrangement.

F. Clip envelopes for micro-edits — optional and powerful
Use clip pitch envelopes to draw micro pitch bends of -5 to +5 cents over 8–16 bar phrases for motion. Use clip volume envelopes for gentle rhythmic gating, creating percussive breathing synced to the beat.

G. Bussing to drums — integration
Add a sidechain compressor on the ambience track keyed to your Kick bus. Automate the Amount or Threshold so the ambience ducks roughly 3 to 6 dB on the kick hits. This preserves punch while letting the ambience sit with the drums and bass.

Common mistakes to avoid
- Don’t resample the whole master by accident when you only want the ambience — set Audio From to the CITY SOURCES group unless you intentionally want master processing printed.  
- Avoid automating too many tiny parameters at once; prioritize a few meaningful lanes like cutoff, saturation, width, and send level.  
- Don’t boost low mids without cleaning sub rumble — high-pass at 30 to 40 Hz to keep the mix clean.  
- Keep Redux and bit reduction subtle; automate Dry/Wet rather than depth for smoother transitions.  
- Check mono stability regularly — wide detuning and phasey automation can cancel important elements.

Pro tips
- Automate macros on an Audio Effect Rack instead of dozens of lanes. Map Saturation and Width to macros and automate those for simpler recall.  
- Use short automation ramps for transient emphasis — 10 to 40 ms — and longer ramps for emotional width or reverb moves — 0.5 to 4 seconds.  
- Print multiple passes: a clean dry resample, a glued bus resample, and a master-style resample. Label them DRY_AMB, BUSS_AMB, MASTER_AMB.  
- Sync Echo and Grain Delay to your tempo for rhythmic texture that locks to your DnB groove.  
- For vintage warmth, low-pass slightly and add small harmonic distortion with Saturator using an Analog Clip curve.  
- Keep a dry version of the resample so you can reprocess later.

Mini practice exercise — 30 to 45 minutes
1. Build a 16-bar CITY SOURCES group with at least three layers: a car pass, a Wavetable low hum, and Simpler noise crowd.  
2. Balance and Glue-Compress the group for about 1 to 2 dB of gain reduction.  
3. Resample the group to a new audio track and record 16 bars.  
4. On the resampled clip, apply automation: EQ Eight low-shelf +2 dB at 100 Hz on bars 9–12; Saturator Dry/Wet from 0 to 40 percent on bars 13–16; Utility Width from 80 to 130 percent across bars 1–16; Reverb send spikes on bars 8 and 16.  
5. Drop a simple drum loop under it and set a sidechain compressor keyed to the kick so the ambience ducks about 3 to 6 dB.  
6. Export the 16-bar resample and compare — does the automation make it feel more modern and more vintage when needed?

Recap
You’ve learned how to design layered city sources in Live, balance and bus them, resample the group cleanly, and apply targeted automation to create modern punch and vintage soul. The key moves are surgical EQ and low-shelf automation for focused low energy, transient shaping with Drum Buss or compression, tasteful saturation and subtle bit reduction for warmth, and stereo motion with Utility, Grain Delay, and detuned duplicates. Use macros, save multiple prints, and prioritize a few expressive automation lanes rather than a sea of tiny changes.

Final coach notes — short checklist before you start
- Think in three layers: source design, what you commit to the print, and what you leave flexible for post-print automation.  
- Record at least three passes: dry, bus-processed, and master-processed. Name and color-code them.  
- Add small fades to avoid clicks, record extra tail space for reverb, and consolidate the clip after resampling.  
- Check your resample in mono often to avoid phase issues.  
- Save your Rack with mapped macros and store your session template for quick recall.

Keep the intent musical. Use automation to give the resample space when the kick and bass need it, to lift it for pre-drops, and to add nostalgic warmth in breakdowns. A few well-chosen automation moves will make this city ambience feel alive and perfectly suited to Drum & Bass.

That’s it — now open Live and start building your city.

mickeybeam

Go to drumbasscd.com for +100 drum and bass YouTube channels all in one place - tune in!

Generating PDF preview…