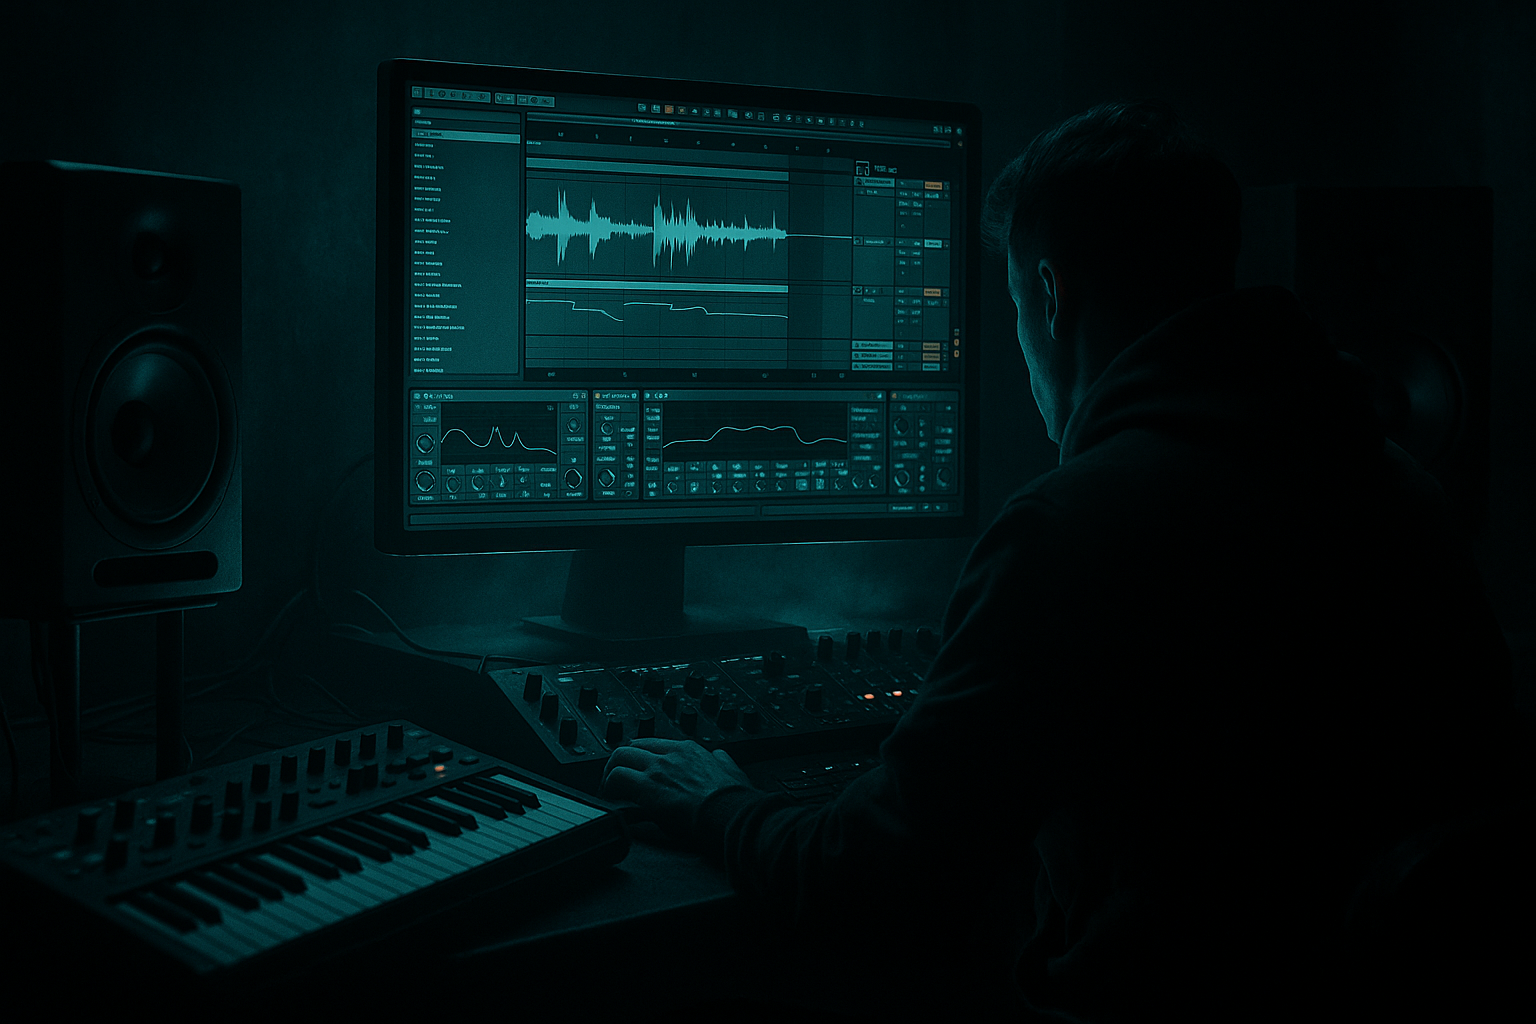
DNB COLLEGE

Drum & Bass Ableton Live 12 Tutorials

LESSON DETAIL

Deep dive for subsine with breakbeat surgery in Ableton Live 12 (Advanced)

An AI-generated advanced Ableton lesson focused on Deep dive for subsine with breakbeat surgery in Ableton Live 12 in the Sampling area of drum and bass production.

Back to lessons
Deep dive for subsine with breakbeat surgery in Ableton Live 12 (Advanced) cover image

Narrated lesson audio

The voice track includes the tutorial plus extra teacher commentary.

Open audio file

Main tutorial

Deep Dive: Sub-Sine Design with Breakbeat Surgery in Ableton Live 12 🥁🔊

1. Lesson overview

In this lesson we’re building a dark, weighty drum and bass toolchain in Ableton Live 12 that combines:

  • sub-sine bass design for clean low-end pressure
  • breakbeat surgery for detailed, modern DnB drum programming
  • sampling workflows that let you turn a single break into a whole arrangement
  • stock Ableton devices for punch, control, and movement
  • This is aimed at advanced producers, so we’ll skip the basics and focus on workflow, signal chain design, surgical editing, and arrangement discipline.

    The goal is not just “make a sub and chop a break.”

    The goal is to create a rolling, hostile, club-ready DnB loop with:

  • a tight sub layer that stays mono and stable
  • a surgically reworked break with swing, ghost notes, and variation
  • space for mid-bass, atmospheres, and FX
  • enough headroom and structure to develop into a full tune
  • ---

    2. What you will build

    By the end, you’ll have a 4-bar DnB loop built from:

    Bass

  • a pure sine sub designed in Operator or Wavetable
  • sidechain control for kick and break interplay
  • subtle saturation for audible translation on smaller systems
  • Drums

  • a chopped breakbeat sliced into Simmer / Simpler / Drum Rack
  • edited ghost hits, reversals, and micro-timing shifts
  • parallel processing for punch and grit
  • Arrangement-ready structure

  • intro with reduced drums
  • full drop with break + sub
  • fill bar with re-edited slices
  • automation-ready setup for movement and tension
  • ---

    3. Step-by-step walkthrough

    ---

    Step 1: Set the project up for DnB

    Start by creating a session designed for fast, precise editing.

    #### Tempo

  • Set tempo to 174 BPM as a starting point
  • If you lean more jungle, try 160–170 BPM
  • If you want a modern rolling feel, 174–176 BPM is the sweet spot
  • #### Time signature

  • Keep it in 4/4
  • #### Track layout

    Create these tracks:

    1. Drum Break Audio Track

    2. Sub Bass MIDI Track

    3. Mid Bass MIDI Track if needed

    4. Return A: short reverb

    5. Return B: delay / dub FX

    6. Return C: parallel crush

    Color-code them. In fast DnB sessions, visual clarity matters.

    ---

    Step 2: Pick and prep your break

    For this lesson, use a break with strong transient detail. Good candidates:

  • Amen-style breaks
  • Think-style breaks
  • Funk breaks with clean kick/snare definition
  • #### Warp correctly

    Drop the break into an audio track and:

    1. Turn Warp on

    2. Set warp mode to Complex Pro only if the break needs time-stretching with fidelity

    3. For punchy drum surgery, try Beats mode

    4. Set Preserve to around 1/16 or 1/32 depending on break density

    #### Extract the timing feel

    Listen for the break’s natural groove:

  • where the snare lands
  • whether the hats are straight or swung
  • whether the kick is slightly late
  • Don’t quantize everything to death. DnB lives in controlled irregularity.

    #### Slice strategy

    You have two strong options in Live 12:

  • Slice to New MIDI Track
  • Manually duplicate and chop in Arrangement View
  • For advanced control, I recommend:

    Option A: Slice to New MIDI Track

    Right-click the break clip → Slice to New MIDI Track

    Use:

  • Transient slicing for a more surgical result
  • 1/8 or 1/16 if the break is too chaotic and you want a tighter grid
  • This creates a Drum Rack with individual slices mapped to pads.

    Option B: Manual surgery in Arrangement View

    If you want more precise orchestration:

  • duplicate the break
  • slice regions at snare, ghost note, and kick points
  • arrange slices like a collage
  • This is better for custom fills, reverse hits, and signature edits.

    ---

    Step 3: Build a sub-sine in Operator

    For DnB, your sub should be:

  • clean
  • stable
  • mono
  • phase-consistent
  • capable of following root notes without muddying the break
  • #### Create an Operator patch

    On a MIDI track, load Operator.

    #### Basic sine setup

    In Operator:

  • Turn on Oscillator A
  • Set waveform to Sine
  • Turn off other oscillators
  • Set Filter off or fully open if unused
  • #### Envelope settings

    For a tight DnB sub:

  • Amp Attack: 0–5 ms
  • Amp Decay: medium if you want a short note, or full sustain for a rolling bassline
  • Amp Sustain: 0 dB
  • Amp Release: 30–80 ms
  • If your notes are overlapping too much, shorten release.

    If you want a smoother rolling line, let release breathe slightly.

    #### Pitch and voicing

  • Keep the sub in a comfortable range, often around G1 to G2
  • Avoid programming super-high sub notes unless they’re intentional
  • Use mono or legato behavior where appropriate
  • If using Wavetable, you can still make a sine-style sub:

  • choose a sine or basic waveform
  • keep modulation minimal
  • use a low-pass filter to remove brightness
  • route the signal cleanly
  • ---

    Step 4: Give the sub real club weight

    A pure sine is great, but on smaller systems it can vanish. We want translation without losing purity.

    #### Suggested device chain for sub

    On the sub track:

    1. EQ Eight

    2. Saturator

    3. Compressor or Glue Compressor for sidechain

    4. Optional Utility

    #### EQ Eight

  • High-pass very gently only if needed, usually off
  • Remove any unwanted upper harmonics if your synth is dirty
  • Do not boost the sub too much here
  • #### Saturator

    Add just enough harmonics to make the sub audible on smaller speakers:

  • Drive: 1–4 dB
  • Turn on Soft Clip if needed
  • Keep it subtle
  • This is especially useful if your break is dense and masks low-end fundamentals.

    #### Utility

  • Set Width = 0% to keep the sub mono
  • Use Gain to balance against the drums
  • #### Sidechain compression

    Use Compressor with sidechain from the kick, or from the drum bus if your break is kick-heavy.

    Suggested settings:

  • Ratio: 2:1 to 4:1
  • Attack: 1–10 ms
  • Release: 40–120 ms depending on groove
  • Adjust threshold for 1–4 dB of gain reduction
  • If the break already contains a strong kick, you may prefer:

  • sidechain from the kick slice
  • or manually carve space with clip envelopes and EQ
  • ---

    Step 5: Construct the breakbeat in the Drum Rack

    Once sliced, open the Drum Rack and think like a surgeon.

    You’re not just triggering slices randomly.

    You’re composing a new break from the original DNA.

    #### Core structure to preserve

    Most rolling DnB breaks rely on:

  • kick
  • snare
  • ghost notes
  • hat texture
  • pickup fills
  • Your job is to maintain energy while shaping a more deliberate groove.

    #### Layering strategy inside the Rack

    For key slices:

  • duplicate a snare slice and layer a slightly different one for body
  • tune ghost hits down for texture
  • keep important backbeats consistent
  • #### Practical editing moves

    Use these techniques:

  • Move ghost notes slightly late for pocket
  • Pull snares slightly forward for urgency
  • Tighten kicks to lock with the sub
  • Repeat hats to create rolling motion
  • Reverse a slice into a snare for tension
  • In Live 12, you can use clip editing and note velocity to humanize the groove:

  • lower velocity on ghost hits
  • emphasize 2 and 4 snare placements
  • let some hats breathe at lower velocities
  • ---

    Step 6: Add break processing for punch and grime

    A clean break often needs controlled violence 😈

    #### Recommended drum bus chain

    Route your break rack or drum group into a Drum Bus with:

    1. Drum Buss

    2. EQ Eight

    3. Glue Compressor

    4. Optional Roar or Saturator

    #### Drum Buss

    This is one of Live’s best stock devices for DnB drum weight.

    Useful settings:

  • Drive: 5–20%
  • Boom: use carefully; too much can fight the sub
  • Crunch: small amounts for edge
  • Transients: positive for extra snap
  • If your low end is already handled by the sub, keep Boom restrained or off.

    #### EQ Eight

  • Cut mud around 200–400 Hz if the break gets boxy
  • Trim harshness around 5–9 kHz if needed
  • Use narrow cuts only if the problem is specific
  • #### Glue Compressor

    Great for making chopped breaks feel like a single performance:

  • Attack: 3–10 ms
  • Release: Auto or 0.1–0.3 s
  • Ratio: 2:1 or 4:1
  • Aim for just a few dB of gain reduction
  • #### Roar

    If you want modern aggression, use Roar subtly:

  • drive for harmonic density
  • filter to keep the top end controlled
  • blend in parallel if the effect gets too wild
  • ---

    Step 7: Use MIDI and clip techniques for variation

    Advanced DnB arrangement depends on micro-variation.

    #### Break variation tactics

    Every 4 or 8 bars, change one or more of these:

  • swap a snare slice
  • mute a hat run
  • add a fill on the last 1/2 bar
  • introduce a reversed slice
  • shift a ghost note pattern
  • #### MIDI clip ideas

    On the Drum Rack:

  • duplicate your main MIDI clip
  • in bar 2 or 4, remove one kick or hat
  • insert a pickup hit before the snare
  • velocity-edit repeated notes for realism
  • #### Humanize with intent

    Don’t randomize blindly.

    Instead:

  • create a groove
  • then break it slightly
  • A classic DnB feel often comes from the balance between:

  • tight snare anchor
  • loose internal hat movement
  • sub that stays disciplined
  • ---

    Step 8: Make the sub and break work together

    This is where the track starts sounding like a record.

    #### Frequency separation

    Make sure:

  • the sub owns the lowest fundamentals
  • the break is not overcrowding 40–120 Hz
  • any bass harmonics above the sub are deliberate
  • Use EQ Eight on the break:

  • gentle high-pass if the break has too much low rumble
  • sometimes around 30–60 Hz
  • don’t remove the kick body if it’s part of the break’s identity, unless you’re replacing it
  • #### Sidechain strategy

    If the break is busy, try:

  • sidechaining the break bus very lightly to the sub or kick
  • sidechaining the sub to the break kick
  • or use Volume Shaper-style automation with clip gain envelopes
  • In DnB, subtle ducking can create the illusion of more space and speed.

    ---

    Step 9: Arrange it like an actual DnB tune

    A loop is not a song. Let’s turn it into a structure.

    #### Simple dark DnB arrangement template

    Intro (1–16 bars)

  • filtered break fragments
  • atmospheric texture
  • sub hints only
  • no full snare weight yet
  • Build (17–24 bars)

  • introduce full break groove
  • add snare layers and risers
  • automate filter opening
  • teaser sub line
  • Drop 1 (25–40 bars)

  • full break surgery
  • solid subline
  • maybe a counter mid-bass
  • Development (41–56 bars)

  • remove one drum layer
  • introduce fill variations
  • automate resampling FX or delay throws
  • Drop 2 (57–72 bars)

  • thicker variation
  • extra drum ghosting
  • harder sub movement
  • alternate fill every 8 bars
  • #### Arrangement tricks

  • mute the sub for 1/2 bar before a drop
  • strip the break to hats only for tension
  • use a snare reverb throw into the next phrase
  • automate a filter or frequency shifter on the break bus for transitions
  • ---

    Step 10: Resample for maximum control

    This is very DnB, very efficient, and very powerful.

    #### Why resample?

    Because once you hear the groove, you’ll want to:

  • print the break
  • re-chop the processed result
  • create one-shot fills
  • design glitch transitions
  • #### Workflow

    1. Solo the break bus or full drum group

    2. Record to a new audio track

    3. Capture 4–8 bars of the best groove

    4. Slice the resampled audio again

    5. Build fills, drops, and variations from the printed material

    This lets you layer:

  • original break
  • processed break
  • resampled break fragments
  • That’s where the real depth comes from.

    ---

    4. Common mistakes

    1. Making the sub too loud

    If the sub dominates, the mix will feel heavy but not powerful.

    The low end should be controlled, not just huge.

    2. Leaving the break too full-range

    Unprocessed breaks often fight the sub around the low mids.

    Use EQ and arrangement discipline.

    3. Quantizing all swing out of the groove

    DnB needs precision, but too much grid-lock makes it sterile.

    Preserve the break’s natural push-pull.

    4. Overusing Drum Buss boom

    Great device, easy to overdo.

    If you already have a strong sub, keep boom minimal.

    5. Too much stereo on the low end

    Keep the sub mono.

    If the bass gets wide below the crossover, club translation suffers.

    6. Ignoring velocity

    Velocity is a major part of break realism and groove.

    Flat velocities make even great chops feel lifeless.

    7. Not leaving space for the snare

    In DnB, the snare is a headline event.

    If the sub or break clutter the backbeat, the tune loses authority.

    ---

    5. Pro tips for darker/heavier DnB

    Use a two-layer bass philosophy

  • Layer 1: pure sub sine
  • Layer 2: mid-bass texture above the sub range
  • The sub stays clean while the mid-bass carries aggression.

    Saturate in parallel

    Instead of destroying the main sub:

  • duplicate the sub track
  • distort the duplicate with Saturator or Roar
  • high-pass the duplicate
  • blend lightly for harmonics
  • Create tension with silence

    A 1/4-bar mute before a drop can hit harder than another riser.

    Use micro-edits in the last 1/2 bar

    In dark DnB, small fill edits are often more effective than big fill overload:

  • one reversed snare
  • one ghost kick
  • one hat cut
  • one impact
  • Keep the snare authoritative

    If the break snare is weak:

  • layer a punchy snare sample
  • transient-shape it
  • compress it lightly
  • keep its fundamental clear
  • Automate filter movement on the break bus

    A gentle low-pass opening across 8 bars can make a loop feel alive without changing the core rhythm.

    Use transient shaping creatively

    With Drum Buss or Envelope Follower:

  • sharpen kicks
  • soften hats
  • emphasize backbeat attack
  • Resample filtered versions of the break

    Print:

  • dry break
  • filtered break
  • crushed break
  • reversed fill
  • Then recombine them like a sound palette.

    ---

    6. Mini practice exercise

    Exercise: Build a 4-bar rolling DnB loop

    #### Part A: Sub

    1. Load Operator

    2. Create a sine sub in G minor or F minor

    3. Program a repeating 4-bar bassline with:

    - long notes under the snare

    - shorter pickup notes before the next bar

    4. Add Saturator with 2 dB drive

    5. Add Compressor sidechained to the kick

    #### Part B: Break

    1. Slice a break to Drum Rack

    2. Build a 2-bar groove

    3. Duplicate it and vary the second 2 bars

    4. Add:

    - one reversed snare pickup

    - one ghost note variation

    - one hat removal for tension

    #### Part C: Bus processing

    1. Group the drums

    2. Add Drum Buss

    3. Add Glue Compressor

    4. Use EQ Eight to trim mud

    #### Part D: Arrangement

    1. Create an 8-bar section

    2. Bars 1–4: reduced groove

    3. Bars 5–8: full groove with fill

    4. Automate a filter opening on the drum group

    #### Goal

    Your loop should feel:

  • dark
  • driving
  • clear in the low end
  • rhythmically alive without sounding over-edited
  • ---

    7. Recap

    You’ve now got a complete workflow for sub-sine design and breakbeat surgery in Ableton Live 12 for DnB production.

    Key takeaways

  • Build the sub with Operator or Wavetable
  • Keep the sub mono, clean, and controlled
  • Slice breaks into Drum Rack for surgical editing
  • Use Drum Buss, Glue Compressor, EQ Eight, Saturator, Utility strategically
  • Resample and re-chop to create unique DnB variation
  • Arrange with tension, reduction, and drop discipline
  • The big idea

    In drum and bass, power comes from contrast:

  • deep but clean sub
  • busy but organized break
  • aggressive but controlled processing
  • repetition plus variation

That’s how you get a loop that doesn’t just bang — it moves the room 🔥

If you want, I can turn this into a companion Ableton project template with exact device chains and track naming, or a second lesson on reese bass layering over broken beats.

Ask GPT about this lesson

Chat with the lesson tutor, get follow-up help, or use quick actions.

Bigup 👽 Ask me anything about this lesson and I’ll answer in context.

Narration script

Show spoken script
Welcome back. In this lesson we’re going deep into a very specific and very powerful DnB workflow in Ableton Live 12: sub-sine design, breakbeat surgery, and arrangement discipline. This is the kind of session where a simple idea turns into a proper club-ready toolchain.

We’re not just making a sub and chopping a break. We’re building a rolling, dark, controlled drum and bass loop that can actually hold up in a full arrangement. Clean low end, surgical drum edits, subtle movement, and enough headroom to keep developing the track. That’s the mission.

Set your project up around 174 BPM to start. If you want a slightly more jungle-leaning feel, you can back off into the high 160s, but for modern rolling DnB, 174 to 176 is right in the pocket. Keep the time signature at 4/4, and organize your session clearly. You want a break audio track, a sub bass MIDI track, maybe a mid-bass track if you’re layering, and a few returns for short reverb, dub delay, and parallel crush. Color-code everything. In fast sessions like this, visual clarity saves your ears and your time.

Now, before we do any drum surgery, choose a break with strong transient detail. Amen-style breaks, Think-style breaks, funk breaks with clean kick and snare definition, all good starting points. Drop it into an audio track and warp it properly. Turn Warp on, and if you need fidelity while stretching, Complex Pro can help. But if you want punch and a more surgical feel, Beats mode is often the better choice for break manipulation. Preserve can sit around 1/16 or 1/32 depending on how dense the break is.

At this stage, don’t flatten the groove into something robotic. Listen to the natural pocket of the break. Pay attention to where the snare sits, how the hats move, and whether the kick is slightly ahead or behind the grid. That little push-pull is part of what gives DnB its life. You want control, not sterilization.

Now for the first big decision: how are you going to slice it? In Ableton Live 12, you’ve got a couple of strong options. The cleanest one for advanced control is Slice to New MIDI Track. Right-click the clip and slice by transient if you want a more surgical result, or use a rhythmic slice like 1/8 or 1/16 if the break is chaotic and you want a tighter grid. This creates a Drum Rack with each slice mapped to a pad, which gives you a proper compositional workflow instead of just copying audio around.

If you want even more control, you can stay in Arrangement View and do manual surgery. Duplicate the break, cut at the snare, ghost note, and kick points, and treat the whole thing like a collage. That approach is excellent for custom fills, reverse hits, and more distinctive edits. It’s also where you start sounding less like you’re looping a break and more like you’re performing with one.

Next up, the sub. In DnB, the sub has to be clean, stable, mono, and phase-consistent. It should follow the harmony without stepping on the break. Load Operator on a MIDI track. Turn on Oscillator A, set it to a sine wave, and turn off the rest. If you’re using a filter, keep it out of the way or fully open. The point here is purity.

Shape the amp envelope so the sub feels tight. Attack should be near zero, maybe a few milliseconds at most. Sustain can sit full if you want a rolling line, or you can shorten it for a more staccato feel. Release should be controlled, somewhere around 30 to 80 milliseconds depending on how much overlap you want. If your notes are smearing into each other, shorten that release. If the line feels too clipped, let it breathe a little.

Keep the notes in a sensible sub range, often somewhere around G1 to G2. You can go lower or higher if the arrangement calls for it, but don’t just chase massive low notes for the sake of it. In drum and bass, the sub is about authority and movement, not just size. If you’re using Wavetable instead of Operator, same idea: choose a sine-style starting waveform, keep modulation minimal, and shape it with a clean low-pass approach if needed.

Now we give that sub real club weight. A pure sine sounds amazing in theory, but on smaller systems it can disappear. So the trick is to add translation without ruining purity. A useful chain on the sub track is EQ Eight, Saturator, Compressor for sidechain, and maybe Utility.

With EQ Eight, don’t get aggressive. You usually do not need a high-pass on a sub unless something’s gone wrong. Remove unwanted upper harmonics only if the synth is dirty. Don’t overthink it. The sub should stay simple.

Then add Saturator and keep it subtle. One to four dB of drive is often enough. Soft Clip can help if needed. You’re just building a few harmonics so the note stays present on smaller speakers. This is one of those details that makes the difference between a sub that looks big on the meters and one that actually translates in a room.

Utility is your friend here too. Set the width to zero so the sub stays mono. That matters. Below the crossover, stereo is usually a liability. Then use gain to balance the sub against the drums.

For sidechain, you can use Compressor with the kick as the trigger, or if your break already has a strong kick, sidechain from that slice or even the whole drum bus. A ratio around 2:1 to 4:1, attack somewhere between 1 and 10 milliseconds, release around 40 to 120 milliseconds depending on groove, and just a few dB of gain reduction. You’re not trying to make the sub vanish. You’re just making room for the transient so the low end feels focused and fast.

Now let’s get into the breakbeat surgery. Open up the Drum Rack and think like a surgeon, not a loop-chaser. You’re not just triggering slices at random. You’re redesigning a performance from the original DNA. The core things to preserve in a rolling DnB break are the kick, the snare, the ghost notes, the hat texture, and the pickup fills. That’s the spine of the groove.

Inside the rack, layering matters. You can duplicate a snare slice and layer a slightly different one for extra body. You can tune ghost hits down a little for texture. You can keep the important backbeats consistent while the smaller details evolve. And the editing moves are where the groove really starts to breathe. Push ghost notes slightly late for pocket. Pull snares slightly forward for urgency. Tighten kicks so they lock with the sub. Repeat hats to create motion. Reverse a slice into a snare for tension.

In Live 12, velocity is a huge part of making this feel alive. Lower the velocity on ghost hits. Give the 2 and 4 snare placements a bit more authority. Let some hats sit lower in velocity so the groove has a natural hierarchy. The idea is to create a deliberate irregularity. Precision with personality. That’s the sweet spot.

At this point, your drums may sound clean, but maybe a little polite. So now we add controlled violence. Group the break or route it to a drum bus, and add Drum Buss, EQ Eight, Glue Compressor, and optionally Roar or Saturator.

Drum Buss is one of Live’s best stock devices for DnB drum weight. Drive it a little, maybe 5 to 20 percent. Use Boom carefully. If your sub is already doing the heavy lifting, too much boom will just fight the low end. Crunch can add edge, and Transients can sharpen the snap. But again, it’s about control. The goal is not to destroy the break. The goal is to make it hit harder while staying readable.

Use EQ Eight to carve mud around 200 to 400 Hz if the break gets boxy. Trim harshness in the 5 to 9 kHz area if needed. Keep the cuts specific. Don’t start sculpting without a reason.

Glue Compressor helps the chopped break feel like one coherent performance. Use a moderate attack, auto release or a reasonably quick release, and a ratio around 2:1 or 4:1. You’re just gluing the slices together, not smashing the life out of them.

If you want a more modern edge, Roar is a great option, but use it with restraint. Add density, then blend it back. You want aggression without destroying the transient structure.

Now here’s where the groove starts to become a track: variation. Advanced drum and bass depends on micro-variation. Every four or eight bars, something should shift. Swap a snare slice. Mute a hat run. Add a fill in the last half bar. Reverse a slice. Shift a ghost note pattern. Keep the core identity, but let it breathe.

A strong DnB groove often comes from a reliable snare anchor with loose internal hat movement and a sub that stays disciplined. That contrast is what gives the music power. Not chaos. Controlled movement.

You also want the drums and sub to work together in frequency space. Make sure the sub owns the bottom. The break should not be crowding the 40 to 120 Hz zone unless that’s a deliberate part of its identity. If needed, use EQ Eight on the break with a gentle high-pass somewhere around 30 to 60 Hz. Be careful not to strip out the kick body if you need it. If the break kick is part of the sound, respect it. If not, replace or supplement it.

Sidechain can help here too. A light duck on the break bus from the sub or kick can create the illusion of more speed and space. It does not need to be dramatic. Subtle ducking often feels more powerful because it’s felt rather than heard.

Now let’s talk about arrangement, because a loop is not a song. A proper DnB tune needs tension, release, and structural discipline. Think in sections. An intro with filtered break fragments, atmosphere, and hints of the sub. Then a build where the full groove starts to emerge. Then the first drop, where the break and sub hit together. Then a development section where you remove a layer, add a fill, or automate a texture. Then a second drop with a stronger variation.

The big trick here is subtraction. A half-bar mute before a drop can hit harder than another riser. Pull the sub out for a moment. Strip the break to hats. Let a reverb throw or a delay tail hang. Then bring the whole thing back in. The impact comes from contrast.

And when you’re working on the arrangement, use markers aggressively. Mark the starts of fills, drops, and edit points so you can audition ideas quickly. Don’t hunt around the timeline. Move with intent. That’s how you stay in the zone.

One of the most powerful DnB workflows in Live is resampling. Print your low end early once it feels right. Freeze, flatten, or resample the sub so you have something tangible. That helps you catch phase issues faster, and it also makes the low end feel more like part of the record instead of an abstract synth patch.

Do the same with the drums. Solo the break bus or the drum group, record it to a new audio track, and capture four to eight bars of the best groove. Then slice the printed material again. Now you’ve got original break material, processed break material, and resampled fragments to play with. That’s where the depth comes from. It also gives you a fast way to create fills and transitions without reprogramming everything from scratch.

A few coach notes here are worth keeping in mind. Treat the break like a performance, not a loop. The strongest grooves usually come from one core chop pattern with small deviations every couple of bars. Keep one dry reference lane. Duplicate the break or the sub and leave one version mostly untouched so you can compare processing decisions without second-guessing yourself. And always check the low end at a quiet monitoring level. If the sub disappears or the groove collapses when you turn it down, the balance needs work.

Also, think by role. Every track should own a job. Fundamental, punch, texture, motion, or space. If a track is trying to do too many of those badly, split it up. That one mindset shift can clean up a lot of messy DnB sessions.

For darker, heavier DnB, a two-layer bass philosophy works beautifully. Layer one is your pure sub sine. Layer two is a mid-bass texture above the sub range. The sub stays clean while the mid layer carries attitude. You can also saturate in parallel instead of destroying the main sub. Duplicate the sub, distort the copy with Saturator or Roar, high-pass the duplicate, and blend it quietly underneath. That gives you harmonics without muddying the actual low end.

If the break feels flat, lean on transient contrast. Sharpen the hit with Drum Buss, then soften the tail with compression or transient reduction. That gives you a punchy front edge and a controlled sustain. And if you want more motion without more notes, automate filter cutoff, distortion drive, drum bus punch, reverb send, or stereo width on the non-low elements. In busy DnB, automation can do more than extra chopping.

For arrangement, think in energy windows. Every four bars, shift the density slightly. Maybe bar one is sparse, bar two fuller, bar three a tension bar, bar four a release into the downbeat. Another great move is a pre-drop subtraction: remove the sub for half a bar, thin the break down to a few high slices, then slam back in. That contrast can make the drop feel massive without resorting to a huge build.

And don’t overlook phrase grammar. Instead of changing the whole pattern, change only how it resolves. Straight groove, pickup before beat four, one hat removed, then a fill into the next section. That kind of phrase-level editing keeps the loop evolving without sounding like a different beat every bar. It feels intentional, musical, and very contemporary.

Here’s a solid practice exercise to lock it in. Build a 4-bar rolling DnB loop. Program a sine sub in a minor key, maybe G minor or F minor. Write a repeating bass line with longer notes under the snare and shorter pickup notes leading into the next bar. Add a little saturation and sidechain it to the kick. Then slice a break into Drum Rack, build a two-bar groove, duplicate it, and vary the second two bars with one reversed snare pickup, one ghost note change, and one hat removal for tension. Group the drums, process them with Drum Buss, Glue Compressor, and EQ Eight, then arrange an eight-bar section where the first half is reduced and the second half opens up with a fill and a filter automation.

If you do it right, the result should feel dark, driving, clear in the low end, and rhythmically alive without sounding over-edited. That’s the whole game here.

So to recap: build the sub with Operator or Wavetable, keep it mono and clean, slice your breaks into Drum Rack for surgical control, use Drum Buss, Glue Compressor, EQ Eight, Saturator, and Utility with intent, and resample the good stuff so you can re-chop it into unique variations. Then arrange with subtraction, contrast, and phrase discipline.

That’s how you turn one break and one sine into something that doesn’t just bang, but actually moves the room.

mickeybeam

Go to drumbasscd.com for +100 drum and bass YouTube channels all in one place - tune in!

Generating PDF preview…