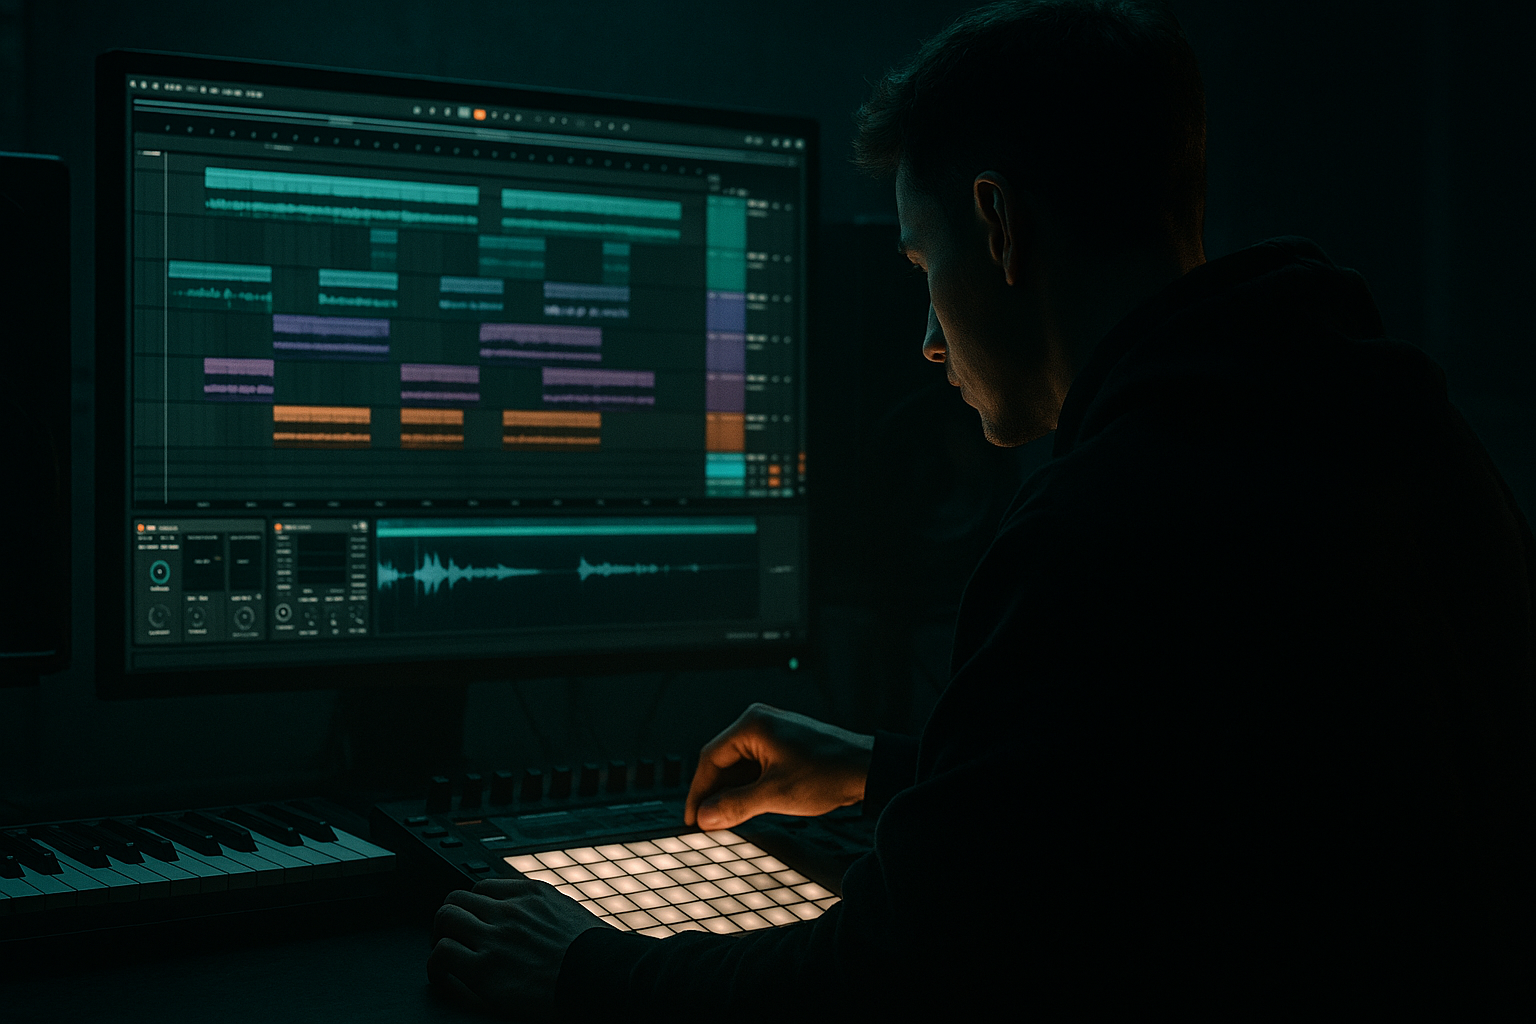
DNB COLLEGE

Drum & Bass Ableton Live 12 Tutorials

LESSON DETAIL

Course for impact using stock devices only in Ableton Live 12 for jungle oldskool DnB vibes (Beginner)

An AI-generated beginner Ableton lesson focused on Course for impact using stock devices only in Ableton Live 12 for jungle oldskool DnB vibes in the Mixing area of drum and bass production.

Back to lessons
Course for impact using stock devices only in Ableton Live 12 for jungle oldskool DnB vibes (Beginner) cover image

Narrated lesson audio

The voice track includes the tutorial plus extra teacher commentary.

Open audio file

Main tutorial

```markdown

Course for Impact (Stock Devices Only) — Ableton Live 12 Mixing for Jungle / Oldskool DnB ⚡🥁

1) Lesson overview

This lesson is about impact: making your jungle / oldskool DnB mix hit hard, feel loud, and stay controlled—using only Ableton Live 12 stock devices.

You’ll learn a practical workflow to:

  • Push drums to the front (Amen-style breaks, punchy kicks, snappy snares)
  • Keep the bass heavy but not messy
  • Create movement + energy with saturation, glue, transient control, and smart EQ
  • Build arrangement impact (drops, fills, tension)
  • Skill level: Beginner (but the results will sound properly “grown”) 😈

    ---

    2) What you will build

    A simple but legit DnB mix template:

  • Drum Bus (break + kick + snare) that feels glued and loud
  • Bass Bus with clean sub + gritty mid layer (classic rolling vibe)
  • Mix Bus chain for extra weight (without crushing dynamics)
  • Target vibe: oldskool jungle / 90s DnB energy with modern clarity.

    ---

    3) Step-by-step walkthrough

    Step 0 — Session + gain staging (set up for impact)

    1. Tempo: 165–175 BPM (start at 170 BPM).

    2. Put your key elements at safe levels:

    - Kick peak around -10 to -8 dB

    - Snare peak around -10 to -8 dB

    - Bass peaks around -12 to -9 dB

    3. On the Master, keep plenty of headroom:

    - Aim for the master peaking around -6 dB while mixing.

    > Why: impact comes from contrast and headroom, not from everything slamming red.

    ---

    Step 1 — Build a Drum Bus that punches (breaks + one-shots)

    You’ll likely have:

  • A breakbeat loop (Amen-ish)
  • A kick one-shot (for weight)
  • A snare one-shot (for crack)
  • Group them: select drum tracks → `Cmd/Ctrl + G` → name it DRUM BUS.

    #### DRUM BUS chain (stock devices)

    Put these devices on the DRUM BUS, in this order:

    1) EQ Eight (clean the junk, keep the smack)

  • HP filter: 30 Hz, 24 dB/oct (remove sub-rumble that steals headroom)
  • Optional: small dip around 250–400 Hz (mud) by -2 to -4 dB (Q ~1.2)
  • Optional: gentle lift at 7–10 kHz by +1 to +2 dB (air)
  • 2) Drum Buss (impact in a box 💥)

  • Drive: 5–15% (start 8%)
  • Boom: 10–25% (start 15%)
  • - Set Freq to 50–60 Hz if you want weight, or 70–80 Hz for more audible thump.

  • Transient: +5 to +25 (start +12) for extra snap
  • Damp: 10–30% if it gets fizzy
  • Output: adjust so the level matches bypass (don’t fool yourself)
  • 3) Glue Compressor (classic “togetherness”)

  • Attack: 3 ms (lets the crack through)
  • Release: Auto (or 0.3 s if you want a steady pump)
  • Ratio: 2:1
  • Threshold: adjust for 1–3 dB gain reduction on peaks
  • Makeup: off (do output manually)
  • 4) Saturator (density + loudness perception)

  • Mode: Soft Clip ON
  • Drive: 2–6 dB (start 3 dB)
  • Output: reduce to match level
  • Optional: enable Color and try “A Bit Warmer” very lightly
  • > Result: your drums will feel closer, heavier, and more “record-like”.

    ---

    Step 2 — Fix breakbeats like jungle (control harshness + enhance snap)

    On the breakbeat track itself (not the whole drum bus), do this:

    #### Break track chain

    1) EQ Eight

  • HP filter at 40–60 Hz (breaks rarely need sub)
  • If the break is harsh: dip 3–6 kHz by -2 to -5 dB (Q 2–4)
  • If it’s dull: tiny shelf +1 dB at 10 kHz
  • 2) Drum Buss (optional, lighter than the bus)

  • Drive 3–7%
  • Transient +5 to +10
  • 3) Gate (tighten tail if it’s too roomy)

  • Threshold: set until room wash reduces
  • Return around 150–300 ms so it doesn’t chop awkwardly
  • > Jungle breaks often need taming, not constant boosting.

    ---

    Step 3 — Bass impact: split sub + mid (clean + nasty)

    Oldskool / rolling bass hits hardest when the sub is stable and the mid has character.

    Create two bass tracks (or duplicate your bass):

  • SUB BASS
  • MID BASS
  • Group them into BASS BUS (`Cmd/Ctrl + G`).

    #### SUB BASS track (clean foundation)

    1) EQ Eight

  • Low-pass around 80–120 Hz (start 100 Hz) to keep it pure
  • If it’s too boomy: tiny dip around 50–60 Hz (-1 to -3 dB)
  • 2) Compressor (steady sub)

  • Ratio: 3:1
  • Attack: 10–30 ms
  • Release: 80–150 ms
  • Aim: 2–4 dB gain reduction on louder notes
  • > You want the sub to feel like a solid floor, not a wild animal.

    #### MID BASS track (grit + audibility on small speakers)

    1) EQ Eight

  • High-pass at 90–130 Hz (start 110 Hz) to keep sub clean
  • Small boost around 700 Hz–1.5 kHz if you need “readability”
  • 2) Saturator or Roar (Live 12 stock) 😈

    Pick ONE to start:

  • Saturator
  • - Soft Clip ON

    - Drive 4–10 dB (start 6 dB)

  • Roar (great for heavier jungle/DnB edge)
  • - Start with a mild preset and reduce Mix

    - Aim for 10–30% Wet (don’t obliterate the tone)

    3) Compressor (optional) to keep mid consistent

  • Ratio 2:1
  • Aim for 1–3 dB reduction
  • #### BASS BUS chain

    1) EQ Eight

  • Small dip 200–350 Hz (-2 dB) if boxy
  • 2) Glue Compressor

  • Ratio 2:1, slow-ish attack (10 ms), Auto release
  • 1–2 dB GR (just glue)
  • ---

    Step 4 — Sidechain for space (drum hits stay dominant)

    Classic DnB trick: let the kick/snare punch through the bass.

    On BASS BUS, add:

    Compressor → enable Sidechain

  • Sidechain input: Kick (or a hidden “ghost kick”)
  • Ratio: 4:1
  • Attack: 1–3 ms
  • Release: 80–140 ms (time to tempo)
  • Threshold: adjust until you get 2–6 dB gain reduction when kick hits
  • For extra “bounce”, also sidechain to the snare lightly:

  • Duplicate Compressor after the first (or use a separate track)
  • Use smaller reduction (1–3 dB)
  • > This is a huge part of getting that rolling but clean low-end.

    ---

    Step 5 — Make the drop feel bigger (impact = contrast)

    Impact isn’t only mixing—it’s arrangement.

    #### Quick jungle/DnB impact moves:

  • 8 bars before drop: filter/strip low end
  • - Put Auto Filter on DRUM BUS or BREAK track

    - Automate HP filter up to ~200–400 Hz

  • Last 1 beat before drop: micro silence
  • - Cut everything for 1/8–1/4 beat (classic smash-in)

  • At the drop: reintroduce sub + full drums
  • - Bring the HP filter back down to normal

  • Add a fill: snare rush or break slice
  • - Use Simpler (Slice mode) on the break and trigger a quick fill

    ---

    Step 6 — Mix Bus (Master) chain: loud-ish without ruining it

    Keep this subtle. You’re mixing, not mastering.

    On Master (or a “PREMASTER” group), try:

    1) EQ Eight

  • HP at 20–25 Hz (gentle cleanup)
  • 2) Glue Compressor

  • Ratio: 2:1
  • Attack: 10 ms
  • Release: Auto
  • GR: 0.5–2 dB max
  • 3) Limiter

  • Ceiling: -1.0 dB
  • Gain: raise until it starts shaving 1–3 dB on peaks
  • > If your drums suddenly lose snap, back off the limiter and fix levels upstream.

    ---

    4) Common mistakes (and how to avoid them)

    1) Over-saturating everything

    - Symptom: harsh hats, smeared snare, bass loses note shape

    - Fix: saturate buses lightly, and compare with bypass often.

    2) Too much low end from too many sources

    - Symptom: mix feels loud but not punchy

    - Fix: only ONE main sub source (usually SUB BASS). High-pass breaks and mid bass.

    3) Crushing drums with compression

    - Symptom: drums sound small/flat

    - Fix: slower attack (3–10 ms), less GR (1–3 dB), use Drum Buss Transients instead.

    4) No sidechain, then “EQ wars”

    - Symptom: bass and kick fight forever

    - Fix: sidechain first, then EQ.

    5) Master limiter doing all the work

    - Symptom: loud but ugly, cymbals splatter

    - Fix: build loudness from drum/bass control, not just the final limiter.

    ---

    5) Pro tips for darker/heavier DnB 🌑

  • Roar for controlled filth: Keep it parallel (low Wet), then EQ after to remove fizz >10 kHz.
  • Midrange focus = perceived power: Try a tiny boost around 1–2 kHz on snare crack or bass mid layer.
  • Mono your sub: Use Utility on SUB BASS → Width 0% (mono). Huge for club translation.
  • Tight reverb only: Use Reverb (or Hybrid Reverb if available) on a return:
  • - Pre-delay 15–25 ms

    - Decay 0.6–1.2 s

    - High-pass reverb input 200–400 Hz

    - Send snare a bit, keep kick/sub mostly dry.

  • Darkness = less top, not no top: Instead of killing highs, control harsh bands (3–6 kHz) with EQ dips.
  • ---

    6) Mini practice exercise (20 minutes) 🎯

    1) Load:

    - 1 break loop

    - 1 kick

    - 1 snare

    - 1 bass (any basic patch/sample)

    2) Create DRUM BUS and apply:

    - EQ Eight (HP 30 Hz)

    - Drum Buss (Drive 8%, Transient +12)

    - Glue (2:1, 3 ms, Auto, 1–3 dB GR)

    3) Create SUB and MID bass split:

    - SUB low-pass 100 Hz, Utility width 0%

    - MID high-pass 110 Hz + Saturator Drive 6 dB

    4) Sidechain BASS BUS to kick for 3–5 dB ducking.

    5) Add one drop-impact automation:

    - Auto Filter HP up to 300 Hz for 8 bars → slam back at drop.

    6) Export a 16-bar loop and A/B:

    - With vs without Drum Buss

    - With vs without sidechain

    ---

    7) Recap ✅

    To get impact in jungle/oldskool DnB using stock Ableton devices:

  • Headroom first, then build loudness with control
  • Drum Buss + Glue + Saturator on DRUM BUS for punch and density
  • Split bass into SUB + MID for clean weight + grit
  • Sidechain the bass so drums stay dominant
  • Use arrangement contrast (filters, micro silences, fills) to make the drop feel massive

If you want, tell me what you’re using for drums (Amen? chopped breaks? 2-step?) and what bass style (Reese, sub-only, wobble), and I’ll give you a tight Ableton rack-style chain tailored to that exact vibe. 🥁

```

Ask GPT about this lesson

Chat with the lesson tutor, get follow-up help, or use quick actions.

Bigup 👽 Ask me anything about this lesson and I’ll answer in context.

Narration script

Show spoken script
Welcome in. Today we’re building impact for jungle and oldskool DnB vibes in Ableton Live 12, using stock devices only. Beginner-friendly, but the goal is grown-sounding results: drums up front, bass heavy but controlled, and that “drop hits you in the chest” feeling without your master limiter doing all the heavy lifting.

Before we touch any processing, quick mindset: impact is contrast plus headroom. Not “everything loud all the time.” If you give the mix space to breathe, the big moments actually feel big.

Let’s set up the session first.

Set your tempo somewhere between 165 and 175. I’m going to say 170 as a sweet spot. Now gain staging: get your kick and snare peaking roughly around minus 10 to minus 8 dB. Bass peaking around minus 12 to minus 9. And while you’re building, aim for the master peaking around minus 6 dB. That headroom is your safety zone.

Coach tip that will save you hours: level-matched bypass. Every time you add Drum Buss, Saturator, Glue, anything that adds loudness, pull the output down so the processed version is about the same volume as bypass. If “on” is always louder, your brain will always pick it, and you’ll end up overcooking everything.

Optional, but highly recommended: drop a reference track onto an audio track. A classic jungle or 90s DnB tune that has the vibe you want. Turn it down to about minus 12 dB so it doesn’t blow your mix away. Toggle it occasionally, especially for three things: how bright the hats really are, how loud the snare body feels, and how controlled the low end is between kick hits.

Now, what we’re building today is basically a simple template:
a drum bus that hits and feels glued, a bass bus with a clean sub plus a gritty mid layer, and a gentle mix bus chain to make it feel finished without crushing the groove.

Alright. Step one: the drum bus.

You’ll usually have a break loop, like an Amen-ish loop, plus a kick one-shot for weight, plus a snare one-shot for crack. Select those drum tracks, group them, and name the group DRUM BUS.

On the DRUM BUS, we’re going to use four stock devices in a specific order: EQ Eight, Drum Buss, Glue Compressor, then Saturator.

First, EQ Eight. Put a high-pass around 30 Hz with a steep slope, like 24 dB per octave. This is not about making it thin. It’s about removing sub-rumble that steals headroom and makes your limiter panic later. If the drums feel muddy, try a small dip around 250 to 400 Hz, like minus 2 to minus 4 dB with a medium Q. And if you want a tiny bit of air, a gentle lift around 7 to 10 kHz, like plus 1 to plus 2. Keep it subtle.

Next, Drum Buss. This is your “impact in a box,” but don’t treat it like a magic loud button. Start with Drive around 8 percent. Boom around 15 percent. For Boom frequency, if you want deep weight, set it around 50 to 60 Hz. If you want a more audible thump, go 70 to 80. Then Transient: this is huge for jungle. Start around plus 12. If it gets fizzy, bring up Damp a bit, like 10 to 30 percent. And remember: match the output to bypass.

Then Glue Compressor. This is for togetherness, not for smashing. Set ratio 2 to 1. Attack 3 milliseconds so the crack of the snare and the snap of the break can get through. Release on Auto is totally fine. Then bring the threshold down until you’re seeing about 1 to 3 dB of gain reduction on peaks. If you see 6 dB constantly, you’re probably flattening the life out of it. Leave Makeup off and adjust the output manually.

Then Saturator. Turn Soft Clip on. Drive around 3 dB to start, anywhere from 2 to 6 depending on how aggressive you want it. Pull the output down so it’s level-matched. If you want a little character, turn on Color and try something like “A Bit Warmer,” but lightly. The goal is density and closeness, not harshness.

At this point, your drums should feel closer to your face. Not necessarily louder on the meter, but more forward in perception. That’s impact.

Now step two: treat the break itself, because jungle breaks often need taming more than boosting.

Go to the break track, not the whole drum bus. Add EQ Eight. High-pass around 40 to 60 Hz because breaks rarely need true sub. If the break is harsh, dip around 3 to 6 kHz by maybe minus 2 to minus 5 dB with a tighter Q. If it’s dull, a tiny high shelf around 10 kHz, like plus 1 dB, and stop. Remember: breaks can sound slightly dull soloed and still feel perfect in the mix. You’re aiming for controlled cymbals, not “sparkle spray.”

Optional: a lighter Drum Buss on the break itself. Drive 3 to 7 percent, Transient plus 5 to plus 10, just to add a little snap without piling on too much grit.

And if the loop is too roomy or the tail is washing out your groove, add a Gate. Set the threshold so the room wash reduces. Then adjust the return or release around 150 to 300 milliseconds so it tightens without sounding like it’s choking. Jungle should feel tight and urgent, not like it’s in a giant cave unless that’s a deliberate aesthetic.

Coach note: find your snare anchor. Oldskool impact often comes from one stable snare fundamental. On the snare track, sweep a bell EQ around 160 to 240 Hz. When you hit the spot that makes the snare feel like it leans forward without needing more volume, remember it. Protect it. Don’t accidentally scoop it out later on your drum bus EQ.

Step three: bass impact by splitting sub and mid.

This is the classic move for rolling DnB. Sub is stable and mono. Mid is character and audibility on small speakers.

Duplicate your bass or create two bass tracks: SUB BASS and MID BASS. Group them into BASS BUS.

On the SUB BASS track, we keep it clean. EQ Eight first. Low-pass around 80 to 120 Hz, start at 100. The idea is: no chorus, no fizz, no stereo weirdness down there. If it’s too boomy, a tiny dip around 50 to 60 Hz can help.

Then a Compressor to keep the sub steady note-to-note. Ratio 3 to 1. Attack 10 to 30 milliseconds. Release 80 to 150 milliseconds. Aim for about 2 to 4 dB of gain reduction on louder notes. You want a solid floor, not a wild animal.

Now very important: Utility on the SUB BASS. Set Width to 0 percent. Mono sub. This is one of the fastest “why does it suddenly sound pro” moves, and it also helps your low end survive club systems.

On the MID BASS track, EQ Eight first. High-pass around 90 to 130 Hz, start at 110, so it doesn’t fight the sub. If you need more readability, a small boost somewhere around 700 Hz to 1.5 kHz can help it speak on phone speakers.

Then choose one distortion option to start. Keep it simple. Either Saturator or Roar, both stock in Live 12.

If you go Saturator: Soft Clip on, Drive around 6 dB to start, maybe 4 to 10 depending on tone. If you go Roar: pick a mild preset, and bring the Wet down. Aim for 10 to 30 percent Wet. The biggest beginner mistake is turning the bass into a cool distorted sound that no longer sits in the track. We want character that still behaves.

Optional Compressor on the mid if it’s too jumpy: ratio 2 to 1, 1 to 3 dB reduction, just to keep it consistent.

Now on the BASS BUS group: EQ Eight, and if it’s boxy, dip 200 to 350 Hz by about 2 dB. Then a Glue Compressor with ratio 2 to 1, attack around 10 ms, Auto release, and only 1 to 2 dB of gain reduction. This is glue, not punishment.

Step four: sidechain for space, so drums stay dominant.

On the BASS BUS, add a Compressor and enable Sidechain. Sidechain input: your kick track. Ratio 4 to 1. Attack 1 to 3 milliseconds. Release 80 to 140 milliseconds, and you can time it to the tempo so the bass breathes musically. Bring the threshold down until you see about 2 to 6 dB of gain reduction when the kick hits.

If you want extra bounce, you can also sidechain to the snare lightly, like 1 to 3 dB, either with a second compressor or by routing a ghost trigger situation. But keep it tasteful. The point is: kick and snare land clearly, the bass rolls around them.

Advanced-but-easy variation: instead of ducking the whole bass bus, duck just the SUB BASS strongly, and duck the MID BASS less, or not at all. That keeps the groove audible while the low end stays disciplined.

Step five: make the drop feel bigger. This is where a lot of “impact” actually comes from. Arrangement moves can do what mixing can’t.

Here are three quick ones you can do right now.

First: 8 bars before the drop, strip the low end. Put Auto Filter on the DRUM BUS or the break track. Use a high-pass filter and automate it up to around 200 to 400 Hz as you approach the drop. You’re creating tension by removing weight.

Second: right before the drop, add a micro-silence. Literally cut everything for an eighth note or a quarter note. It’s that classic “suck in the air” moment, and when the drop hits, the same level feels way bigger because of contrast.

Third: add a fill. Take your break, put it in Simpler in Slice mode, and trigger a quick snare rush or a little stutter fill at the end of a phrase. Jungle loves these tiny edits. They make the track feel alive.

Coach tip: try “frequency reveals,” not just volume rises. For example, right before the drop, automate Utility gain down a touch, like minus 1.5 dB, while you also filter out lows. Then at the drop, restore both. The ear hears that as a bigger jump than volume alone.

Step six: a subtle mix bus chain. We are not mastering here. We’re just giving it a touch of finish.

On the master, or better, on a premaster group, add EQ Eight with a gentle high-pass around 20 to 25 Hz. Then Glue Compressor: ratio 2 to 1, attack 10 ms, release Auto, and keep gain reduction extremely light, like 0.5 to 2 dB maximum.

Then a Limiter. Set ceiling to minus 1.0 dB. Increase gain until it’s shaving about 1 to 3 dB on peaks. If the drums lose snap, back off the limiter and fix loudness upstream on the drum bus and bass control.

Big rule: pick one element to be your loudness generator. In this style, it’s usually the drum bus saturation and gentle clipping behavior, not smashing the master limiter. If you chase loudness on the master, you flatten the groove and the track stops rolling.

Quick troubleshooting, because these problems happen to everyone.

If everything starts sounding harsh and smeared, you’re probably over-saturating. Compare bypass, level-matched, and back off. A little goes far.

If the mix feels loud but not punchy, you likely have too many sources with low end. Decide who owns the sub. Usually, only the SUB BASS. High-pass the break and the mid bass properly.

If the drums sound small and flat, you’re compressing too hard or too fast. Ease off gain reduction, use a slightly slower attack, and let Drum Buss Transient do more of the punch work.

If kick and bass fight forever, sidechain first, then EQ. Don’t start an endless EQ war.

Now a quick 20-minute practice exercise you can do after this lesson.

Load one break loop, one kick, one snare, and one bass. Group drums into DRUM BUS. Add EQ Eight with a 30 Hz high-pass, Drum Buss with Drive 8 percent and Transient plus 12, Glue at 2 to 1 with 3 ms attack and 1 to 3 dB gain reduction.

Split bass into SUB and MID. SUB gets low-pass around 100 Hz and Utility width 0 percent. MID gets high-pass around 110 Hz and Saturator Drive around 6 dB.

Sidechain the BASS BUS to the kick for about 3 to 5 dB of ducking.

Then add one drop automation: Auto Filter high-pass rising to around 300 Hz for 8 bars, then slam it back at the drop.

Export a 16-bar loop and A/B two things: with versus without Drum Buss, and with versus without sidechain. You’ll hear impact instantly when you toggle those two.

Last coach move before you go: check your low end in mono while you work. Put Utility on the master temporarily and set width to 0 percent. If your bass vanishes or gets wobbly, your sub is too wide or phasey, often from stereo distortion or reverb. Fix that at the source, don’t fight it with EQ.

Recap, clean and simple. Headroom first. Drum bus chain for punch and density. Split bass into clean mono sub plus character mid. Sidechain so drums stay dominant. And use arrangement contrast to make the drop feel massive.

If you tell me what break you’re using, like clean or noisy, bright or dark, and whether your bass is a synth or a sample, I can suggest a tight stock-only return setup with exact settings tailored to your material.

mickeybeam

Go to drumbasscd.com for +100 drum and bass YouTube channels all in one place - tune in!

Generating PDF preview…