DNB COLLEGE

Drum & Bass Ableton Live 12 Tutorials

LESSON DETAIL

Course for FX chain for smoky warehouse vibes in Ableton Live 12 for jungle oldskool DnB vibes (Advanced)

An AI-generated advanced Ableton lesson focused on Course for FX chain for smoky warehouse vibes in Ableton Live 12 for jungle oldskool DnB vibes in the Ragga Elements area of drum and bass production.

Back to lessons
Course for FX chain for smoky warehouse vibes in Ableton Live 12 for jungle oldskool DnB vibes (Advanced) cover image

Narrated lesson audio

The voice track includes the tutorial plus extra teacher commentary.

Open audio file

Main tutorial

Course: FX Chain for Smoky Warehouse Vibes in Ableton Live 12

For Jungle / Oldskool DnB with Ragga Elements 🎛️🔥

---

1. Lesson overview

In this lesson, we’re building an FX chain designed to make your DnB and jungle ideas feel like they’re echoing through a damp warehouse at 3AM. The goal is not just “make it lo-fi” or “add reverb.” We want a specific atmosphere:

  • dark, smoky, and dub-influenced
  • wide but controlled
  • gritty, with ragga energy
  • spacious, but still punchy enough for breakbeats and rolling bass
  • styled for oldskool jungle / DnB rather than modern clean dance music
  • This is especially useful for:

  • ragga vocal chops
  • siren stabs
  • dub FX hits
  • reese bass accents
  • break edits
  • atmosphere layers like crowd noise, vinyl crackle, rain, or warehouse ambience
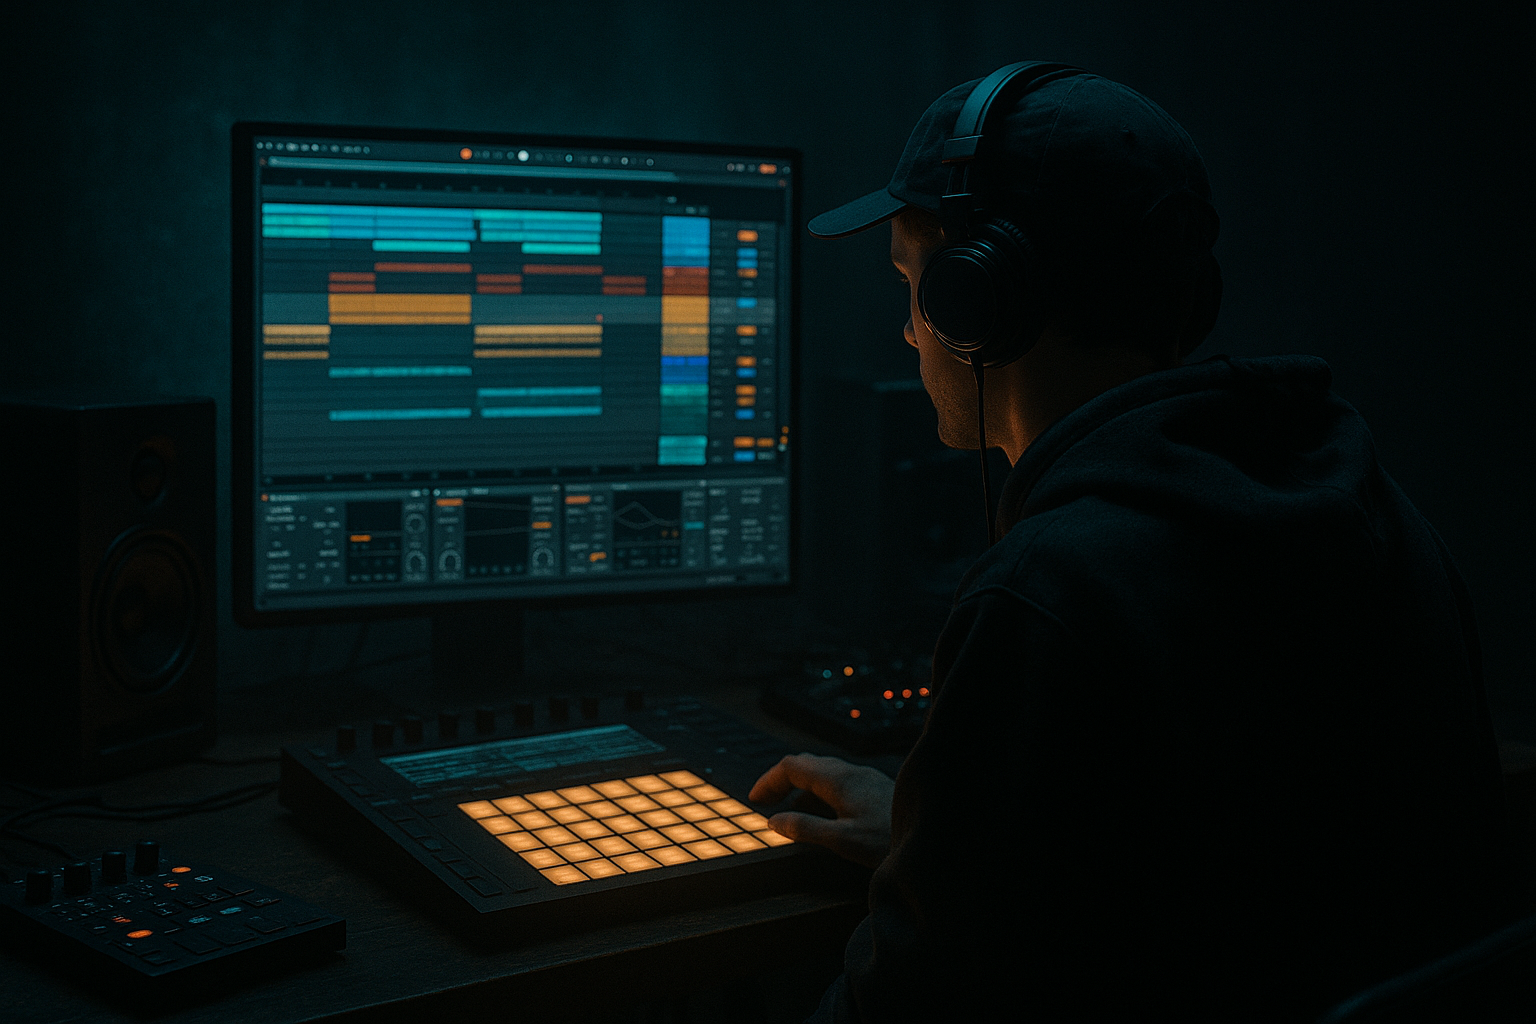
  • We’ll build the chain in Ableton Live 12 using stock devices so you can drop it into any project without relying on third-party plugins.

    ---

    2. What you will build

    By the end, you’ll have an FX return chain that can transform dry sounds into:

  • smoky tape-worn echoes
  • dub-style spatial depth
  • grimy pre-delay and movement
  • band-limited haze
  • filtered delay throws
  • controlled saturation and glue
  • Final chain concept

    You’ll build a chain like this:

    1. EQ Eight – filtering and shaping

    2. Saturator or Roar – grit and harmonic weight

    3. Echo – dub delay movement

    4. Reverb – warehouse space

    5. Hybrid Reverb or Reverb – deeper tail option

    6. Auto Filter – movement and darkening

    7. Utility – stereo control

    8. Optional: Redux or Drum Buss – texture and edge

    We’ll set it up as an Audio Effect Rack or Return track, then use it with:

  • ragga vocal slices
  • snare hits
  • rimshots
  • ghost percussion
  • horn stabs
  • FX one-shots
  • chopped amen fills
  • ---

    3. Step-by-step walkthrough

    Step 1: Start with the right source material

    This chain works best on sounds that already feel slightly raw or rhythmic. For example:

  • ragga vocal phrase: “come again”, “selecta”, “run come”
  • short stab: horn, organ, synth hit
  • breakbeat accent: snare, tom, ride, hat
  • dub FX: impact, noise burst, reverse swell
  • Tip: Don’t start with a perfectly polished sound. A smoky warehouse chain needs a source with character.

    ---

    Step 2: Create a Return track for send-based processing

    For jungle and DnB, this is often better than inserting the FX directly.

    1. Create a Return Track in Ableton.

    2. Rename it something like “Warehouse Dub FX”.

    3. Set the track to 100% wet if you’re using it as a send effect.

    Why this matters:

  • You can send multiple elements to the same vibe
  • It keeps the mix consistent
  • It lets the dry drums stay punchy while the ambience sits behind them
  • ---

    Step 3: Add EQ Eight first

    Place EQ Eight at the start.

    #### Suggested settings:

  • High-pass filter around 120–180 Hz
  • - This clears out low-end mud from the reverb/delay chain

  • Low-pass filter around 8–12 kHz
  • - This removes harsh top-end and creates that smoky, aged feel

  • Optional mid dip:
  • - 300–600 Hz, reduce by 2–4 dB

    - Helps reduce boxiness in warehouse-style ambience

    #### Why this works:

    Oldskool dub and jungle FX often sound dark because they are band-limited. You’re not trying to create pristine width; you’re creating depth with shadow.

    ---

    Step 4: Add saturation for grime and density

    Use either Saturator, Roar, or even Drum Buss if you want a rougher edge.

    #### Option A: Saturator

  • Drive: 2–6 dB
  • Soft Clip: On
  • Output: compensate so the level stays controlled
  • #### Option B: Roar

    If you want more modern dirty harmonics:

  • Drive gently, around 10–25%
  • Use a darker tone or low emphasis if available
  • Keep it subtle on sends
  • #### Option C: Drum Buss

    Useful if the source is percussion or a snare hit:

  • Drive: 5–15%
  • Crunch: subtle
  • Boom: usually off for FX returns unless you want extra thump
  • #### Goal:

    You’re adding a little smoke and glue, not destroying the signal. The sound should feel warmed by tape and time.

    ---

    Step 5: Add Echo for dub pressure

    Now the fun part 😈

    Place Echo after saturation.

    #### Core settings:

  • Time: sync to project tempo
  • - Try 1/8, 3/16, or 1/4 dotted

  • Feedback: 20–45%
  • - Higher if you want long tail throws

  • Dry/Wet: if on a return, set to 100%
  • Filter:
  • - High-pass around 200–400 Hz

    - Low-pass around 4–8 kHz

  • Modulation: small amount
  • Character:
  • - Use Age or Wobble lightly for movement

  • Noise: a touch if you want tape/hardware flavor
  • #### DnB-friendly delay ideas:

  • 1/8 dotted for vocal stabs
  • 1/4 for atmospheric swells
  • Ping-pong for wide dub throws, but watch the low end
  • #### Pro move:

    Automate send levels or feedback on specific words or hits:

  • “yeah”
  • “come again”
  • snare accents
  • end-of-bar fills
  • That’s classic jungle energy.

    ---

    Step 6: Add Reverb for warehouse size

    After Echo, add Reverb or Hybrid Reverb.

    #### Reverb starting point:

  • Decay: 1.8–4.5 sec
  • Pre-delay: 15–35 ms
  • Size: medium to large
  • Diffusion: medium-high
  • Low cut: 200–400 Hz
  • High cut: 5–9 kHz
  • Stereo width: fairly wide, but not maxed
  • #### Hybrid Reverb suggestion:

    For a more cinematic warehouse feel:

  • Combine a Room/Convolution style with a lush algorithmic tail
  • Keep the tail darker than the direct reflections
  • #### Important:

    Do not let the reverb wash out the groove. Jungle depends on rhythmic clarity, even when it’s atmospheric.

    ---

    Step 7: Add Auto Filter for motion and dark sweeps

    This is where you make the FX feel alive.

    Place Auto Filter after Reverb.

    #### Suggested setup:

  • Filter type: Low-pass
  • Drive: small amount if desired
  • LFO: on, but subtle
  • Rate: 1/2, 1 bar, or 2 bars
  • Amount: low to medium
  • Resonance: keep moderate
  • #### Use cases:

  • slow dark opening sweep into a drop
  • moving ragga vocal texture
  • “breathing” ambience under breaks
  • controlled filter throws at the end of phrases
  • #### Practical tip:

    Automate the filter cutoff so the FX opens slightly before a snare fill and closes again after the drop. That movement is very warehouse, very sound system, very jungle.

    ---

    Step 8: Add Utility to control the stereo image

    Finish with Utility.

    #### Suggested settings:

  • Width: 80–120%
  • Mono below: if needed, keep low-end mono by not sending bass-heavy content to the return
  • Gain: use to compensate for output level
  • #### Why this matters:

    A smoky FX chain should feel wide, but not phasey or blurry. Utility helps you keep the ambience controlled.

    ---

    Step 9: Optional texture layer with Redux or Lo-Fi-style degradation

    If you want that extra oldschool edge, add one of these near the end:

    #### Redux

  • Reduce bit depth subtly
  • Sample rate reduction: very light
  • Use sparingly on vocals or FX stabs
  • #### Grain Delay

    Great for weird jungle atmospheres:

  • Delay time short
  • Dry/wet low
  • Randomization moderate
  • Filter dark
  • #### Result:

    You get a slightly broken, pirate-radio texture without killing the musicality.

    ---

    Step 10: Build an Audio Effect Rack for quick control

    Now wrap the whole chain in an Audio Effect Rack and map macros.

    #### Suggested Macros:

    1. Smoke – drives saturation amount and low-pass cutoff

    2. Space – reverb decay and send amount

    3. Dubs – delay feedback

    4. Wobble – echo modulation / filter LFO depth

    5. Grime – saturation drive / Redux amount

    6. Width – Utility width

    7. Tone – EQ high-cut control

    8. Throw – a macro for automating sends or delay feedback boost

    This is huge for workflow. You can jam the rack live, automate it across a 16-bar breakdown, or use it for arrangement variation.

    ---

    Step 11: Use it in an arrangement like a real jungle track

    Here’s a practical arrangement idea:

    #### Intro

  • Dark atmosphere
  • low-level ragga vocal send
  • filtered dub delay tails
  • minimal drums
  • #### Build

  • increase send on vocal chop or horn stab
  • open filter slowly
  • shorten delay feedback slightly as drums get busier
  • #### Drop

  • reduce reverb send on kicks and main break
  • keep only select FX throws
  • use the chain on the last snare of every 4 or 8 bars
  • #### Breakdown

  • send more heavily into the warehouse chain
  • automate feedback and cutoff for a smoky dub wash
  • bring in ambient layers, sirens, or chopped vocal fragments
  • This keeps the mix from becoming a foggy mess while preserving vibe.

    ---

    4. Common mistakes

    1. Too much low end in the FX return

    If your delay and reverb are bloating the sub region, the whole track will feel muddy.

    Fix: High-pass your FX chain aggressively enough. Often 150–250 Hz is fine for returns in DnB.

    ---

    2. Making it too bright

    Warehouse vibe is not sparkling EDM gloss.

    Fix: Use low-pass filtering and darker reverb tones. Keep the top end aged and smoky.

    ---

    3. Too much feedback

    Long dub delays can quickly swamp the groove.

    Fix: Automate feedback for specific moments only. Don’t leave it maxed all the time.

    ---

    4. Overusing stereo widening

    Excessive width can cause phase issues and weaken the impact of the drums.

    Fix: Keep the return wide, but check mono compatibility and avoid wide low mids.

    ---

    5. Putting the chain on the master

    This is a common beginner mistake.

    Fix: Keep these FX on returns or specific sends. DnB needs a strong dry core.

    ---

    6. Not automating enough

    A static FX chain sounds like an insert, not a vibe.

    Fix: Move cutoff, feedback, decay, and send amount throughout the arrangement.

    ---

    5. Pro tips for darker/heavier DnB

    Tip 1: Parallel the darkness

    Run two returns:

  • Return A: short dub delay
  • Return B: long warehouse reverb
  • Blend them differently depending on the section.

    ---

    Tip 2: Use sidechain ducking on the return

    Add Compressor after reverb/delay and sidechain it to the kick or break.

    #### Suggested idea:

  • Sidechain from kick or main drum bus
  • Fast attack
  • Medium release
  • Aim for subtle ducking, not pumping
  • This keeps the ambience behind the beat and preserves punch.

    ---

    Tip 3: Filter the FX into the drop

    Before the drop hits, automate the low-pass down and then snap it open slightly on the downbeat. That contrast gives the drop more impact.

    ---

    Tip 4: Use resampled FX fills

    Record a few bars of the return track, then chop the resampled tail into:

  • reverse swells
  • tape stop-style edits
  • stuttered vocal echoes
  • impact layers for transitions
  • That’s very authentic jungle workflow.

    ---

    Tip 5: Combine with a break chop bus

    If your break edits are busy, send only selected hits:

  • snare rolls
  • ghost hats
  • vocal punctuations
  • percussion accents
  • Don’t send every drum hit equally. Use the FX as a phrase tool.

    ---

    Tip 6: Add a dub-style “one shot” moment

    At the end of every 8 or 16 bars:

  • mute the dry vocal/stab
  • send one word or hit hard into the return
  • automate feedback up briefly
  • print the tail
  • This creates that classic system-music vibe.

    ---

    6. Mini practice exercise

    Exercise: Build a smoky warehouse FX return in 15 minutes

    #### Source:

    Pick one of these:

  • a ragga vocal chop
  • a rimshot
  • a short synth stab
  • a siren hit
  • #### Task:

    Build a return chain with:

    1. EQ Eight

    2. Saturator

    3. Echo

    4. Reverb

    5. Auto Filter

    6. Utility

    #### Constraints:

  • High-pass at 150 Hz or higher
  • Keep the return mostly dark
  • Use one sync delay time like 1/8 dotted
  • Automate the filter cutoff over 8 bars
  • Create one moment where feedback briefly rises for a dub throw
  • #### Challenge:

    Bounce the result and resample it into a new audio track. Then chop it into 3 usable FX fills.

    If it doesn’t sound like it belongs in a smoky jungle rave, adjust:

  • EQ darker
  • more saturation
  • less reverb decay
  • tighter feedback
  • ---

    7. Recap

    You’ve now got a practical Ableton Live 12 FX chain for smoky warehouse vibes in jungle / oldskool DnB with ragga flavor.

    Core idea:

  • EQ to darken and clean
  • Saturation to thicken and age
  • Echo for dub movement
  • Reverb for warehouse space
  • Auto Filter for motion
  • Utility for stereo control
  • Optional degradation for extra grime
  • The big takeaway:

    In DnB, atmosphere works best when it supports the groove instead of smearing it. Your FX chain should feel like fog in a sound system room: thick, moving, and alive — but never blocking the drums or bass.

    Build it as a reusable return, automate it musically, and resample the best moments. That’s how you turn a dry ragga chop or stab into a proper jungle weapon 🥁🔥

    If you want, I can also give you:

  • a ready-made macro mapping template
  • a version for vocal chops specifically
  • or a full 8-bar arrangement example for this FX chain in Ableton Live 12

Ask GPT about this lesson

Chat with the lesson tutor, get follow-up help, or use quick actions.

Bigup 👽 Ask me anything about this lesson and I’ll answer in context.

Narration script

Show spoken script
Welcome back. In this lesson we’re building an FX chain in Ableton Live 12 that gives your jungle and oldskool DnB ideas that smoky warehouse vibe. Think damp concrete, late-night sound system pressure, ragga attitude, and echoes bouncing around a dark room at 3AM.

This is not about making everything huge and shiny. It’s about controlled decay, selective dirt, and movement that feels musical. We want the ambience to sit behind the drums and bass, not smear over them. If you’ve got ragga vocal chops, siren stabs, dub hits, break edits, horn shots, or little atmosphere layers, this chain is going to make them feel like they belong in a proper oldskool rave.

We’re going to build this using stock Ableton devices, so you can use it in any project without needing third-party plugins.

First, a quick mindset note: treat the FX return like an instrument. Don’t just send audio into it and leave it there. Play it. Automate it. Mute it. Throw one word into it at the end of a phrase and let the tail answer back. That’s where the character lives.

Start with a source that already has some attitude. This chain works best on things like a ragga phrase, a rimshot, a short stab, a snare accent, or a dub-style impact. If your sound is too clean and polished, the chain will still work, but it won’t feel as authentic. Smoky warehouse processing likes a bit of roughness.

Now create a Return track in Ableton and give it a clear name, something like Warehouse Dub FX. Using a return is usually better than inserting the effect chain directly on the source, because it lets you feed multiple elements into the same vibe, and it keeps your dry drums punchy while the atmosphere sits behind them. Set the return to fully wet if you’re using it as a send effect.

The first device in the chain is EQ Eight. This is where we shape the tone before the space and delay start doing their thing. Put in a high-pass filter somewhere around 120 to 180 hertz to clean out low-end mud. On a DnB return, you often want to be even more aggressive if needed. Then add a low-pass around 8 to 12 kilohertz to remove the brittle top end and make the whole thing feel older and darker. If the sound is boxy, dip a little around 300 to 600 hertz. That band can really build up fast in warehouse-style ambience.

The reason we do this first is simple: oldskool dub and jungle FX are often band-limited. They don’t sound pristine. They sound like they’ve been through time, speakers, tape, and air. That darkness is part of the vibe.

Next, add some saturation. You can use Saturator, Roar, or Drum Buss depending on the source. If you want something simple and reliable, go with Saturator. Try around 2 to 6 dB of drive, turn soft clip on, and then level-match the output. That gives you warmth and density without blowing the sound apart. If you want a more modern gritty harmonic character, Roar can work really nicely, but keep it subtle. On a send, less is usually more. If the source is percussion-heavy, Drum Buss can add nice edge and crunch, but be careful with the Boom control unless you specifically want extra thump.

The goal here is not destruction. We’re adding smoke, not setting the room on fire. You want the sound to feel warmed up, aged, and a little rough around the edges.

Now comes the heart of the chain: Echo. This is where the dub pressure lives. Put Echo after the saturation. Sync the time to your project tempo and try values like 1/8, 3/16, or 1/4 dotted. Those are especially useful for vocal stabs and rhythmic throws. Keep feedback around 20 to 45 percent for a controlled tail, and if this is a return track, set the wet amount to 100 percent.

Then shape the delay tone. High-pass the echo around 200 to 400 hertz so it doesn’t clutter the low end, and low-pass it around 4 to 8 kilohertz to keep it dark and smoky. Add a small amount of modulation if you want movement, and use Age or Wobble gently for that worn, hardware-like instability. A little bit of noise can also help if you want tape character.

For DnB, some really useful delay timings are 1/8 dotted for vocal phrases, 1/4 for broader atmospheric throws, and ping-pong when you want width. Just be careful with ping-pong on anything low-mid heavy, because it can start to blur the groove fast.

A classic move here is to automate send levels or feedback only on certain words or hits. For example, let a ragga phrase like “come again” shoot into the echo, or hit the last snare of a bar and let the tail speak for a moment. That’s pure jungle language right there.

After Echo, add Reverb or Hybrid Reverb for the warehouse space. Start with a decay somewhere around 1.8 to 4.5 seconds, a pre-delay around 15 to 35 milliseconds, and a medium-to-large size. Keep the diffusion fairly high, but not so high that everything turns into a blur. Use a low cut around 200 to 400 hertz and a high cut around 5 to 9 kilohertz. You want the reverb to feel big and dark, not bright and glossy.

If you use Hybrid Reverb, you can combine a room or convolution style with a lush tail, which can sound amazing for a warehouse vibe. The important thing is to keep the reflections and tail darker than the dry source. We’re not trying to make EDM sparkle. We’re building atmosphere that sits deep in the mix.

One thing to remember: jungle depends on rhythmic clarity, even when it’s atmospheric. So don’t let the reverb wash over the breaks and smear the bass. The space should support the groove, not hide it.

Next, add Auto Filter. This is where the chain starts to breathe. Put it after the reverb and set it to a low-pass filter. Add a little drive if you want some extra edge, then use the LFO subtly. Try rates like half notes, one bar, or two bars for slow movement. Keep the amount low to medium and resonance moderate. The idea is to make the FX feel alive, not seasick.

This device is great for slow dark sweeps into a drop, breathing ambience under the drums, or controlled throws at the end of phrases. A really good trick is to automate the cutoff so it opens slightly before a fill, then closes back down after the drop. That kind of motion makes the whole thing feel very sound-system and very warehouse.

Finish with Utility. This is your stereo control and cleanup stage. Keep the width around 80 to 120 percent depending on how wide you want the return to feel. Since this is a return track, you should already be avoiding sending too much low-end content into it, but Utility is still useful for keeping the image solid and controlled. Use gain to compensate if the chain is too loud or too quiet.

If you want extra oldschool grime, you can add an optional texture layer near the end. Redux is great for subtle bit reduction or sample-rate reduction. Use it very lightly, especially on vocal stabs or one-shot FX. Grain Delay can also create some really wild jungle atmospheres if you keep the dry/wet low and the filter dark. This is where you can get that slightly broken pirate-radio flavor without losing the musicality.

Now, once the chain is built, wrap it in an Audio Effect Rack and map some macros. This is where the workflow gets powerful. For example, you could map one macro to Smoke, which controls saturation and low-pass cutoff. Another could be Space, linked to reverb decay and send amount. Dubs could control delay feedback. Wobble could move the modulation depth or filter LFO. Grime could affect saturation drive or Redux amount. Width could control the Utility width. Tone could shape the high-cut. And Throw could be your momentary lift for feedback or send boosts.

That makes the rack much more playable. You can jam it live, automate it across sections, or use it to create variation in a 16-bar arrangement without constantly rebuilding the chain.

Let’s talk arrangement, because this is where the effect really earns its keep. In the intro, keep things dark and distant. Maybe a low-level ragga vocal send, a filtered delay tail, and minimal drums. In the build, increase the send amount on a vocal chop or horn stab, slowly open the filter, and keep the delay from getting too long as the drums become more active. In the drop, reduce the reverb on the main groove elements and use the chain more sparingly, maybe only on the last snare of every four or eight bars. Then in the breakdown, open it back up. Push more into the warehouse chain, automate feedback and cutoff, and let the tails become part of the atmosphere.

That contrast is what keeps the mix from turning into fog. Too much ambience all the time just flattens the track. The magic happens when you use the FX as punctuation.

A few common mistakes to watch out for. First, too much low end in the return. If the reverb and delay are bloating the sub region, the whole tune will feel muddy. High-pass the return aggressively enough. In DnB, 150 to 250 hertz is often completely reasonable for a send. Second, making it too bright. Warehouse vibe is not sparkling. Use darker filtering and aged top end. Third, too much feedback. Dub delays can take over very fast, so automate them instead of leaving them maxed out. Fourth, overusing stereo widening. Keep the return wide, but check mono compatibility and avoid bloated low mids. And fifth, don’t put this kind of chain on the master. Keep it on returns or specific sends so your dry core stays strong.

Here are a few pro moves to take it further. One is to run two parallel returns. Make one a short dirty echo return and the other a long warehouse reverb return. That gives you separate control over rhythm and haze. Another is to sidechain the return with a Compressor keyed from the kick or drum bus. You don’t want pumping, just subtle ducking so the ambience sits behind the beat. Another strong move is to filter into the drop. Roll the low-pass down before the drop, then snap it open slightly on the downbeat. That contrast makes the drop hit harder.

Resampling is also huge in jungle. Print a few bars of the return, then chop the tail into reverse swells, stutters, tape-stop-style edits, or impact layers. That’s a very authentic oldskool workflow. You can also use the effect chain as a phrase tool instead of a constant wash. Send only selected hits from the break, like snare rolls, ghost hats, vocal punctuations, or percussion accents. Not every hit needs the same amount of ambience. Think in layers of depth: dry drums and bass up front, delayed dark FX in the middle, and washed atmosphere in the back. If everything sits at the same distance, the room illusion disappears.

Here’s a quick practice exercise. Pick a ragga vocal chop, a rimshot, a short synth stab, or a siren hit. Build a return with EQ Eight, Saturator, Echo, Reverb, Auto Filter, and Utility. High-pass at 150 hertz or higher. Keep it dark. Use one synced delay time, like 1/8 dotted. Automate the filter cutoff over eight bars. Then create one moment where the feedback rises briefly for a dub throw. Bounce it, resample it, and chop it into three usable FX fills. If it doesn’t sound like it belongs in a smoky jungle rave, make it darker, a bit grittier, slightly tighter, and less washed out.

So the big takeaway is this: in jungle and oldskool DnB, atmosphere works best when it supports the groove instead of smothering it. Your FX chain should feel like fog in a sound system room: thick, moving, alive, and full of character, but never blocking the drums or bass. Build it as a reusable return, automate it musically, and resample the best moments. That’s how a dry ragga chop or stab turns into a proper jungle weapon.

If you want, I can also turn this into a macro mapping guide, a vocal-chop-specific version, or a full 8-bar arrangement example.

mickeybeam

Go to drumbasscd.com for +100 drum and bass YouTube channels all in one place - tune in!

Generating PDF preview…