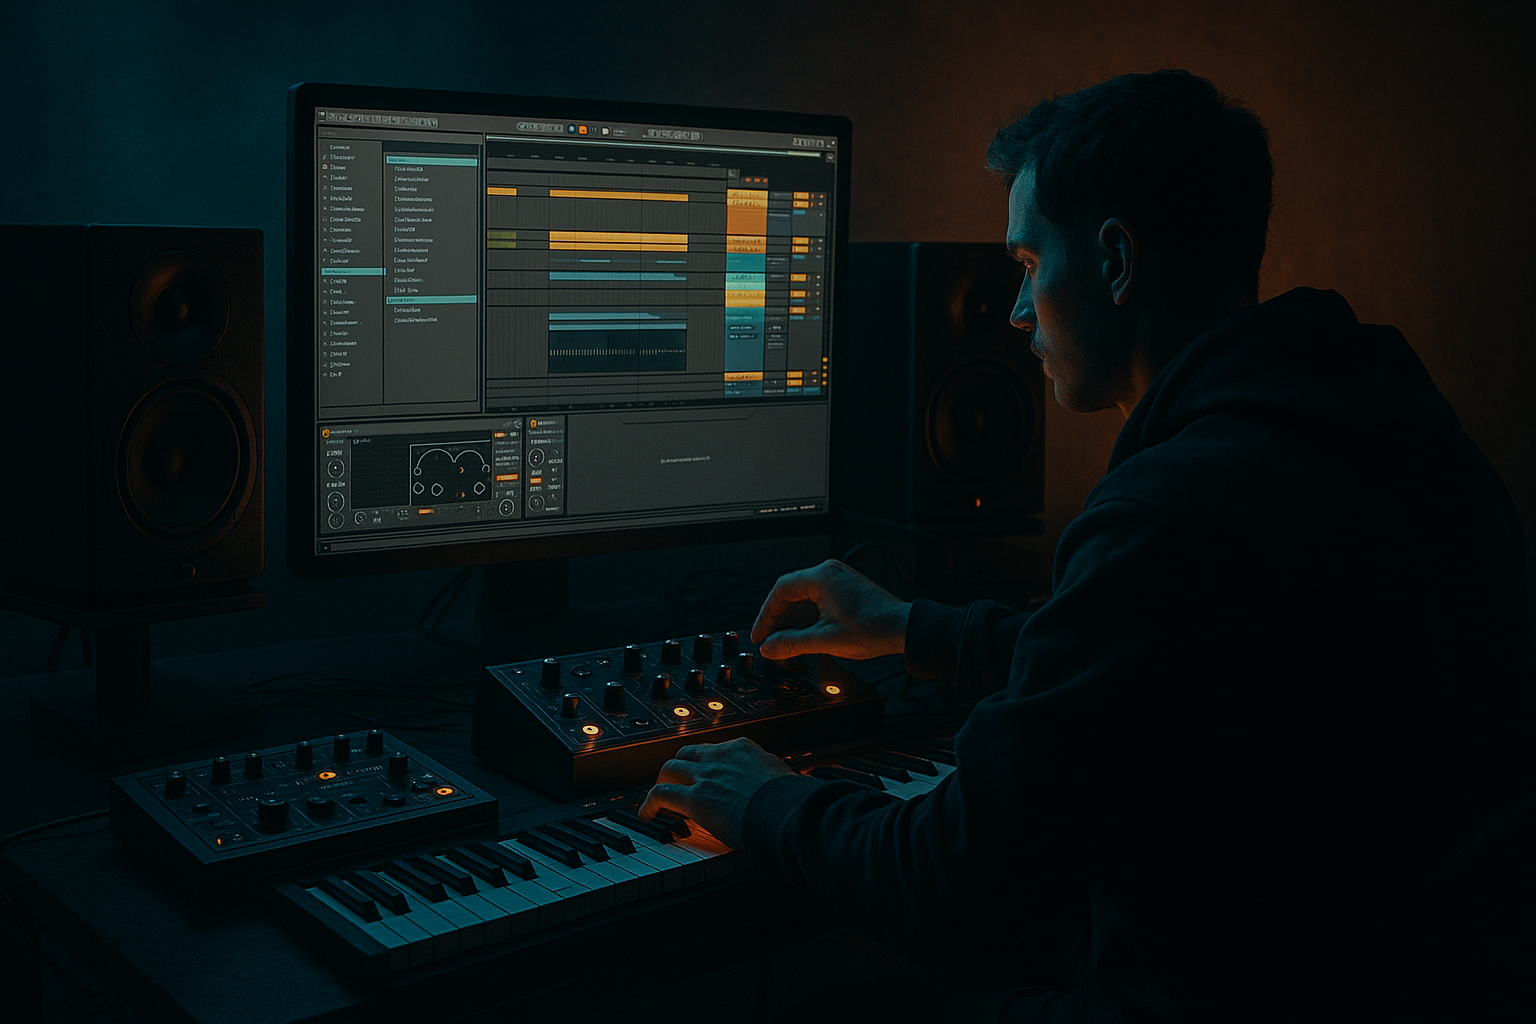
Main tutorial
Lesson Overview
Oldskool DnB breakbeat is one of the fastest ways to give a track instant pirate-radio energy: raw, urgent, and still clean enough to hit hard on a modern system. In this lesson, you’ll learn how to build a break-driven drum section in Ableton Live 12 that feels rooted in jungle and early rollers, but is organized and mixed like a contemporary advanced DnB production.
The goal is not to make the drums “perfectly polished” in a sterile sense. The goal is to make them tight, energetic, and aggressively musical: the kind of break treatment that leaves room for a dark reese, a subline, and a DJ-friendly arrangement, while still sounding like it could come out of a late-night pirate radio set. That means editing the break with intention, automating motion across sections, controlling transients, and shaping the groove so it feels alive instead of looped.
Why this matters in DnB: the breakbeat is often the emotional engine of the track. In oldskool-inspired DnB, the break isn’t just percussion — it’s momentum, swing, identity, and tension. If you can automate the break so it evolves through the intro, build, drop, and switch-up, you can make a simple 8-bar idea feel like a full arrangement. ⚡
What You Will Build
You’ll build a clean but gritty oldskool DnB breakbeat system in Ableton Live 12 consisting of:
- A main break loop with edited ghost hits, cleaned transients, and groove
- A layered kick/snare reinforcement chain to keep the break powerful on modern playback
- A parallel drum bus for saturation and glue without flattening the break
- Automation that evolves the break over 16-bar sections
- Arrangement moves for a DJ-friendly intro, a drop with pirate-radio energy, and a switch-up that opens the energy
- A mix-ready drum foundation that can support a sub-heavy bassline, a reese, or a darker call-and-response bass phrase
- Bars 1–8: filtered break intro with atmosphere and tension
- Bars 9–16: full break enters with kick/snare reinforcement and subtle top-end movement
- Bars 17–24: bassline locks in, break gets more aggressive with automation accents
- Bars 25–32: switch-up with a fill, filter motion, and a small drum variation to reset the groove
- Over-quantizing the break
- Making the break too loud instead of better shaped
- Letting kick layers fight the bassline
- Overusing reverb on snare hits
- Automating too many parameters at once
- Ignoring mono compatibility
- Use parallel saturation on the drum bus: duplicate the drum bus, crush one copy with Saturator or Drum Buss, then blend it quietly underneath. This adds pressure without killing transients.
- Automate the break’s brightness, not just its volume: a 1–2 dB high-shelf lift during the drop can make the energy feel like it’s opening up.
- Resample fills for authenticity: chopped, re-recorded break fills often feel more “real” than fully programmed ones.
- Keep the snare as the emotional anchor: in darker rollers, the snare is often what makes the track feel forward and authoritative.
- Use tiny timing offsets between layers: a kick layer slightly ahead and a hat layer slightly behind can create a more human, urgent pocket.
- Let the bass answer the drums: in neuro-leaning dark DnB, a short bass stab after a break fill can feel huge if the arrangement leaves a pocket.
- Make the intro DJ-friendly: 16 bars of stripped drums with evolving filter and atmosphere gives selectors room to mix while still sounding alive.
- Clean oldskool DnB breakbeats work best when they’re edited for timing first, processed second.
- Use Ableton stock devices like EQ Eight, Drum Rack, Glue Compressor, Saturator, Drum Buss, Auto Filter, Utility, and Reverb to shape the break into a modern, mix-ready DnB backbone.
- Automation is the key: filter, saturation, width, and sends should evolve across 8- and 16-bar phrases.
- Keep the break energetic but not messy by protecting the sub, controlling the low mids, and checking mono.
- The strongest pirate-radio energy comes from a break that feels alive, dangerous, and deliberate — not overproduced.
Musically, the result should feel like:
Step-by-Step Walkthrough
1. Choose a break with character, then edit the timing before adding processing
Start with a classic break source: think tight, punchy, and recognizably oldskool — Amen-style energy, Think break flavor, or any short funk break with strong snare backbeats. Drag it into an Audio Track and set the Warp mode to Complex Pro only if the break is long and tonal; for short, punchy drum breaks, use Beats and preserve transients.
In Ableton Live 12, zoom in and trim the clip so the downbeat lands exactly where your arrangement needs it. If the break is loose, don’t just quantize everything hard. Instead:
- Align the main snare to the grid
- Leave some micro-push/pull on ghost hits
- Nudge kicks forward by 5–15 ms if the groove feels late
- Pull a sloppy snare back by 5–10 ms if it smears the drop
Advanced tip: duplicate the break to a second track and create a “clean” version and a “dirty” version. The clean version can carry the groove; the dirty version can be more heavily processed and automated for transitions.
2. Build a reinforcement layer with Drum Rack for consistency
Oldskool breaks often need modern support in the low-mid and transient regions. Create a Drum Rack with:
- One short kick sample
- One snare/clap layer
- One hi-hat or shaker top layer
Keep these layers minimal. The break should still be the star. Use the Drum Rack to reinforce only what the break lacks:
- Kick: add a tight 808-style or acoustic kick with a fast decay
- Snare: layer a crisp snare with body around 180–220 Hz
- Hat: add a tiny closed hat to stabilize the top end
Suggested settings:
- Sampler or Simpler on each pad, with Fade/Decay under 120 ms for kicks and 150–250 ms for snares
- EQ Eight on the kick layer: high-pass only if needed, but usually low-pass the break layer instead
- Keep the kick layer about 3–6 dB lower than the break’s natural kick hits, unless the original break is extremely thin
Route the break and the layers to a Drum Bus for glue and shared movement later.
3. Clean the frequency split with EQ before you start automating
For pirate-radio energy, the low end should be punchy but not cloudy. On the break track, use EQ Eight:
- High-pass gently around 28–35 Hz if there’s rumble
- Cut muddy low-mid energy around 220–350 Hz if the break is boxy
- If the snare is harsh, tame 3.5–6 kHz by 1–3 dB, using a narrow-ish bell
- If the hats are brittle, use a shelf or gentle bell around 8–11 kHz
On the kick reinforcement, keep the fundamental focused and leave the sub to your bassline:
- Aim for a kick fundamental around 50–70 Hz or a punch point around 90–120 Hz
- Don’t let the kick fight the bassline’s sub notes
Why this works in DnB: the break gives you movement and texture, while the reinforcement layers give you translation. On a big system or in mono, you need the drums to read instantly without relying on messy overlap. Clean separation lets the bassline hit harder.
4. Apply groove without making it lazy
The oldskool feel comes from swing and microtiming, but in DnB you need control. Open the Groove Pool and try a swing from one of Ableton’s built-in MPC-style grooves or a subtle shuffle. Use this carefully:
- Start with 10–20% groove amount
- Apply groove to hats and ghost notes first
- Leave the main kick/snare anchors more stable
If you’re working with MIDI Drum Rack patterns, use groove on the clip. If you’re working with audio break edits, manually nudge select hits instead of over-quantizing the whole loop.
Useful approach:
- Keep the kick on-grid
- Let ghost snare notes sit slightly behind the grid
- Push some hi-hats a little ahead to create urgency
That tension between stable backbeat and restless top-end is a big part of authentic jungle and rollers energy.
5. Resample the break into a more controllable performance clip
Once the break and layers feel good, resample the combined drum bus to a new audio track. This gives you a single performance clip you can edit like an instrument. In Ableton, this is huge for advanced DnB because it lets you automate and sculpt a finished-sounding break without overcomplicating the live chain.
On the resampled clip:
- Slice or warp it into 1-bar or 2-bar phrases
- Create tiny fills by duplicating a snare hit or reversing a small segment
- Keep one version clean and one version with extra processing
Then use Simpler in Slice mode if you want to trigger individual hits from the resampled break. This is ideal for:
- Ghost note edits
- One-shot snare flams
- Stuttered fill-ins before the drop
Advanced workflow: resample three states of the drum section:
- Dry
- Saturated
- Filtered + FX
Then automate which clip or track is active by arrangement section. This keeps the energy moving without rebuilding every bar.
6. Create automation lanes that make the break feel alive across sections
This is the core of the lesson. Build automation on the break bus and select individual devices to shape the track over time. Focus on a few high-impact parameters instead of everything at once.
Strong automation targets:
- Auto Filter cutoff on the break bus
- Saturator drive on the drum bus
- Redux bit reduction very subtly for transition moments
- Reverb Send on snare hits only
- Utility width on tops and transitions
- EQ Eight high shelf or low cut for arrangement changes
Practical automation range ideas:
- Auto Filter cutoff: from 250 Hz up to 14 kHz over 8 or 16 bars
- Saturator drive: automate from 0 to +3 dB for subtle intensification, or +6 dB for a more aggressive switch
- Utility width: keep drums at 100% or lower, and open tops only to 120–130% in fills if needed
- Reverb send on snare: short bursts only, around 5–15% send, then pull back hard before the next downbeat
A very effective move: automate a low-pass filter on the break intro, then at the drop remove the filter while simultaneously increasing drum bus drive by a small amount. That creates a “waking up” effect that feels classic and effective.
7. Shape the drum bus with glue, not flattening
On the Drum Bus, use a gentle chain:
- Glue Compressor with slow-ish attack and fast release
- Saturator for harmonics
- Optional Drum Buss for transient emphasis and density
Suggested starting point:
- Glue Compressor: attack around 10–30 ms, release around 0.1–0.3 s or Auto, aiming for 1–2 dB gain reduction
- Saturator: Soft Clip on, drive around 1–4 dB
- Drum Buss: very light drive, Transients around 5–20, Boom minimal or off if the bass is already heavy
Don’t crush the break. You want the transient snap of the snare and kick to survive. The point is to make the break feel like one coherent performance, not a pasted loop.
If the break gets too sharp after processing, place a Dynamic Tube or a small EQ dip in the 4–7 kHz zone. That keeps the pirate-radio roughness without turning into fizz.
8. Write the arrangement around the break’s energy curve
Think in 8- or 16-bar phrases, like a DJ would mix it. A clean oldskool DnB arrangement often works best when the break tells the story before the bass fully arrives.
Example arrangement context:
- Bars 1–8: intro with filtered break, atmosphere, and a teased snare fill
- Bars 9–16: drop with full break and bassline entering on bar 9 or 11
- Bars 17–24: call-and-response between bass and drums; automate break brightness slightly higher
- Bars 25–32: switch-up with a one-bar drum fill, then strip back to the core loop
Use automation to support arrangement:
- Open the filter slightly every 4 bars
- Increase drum bus saturation just before the bass phrase lands
- Add a short reverb throw on the final snare before a section change
- Remove low-end from the break briefly before a sub-heavy bass re-entry
This is where advanced DnB arrangement thinking matters: the drums are not just repeating, they are sculpting tension and release across the whole tune.
9. Protect the sub and make room for the bassline
A clean oldskool break needs a disciplined relationship with sub weight. If your bassline is a rolling sub/reese hybrid, keep the break from stealing the bottom octave.
Use Utility on the break bus to check mono, and compare with your bass. Then:
- High-pass the break lightly if needed
- Remove unnecessary low-end from any layered kick that overlaps the sub
- Sidechain the bass very gently to the kick/snare anchor if the groove needs more pump
For a darker bassline, think call-and-response:
- Break fills leave space for bass phrases
- Bass drops out on the first snare of a new phrase
- A reese answers the break with a short, syncopated stab
Why this works in DnB: the genre is often built on the relationship between drum momentum and bass pressure. If the drums and bass both claim the same low-mid space, the track loses urgency. Clear arrangement gaps make the break feel even faster.
10. Add transition FX, but keep them functional
Oldskool pirate-radio energy loves a bit of chaos, but every FX move should help the groove. Use stock Ableton tools:
- Auto Filter sweeps for build tension
- Reverb throws on the last snare before a drop
- Delay on a chopped break hit for a tiny tail
- Reverse a short drum slice into a fill
- Vinyl Distortion or Redux very subtly for grime
Keep these FX short and deliberate. For example:
- A snare reverb throw of 1/8 or 1/4 length only at the end of an 8-bar phrase
- Delay feedback around 10–25% for a single atmospheric repeat
- Filter resonance modest, around 10–25%, so the sweep doesn’t whistle over the break
If the FX start fighting the drums, mute them. The break should still feel punchy and forward.
Common Mistakes
Fix: keep the main anchors stable, but let ghost notes and hats breathe.
Fix: use EQ, saturation, and layer balance. Volume alone won’t solve a muddy loop.
Fix: choose whether the kick supports the sub or the mid punch, then carve accordingly.
Fix: use short throws only at phrase endings. Too much wash kills pirate-radio urgency.
Fix: pick 2–4 high-impact moves per section, such as filter cutoff, saturation drive, and width.
Fix: check Utility in mono on the drum bus. If the break collapses badly, simplify stereo FX and top-end widening.
Pro Tips for Darker / Heavier DnB
Mini Practice Exercise
Spend 15 minutes building a 16-bar drum passage in Ableton Live:
1. Load one break into Audio Track 1 and warp it in Beats mode.
2. Build a minimal Drum Rack layer with kick, snare, and hat reinforcement.
3. Route both to a Drum Bus with EQ Eight, Glue Compressor, and Saturator.
4. Create automation for:
- Auto Filter cutoff from dark to open over 16 bars
- Saturator drive increasing slightly on bars 9–16
- Reverb send only on the last snare of bars 8 and 16
5. Resample the finished drum bus to a new audio track.
6. Edit one 1-bar fill from the resampled clip and place it at bar 16.
7. Check the result in mono and reduce any stereo widening if the groove collapses.
Goal: make the break feel like it evolves across the section, not just loops.

