Main tutorial
1. Lesson overview
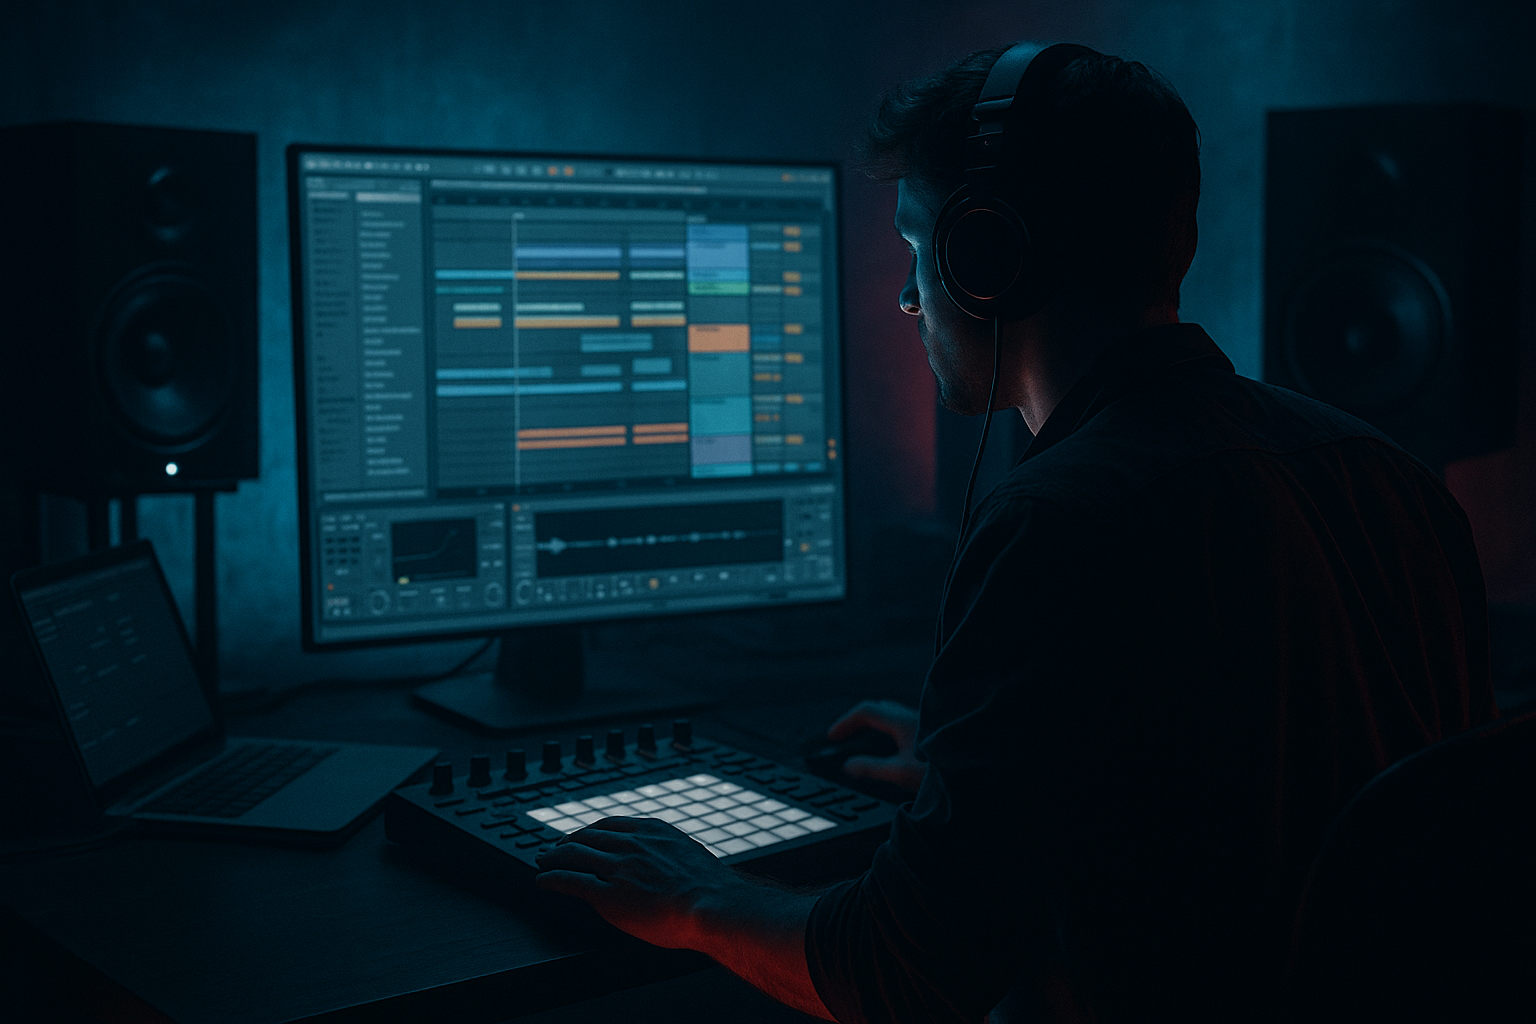
Energetic, rolling, and long — a 32-bar drop needs movement, variation and tight low-end control so the energy doesn’t flatten out. In this lesson you’ll build a full 32-bar Drum & Bass drop in Ableton Live (174 BPM) with practical Ableton device chains, arrangement strategies, automation lanes, and mix-ready settings. This is an intermediate-level, hands-on walkthrough that assumes you already know basic clip editing, grouping, and warping in Ableton.
Expect to finish with:
- A solid 32-bar drop arranged in Arrangement View.
- A drum/drum-bus workflow, layered bass (sub + mid growl), FX and automation to keep 32 bars interesting.
- Stock-Ableton device chains and practical settings you can drop into any DnB project. ⚡️
- Punchy break/drum arrangement with variations and fills.
- Layered bass: clean mono sub + distorted mid growl modulated across the drop.
- FX, risers, and impact transitions that maintain forward momentum.
- Mix-aware routing (drum bus, bass bus, FX returns) and sidechain that keeps the low-end tight.
- Dynamic automation and micro-variations so the 32 bars never feel static.
- High-pass everything except the sub/bass under 40–60 Hz with EQ Eight.
- Keep the sub track clean and mono; all distortion/width applied to midlayer only.
- Use Multiband Dynamics lightly on the overall bass bus: compress mids/heavies to glue the growl to the sub.
- Use a brickwall limiter only at final bounce — keep master no more than -6 to -3 dBFS during arrangement.
- Letting the drop sit static for 32 bars: a true “long” DnB drop needs micro-variation every 1–4 bars (hat rolls, velocity changes, filter nudges).
- Distorting the sub: adding saturation/distortion before low-pass will ruin clean sub content — always high-pass or use side-chain EQ on distortion chains to protect sub (cut below 100–120 Hz).
- Overusing reverb on low-end elements — sends to reverb should be high-passed.
- Not checking mono/phase: wide mids with low subs can cancel in club PA systems.
- Using the same drum loop without resynthesis: relying only on static break samples without slicing and reprocessing leads to repetitive drops.
- Over-compressing the entire mix while arranging — kills dynamics and the “breathing” feel.
- Use aggressive midrange saturation: employ a parallel chain with Saturator driving into Overdrive. Then compress that chain heavily and blend via macro. This keeps the low-end clean while the mids bite.
- Notch & resonance: for darker tones, use narrow band EQ boosts at 800–1200 Hz with a slightly resonant filter to create vocal/formant-like character on growls.
- Gated reverb tails: automate reverb sends or gate returns to keep tails from smearing; use transient gating (Gate Max for Live or Sampler AMPL envelope).
- Make silence powerful: occasional 1/16 or 1/8 rests in drums reset energy and make returns heavier.
- Make the last 8 bars unpredictable: slight off-grid hat rolls, increased shuffle on hats, or a tempo-synced LFO on growl cutoff for wobble.
- Use subharmonic trick: a sine sub an octave below your main note, ducked by the main sub to create subterranean weight.
- Film-scoring percussion: layer metallic hits (Corpus or Resonator) to give industrial, angry tones that cut through the mix.
- Sidechain band-compression: compress the mids (200–1kHz) harder than lows: Multiband Dynamics can duck muddy mids more than sub.
- Break down the 32 bars into manageable zones (four 8-bar sections) and plan escalation.
- Keep sub clean and mono; apply distortion and width to mid-bass only.
- Use Drum Rack + Drum Bus with Glue/Drum Buss to get punch; protect mix with HP filters on non-bass tracks.
- Maintain interest with micro-variations: fills, automation, filter modulation, FX sends.
- Use sidechain compression and multiband control to keep the low-end tight and powerful.
- Practice the mini exercise to internalize the workflow and then expand the arrangement with extra layers and transitions.
2. What you will build
A 32-bar rolling DnB drop at 174 BPM with:
You’ll use Ableton stock devices such as Drum Rack, Simpler/Sampler, Wavetable/Operator, EQ Eight, Compressor (for sidechain), Glue Compressor, Saturator, Overdrive, Utility, Auto Filter, Echo/Delay and Reverb (Return tracks), Beat Repeat, Redux and Drum Buss.
3. Step-by-step walkthrough
Prereqs: Ableton Live (10+), basic knowledge of clips/groups. Set tempo to 174 BPM and work in Arrangement View.
A. Project template & routing (5–10 minutes)
1. Create tracks:
- Drum Rack (Audio or MIDI track)
- Bass Sub (MIDI track, Simpler/Operator)
- Bass Growl (MIDI track, Wavetable or Sampler)
- FX/Atmos (Audio tracks for samples)
- Vocals/Chops (Audio)
- Master return tracks: Reverb (Return A), Delay (Return B), Filter/Auto-Filter Return (Return C)
2. Create Bus Groups:
- Group drums into “Drum Bus”
- Group bass tracks into “Bass Bus”
- Send drums/bass to the Returns for ambience.
3. Utility and mono management:
- Add Utility on Bass Sub with Width = 0 (sub mono).
- Place Utility first in the chain for gain staging.
B. Foundations: drums (20–30 minutes)
1. Pick an amen-style break or layered one-shots.
- Use Drum Rack: top layer for transient snaps (close hats, top-snares), one chain for kick, one for snare, and one for sliced break material (Simpler slices or audio clip).
2. Drum Rack chain ideas:
- Kick chain → transient-enhancer: Drum Buss (drive 2–4), EQ Eight (HP 30–40 Hz), Glue Compressor (fast attack 1–3 ms, release 0.1–0.3 s).
- Snare chain → add Saturator (Warmth: Drive 2–4 dB, Type: Analog Clip), parallel reverb send only.
3. Process the break:
- Chop a break into a Simpler (Slice mode) or use audio warp and consolidate 4-bar pattern.
- Edit variations every bar: e.g., drop hat on beat 3 every second bar, ghost notes on snare.
- For fills use Beat Repeat (Interval: 1/16, Chance: 50–80%, Gate: 1/8) automating On/Off during fill bars.
4. Drum Bus chain:
- EQ Eight: HP at 40 Hz for clarity; slight bell boost at 150–200 Hz for thump (+1.5–3 dB); cut 300–600 Hz if muddy.
- Drum Buss: Crush 1–2, Boom 2–4 (taste).
- Glue Compressor: Ratio 4:1, Attack 1–3 ms, Release 0.1–0.3 s — glue the kit.
- Parallel chain: Duplicate Drum Bus group; heavy compression and distortion to blend for attitude.
C. Sub + mid-bass assembly (25–35 minutes)
1. Sub (Mono, Simpler/Operator):
- Use Operator with Sine on oscillator A; set octave to -2 or -3 according to key.
- LP filter off or very low-cut; no stereo width. Utility width = 0.
- Add EQ Eight: cut above 180–220 Hz (low-pass), slight boost 40–70 Hz if needed.
- Compression: minimal; keep sub clean.
2. Mid / growl (Wavetable or Sampler):
- Initialize Wavetable: choose a noisy, wavetabled oscillator; add FM or wavetable position modulation for movement.
- Filter: Lowpass with drive. Set cutoff around 600–1500 Hz and modulate with an LFO or envelope.
- Distortion chain: Saturator -> Overdrive -> EQ Eight (shelf cut <80–120Hz to avoid destroying the sub).
- Parallel distortion: Create an Audio Effect Rack with 2 chains — Dry clean + Distorted (Saturator + Glue). Macro to control Distort amount.
3. Routing:
- Sidechain the growl to the kick/snare group via Compressor sidechain: Compressor on Growl, sidechain input = Drum Bus (or a ghost kick). Settings: Ratio 3–6:1, Attack 1–5ms, Release 70–150 ms, Threshold until you get ~3–6 dB duck during transients.
- Send both Sub + Growl to Bass Bus for group processing (EQ, Multiband Dynamics).
D. Arrangement: breaking the 32 bars into zones (30–40 minutes)
Strategy: treat 32 bars as four 8-bar sections: A (1–8), B (9–16), C (17–24), D (25–32). Introduce, vary, intensify, climax.
1. Bars 1–8 (A — core theme)
- Drop start: kick+snare chop + sub hit + growl stab on 1. Keep elements minimal but strong.
- Keep main drum loop locked in. Bass groove pattern repeats every 2 bars; modulate growl LFO slowly.
- Automation: slight rise on reverb send (0 → low) for hats, small cutoff movement on growl (Macro).
2. Bars 9–16 (B — variation)
- Add percussion layers (rolling hats, shuffled toms).
- Introduce a mid-range texture (metallic hit) using Corpus on a noise sample. Put that on off-beats and automate panning.
- Drum fills: at bar 16, create a 1-bar fill with Beat Repeat and increase snare reverb send automated to higher value. Add a white-noise riser (automate filter cut-off up) ending with a short reverse cymbal to transition.
3. Bars 17–24 (C — intensify)
- Add a second growl voice or automate more aggressive distortion macro.
- Introduce rhythmic gating on a pad or atmosphere using Auto Filter set to Band Pass and LFO (sync to 1/4 or 1/8) to add motion.
- Reduce low-mid clashes: automate EQ Eight on Drum Bus to notch 300–500Hz slightly when the second growl hits.
- Add micro-variations: remove kick for 1 beat at bar 20, then slam it back to create push/pull energy.
4. Bars 25–32 (D — climax + release)
- This is the peak. Increase Drive on Distortion Macro gradually from bar 24–28.
- Automate send to Delay (Return B) to increase in presence on certain snare accents (try send values 0.05 → 0.25).
- Add a dual-hit impact (low-frequency sub-hit + wide short impact) at bar 32; sidechain all pads and long tails to stop them abruptly.
- End the 32 bars with either a half-bar cut (silence) or an 8-bar extension depending whether you’re going to a breakdown or play out.
E. FX, transitions and interest tricks (10–20 minutes)
1. Risers: create a long white-noise riser on an audio track. Use EQ Eight automation to open cutoff slowly across 4–8 bars. Add Glue Compressor for punch when it hits.
2. Reverse hits: reverse cymbals, vocal chops, or snare tails placed before bar transitions.
3. Drum micro-fills: program snare rolls with decreasing groove values (1/32 → 1/64) and add pitch automation with Sampler transpose for rising tension.
4. Use Echo and Ping Pong delays on the Return with feedback 30–50% and lowpass around 5kHz — automate Send up during the climax for lush tails.
F. Automation & arrangement housekeeping (10–15 minutes)
1. Group automation and macros:
- Create macros in an Effect Rack for growl Drive, growl Cutoff, Drum bus Glue Gain, Reverb send level.
- Automate macros rather than many small device knobs for faster recall.
2. Clip automation:
- On repeating clips, use clip envelope to adjust pitch and filter LFO for subtle per-loop variation (e.g., detune 1–2 cents on alternate bars).
3. Final checks:
- Listen in mono (Utility Width = 0 on Master) to check phase issues.
- Use Spectrum to monitor sub energy; avoid peaks above -6 dBFS on master while arranging (leave headroom).
G. Quick mix notes during arrangement
4. Common mistakes
5. Pro tips for darker/heavier DnB
6. Mini practice exercise (30–60 minutes)
Goal: Create a minimal, effective 32-bar drop skeleton you can expand.
Steps:
1. Set Ableton to 174 BPM. Create a 32-bar MIDI Arrangement view loop region.
2. Drums:
- Drag an Amen break (or favorite beat) to an audio track, warp to 174 and create a 4-bar loop. Chop into Simpler slices and build a 4-bar drum clip; duplicate to fill 32 bars.
- Program two fills: a 1/8 fill at bar 8 and a 1/16 roll at bar 24 using Beat Repeat.
3. Bass:
- Create Sub with Operator: sine octave -3. Place a sustained sub hit on each downbeat.
- Create Growl with Wavetable: add LFO to filter cutoff (sync 1/8), set lower cutoff 700 Hz. Add Saturator (drive 3), then EQ Eight cutting below 100 Hz.
- Sidechain growl to the drum bus with Compressor (set release 80–120ms).
4. Dynamics & automation:
- Automate growl filter cutoff: start 20% closed in bar 1, slightly open by bar 9, more open by bar 17, and maxed for 2 bars in 25–26 then tightened after.
- Automate a Distort Macro: 0% in bars 1–8, ~25% bars 9–16, ~45% 17–24, ~70% 25–32.
5. FX:
- Add a white noise riser: highpass at 1k, automate cutoff up over 4 bars ending at bar 24, reverse cymbal at bar 24. Add a small reverb send increase in bars 25–28.
6. Play back and adjust ducking, filter movements, and fill placements. Aim to make each 8-bar block feel distinct.
If you finish the skeleton quickly, iterate: change velocity patterns, alternate drum loop slices every 4 bars, automate a small pitch detune (1–2 cents) on alternating growl notes.
7. Recap
Go build it — make those 32 bars breathe, twist and hit like a rolling DnB freight train. If you want, send a project export or screenshots of your arrangement and I’ll give concrete tweaks to levels, automation, or device settings. 🔥🥁

