DNB COLLEGE

Drum & Bass Ableton Live 12 Tutorials

LESSON DETAIL

Build oldskool DnB swing with automation-first workflow in Ableton Live 12 (Beginner)

An AI-generated beginner Ableton lesson focused on Build oldskool DnB swing with automation-first workflow in Ableton Live 12 in the Groove area of drum and bass production.

Back to lessons
Build oldskool DnB swing with automation-first workflow in Ableton Live 12 (Beginner) cover image

Narrated lesson audio

The voice track includes the tutorial plus extra teacher commentary.

Open audio file

Main tutorial

Build Oldskool DnB Swing with an Automation‑First Workflow (Ableton Live 12) 🥁⚡

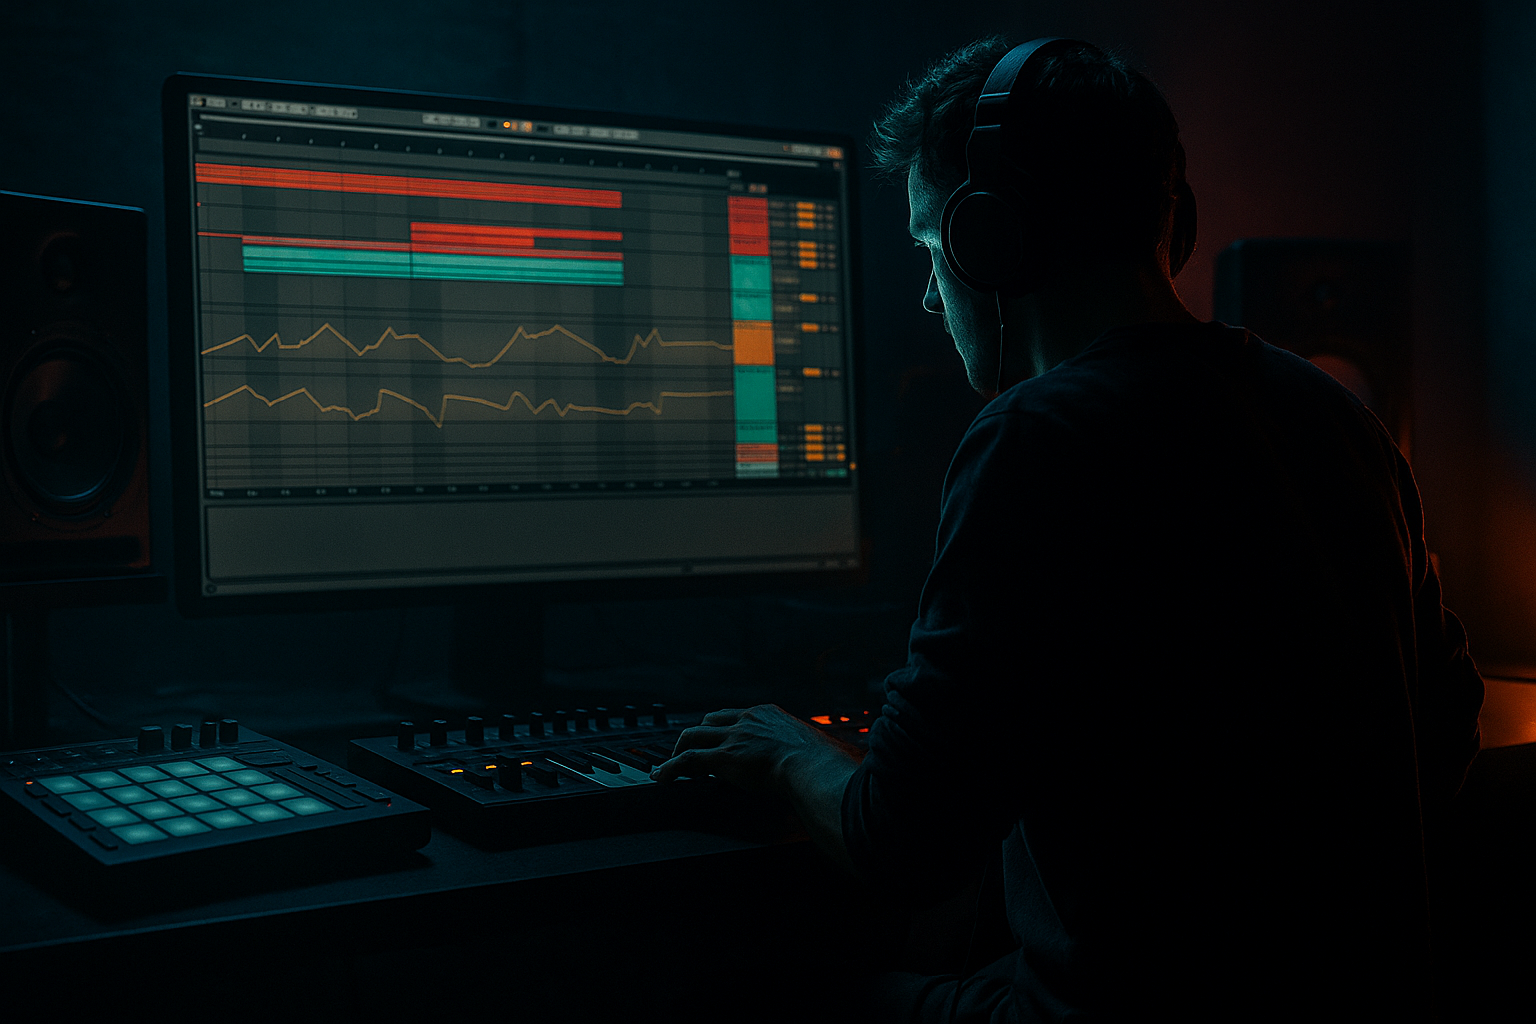
Skill level: Beginner • Category: Groove • DAW: Ableton Live 12 (stock devices)

---

1. Lesson overview

Oldskool drum & bass / jungle swing isn’t just “shuffle.” It’s a living push‑pull between kick, snare, hats, and ghost notes—plus tiny changes over time that stop a loop from feeling static.

In this lesson you’ll build a classic rolling break-style groove (think early jungle → techstep → early rollers) using an automation‑first mindset:

  • Get the beat working fast with simple MIDI/programming
  • Then immediately start automating feel (timing, velocity, filter, room/space)
  • Build a loop that evolves like a DJ-friendly 8–16 bar phrase 🎚️
  • ---

    2. What you will build

    You’ll end up with:

  • A 2‑bar oldskool DnB drum groove at 170–174 BPM
  • Classic snare on 2 and 4, with swingy hats and ghost notes
  • A “human” feel created by:
  • - Groove Pool swing + manual micro-timing

    - velocity shaping

    - automation lanes that move the groove over 8–16 bars

  • A tight, mix-ready drum bus using stock devices:
  • - Drum Rack + Simpler

    - Saturator / Drum Buss

    - EQ Eight

    - Compressor / Glue Compressor

    - Auto Filter

    - Reverb + Delay (subtle)

    ---

    3. Step-by-step walkthrough

    Step 0 — Project setup (so it feels like DnB immediately)

    1. Set tempo to 172 BPM (good all-round oldskool/roller tempo).

    2. Create 3 MIDI tracks:

    - `KICK`

    - `SNARE`

    - `HATS + GHOSTS`

    3. Optional but recommended: Group them into a Drum Bus Group (`Cmd/Ctrl + G`).

    ---

    Step 1 — Load basic drum sounds (fast and functional)

    Goal: Don’t hunt for perfect samples yet—get a groove running, then refine.

    Kick (Simpler):

  • Drag a punchy kick into Simpler (One‑Shot)
  • In Simpler:
  • - Warp: Off

    - Voices: 1 (to avoid overlap)

    - Filter: Off (for now)

    Snare (Simpler):

  • Use a snare with mid punch (think classic break snare vibe).
  • In Simpler:
  • - Voices: 1

    - Consider Filter: On later if it’s too bright

    Hats (Drum Rack is easiest):

  • Put Closed Hat and Open Hat into a Drum Rack on the HATS track
  • Keep it simple: one closed hat, one open hat.
  • ---

    Step 2 — Program the “anchor” DnB pattern (no swing yet)

    In a 1-bar loop first, then expand to 2 bars.

    Kick pattern (classic rolling foundation):

  • Place kicks at:
  • - 1.1

    - 1.3.2 (the “and” before 3)

    - Optional extra: 1.4.3 (light kick for momentum)

    Snare pattern (DnB backbone):

  • Put snare at:
  • - 1.2

    - 1.4

    This instantly reads as DnB/jungle. 🎯

    ---

    Step 3 — Add hats as steady “engine,” then make them swing

    1. Add closed hats on every 1/8 note (8th notes) for now.

    2. Add an open hat on the offbeat before the snare occasionally (tastefully), e.g.:

    - 1.1.3 or 1.3.3 (depends on your kick placement)

    Now the key: swing is mostly about what happens to the offbeats.

    ---

    Step 4 — Apply Groove Pool swing (the beginner-friendly way)

    1. Open Groove Pool (left side browser → Grooves → drag one to Groove Pool).

    2. Try one of Ableton’s built-in swings like:

    - Swing 16‑55 or Swing 16‑57

    - For jungle-ish looseness, try slightly heavier like 16‑59, but don’t overdo it.

    3. Drag the groove onto the HATS clip only first (not the kick/snare yet).

    4. In Groove Pool, set:

    - Timing: 50–70% (start at 60%)

    - Velocity: 10–25% (start at 15%)

    - Random: 0–10% (start at 5%)

    - Base: 1/16

    5. Click Commit only when you’re sure. For now, leave it live so you can tweak.

    Why this works: Oldskool feel often keeps the kick/snare solid while hats/ghosts “dance” around them.

    ---

    Step 5 — Micro-timing: the oldskool “push-pull” (crucial)

    Groove Pool gets you 60% there. The last 40% is manual nudges.

    In the HATS + GHOSTS MIDI clip:

    1. Turn off grid snapping temporarily (`Cmd/Ctrl + 4`).

    2. Nudge some offbeat hats slightly late (1–6 ms-ish feel; visually tiny).

    3. Nudge a few hats slightly early to create urgency.

    Rule of thumb (beginner-safe):

  • Keep snare dead-on.
  • Let hats + ghost notes do the wobble.
  • Kicks can be nudged a hair early/late, but be careful—too much kills weight.
  • ---

    Step 6 — Add ghost notes (this is where jungle energy appears) 👻

    Ghost notes = low-velocity hits that create motion.

    Add on the SNARE track (or a separate “GHOST SNARE” lane):

  • Use the same snare or a lighter snare/rim.
  • Place quiet hits:
  • - Just before the main snare (e.g., 1.1.4, 1.3.4)

    - Or between beats (tastefully, not everywhere)

    Velocity ranges (DnB-friendly):

  • Main snare: 95–120
  • Ghost snare: 20–50
  • Hats: vary 45–95 (don’t make them all identical)
  • Pro move (beginner-friendly):

    Make ghost notes slightly later than the grid. That “drag” is a classic oldskool pocket.

    ---

    Step 7 — Automation-first workflow: make the loop evolve over 8–16 bars 🎛️

    Now we stop thinking “static 1-bar loop” and start thinking like a track.

    #### A) Automate hat brightness (simple, huge impact)

    On the HATS track, add Auto Filter after Drum Rack.

    Settings:

  • Filter type: LP24
  • Frequency: start around 10–14 kHz (depends on hat brightness)
  • Resonance: 0.20–0.40
  • Drive: 0–3 dB
  • Automation idea (8 bars):

  • Bars 1–4: slightly darker (lower cutoff)
  • Bars 5–8: open it gradually to lift energy into the next phrase
  • This mimics how DJs feel energy rising without changing the beat.

    #### B) Automate swing amount (yes—automate groove feel)

    In Live 12, you can automate Groove Pool parameters by recording changes or committing variations.

    Beginner method:

    1. Duplicate your hats clip across 8 bars.

    2. Use two groove states:

    - Bars 1–4: Timing ~ 55–60%

    - Bars 5–8: Timing ~ 62–68%

    3. You can do this by:

    - Using two separate clips with different groove settings, or

    - Committing the groove to one clip and manually adjusting timing/velocities in the second.

    Result: the groove “leans” more as the phrase progresses—very oldskool.

    #### C) Automate ghost note density (arrangement groove trick)

    Over 16 bars:

  • Bars 1–8: fewer ghosts (more “intro DJ mix”)
  • Bars 9–16: add extra ghost hits + a tiny hat variation
  • This makes your drum loop feel like it’s “coming alive” without adding new instruments.

    ---

    Step 8 — Stock device chain for punch + glue (drum bus)

    On the Drum Bus Group, try this simple chain:

    1. EQ Eight

    - HP filter at 25–35 Hz (remove rumble)

    - Small dip if muddy: 250–400 Hz (–1 to –3 dB)

    - Optional presence: tiny boost 3–6 kHz (+1 dB) if needed

    2. Drum Buss

    - Drive: 2–8% (go easy)

    - Crunch: 0–10%

    - Boom: Off at first (or very subtle)

    - Transients: +5 to +15 (if you need snap)

    3. Glue Compressor (subtle)

    - Attack: 10 ms

    - Release: Auto

    - Ratio: 2:1

    - Aim for 1–2 dB gain reduction on peaks

    4. Optional: Saturator

    - Mode: Soft Sine or Analog Clip

    - Drive: 1–4 dB

    - Turn on Soft Clip if it’s spiky

    This keeps it punchy while retaining that gritty, rolling attitude.

    ---

    Step 9 — Arrangement idea: classic 16-bar DnB drum phrase

    Here’s a super usable structure:

  • Bars 1–4: Main groove, darker hats, fewer ghosts
  • Bars 5–8: Slightly more swing + hats open gradually
  • Bars 9–12: Add extra ghost notes or a small hat fill at bar 12
  • Bars 13–16: Mini break/edit (mute kick for 1/2 bar, or remove hats briefly), then slam back in
  • Oldskool is all about small edits that keep dancers locked. 🔥

    ---

    4. Common mistakes

    1. Too much swing on everything

    If you swing the kick/snare heavily, you often lose weight and impact. Start with hats/ghosts only.

    2. Identical velocities

    Perfectly even hats sound like a basic drum machine loop. Vary them deliberately.

    3. Over-randomizing

    Random timing can turn into sloppy timing. Use small amounts, then choose a few manual nudges.

    4. Ghost notes too loud

    If you hear them as main hits, they’re not ghosts—they’re clutter.

    5. No evolution across bars

    DnB grooves need phrase movement. Automate something every 8–16 bars.

    ---

    5. Pro tips for darker/heavier DnB 🖤

  • Short room reverb on snare only
  • Add Reverb on a return or directly on snare:

    - Decay: 0.4–0.9 s

    - Pre-delay: 10–25 ms

    - Low Cut: 200–400 Hz

    - High Cut: 6–10 kHz

    Keep it subtle—just enough to give “warehouse.”

  • Parallel smash (without killing transients)
  • Make a Return track with:

    - Compressor (fast attack) or Glue

    - Saturator

    Send drums lightly (10–25%). This adds density for darker rollers.

  • Tighter low end = heavier groove
  • Keep kick/snare clean with EQ Eight; don’t let hats/rooms muddy the low mids.

  • Use Corpus for metallic oldskool edge (carefully)
  • On hats or snare ghosts, very low mix can add that gritty resonance.

    ---

    6. Mini practice exercise (10–15 minutes) ✅

    1. Create a 1-bar DnB beat (kick + snare + 8th hats).

    2. Add Groove Pool Swing 16‑57 to hats only:

    - Timing 60%, Velocity 15%, Random 5%

    3. Add 4 ghost notes in the bar:

    - 2 ghost snares (velocity 25–45)

    - 2 extra hat taps (velocity 40–60)

    4. Duplicate to 8 bars.

    5. Automate Auto Filter cutoff on hats:

    - Start darker → open up by bar 8

    6. Add one tiny edit at bar 8:

    - Mute hats for 1/4 bar or remove one kick hit

    7. Bounce/export a quick loop and listen away from the DAW. Does it “roll” without anything else?

    ---

    7. Recap

  • Oldskool DnB swing = steady anchors (snare, main kick) + moving details (hats, ghosts, velocity, micro-timing).
  • Groove Pool swing is your fast entry point, but the magic is in manual nudges + velocity shape.
  • The automation-first workflow keeps your beat evolving: filter opening, swing variation, ghost density changes across 8–16 bars.
  • Stock Ableton devices (Auto Filter, Drum Buss, Glue, EQ Eight) are more than enough to get authentic rolling jungle/DnB groove.

If you want, tell me the vibe you’re aiming for (early jungle / techstep / liquid roller / modern heavy), and I’ll suggest a specific 2‑bar MIDI pattern + exact swing and ghost placements to match it.

Ask GPT about this lesson

Chat with the lesson tutor, get follow-up help, or use quick actions.

Bigup 👽 Ask me anything about this lesson and I’ll answer in context.

Narration script

Show spoken script
Title: Build oldskool DnB swing with automation-first workflow in Ableton Live 12 (Beginner)

Alright, let’s build that oldskool drum and bass swing in Ableton Live 12, beginner-friendly, using only stock devices, and with an automation-first workflow.

And here’s the mindset that makes this work: oldskool swing is not just “shuffle.” It’s a push-pull relationship. Your kick and snare are the anchors, and your hats and ghost notes are the ornaments that move around them. Then, to stop it sounding like a static loop, we automate the feel and tone over 8 to 16 bars like a DJ-friendly phrase.

By the end, you’ll have a rolling two-bar DnB groove around 172 BPM, with a solid snare on 2 and 4, hats that actually dance, ghost notes that create forward motion, and subtle automation that makes it evolve.

Let’s go step by step.

First, project setup.
Set your tempo to 172 BPM. That’s a sweet spot for oldskool, jungle, early rollers, all of it.

Now create three MIDI tracks and name them:
Kick
Snare
Hats plus Ghosts

Optional but recommended: select those three tracks and group them. That group becomes your drum bus, where we’ll do the glue and punch later.

Next, load basic sounds, and do it fast.
The biggest beginner trap is sample-shopping for 30 minutes and then never finishing the groove. So today, pick functional sounds first. We can refine later.

On the Kick track, drop a punchy kick into Simpler. Set it to One-Shot. Turn Warp off. Set Voices to 1 so it doesn’t overlap and smear.

On the Snare track, drop in a snare that has mid punch. Again, Voices to 1. Don’t overthink the snare yet. We’ll shape it later with EQ and space.

On the Hats plus Ghosts track, create a Drum Rack, and load a closed hat and an open hat. Keep it simple: one closed, one open.

Now we program the anchor pattern, and we do it without swing at first.
Start with a one-bar MIDI clip so your ears can lock in quickly. We’ll expand to two bars in a moment.

Kick pattern: place a kick on 1.1. Then add a kick at 1.3.2, that’s the “and” before 3, and it’s a classic rolling foundation. Optionally add a light kick at 1.4.3 for momentum. If you add that third kick, keep it lighter in velocity so it feels like movement, not a heavy stomp.

Snare pattern: put the snare on 1.2 and 1.4. That’s your backbone. That’s the thing you do not mess up. In a lot of oldskool-feeling DnB, the snare being steady is what makes the wobble around it feel intentional.

Now hats.
Put closed hats on every eighth note. Just steady 1/8 hats for now. Think of this as the engine.

Then add an open hat occasionally on an offbeat, like 1.1.3 or 1.3.3. Don’t do it every time. Tasteful is the word. You want a little lift, not a constant splash.

At this point you should already hear “okay, that’s drum and bass.” It’s rigid, yes, but the identity is there.

Now we swing it using the Groove Pool.
Open the Groove Pool. In the Browser, find Grooves, and grab something like Swing 16-55 or Swing 16-57. If you want it looser and junglier, you can try 16-59, but as a beginner, go easy. Too much swing too early can turn into a stumble.

Drag the groove onto your hats clip only. Not the kick and snare yet. Remember: anchors versus ornaments.

In the Groove Pool settings, set Base to 1/16. Set Timing around 60%. Set Velocity around 15%. Set Random around 5%. This is a great starting pocket.

And I want you to leave it uncommitted for now. Don’t hit Commit yet. Keep it live so you can tweak and compare quickly.

Now the manual micro-timing, the push-pull.
Groove Pool gets you most of the way, but the oldskool pocket usually has a couple of intentional nudges.

Open your hats MIDI clip. Turn off grid snapping for a moment. Now pick a few offbeat hats and nudge them slightly late. Not a full 16th note late. Tiny. Visually, it’s almost nothing. Sonically, it’s everything.

Then pick one or two hats and nudge them slightly early. That creates urgency. You’re basically telling the groove when to lean back and when to lean forward.

Beginner rule: keep the snare dead-on. Keep the main kick hits mostly dead-on too. If you start swinging the kick and snare heavily, you often lose weight and the groove feels like it’s tripping.

Now, there’s also a super beginner-safe way to do timing without touching all the notes: Track Delay.
Go to your Hats plus Ghosts track, and find Track Delay. Now try pushing the whole hats track later by about plus 5 to plus 15 milliseconds. Later equals laid-back. Or if you want more bite and urgency, try negative 3 to negative 8 milliseconds.

Track Delay is amazing because it’s fast, reversible, and it keeps your MIDI neat. You can do a lot of “pocket searching” just by A/B-ing different delay values.

Next: ghost notes. This is where the jungle energy appears.
Ghost notes are low velocity hits that create motion between the main hits. The key is they should be felt more than they’re heard.

On your snare track, you can use the same snare, or a lighter rimmy snare if you have one. Add a couple quiet hits just before the main snare. For example, one right before the snare at 1.2, and one right before the snare at 1.4. You can also add a ghost between beats, but keep it tasteful. If you put ghost notes everywhere, you don’t get groove, you get clutter.

Aim for velocity like this:
Main snare around 95 to 120.
Ghost snares around 20 to 50.

And here’s a great little trick: make some ghost notes slightly late. That drag behind the beat is a classic oldskool pocket. It’s like the groove is pulling the listener forward into the next anchor hit.

Now let’s talk about “velocity is your second swing.”
If the timing is only slightly swung, but your velocity accents are right, the groove still rolls.

For your 1/8 hats, try this simple accent map:
Downbeats a little stronger, maybe 75 to 90.
Offbeats a little softer, maybe 50 to 75.

Then add one intentional exception, like one offbeat hat a little louder. That one moment can create instant funk.

A fast workflow trick here: in the MIDI editor, use Fold so you only see the notes you actually used. Then select every second hat hit and pull the velocity down a bit. In about ten seconds, you’ve gone from machine-gun hats to drummer hands.

Cool. Now expand from 1 bar to 2 bars.
Duplicate the clip so you’ve got a two-bar loop. And do not just copy-paste and call it done. Change something small in bar two. Even if it’s only one ghost note moved to after the snare instead of before it.

Here’s an easy advanced-feeling variation: call-and-response ghosts.
In bar one, put ghosts mostly before the snares.
In bar two, put ghosts mostly after the snares.
Same overall density, but it feels like the groove is speaking.

Now we shift into the main theme of this lesson: automation-first workflow.
Instead of obsessing over a perfect one-bar loop, we make an 8 to 16 bar phrase that evolves. That’s what makes it feel like a record, not a loop.

Automation idea number one: automate hat brightness.
On the hats track, add Auto Filter after the Drum Rack. Set it to a low-pass 24 dB slope. Set the cutoff somewhere like 10 to 14 kHz depending on the hat sample. Resonance around 0.2 to 0.4. Drive between 0 and 3 dB.

Now automate the cutoff across 8 bars.
Bars 1 to 4: slightly darker.
Bars 5 to 8: gradually open it up.

This creates a natural energy lift without changing the pattern, and it’s super DJ-friendly.

Automation idea number two: automate swing amount.
If your hats are using Groove Pool, you can create two swing “states” by using two clips.

Duplicate your hats clip across 8 bars, then make two versions:
A tighter version for bars 1 to 4, timing around 55 to 60%.
A looser version for bars 5 to 8, timing around 62 to 68%.

You can do that by duplicating clips and adjusting groove settings, or by committing and then manually nudging and reshaping velocities differently in each clip.

The result is subtle, but it’s powerful: the phrase leans more as it progresses.

Automation idea number three: automate ghost density, meaning arrangement-level groove.
Across 16 bars, keep it simpler for the first half, then add a bit more movement in the second half.
Bars 1 to 8: fewer ghosts, more “intro mix” energy.
Bars 9 to 16: a couple extra ghost hits and maybe one tiny hat variation.

Notice what we’re doing: we’re developing energy without adding new instruments. That’s oldskool.

Now let’s get it punchy and glued with a stock drum bus chain.
Go to your drum group and add EQ Eight first.
High-pass around 25 to 35 Hz to remove rumble.
If it’s muddy, dip a little at 250 to 400 Hz, like 1 to 3 dB.
If you need presence, a tiny boost around 3 to 6 kHz, but be gentle.

Then add Drum Buss.
Drive around 2 to 8%, go easy.
Crunch 0 to 10%.
Transients plus 5 to plus 15 if you need snap.
Leave Boom off at first, until you know what the low end is doing.

Then add Glue Compressor.
Attack 10 milliseconds, Release Auto, Ratio 2 to 1.
Aim for just 1 to 2 dB of gain reduction on peaks. This is not for smashing. It’s for cohesion.

Optional: add Saturator after that, Soft Sine or Analog Clip, drive 1 to 4 dB. Turn on Soft Clip if things get spiky.

Now a couple pro-style options that still stay beginner-safe.
If you want darker, heavier vibes, put a short room reverb on the snare only.
Decay around 0.4 to 0.9 seconds, pre-delay 10 to 25 milliseconds, low cut 200 to 400 Hz, high cut 6 to 10 kHz. Keep it subtle. We want “warehouse,” not “cathedral.”

You can also do a parallel smash return: a compressor and saturator on a return track, and send your drums lightly, like 10 to 25%. That adds density without killing transients.

Now arrangement: build a classic 16-bar drum phrase.
Bars 1 to 4: main groove, darker hats, fewer ghosts.
Bars 5 to 8: open the hat filter gradually, maybe slightly more swing.
Bars 9 to 12: add an extra ghost or a tiny hat ramp into the snare.
Bars 13 to 16: do one mini edit that’s DJ-friendly. For half a bar, go hats only, or snare only, or mute the kick for a moment, then slam back in.

And here’s a really important upgrade concept: drop-prep by removing, not adding.
Right before a new section, remove one tiny element, like one offbeat hat or one ghost. When the full loop returns, it sounds heavier than if you tried to “fill” your way there.

Quick common mistakes to avoid while you’re building this.
First, too much swing on everything. If you swing the kick and snare hard, you lose impact. Swing hats and ghosts first.
Second, identical velocities. That’s the fastest way to sound like a basic loop.
Third, over-randomizing. Random can become sloppy. Use a little, then do intentional nudges.
Fourth, ghost notes too loud. If you clearly hear them as main hits, they’re not ghosts anymore.
And fifth, no evolution across bars. If nothing changes over 8 to 16 bars, the loop gets old fast. Automate something, even if it’s just a filter cutoff.

Now let’s close with a quick 10 to 15 minute practice run you can repeat anytime.
Make a 1-bar DnB beat: kick, snare, 1/8 hats.
Add Swing 16-57 to hats only: timing 60, velocity 15, random 5.
Add four ghost notes: two ghost snares at velocity 25 to 45, and two extra hat taps at velocity 40 to 60.
Duplicate it to 8 bars.
Automate the hat filter cutoff from darker to brighter by bar 8.
Then at bar 8, do one tiny edit, like muting hats for a quarter bar, or removing one kick hit.
Export it and listen away from the DAW. If it rolls with no bass, you’re doing it right.

Recap to lock it in.
Anchors versus ornaments: keep snare and main kicks steady.
Groove Pool gets you started, but manual nudges and velocity shaping give you the real pocket.
Automation-first means your loop evolves over 8 to 16 bars using filter, swing variation, and ghost density.
And Ableton stock devices are more than enough to get authentic oldskool rolling energy.

If you tell me what vibe you’re aiming for, like early jungle, techstep, liquid roller, or modern heavy, I can suggest a specific two-bar MIDI layout with exact ghost placements and a swing setting that matches the style at 172 BPM.

mickeybeam

Go to drumbasscd.com for +100 drum and bass YouTube channels all in one place - tune in!

Generating PDF preview…