DNB COLLEGE

Drum & Bass Ableton Live 12 Tutorials

LESSON DETAIL

Breakdown for drum bus for deep jungle atmosphere in Ableton Live 12 (Intermediate)

An AI-generated intermediate Ableton lesson focused on Breakdown for drum bus for deep jungle atmosphere in Ableton Live 12 in the Arrangement area of drum and bass production.

Back to lessons
Breakdown for drum bus for deep jungle atmosphere in Ableton Live 12 (Intermediate) cover image

Narrated lesson audio

The voice track includes the tutorial plus extra teacher commentary.

Open audio file

Main tutorial

```markdown

Breakdown for Drum Bus for Deep Jungle Atmosphere (Ableton Live 12) 🥁🌫️

Skill level: Intermediate

Category: Arrangement (DnB / Jungle)

---

1. Lesson overview

A great jungle/DnB breakdown isn’t just “mute the drums and add a pad.” It’s a controlled release of energy that keeps the listener locked in while you reset tension for the drop. In this lesson you’ll build a drum-bus-focused breakdown using Ableton Live 12 stock tools—where the drums evolve from distant, filtered, atmospheric fragments back into full impact.

We’ll do this by:

  • Automating drum bus processing (not just volume)
  • Using returns and resampling to create jungle “ghost air”
  • Creating movement with filtering, reverb throws, delays, and transient control
  • Reintroducing the groove in stages (classic rolling pressure)
  • ---

    2. What you will build

    A 16–32 bar breakdown section that:

  • Pulls the full drum bus into a washed, distant space
  • Keeps the break identity alive (ghost hits, rimshots, tiny shuffles)
  • Ramps tension with automation and staged drum re-entry
  • Slams back into the drop with restored transients + controlled tail
  • You’ll end with:

  • A drum group (“DRUM BUS”) with a breakdown automation macro system
  • A “Ghost Break” layer (resampled/printed) for atmosphere
  • A reliable arrangement blueprint you can reuse in future tracks
  • ---

    3. Step-by-step walkthrough

    Step 0 — Prep your session (2 minutes)

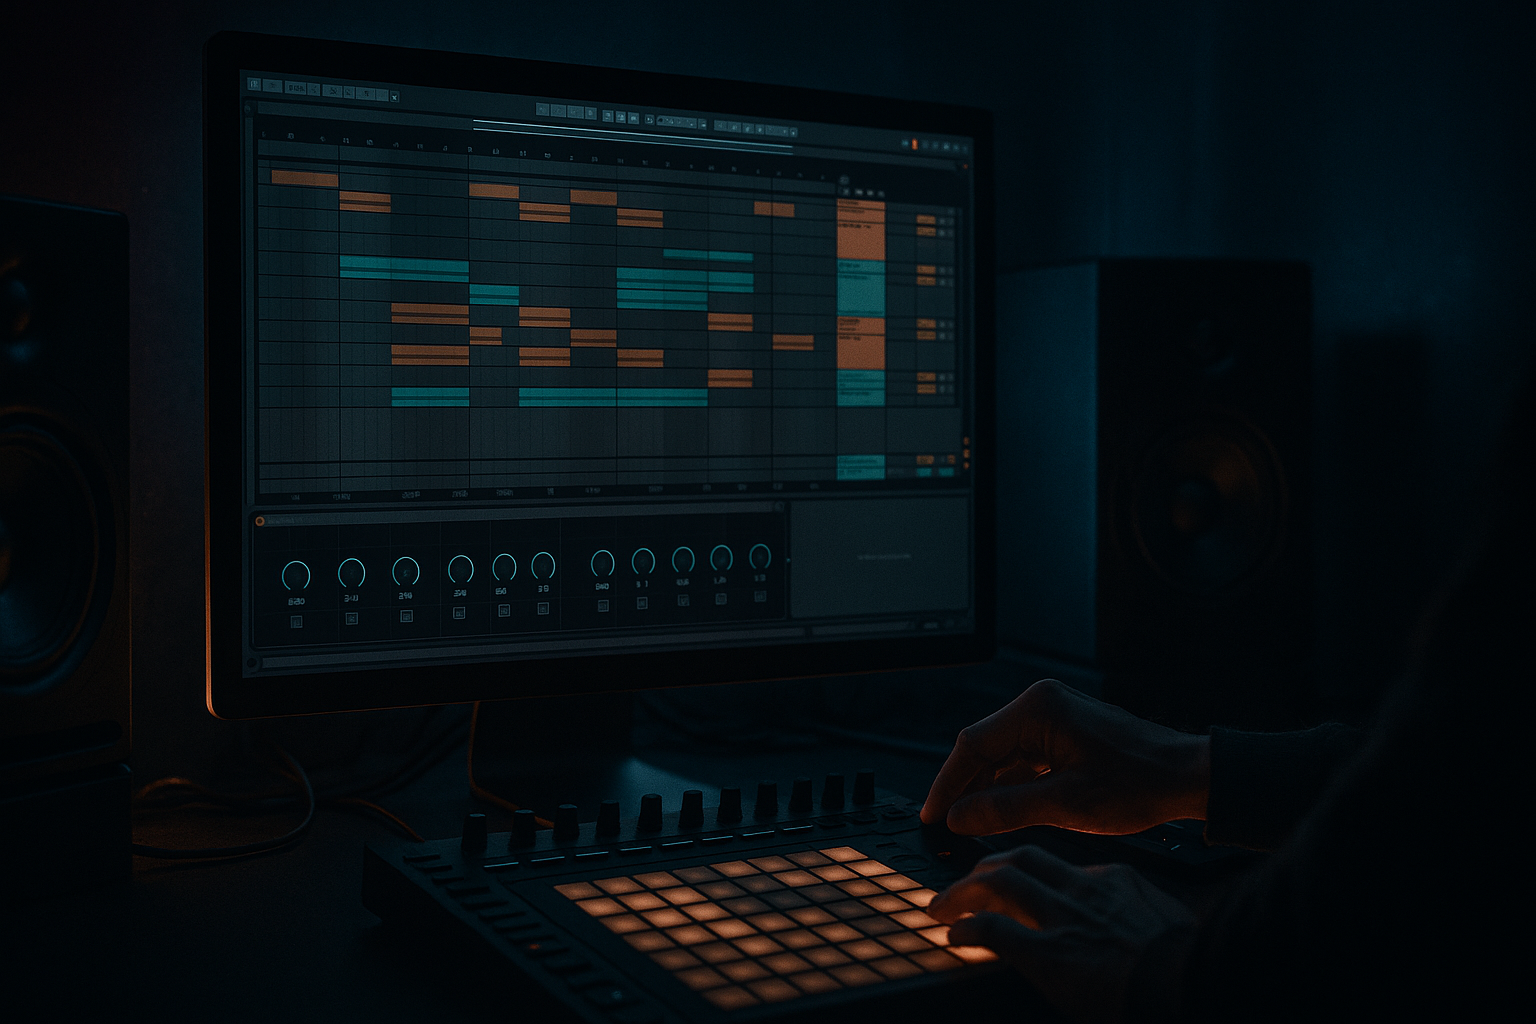
    1. Group your drums: select all drum tracks (kick, snare, break, hats, percussion) → `Cmd/Ctrl + G` → name it DRUM BUS.

    2. Create two Return tracks:

    - Return A: SPACE (Reverb)

    - Return B: DUB (Delay)

    3. If you already have mix returns, still consider dedicated breakdown returns—clean separation makes automation easier.

    DnB note: In jungle, breakdown vibe often comes from reverb/echo tails + filtered breaks rather than big chord changes.

    ---

    Step 1 — Build your Drum Bus “Breakdown Rack” 🎛️

    On the DRUM BUS group, add an Audio Effect Rack and build this chain (all stock):

    Chain order (recommended):

    1. EQ Eight (tone shaping for the breakdown)

    2. Auto Filter (main “distance” filter)

    3. Drum Buss (transient + drive control)

    4. Glue Compressor (optional, for cohesion)

    5. Utility (stereo and gain staging)

    #### Suggested starting settings

    1) EQ Eight

  • Enable a Low Cut around 25–35 Hz (clean rumble).
  • Add a gentle dip: 250–450 Hz (–1 to –3 dB) if boxy.
  • Optional: tiny shelf boost at 8–12 kHz (+1 dB) if you want hissy break air later.
  • 2) Auto Filter

  • Mode: Lowpass (24 dB)
  • Base cutoff: 18 kHz (normal “open” state)
  • Resonance: 0.20–0.35 (careful—too much sounds EDM)
  • Drive: 0–3 dB (tiny grit is nice)
  • 3) Drum Buss

  • Drive: 2–6
  • Crunch: 0–10% (keep subtle)
  • Transients: +5 to +20 (for drop)
  • During breakdown we’ll automate this down to soften impact.

  • Boom: 0 (usually keep off on full drum bus in DnB; manage low end elsewhere)
  • 4) Glue Compressor (optional but useful)

  • Ratio: 2:1
  • Attack: 3 ms
  • Release: Auto
  • Threshold: aim for 1–2 dB GR in drop, less in breakdown
  • 5) Utility

  • Set width around 100% normally.
  • You’ll automate width wider/narrower for “distance” tricks.
  • #### Map macros (highly recommended)

    Open the rack’s Macro Map and map:

  • Macro 1: LP Cutoff (Auto Filter Frequency)
  • Macro 2: Drum Buss Transients
  • Macro 3: Reverb Send (to Return A, from the DRUM BUS)
  • Macro 4: Delay Send (to Return B, from the DRUM BUS)
  • Macro 5: Width (Utility Width)
  • Macro 6: Output Gain (Utility Gain) for compensation
  • This gives you a single “breakdown console.” ✅

    ---

    Step 2 — Build the returns for jungle atmosphere 🌫️

    #### Return A: SPACE (Reverb)

    Use Hybrid Reverb (great for jungle spatial fog).

    Hybrid Reverb settings (starting point):

  • Mode: Convolution + Algorithm (Hybrid)
  • Convolution IR: try Rooms / Halls (not huge cinematic)
  • Algorithm: Plate or Hall
  • Decay: 2.5–5.5 s (longer for deeper breakdowns)
  • Pre-delay: 15–30 ms (keeps break transients from smearing immediately)
  • Low Cut: 180–300 Hz
  • High Cut: 7–10 kHz (prevents harsh fizz)
  • Wet: 100% (since it’s on a return)
  • Add EQ Eight after Hybrid Reverb:

  • HP at 200–350 Hz
  • A small dip around 2–4 kHz if the snare gets spitty
  • #### Return B: DUB (Delay)

    Use Echo.

    Echo settings (starting point):

  • Time: 1/4 or 1/8 dotted (classic jungle bounce)
  • Feedback: 20–40%
  • Filter: HP around 250 Hz, LP around 6–9 kHz
  • Modulation: small (Amount 5–15%)
  • Noise: off (unless you want texture)
  • Dry/Wet: 100% (return track)
  • Optional: add Saturator after Echo:

  • Drive: 2–5 dB
  • Soft Clip: ON
  • This helps the delay sit “taped” and gritty.

    ---

    Step 3 — Create the actual breakdown arrangement (16 bars)

    Here’s a reliable jungle breakdown blueprint (16 bars). Use your macros to automate the DRUM BUS as a whole.

    #### Bars 1–4: “Drop the floor, keep the ghost”

  • Mute kick (or low-cut it hard).
  • Keep tiny break fragments and hats.
  • Automation ideas:
  • - Macro 1 (LP Cutoff): sweep from 18 kHz → 2–5 kHz

    - Macro 2 (Transients): drop to -10 to 0 (softer)

    - Macro 3 (Reverb Send): increase (e.g., from 0% → 25–40%)

    - Macro 5 (Width): slightly wider (110–125%) for “fog”

  • Add one or two snare verb throws: automate send spikes on key snare hits.
  • DnB vibe target: listener feels the tempo and break DNA, but the punch disappears.

    #### Bars 5–8: “Distant break in a tunnel”

  • Bring in percussion texture (shaker, rim, foley).
  • Increase dub delay moments:
  • - Macro 4 (Delay Send): automate short spikes on offbeats or snare tails.

  • Consider a high-pass on the DRUM BUS (via EQ Eight) in bars 7–8:
  • - HP rising to 250–450 Hz for a thin, suspenseful section.

    Optional trick: automate Utility Gain down by –1 to –3 dB to make the drop feel bigger when it returns.

    #### Bars 9–12: “Rebuild the groove in layers”

  • Reintroduce kick ghost (low volume, filtered) or a sub-less kick.
  • Start opening the filter:
  • - Macro 1 (LP Cutoff): 2–5 kHz → 10–14 kHz

  • Reduce reverb send gradually:
  • - Macro 3: 40% → 10–15%

  • Bring transients back:
  • - Macro 2: 0 → +10 (don’t go full punch yet)

    Key jungle feel: the break starts to sound real again but still not fully hitting.

    #### Bars 13–16: “Pre-drop snap + final breath”

  • Add a short drum fill (classic Amen chop or 2-step tom run).
  • Add a 1-bar “suck in” moment right before the drop:
  • - LP cutoff quickly dips (e.g., 14 kHz → 3 kHz on the last 1/2 bar)

    - Reverb send dips (tighten space)

    - Width narrows slightly (100% → 85–95%) for “center focus”

  • Final bar: mute most drums for 1/4–1/2 beat, leave a delay tail.
  • Goal: the drop feels like the room collapses back into punch.

    ---

    Step 4 — Print a “Ghost Break” layer (signature jungle move) 👻

    This is where your breakdown gets deep without adding new instruments.

    1. On the DRUM BUS, set reverb/delay sends higher than normal.

    2. Resample:

    - Create a new audio track called GHOST BREAK PRINT

    - Set its input to Resampling

    - Arm and record 4–8 bars of your drums with breakdown processing

    3. Now in the breakdown:

    - Use only the printed ghost layer for parts of bars 1–8

    - Fade it in/out, reverse small chunks, stretch a tail

    - Add Auto Filter + Vinyl Distortion (subtle) if you want grit

    This creates a cohesive “drum atmosphere bed” that still sounds like your breaks.

    ---

    Step 5 — Clean transitions (the professional glue)

    A) Reverb tail management

    Right before the drop, your breakdown reverb can ruin impact.

    On Return A (SPACE), automate either:

  • Hybrid Reverb decay down (e.g., 5s → 1.2s in last bar), or
  • Add a Gate after reverb:
  • - Threshold: adjust until tail cuts cleanly

    - Release: 120–250 ms (natural but controlled)

    B) Prevent low-end reverb mud

    Ensure your SPACE return has a high-pass at 200–350 Hz. Jungle breaks + long verb get muddy fast.

    C) Restore punch at drop

    At the drop start:

  • Macro 1 LP Cutoff back to 18 kHz
  • Macro 2 Transients back to +10 to +20
  • Macro 3 Reverb send back near 0–8%
  • Utility gain back to baseline
  • ---

    4. Common mistakes

  • Only muting drums instead of transforming them: breakdown feels empty rather than hypnotic.
  • Too much reverb without filtering: your snare turns into harsh white noise.
  • No staged reintroduction: if everything returns at once, the drop feels smaller.
  • Reverb tails overlapping the drop: you lose punch and clarity right where it matters.
  • Over-widening the drum bus: wide breaks can feel cool, but they can also smear groove and mess mono compatibility.
  • ---

    5. Pro tips for darker/heavier DnB 🖤

  • Use distortion on the returns, not the main bus:
  • Add Saturator or Roar lightly after Echo/Reverb for gritty atmosphere without destroying transient punch.

  • Automate resonance tastefully:
  • A tiny bump in Auto Filter resonance during sweeps adds tension—too much turns into a whistling EDM filter.

  • Add a “dread hat” layer:
  • Quiet closed hat loop with Auto Pan (very subtle) + high-pass = nervous energy without clutter.

  • Create a “pre-drop silence notch”:
  • Even 1/8 beat of near-silence before the drop makes the hit feel violent (in a good way).

  • Ghost notes are everything:
  • Keep low-level break shuffles audible in the breakdown—this is what separates jungle from generic DnB.

    ---

    6. Mini practice exercise (15–25 minutes) ✅

    1. Take an 8-bar rolling drum section (with a break).

    2. Duplicate it to create a 16-bar “breakdown” block.

    3. Build the Drum Bus rack and map 6 macros as described.

    4. Automate across the 16 bars:

    - LP Cutoff: 18k → 3k → 14k → quick dip → 18k

    - Reverb send: 0 → 35% → 10% → 0

    - Transients: +15 → 0 → +8 → +15

    - Width: 100% → 120% → 100% → 90% (last half bar) → 100%

    5. Resample 4 bars into a Ghost Break and layer it under bars 1–8 at low volume.

    Deliverable: bounce the section and check: does the drop feel bigger after the breakdown?

    ---

    7. Recap

  • A deep jungle breakdown is about controlled distance + groove continuity, not just removing drums.
  • Build a macro-driven Drum Bus rack to automate filter, transients, sends, width, and gain.
  • Use Hybrid Reverb + Echo returns with smart filtering for spacious, dubby atmosphere.
  • Arrange the breakdown in stages: ghost → tunnel → rebuild → snap.
  • Print a Ghost Break layer to glue the vibe and keep it authentically break-driven.

If you want, tell me your drum layout (kick/snare separate vs. full break-only) and how long your breakdown is (8/16/32 bars), and I’ll suggest an exact automation curve and re-entry pattern for your specific groove. 🥁

```

Ask GPT about this lesson

Chat with the lesson tutor, get follow-up help, or use quick actions.

Bigup 👽 Ask me anything about this lesson and I’ll answer in context.

Narration script

Show spoken script
Title: Breakdown for drum bus for deep jungle atmosphere in Ableton Live 12 (Intermediate)

Alright, let’s build a proper jungle-style breakdown in Ableton Live 12, focused around the drum bus. Not “mute the drums and pray the pad carries it.” We’re going for controlled distance, ghost energy, and then a staged return that makes the drop feel way bigger.

The big idea today is: the breakdown is basically a second mix of the same drums.
Breakdown mix equals less low-end, softer attack, more haze, longer tails.
Drop mix equals tight low-end, clear transient edges, controlled space.

And we’re going to make switching between those two feels easy by automating a small set of macros on the DRUM BUS, instead of drawing twenty messy automation lanes.

Step zero: quick session prep.

In Arrangement View, select all your drum tracks. Kick, snare, breaks, hats, percussion, whatever makes up your groove. Group them, and name that group DRUM BUS.

Now create two Return tracks even if you already have returns. Dedicated breakdown returns keep your automation clean and keep your mix decisions separate.

Return A is SPACE, for reverb.
Return B is DUB, for delay.

Cool. Now we’re set up to make the breakdown feel like the drums are being swallowed by an environment… without losing the grid.

Step one: build the Drum Bus Breakdown Rack.

On the DRUM BUS group, drop an Audio Effect Rack. Inside it, add devices in this order.

First, EQ Eight.
Then Auto Filter.
Then Drum Buss.
Then Glue Compressor, optional but useful.
Then Utility.

This is a very classic chain for “distance control,” because EQ shapes the tone, the filter creates the far-away effect, Drum Buss controls impact, Glue glues, Utility handles width and level.

Let’s rough in the starting settings.

On EQ Eight: turn on a low cut around 25 to 35 hertz. You’re not trying to remove bass from the track, you’re removing garbage that makes reverb and compression behave weird.

If the drum bus feels boxy, do a small dip around 250 to 450 hertz, like one to three dB.

And optionally, you can do a tiny high shelf boost around 8 to 12k later in the breakdown, if you want that hissy “break air.” Don’t boost it now just because you can. Earn it with the arrangement.

On Auto Filter: set it to low-pass, 24 dB slope. Make the normal open state around 18k so it’s basically not filtering during the drop. Resonance around 0.2 to 0.35. Keep it tasteful. Too much resonance and it stops sounding like jungle and starts sounding like an EDM filter demo. Drive at zero to three dB if you want a little hair.

On Drum Buss: drive around 2 to 6. Crunch subtle, like 0 to 10 percent.
Transients is the big one. For the drop you might like plus 10 to plus 20, but during the breakdown we’ll automate it down so the hits soften.
And keep Boom off on the full drum bus most of the time. In drum and bass, low end management is usually a more surgical job than “Boom on the whole bus.”

Glue Compressor: ratio 2 to 1, attack 3 milliseconds, release on Auto. Set threshold so in the drop you’re getting like one to two dB of gain reduction. In the breakdown it’ll naturally back off.

Utility: leave width at 100% for your normal state. We’ll automate width for distance tricks, and we’ll also use Utility gain for level compensation, because when you filter and soften transients, perceived loudness drops. We don’t want the breakdown to just feel “quiet.” We want it to feel “far.”

Now the power move: macro mapping.

Open Macro Map on the rack and map these:
Macro 1: Auto Filter frequency, your low-pass cutoff.
Macro 2: Drum Buss transients.
Macro 3: DRUM BUS send to Return A, SPACE reverb.
Macro 4: DRUM BUS send to Return B, DUB delay.
Macro 5: Utility width.
Macro 6: Utility gain.

This becomes your breakdown console. And here’s a coaching tip: even though you mapped six, try to do most of the musical motion with three concepts.
Distance, which is mainly filter plus transient softening.
Space, which is reverb and delay sends.
Focus, which is width plus output trim.

Fewer automation curves usually means cleaner, more intentional results.

Step two: build the returns for jungle atmosphere.

Return A, SPACE: put Hybrid Reverb on it.

Set it to a hybrid mode, convolution plus algorithm. Choose an IR that feels like a room or hall, not a giant cinematic canyon. Then for the algorithm section, plate or hall works great.

Decay somewhere around 2.5 to 5.5 seconds depending on how deep you want the fog. Pre-delay 15 to 30 milliseconds. That pre-delay is important because it lets the transient speak before the wash arrives, so the groove stays readable.

Filter the reverb hard. Low cut around 180 to 300 hertz. High cut around 7 to 10k so you don’t get that fizzy “S” cloud.

Set dry/wet to 100% because it’s a return.

After Hybrid Reverb, add EQ Eight. High-pass again, like 200 to 350 hertz. And if the snare is getting spitty, dip a little at 2 to 4k. Small moves.

And here’s one of those “pro” checks: solo the SPACE return for ten seconds during the breakdown.
If it sounds like harsh fizz, lower the high cut or dip around 6 to 10k.
If it sounds like cardboard buildup, notch around 300 to 600.
If it’s metallic ringing, shorten decay or change the IR.
Fixing the return is often faster than endlessly tweaking the drum bus.

Return B, DUB: put Echo on it.

Set time to a quarter note, or eighth dotted for that classic jungle bounce. Feedback 20 to 40 percent.
Filter it: high-pass around 250, low-pass around 6 to 9k.
Add just a touch of modulation, like 5 to 15 percent, for movement.

Dry/wet 100% because return.

Optional but very jungle: add Saturator after Echo. Drive 2 to 5 dB, soft clip on. It makes the delay sit like tape, and it stops repeats from poking out randomly.

Also, a great trick is to filter the delay even harder than you think. Like, high-pass 400 to 700 and low-pass 2.5 to 6k. Then increase feedback a bit. You get “memory of the snare,” not a muddy echo that fights the whole mix.

Step three: arrange the breakdown. We’ll do a solid 16-bar blueprint.

Before you automate anything, mentally mark four energy points:
A: release, where the floor drops out.
B: lowest energy.
C: rebuild.
D: pre-drop clamp, where everything tightens before impact.

Now bars 1 to 4: drop the floor, keep the ghost.

The move here is: remove punch, not rhythm.

Mute the kick, or low-cut it hard so it’s basically gone.
Keep tiny break fragments, hats, little shuffles.

Now automate your macros.
Low-pass cutoff sweeps down from wide open, like 18k, down to somewhere around 2 to 5k over these first four bars.
Transients down. Try anywhere from minus 10 up to zero. You’re shaving the attack so the drums feel far away.
Reverb send up from basically none to like 25 to 40 percent.
Width slightly wider, like 110 to 125, to create fog.

And add one or two reverb throws on specific snare hits. Don’t just wash everything constantly. Jungle feels alive when the space moves like an effect, not like a blanket.

The vibe target is: you can still feel the tempo and the break DNA, but the punch is gone.

Bars 5 to 8: distant break in a tunnel.

Bring in percussion texture if you have it. Shaker, rim, foley, whatever fits the track. But keep it high-passed so it doesn’t fight the reverb cloud.

Now use delay throws. Automate the DUB send in little spikes, especially on offbeats or snare tails. That’s where the “dub” feeling comes from.

And here’s a tension move that works almost every time: in bars 7 to 8, automate a high-pass on the DRUM BUS using EQ Eight. Bring it up to like 250 to 450 hertz. You’re making the drums thin and suspenseful.

Also consider automating Utility gain down one to three dB in this middle section. It’s sneaky, but when the drop returns at the original level, it feels bigger without you actually turning it up.

Coach note: keep one consistent timekeeper element through the breakdown. A quiet closed-hat tick, a shaker loop, or a rim ghost. High-pass it heavily. The listener can get lost in the fog if nothing anchors the grid, and then tension collapses.

Bars 9 to 12: rebuild the groove in layers.

Now we start bringing reality back.

Maybe bring in a ghost kick, low volume and filtered, or use a sub-less kick layer. The goal is suggestion, not full impact.

Open the low-pass filter gradually from that 2 to 5k area up to around 10 to 14k.
Reduce the reverb send from heavy, like 40 percent, down to 10 to 15.
Bring transients back from around zero up to maybe plus 10. Not full punch yet.

This is where a lot of people mess up: they reopen everything too quickly and kill the tension. Let the groove return like a creature emerging from mist.

Bars 13 to 16: pre-drop snap and final breath.

Add a short fill. Amen roll, tom run, snare flam cascade, whatever is your track’s identity. Pick one fill style and reuse it across the tune in different lengths. Consistency makes the arrangement feel intentional.

Now the “suck in” moment right before the drop.
In the last half bar, do a quick low-pass dip. For example, if you’re open at 14k, dip down to 3k fast.
Pull the reverb send down to tighten the space.
Narrow the width slightly, like from 100 down to 85 to 95, to center focus.

And in the final bar, mute most drums for a quarter beat or even an eighth beat, while leaving a delay tail ringing. That tiny near-silence notch makes the drop hit feel violent in the best way.

Step four: print a Ghost Break layer. This is the signature jungle move that makes the breakdown deep without adding new instruments.

Push your reverb and delay sends higher than normal for a moment.
Create a new audio track named GHOST BREAK PRINT.
Set its input to Resampling.
Arm it, and record four to eight bars of your drum bus while the breakdown processing is active.

Now you’ve got an atmosphere bed that is literally your break, stretched into a texture.

In the breakdown, especially bars 1 to 8, try using only that ghost layer for certain moments, with the main drums muted or heavily filtered. Fade it in and out. Reverse a tiny chunk. Stretch a tail.

You can put Auto Filter and a little Vinyl Distortion on the ghost layer for grit, but keep it subtle. You want “haunted drum room,” not “lo-fi plugin showcase.”

Optional advanced move: make a parallel Fog Bus.

Create an audio track called FOG BUS. Route audio from DRUM BUS post-FX, monitor In.
On FOG BUS, put a low-pass filter around 3 to 6k, then Hybrid Reverb 100% wet, then Utility width 130 to 160, then gentle compression.
In the breakdown, blend in FOG BUS while keeping the main drums a bit drier. This keeps the groove readable while still going deep.

Step five: clean transitions like a professional.

Number one issue: reverb tails eating the drop.

Right before the drop, control the SPACE return. Either automate the reverb decay down, like from 5 seconds to around 1.2 in the last bar, or add a Gate after the reverb and set it so the tail cuts cleanly. Release around 120 to 250 milliseconds tends to feel natural.

And always prevent low-end reverb mud. Make sure the SPACE return is high-passed around 200 to 350. Long reverb plus breaks equals mud fast.

Also: restore punch at the drop.
At the exact drop start, snap your macros back.
Low-pass cutoff back to 18k.
Transients back up, like plus 10 to plus 20.
Reverb send back near zero to maybe 8%.
Utility gain back to baseline.

One more coach check: mono-check the breakdown, not just the drop.
Put Utility on the master temporarily and hit mono. If the swing vanishes, reduce width on the returns first. Returns are often the real phasing culprit, not the dry drums.

Common mistakes to avoid as you build this.

Don’t just mute drums. Transform them. Empty is not hypnotic.
Don’t drown everything in reverb without filtering. That’s how your snare becomes harsh white noise.
Don’t bring everything back at once. Staged re-entry is the whole game.
And don’t let tails overlap the drop. Impact lives in that first half second.

Now a quick practice flow you can do in 20 minutes.

Take an 8-bar rolling drum section and duplicate it to make a 16-bar breakdown block.
Build the rack and map your six macros.
Then automate like this:
Low-pass cutoff goes 18k down to 3k, then up to 14k, then a quick dip, then back to 18k at the drop.
Reverb send goes from near zero up to around 35%, down to around 10, then back near zero.
Transients go from plus 15 down to around zero, up to around plus 8, then back to plus 15 at the drop.
Width goes 100 to 120 to 100, then down to about 90 for the last half bar, then back to 100 at the drop.
Then resample four bars to a Ghost Break and layer it under bars 1 to 8 quietly.

When you bounce it, the question is simple:
Did the drop feel bigger after the breakdown?

If not, usually the fix is one of three things: you didn’t remove enough low end in the low point, you didn’t tighten the reverb right before the drop, or you reintroduced too many elements too early.

Homework challenge if you want to level up fast: make two breakdown personalities with the same drums.
One version is “Underwater Tunnel.” More band-limited, wider returns, shorter filtered delay.
Second version is “Dry Warehouse Tension.” Less reverb overall, sharper transient re-entry, and one or two obvious echo throws as punctuation.

Same clips, different automation. That’s how you learn arrangement control.

And that’s the whole method: drum bus macros for distance, dedicated space and dub returns, a staged 16-bar energy curve, and a printed ghost break to glue the atmosphere.

If you tell me whether your drums are kick and snare layered separately or it’s mostly a full chopped break, and whether your breakdown is 8, 16, or 32 bars, I can suggest an exact lowest-energy bar recipe and a clean re-entry pattern that keeps the swing readable.

mickeybeam

Go to drumbasscd.com for +100 drum and bass YouTube channels all in one place - tune in!

Generating PDF preview…