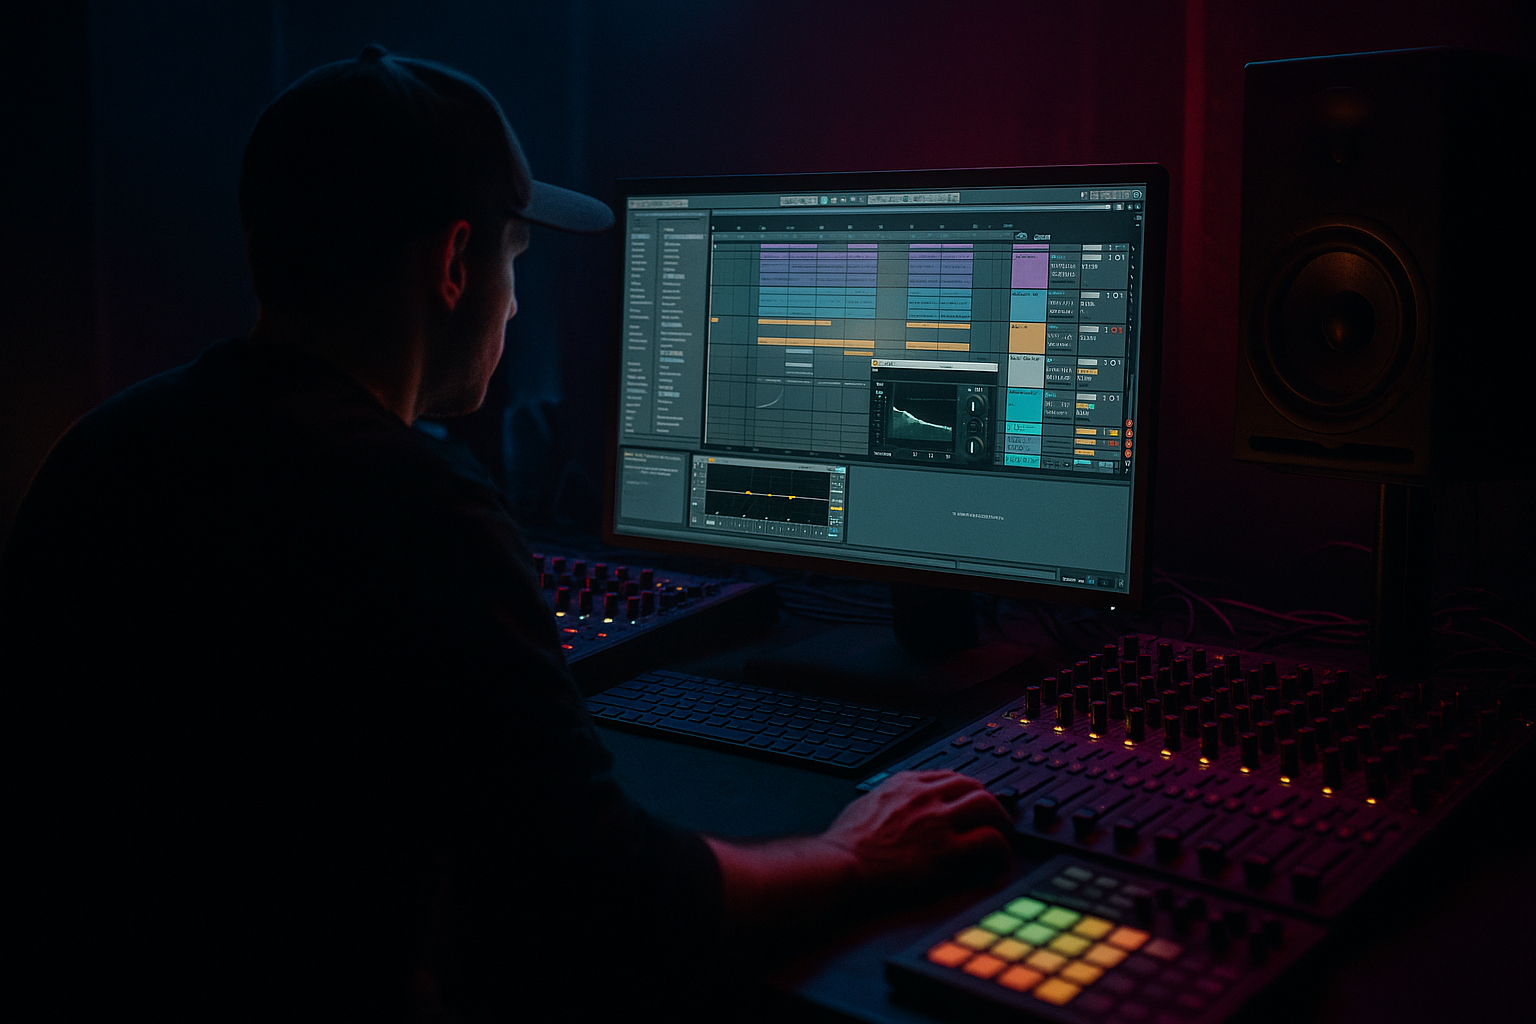
DNB COLLEGE

AI Drum & Bass Ableton Tutorials

LESSON DETAIL

Bassline bounce at 170 BPM with clean routing (Beginner)

An AI-generated beginner Ableton lesson focused on Bassline bounce at 170 BPM with clean routing in the Basslines area of drum and bass production.

Free plan: 0 of 1 lesson views left today. Premium unlocks unlimited access.

Bassline bounce at 170 BPM with clean routing (Beginner) cover image

Narrated lesson audio

The voice track includes the tutorial plus extra teacher commentary.

Open audio file

Main tutorial

Bassline Bounce at 170 BPM with Clean Routing (Ableton Live) 🥁🔊

1. Lesson overview

In drum & bass (and jungle/rollers), “bounce” isn’t just the notes—it’s the relationship between bass, kick, and snare, plus tight routing so your low-end stays clean and controllable.

In this lesson you’ll build a classic rolling DnB bassline at 170 BPM, set up clean routing (bass bus + sidechain/key input), and use stock Ableton devices to make the groove hit hard without turning into a muddy mess.

Goal: A bassline that moves—tight, pumping tastefully, and sitting under drums like a proper roller. ✅

---

2. What you will build

You’ll create:

  • A 2-bar rolling bassline (classic DnB bounce)
  • A two-layer bass:
  • - Sub (mono, clean sine/triangle)

    - Mid bass (character/growl or reese-ish)

  • Clean routing using groups/busses:
  • - DRUMS group

    - BASS group

    - Sidechain trigger track (ghost kick)

  • A sidechain + dynamics setup that keeps the low end punchy
  • A simple arrangement idea (8–16 bars) that feels like a real DnB drop
  • ---

    3. Step-by-step walkthrough

    Step 0 — Project setup (30 seconds)

    1. Set tempo to 170 BPM.

    2. Set Global Quantization to 1 Bar (top middle).

    3. Turn on the Metronome and loop 2 bars.

    Ableton tip: Use Ctrl/Cmd + L to set Loop Brace to a selection.

    ---

    Step 1 — Lay down a simple DnB drum anchor 🥁

    You can’t judge bass bounce without drums.

    1. Create a MIDI track: Drums.

    2. Load Drum Rack (stock).

    3. Add a basic pattern (2 bars). Classic minimal roller skeleton:

    - Kick: Bar 1 beat 1; add a second kick lightly before/after snare depending on vibe (optional)

    - Snare/Clap: Beats 2 and 4

    - Closed hats: 1/8 or 1/16 with some velocity variation

    Quick pattern (starting point):

  • Snare: 1.2, 1.4, 2.2, 2.4 (i.e., beat 2 and 4 each bar)
  • Hats: steady 1/8 notes, velocities alternating (e.g., 95 / 70)
  • Why: The bass “dance” is mostly how it weaves around snare hits and pushes into the gaps.

    ---

    Step 2 — Create clean routing first (do this early) 🧼

    Clean routing keeps you fast and prevents “why is my bass distorting?” later.

    Tracks you’ll make:

  • SUB (audio or MIDI)
  • MID BASS (MIDI)
  • BASS BUS (Group)
  • SC TRIG (Ghost Kick) (for sidechain)
  • #### 2A) Make your bass group

    1. Create two MIDI tracks: SUB and MID.

    2. Select both → Ctrl/Cmd + G to Group.

    3. Rename the group to BASS BUS.

    #### 2B) Make a sidechain trigger track (ghost)

    1. Create an Audio track called SC TRIG.

    2. Drop a short, clean kick sample on it (or use a clicky transient).

    3. Program it to hit wherever you want the bass to duck (start simple: on every kick).

    4. Important: Set SC TRIG output to “Sends Only” (in I/O section) so you don’t hear it.

    > If you don’t see I/O, press I/O button on the right side.

    ---

    Step 3 — Build the SUB (simple, powerful) 🔉

    1. On SUB track, load Operator (stock).

    2. Operator settings:

    - Osc A: Sine

    - Level: around -12 dB (don’t slam)

    - Voices: 1 (mono)

    3. Add MIDI Effects (optional but useful):

    - Scale (if you struggle staying in key)

    - Velocity (to control note dynamics consistently)

    #### Add a “sub safety chain” (recommended)

    On the SUB track:

    1. Add EQ Eight:

    - Cut everything above ~140–200 Hz (low-pass style):

    - Use a Low-pass filter at ~180 Hz, 24 dB slope

    2. Add Utility:

    - Bass Mono: ON (or Width 0%)

    - Gain: adjust so your master isn’t clipping

    Why: Sub should be mono and clean. The mid layer supplies character.

    ---

    Step 4 — Build the MID bass layer (character + bounce) 🐍

    1. On MID track, load Wavetable (stock).

    2. Wavetable starting settings (easy roller tone):

    - Osc 1: Basic Shapes (saw-ish) or a more complex wavetable if you want edge

    - Unison: 2–4 voices, Amount low (don’t go huge)

    - Filter: LP24, cutoff around 200–800 Hz to taste

    3. Add Saturator (stock):

    - Drive: 2–6 dB

    - Soft Clip: ON

    4. Add EQ Eight:

    - High-pass around 90–120 Hz (keep sub space for SUB track)

    - Small dip if it’s boxy (often 250–400 Hz)

    Rule of thumb:

  • SUB owns 20–90 Hz
  • MID owns 90 Hz and up (the “readable” bass)
  • ---

    Step 5 — Write a 2-bar rolling bassline that bounces at 170 🎯

    DnB bounce often comes from syncopation + note length control. Let’s do a classic roller: mostly 1/8 notes with some gaps.

    1. Create a MIDI clip (2 bars) on SUB.

    2. Set grid to 1/16.

    3. Pick a key (example: F minor). Start with F1 as your main sub note.

    #### Example 2-bar rhythm (roller-friendly)

    Use mostly F1, add one variation note (like Ab1 or G1) near the end of bar 2.

    Pattern idea (positions are 1/16ths):

  • Bar 1: notes on 1.1, 1.1.3, 1.2.3, 1.3.3, 1.4.3
  • Bar 2: similar, but change last hit to Ab1 or G1 for movement
  • #### The “bounce trick”: note lengths

  • Shorten most notes to 1/16–1/8 length
  • Leave a gap before the snare (beat 2 and 4) so the snare feels bigger
  • Now copy the same MIDI clip to MID so both layers follow the same groove.

    Why this works:

    At 170 BPM, long sustained bass notes quickly smear into the drums. Short notes = punch + perceived speed.

    ---

    Step 6 — Sidechain that’s clean and controlled (not pumping like house) 🫧

    You’ll sidechain the BASS BUS (so sub + mid duck together).

    1. On BASS BUS group, add Compressor (stock).

    2. Enable Sidechain:

    - Audio From: SC TRIG

    - Pre-FX (recommended so SC doesn’t change if you process the ghost)

    3. Starting settings (tasteful DnB duck):

    - Ratio: 4:1

    - Attack: 3–10 ms (let the transient poke)

    - Release: 80–140 ms (bounce back quick)

    - Threshold: lower until you get about 2–5 dB gain reduction on hits

    Tip: Watch gain reduction meter. You want control, not extreme pumping (unless that’s your style).

    ---

    Step 7 — Tighten the groove with subtle timing + velocity 🎛️

    DnB bounce is micro-detail.

    1. In the MIDI clip, vary velocity slightly:

    - Stronger hits on the “main pulse”

    - Slightly softer on offbeats

    2. Try nudging some bass notes a tiny bit late:

    - Use Track Delay on MID only: +5 to +15 ms

    - Keep SUB tighter (0 ms) to maintain low-end focus

    Why: A slightly late mid layer can feel fatter without making sub flabby.

    ---

    Step 8 — Clean bus processing (keep it minimal) 🧽

    On BASS BUS (after compressor):

    1. EQ Eight (optional, gentle):

    - Tiny dip if muddy around 200–350 Hz

    - If harsh, dip around 1–3 kHz

    2. Limiter (optional safety):

    - Ceiling: -0.3 dB

    - Only catching peaks (1–2 dB at most)

    On DRUMS group (optional glue):

  • Glue Compressor:
  • - Attack: 10 ms

    - Release: Auto

    - Ratio: 2:1

    - Just 1–2 dB reduction

    ---

    Step 9 — Simple arrangement idea (make it feel like a track) 🧱

    Try this 16-bar drop structure:

  • Bars 1–4: Full drums + bass, keep it simple
  • Bars 5–8: Add variation (change last note of bar 8)
  • Bars 9–12: Drop hats for 1 bar then slam back in (contrast)
  • Bars 13–16: Add a mid-bass automation (filter cutoff or saturation drive)
  • Automation idea (MID track):

  • Automate Wavetable filter cutoff:
  • - Bars 1–8: steady

    - Bars 9–16: slowly open 10–20% for rising intensity

    ---

    4. Common mistakes 🚫

    1. Sub and mid both playing full low-end

    - Fix: high-pass MID at 90–120 Hz, low-pass SUB around 180 Hz

    2. Sidechaining the SUB too hard

    - Fix: reduce threshold or use slower release; aim for 2–5 dB GR

    3. Notes are too long

    - Fix: shorten most notes; create gaps before snare hits

    4. Stereo sub

    - Fix: Utility → width 0% or Bass Mono

    5. No routing discipline

    - Fix: bass layers into BASS BUS, drums into DRUMS, keep SC trigger separate and muted via Sends Only

    ---

    5. Pro tips for darker/heavier DnB 🖤

  • Add “movement” with subtle distortion stages
  • - MID chain idea: `Saturator (light) → Overdrive (tiny) → EQ Eight`

    - Keep each stage gentle; stacking sounds more pro than one huge drive.

  • Make a reese-style mid quickly (stock)
  • - Wavetable: saw wave + unison 4 voices

    - Add Chorus-Ensemble very lightly (high-pass after it!)

  • Parallel mid aggression
  • - Create a return track “BASS CRUSH”:

    - Saturator (Drive 8–12 dB)EQ Eight (HP 200 Hz)

    - Send MID to it lightly (5–15%) for grit without wrecking clarity.

  • Jungle-style swing
  • - Add Groove: try MPC swing lightly (5–15%) on hats and MID only, keep SUB straighter.

    ---

    6. Mini practice exercise (10–15 minutes) 🎯

    1. Make three 2-bar bass patterns using the same sound:

    - Pattern A: mostly 1/8 notes (steady roller)

    - Pattern B: add more gaps before snares

    - Pattern C: same rhythm, but change the last note each 2 bars (F → G → Ab)

    2. Bounce-check:

    - Mute drums for 5 seconds → unmute

    - If bass feels like it “falls into place” with drums, you nailed the bounce.

    3. Export a quick loop and listen on:

    - headphones + small speaker (sub translation test)

    ---

    7. Recap ✅

  • Bounce at 170 BPM comes from rhythm + note length + drum interaction, not just a cool patch.
  • Keep it clean with layering:
  • - SUB = mono + low-passed

    - MID = high-passed + character

  • Use clean routing:
  • - SUB + MID → BASS BUS

    - Ghost kick → SC TRIG (Sends Only)

    - Sidechain compressor on BASS BUS for unified ducking

  • Arrange in 16 bars with small variations and automation for real DnB energy.

If you tell me what sub style you want (smooth roller, foghorn-ish, reese-driven, or jump-up wobble), I can give you a specific 2-bar MIDI pattern and a matching Wavetable/Operator patch recipe.

Ask GPT about this lesson

Chat with the lesson tutor, get follow-up help, or use quick actions.

Bigup 👽 Ask me anything about this lesson and I’ll answer in context.

Narration script

Show spoken script
Welcome in. Today we’re building a classic drum and bass bassline bounce at 170 BPM in Ableton Live, and we’re doing it with clean routing from the start, so your low end stays punchy, controlled, and easy to mix.

Here’s the big idea: bounce isn’t just the bass notes. Bounce is the relationship between the bass, the kick, and the snare, plus the way we manage dynamics so the bass moves out of the way and then returns at the right moment. If the timing is right and the routing is clean, even a simple two-note bassline can feel like a real roller.

Alright, let’s set up.

First, set your tempo to 170 BPM. Set Global Quantization to 1 Bar, turn on the metronome, and loop two bars. Quick tip: select two bars in the timeline and hit Control or Command L to snap the loop brace perfectly.

Now we need a drum anchor, because judging bass bounce without drums is basically guessing. Create a MIDI track called Drums and load a stock Drum Rack. Keep this minimal. Put your snare or clap on beats 2 and 4 in each bar. Put a kick on bar 1 beat 1, and for now you can keep it simple with just that, or add a second kick if you want a little more forward motion. Then add closed hats on eighth notes or sixteenths, and give them a little velocity variation so it doesn’t feel like a typewriter.

As you listen, focus on the gaps around the snare. In drum and bass, the snare is the landmark. The bass has to respect it. A huge part of “bounce” is leaving space before that snare so it feels like it hits harder.

Now we do the most beginner-friendly pro move: routing first. This prevents the classic problem where you’re ten plugins deep and you have no idea why the bass is distorting or why the sidechain is acting weird.

Create two MIDI tracks and name them BASS - Sub and BASS - Mid. Select both and group them, then name the group BUS - Bass, or BASS BUS. Color them if you like. The point is: you always know where your low end lives.

Next, create a sidechain trigger track. Make an audio track named SC - Ghost, or SC TRIG. Drop a short clean kick sample on it. Program it to hit wherever you want the bass to duck. To keep it simple, put it on every kick hit for now.

Important detail: open the I/O section if you can’t see it, and set the output of SC TRIG to Sends Only. That means it will trigger the sidechain but you won’t hear it. This one move keeps your session clean and avoids that “why is there an extra click in my mix” moment later.

Cool. Now we build the sub.

On the Sub track, load Operator. Set Oscillator A to a sine wave. Keep it mono, one voice. Turn the level down. Aim conservative, because sub eats headroom fast. A really useful target while you loop these two bars is: your master should peak around minus 6 dB. If you can’t get your track loud later, it’s usually because the sub was too hot at the beginning. So be disciplined here.

Now add a sub safety chain. Put EQ Eight on the Sub track and low-pass it somewhere around 180 Hz with a steeper slope, like 24 dB per octave. We’re not trying to make the sub “sound exciting.” We’re trying to make it clean and predictable.

Then add Utility. Set Bass Mono on, or set Width to zero percent. The sub should be centered, always. That’s one of the most reliable ways to get your track to translate outside your studio.

Now the mid bass layer, where the personality lives.

On the Mid track, load Wavetable. Start simple: a basic shapes wavetable, leaning saw-ish if you want that roller edge. Add a little unison, like two to four voices, but keep the amount modest. We’re not making a supersaw anthem. Filter it with an LP24 and put the cutoff somewhere in the 200 to 800 Hz zone depending on how bright you want it.

Add Saturator next. Drive somewhere around 2 to 6 dB, and turn Soft Clip on. Then EQ Eight. High-pass the mid around 90 to 120 Hz. This is a key rule: the Sub owns roughly 20 to 90 Hz, and the Mid owns 90 Hz and up. If you let the mid layer fight down low, your mix gets blurry, and the bounce turns into mush.

If the mid sounds boxy, sweep around 250 to 400 Hz and try a gentle dip. And if you want it to speak on small speakers later, you can add a tiny boost somewhere around 900 Hz to 2 kHz, like one or two dB. Tiny. We’re sculpting, not repainting the wall.

Now we write the bassline.

Create a two-bar MIDI clip on the Sub track. Set your grid to sixteenth notes. Pick a key. Let’s say F minor. Start with F1 as your main sub note.

Here’s a simple roller rhythm to get bounce fast: use mostly eighth-note energy, but place hits in a slightly syncopated way and keep them short. Try putting notes at these positions as a starting groove: bar 1 on 1.1, 1.1.3, 1.2.3, 1.3.3, and 1.4.3. Then bar 2, do something similar, but change the last hit to a variation note like G1 or Ab1.

Now the bounce trick that beginners usually miss: note length. Shorten most notes so they’re more like a sixteenth to an eighth long. And leave a gap before the snare hits. You want the snare to feel like it has a pocket. If your bass note is still sustaining into beat 2 and beat 4, the snare will feel smaller, even if the snare sample is great.

Once the Sub rhythm feels good, copy that same MIDI clip to the Mid track so both layers share the same groove. Same rhythm, same bounce, different frequency roles.

Now let’s do the clean sidechain.

Put a stock Compressor on the BASS BUS group, not on individual layers. Sidechaining the group means the Sub and Mid duck together, like one instrument. Turn on Sidechain. Set Audio From to SC TRIG. Choose Pre-FX if possible, so the sidechain signal stays consistent even if you process the ghost track later.

Set a starting ratio around 4 to 1. Attack around 3 to 10 milliseconds. That little bit of attack time lets the drum transient read before the bass ducks fully. Release around 80 to 140 milliseconds. Then lower the threshold until you’re seeing about 2 to 5 dB of gain reduction on each hit.

And listen for feel, not numbers. Release timing is everything. If the bass never seems to come back, your release is too long. If it swells back too late and misses the groove, shorten the release, or ease off the threshold. If your kick suddenly feels smaller, increase the attack slightly so the ducking isn’t instant.

Now let’s tighten the groove in a musical way.

First, add slight velocity variation in the MIDI, especially on the Mid track. Not dramatic. Just enough to create phrasing.

Second, for a quick “fatter but still clean” trick: keep the Sub perfectly on time, but make the Mid slightly late. You can do this with track delay on the Mid track, somewhere around plus 5 to plus 15 milliseconds. That tiny lag can make the mid feel wider and heavier, while the sub stays locked and focused.

If you want a beginner-friendly sanity check for phase and overlap, here’s one: temporarily put Utility on the Mid track and hit Phase Invert for left and right. If your low end disappears or gets really weird when both layers play, that’s a sign your Mid still has too much low frequency content, or you have stereo modulation happening too low. The fix is usually simple: raise the Mid high-pass a bit and keep any widening above around 200 Hz.

Now bus processing. Keep it minimal.

After the sidechain compressor on the BASS BUS, you can add EQ Eight for tiny cleanup. If it’s muddy, a small dip around 200 to 350 Hz can help. If it’s harsh, a small dip around 1 to 3 kHz.

You can add a limiter as a safety net, ceiling around minus 0.3 dB, but it should only catch peaks, like one or two dB at most. If it’s working hard, something earlier is too loud.

For the drums, optional: put Glue Compressor on the DRUMS group, with an attack around 10 milliseconds, release on Auto, ratio 2 to 1, and aim for just one to two dB of reduction. The goal is cohesion, not squashing.

Now let’s make it feel like a track with a simple arrangement.

Take your two-bar loop and extend it into a 16-bar drop. Bars 1 to 4: full drums and bass, keep it steady. Bars 5 to 8: add a tiny variation, like changing the last note at the end of bar 8. Bars 9 to 12: pull the hats out for one bar, then slam them back in. Bars 13 to 16: automate something on the Mid layer, like slowly opening the Wavetable filter cutoff by 10 to 20 percent. That’s enough to create lift without changing the whole sound.

If you want a super clean “energy ramp” without new sounds, you can also add mid-only ghost notes. That means adding tiny, very short sixteenth-note ticks to the Mid clip only, leaving the Sub unchanged. It increases perceived speed and movement without muddying the low end.

And here’s a signature DnB move: the bar-2 turnaround. In bar 2, replace the last one or two hits with a quick walk like F to G to Ab. Keep those notes short, and if the sub starts sounding too melodic, make that little walk Mid-only.

Before we wrap, let’s cover the most common mistakes so you can avoid them immediately.

Mistake one: Sub and Mid both playing full low end. Fix it with the Mid high-pass around 90 to 120, and the Sub low-pass around 180.

Mistake two: sidechaining the Sub too hard. If you’re ducking like 10 dB, it might sound exciting solo, but it often makes the drop feel weak. Aim for controlled movement, 2 to 5 dB.

Mistake three: bass notes are too long. At 170, sustained notes smear fast. Short notes, intentional gaps, especially before snares.

Mistake four: stereo sub. Always mono the sub.

Mistake five: messy routing. Keep layers into the BASS BUS, drums into a DRUMS group, and keep the sidechain trigger separate and silent using Sends Only.

Now a quick practice challenge to lock this in.

Make three versions of the same two-bar bassline. Don’t change the notes. Only change one thing per version. Version A: compressor release, fast versus medium. Version B: Mid amp envelope release in Wavetable, short versus slightly longer, because sometimes envelope shaping creates bounce more musically than adding more compression. Version C: saturation amount, light versus moderate.

Then do a bounce-check: mute the drums for five seconds, then unmute. If the bass suddenly “falls into place” with the drums when they come back, you nailed the relationship.

And if you want to level up your ear fast, drag a pro roller loop into your set on an audio track, warp it, turn it down, and A/B it. Focus on one question: how long does the bass stay loud after each kick? That’s the pocket.

Let’s recap.

At 170 BPM, bounce comes from rhythm, note length, and the bass interacting with kick and snare. Clean routing makes it controllable. Sub is mono and clean, low-passed. Mid is high-passed and provides character and translation on small speakers. Route both into a bass bus and sidechain that bus from a ghost kick set to Sends Only, so the ducking is unified and predictable.

When you’re ready, tell me your target vibe: smooth roller, techy, jump-up, reese-driven, or foghorn-ish. And I’ll give you a go-to two-bar variation plus a matching Wavetable patch that fits that style and translates well.

Mickeybeam

Go to drumbasscd.com for +100 drum and bass YouTube channels all in one place - tune in!

Any 1 Tutorial FREE Everyday
Tutorial Explain
Generating PDF preview…