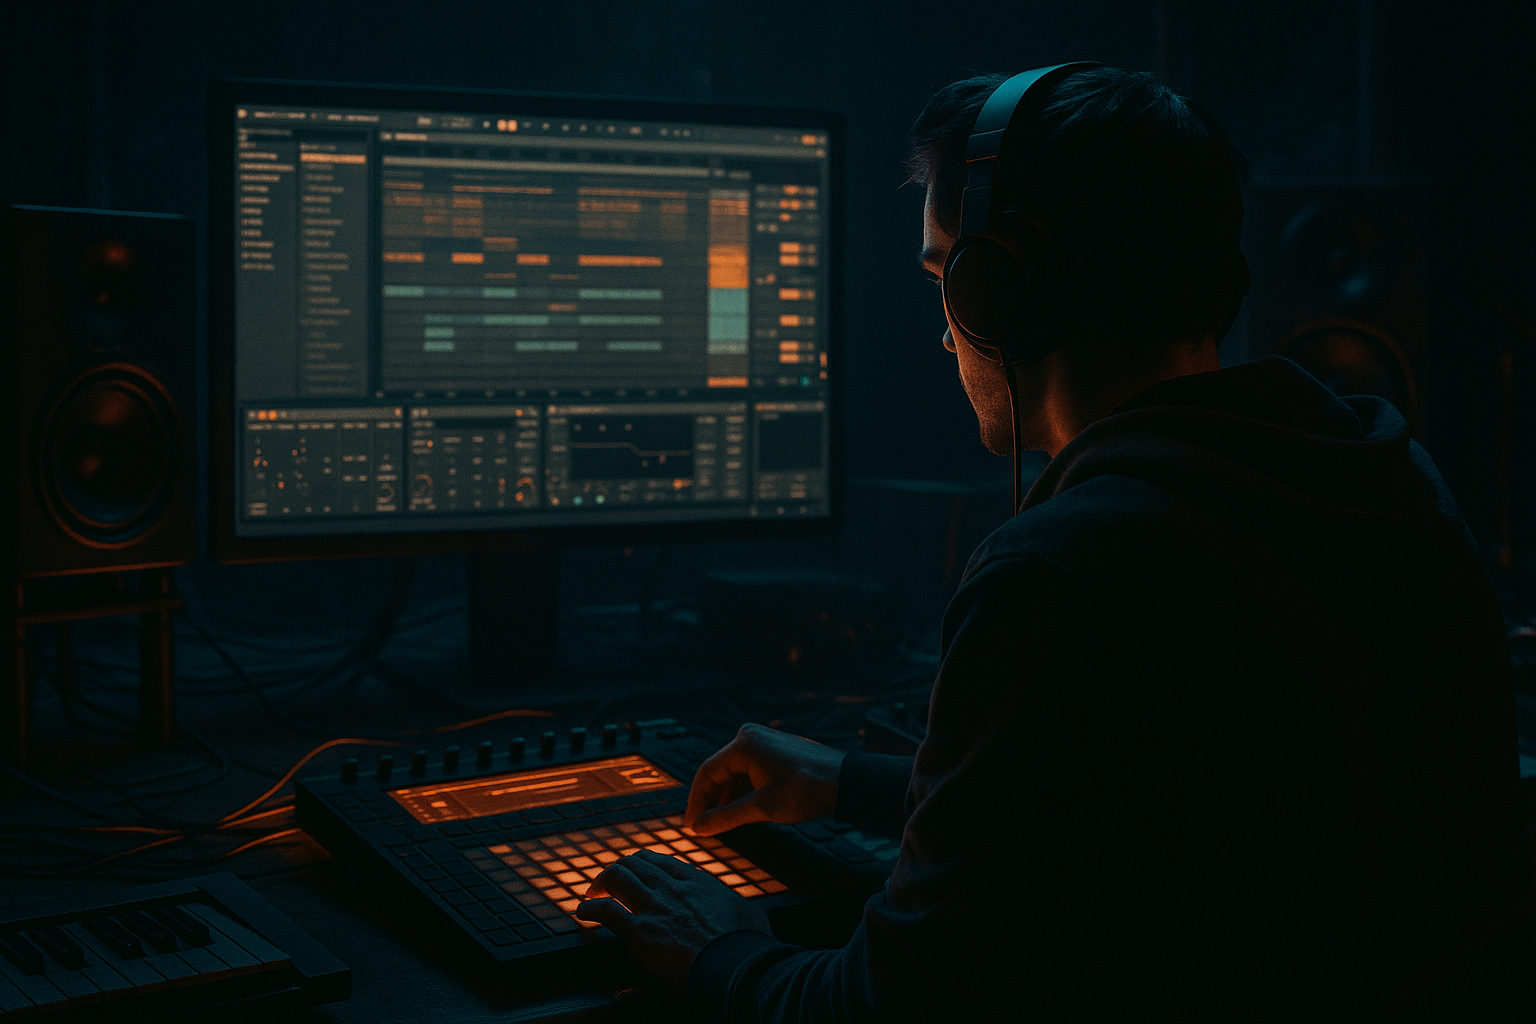
DNB COLLEGE

Drum & Bass Ableton Live 12 Tutorials

LESSON DETAIL

Bass wobble shape method using Session View to Arrangement View in Ableton Live 12 for jungle oldskool DnB vibes (Intermediate)

An AI-generated intermediate Ableton lesson focused on Bass wobble shape method using Session View to Arrangement View in Ableton Live 12 for jungle oldskool DnB vibes in the Sampling area of drum and bass production.

Back to lessons
Bass wobble shape method using Session View to Arrangement View in Ableton Live 12 for jungle oldskool DnB vibes (Intermediate) cover image

Narrated lesson audio

The voice track includes the tutorial plus extra teacher commentary.

Open audio file

Main tutorial

```markdown

Bass Wobble Shape Method (Session → Arrangement) in Ableton Live 12

Jungle / oldskool DnB vibes — Intermediate — Sampling 🔊🌀

---

1. Lesson overview

This lesson shows a practical “wobble shape” workflow for drum & bass: you’ll design a set of rhythmic filter/amp “wobble shapes” in Session View, perform/record them like an instrument, then print and arrange them in Arrangement View like classic jungle / early DnB bass movement.

Instead of drawing endless automation lanes from scratch, you’ll build reusable wobble clips that you can launch, combine, and resample into tight, rolling bass phrases. ⚙️🎛️

---

2. What you will build

You’ll end up with:

  • A Resampled bass audio track (clean, editable, “commit-to-a-vibe” style)
  • A rack-based wobble system using stock Ableton devices:
  • - Auto Filter (movement)

    - Saturator (weight)

    - Compressor / Glue Compressor (control)

    - Limiter (safety)

    - Optional: Corpus / Erosion (texture), Redux (oldskool grit)

  • A library of Session View clips that each represent a wobble rhythm:
  • - 1/8 wobble, triplet wobble, dotted, gated, syncopated “jungle push”

  • A simple arrangement idea: 16 bars with call/response bass phrases under a rolling break
  • ---

    3. Step-by-step walkthrough

    A) Set up the project for jungle / oldskool DnB

    1. Tempo: set to 164–172 BPM (try 168 BPM).

    2. Groove: In the Groove Pool, load something subtle like MPC 16 Swing 55–58 (apply lightly later).

    3. Drum context (quick): Drop a break (Amen/Think-style) on an audio track so you’re designing bass to the drums.

    - Warp mode: Complex Pro or Beats (try Beats for crunchy transients).

    - Add a Drum Buss (Drive ~5–15%, Boom low).

    > You can build the wobble system without drums, but you’ll make better decisions with a break rolling underneath. 🥁

    ---

    B) Create the bass source (Sampler/Simpler sampling approach)

    We’re going for oldskool subs with mid bite (not modern tearout).

    1. Create a MIDI Track → load Sampler (or Simpler).

    2. Source sample options (choose one):

    - A clean single-cycle wave (sine/triangle) for sub purity

    - A short reese-style sample or bass hit for instant character

    - A recorded note from a synth, resampled to audio, then loaded into Sampler

    3. In Sampler:

    - Turn on Loop if using a sustained sample.

    - Filter: enable low-pass (LP24).

    - Amp envelope (starting point):

    - Attack: 0–5 ms

    - Decay: 200–600 ms (optional)

    - Sustain: -6 to -12 dB (or full if you want steady)

    - Release: 80–150 ms (avoid clicks)

    4. Add a MIDI clip: 1 bar, notes like F1 / G1 / A#1 (classic dark keys).

    Keep it simple: root note held for the whole bar to let wobble do the rhythm.

    ---

    C) Build the “wobble shape rack” (this is the core method)

    On the same bass track, build this device chain:

    1) Saturator

  • Mode: Analog Clip
  • Drive: 3–8 dB
  • Soft Clip: ON
  • Output: adjust to avoid clipping
  • 2) Auto Filter (your wobble engine)

  • Filter type: LP24
  • Frequency: start around 200–800 Hz (depends on sample)
  • Resonance: 0.30–0.60 (too high gets whistly)
  • Envelope: 0 (we’ll use LFO)
  • Enable LFO:

  • Amount: 25–60%
  • Waveform: start with Sine (smooth), later try Square (gated)
  • Rate: Sync ON
  • 3) Compressor (optional but helpful)

  • Ratio: 2:1–4:1
  • Attack: 10–30 ms
  • Release: Auto or 80–150 ms
  • Use it to keep wobble peaks controlled.
  • 4) EQ Eight

  • High-pass at 25–35 Hz (clean rumble)
  • Optional: small dip around 250–400 Hz if boxy
  • Optional: tame harshness around 2–4 kHz if needed
  • 5) Limiter (safety)

  • Ceiling: -0.8 dB
  • Don’t crush it—just catch overs.
  • ---

    D) Session View: create wobble “shape clips” (automation per clip)

    This is the magic: each Session clip contains its own Auto Filter LFO Rate/Amount (and/or Filter Frequency) automation.

    1. In Session View, make 4–8 MIDI clips on your bass track. Name them like:

    - `WOB 1/8`

    - `WOB 1/16`

    - `WOB TRIP`

    - `WOB DOT`

    - `WOB GATE`

    - `WOB RAMP`

    - `WOB OFF` (steady)

    2. For each clip:

    - Double-click the clip to open Clip View.

    - Go to the Envelopes box.

    - Choose:

    - Device: Auto Filter

    - Control: LFO Rate (and optionally LFO Amount)

    #### Suggested wobble shapes (practical settings)

    Clip 1: “WOB 1/8” (classic roll)

  • Auto Filter LFO Rate: 1/8
  • LFO Amount: 35–55%
  • Keep clip length: 1 bar
  • This gives the classic “wub-wub-wub-wub” under a break.

    Clip 2: “WOB 1/16” (more urgency)

  • Rate: 1/16
  • Amount: 25–45%
  • Use in fills or when drums get busier.

    Clip 3: “WOB TRIP” (jungle swing/skip)

  • Rate: 1/8T or 1/16T
  • Amount: 30–50%
  • Great for that skippy, break-led bounce.

    Clip 4: “WOB DOT” (syncopation)

  • Rate: 1/8D
  • Amount: 30–55%
  • Dotted rates can feel very “old tape rave” when paired with breaks.

    Clip 5: “WOB GATE” (hard steps)

  • LFO waveform: Square
  • Rate: 1/8
  • Amount: 40–70%
  • This makes the bass feel like it’s being chopped—nice for call/response.

    Clip 6: “WOB RAMP” (riser-ish movement)

    Instead of LFO Rate, automate Filter Frequency:

  • In Envelopes:
  • - Device: Auto Filter

    - Control: Frequency

  • Draw a ramp from 200 Hz → 1.2 kHz over 1 bar
  • Use as a transition into a drop or variation.

    Clip 7: “WOB OFF” (steady)

  • LFO Amount automation down to 0%
  • This is your “reset / breathe” clip.

    > Tip: In Clip View, enable “Linked” (if you want the envelopes to loop with the clip) and keep clip lengths tight (1 bar or 2 bars). This makes them performance-friendly. 🎚️

    ---

    E) Make it playable: Follow Actions + Launch workflow

    To get that “performed” bass movement:

    1. Set each wobble clip’s Launch Quantization to 1 Bar (global is fine).

    2. Optional: Use Follow Actions (great for oldskool generative switch-ups):

    - Clip length: 1 bar

    - Follow Action: “Next” or “Other”

    - Chance: 20–40% (subtle variety, not chaos)

    Now you can launch clips like a DJ while the break loops.

    ---

    F) Record the performance into Arrangement (Session → Arrangement)

    1. Press Global Record (top transport).

    2. Launch your bass wobble clips in real time:

    - Bars 1–4: `WOB 1/8`

    - Bars 5–8: pepper in `WOB TRIP` for 1 bar here and there

    - Bars 9–12: `WOB GATE` call/response with drums

    - Bars 13–16: `WOB DOT` then `WOB RAMP` into next section

    3. Hit Stop.

    Now switch to Arrangement View and you’ll see your recorded clip launches as an arrangement lane.

    ---

    G) Resample/print the bass (commit and edit like classic DnB)

    This is where the “sampling” part becomes powerful: you’ll print the movement and then cut it like audio.

    Method 1 (quick): Resampling track

    1. Create a new Audio Track named `BASS PRINT`.

    2. Set its input to Resampling.

    3. Arm `BASS PRINT`.

    4. Solo the bass track (optional) and record 16 bars.

    Method 2 (cleaner): Freeze + Flatten

    1. Right-click bass track → Freeze Track

    2. Right-click again → Flatten

    Now it’s audio with your modulation baked in.

    ---

    H) Arrange like jungle: cut, repeat, and accent

    With your bass printed to audio:

    1. Use Slice (Cmd/Ctrl+E) on key rhythmic points:

    - On downbeats (1.1.1, 1.2.1 etc.)

    - Right before snare hits (classic push/pull)

    2. Create 2-bar phrases:

    - Phrase A (bars 1–2): steady 1/8 wobble

    - Phrase B (bars 3–4): triplet variation

    - Repeat A, then B, then A with a gated fill

    3. Add a single-beat stop before a drop (oldskool trick):

    - Mute bass for the last 1/4 bar of bar 8 or 16.

    Optional: Add Delay throws:

  • Echo on a return track
  • - Time: 1/8 or 1/4

    - Feedback: 15–30%

    - Filter: roll off highs for dubby vibe

    ---

    4. Common mistakes

  • Too much resonance on Auto Filter: it whistles and takes over the mix. Keep it controlled.
  • Wobble fights the sub: if your filter opens too high, the sub can feel inconsistent. Consider splitting sub/mids (see Pro Tips).
  • No rhythmic relationship to the break: the wobble should support the groove. Use 1/8, dotted, and triplets in small doses.
  • Over-recording modulation: if every bar changes, you lose the hypnotic roll. DnB loves repetition with smart variations.
  • Not committing to audio: printing lets you edit like classic sampled jungle—don’t be afraid to bake it in.
  • ---

    5. Pro tips for darker/heavier DnB 🕶️

    A) Split sub and mid so the wobble doesn’t wobble the sub

    1. Create an Audio Effect Rack after your Sampler.

    2. Make two chains:

    - SUB chain: EQ Eight low-pass around 90–120 Hz (no wobble)

    - MID chain: EQ Eight high-pass around 90–120 Hz (wobble happens here)

    3. Put Auto Filter only on the MID chain.

    Result: sub stays solid like a proper system tune, mids do the talking.

    B) Add controlled dirt without losing punch

  • SaturatorPedal (guitar-style bite)
  • - Pedal: “Overdrive” or “Distortion”

    - Keep Mix low (10–30%) if it’s getting hairy

  • Follow with EQ Eight to tame harshness at 3–6 kHz.
  • C) Make the wobble “talk”

    Add subtle formant-like motion:

  • Auto Filter into Corpus (very subtle)
  • - Preset-ish starting point: Tube/Beam vibes

    - Dry/Wet: 5–15%

    This can add that eerie, spoken midrange without going full neuro.

    D) Oldskool crunch trick

  • Redux (very lightly)
  • - Bit reduction: small (e.g., 12–14 bits)

    - Downsample: minimal

    Use it on the MID chain only.

    ---

    6. Mini practice exercise (15–25 minutes) 🎯

    1. Build the bass chain (Sampler → Saturator → Auto Filter → EQ → Limiter).

    2. Create 5 Session clips:

    - 1/8, 1/16, 1/8T, 1/8D, GATE (Square)

    3. Record 8 bars of clip launching into Arrangement.

    4. Resample to audio.

    5. Create a 16-bar loop:

    - Bars 1–8: two phrases alternating

    - Bars 9–16: same but with a 1-beat bass mute at bar 16 for tension

    6. Bounce a quick demo and listen on headphones + monitors:

    Does the sub stay consistent? Does the wobble rhythm lock with the snare?

    ---

    7. Recap

  • You built a wobble shape system using Session View clips as rhythmic modulation presets. 🌀
  • You performed wobble variations live and recorded into Arrangement for real musical movement.
  • You resampled/flattened to audio for classic jungle-style chopping and arranging.
  • You learned how to keep it rolling and hypnotic, with variations that feel authentic to oldskool DnB.

If you want, tell me the vibe (e.g., dark Roller, 94 jungle, techstep) and what key/tempo you’re using—I can suggest a tight 16-bar bass arrangement blueprint and a couple of wobble clip sets tailored to that style. 🔥

```

Ask GPT about this lesson

Chat with the lesson tutor, get follow-up help, or use quick actions.

Bigup 👽 Ask me anything about this lesson and I’ll answer in context.

Narration script

Show spoken script
Welcome back. In this lesson we’re doing a really practical jungle and oldskool DnB workflow in Ableton Live 12: the bass wobble shape method, where Session View is your performance instrument, and Arrangement View is where you commit it, print it, and chop it like proper sampled drum and bass.

The big mindset shift is this: instead of drawing automation lanes for hours, you build a small library of wobble “shapes” as Session clips. Each clip is basically a modulation preset with a groove. Then you launch them like you’re playing an instrument, record that performance into Arrangement, and finally resample it to audio so you can edit it with that classic, gritty, committed vibe.

Alright, let’s set the room up first.

Set your tempo somewhere between 164 and 172 BPM. I’m going to sit at 168 because it just feels right for rolling breaks. If you use grooves, go to the Groove Pool and grab something subtle, like an MPC 16 Swing around 55 to 58. Don’t slam it. This is about a nudge, not a drunken stumble.

Now, put a break in. Seriously. Even if you’re “just designing bass,” the bass decisions are different when an Amen or Think is actually pushing air. Drop your break on an audio track. For warp, try Beats if you want that crunchy transient bite, or Complex Pro if you want it smoother. Add Drum Buss if you like, a little drive, a little boom, just enough that the break has attitude.

Now we build the bass source. We’re going for oldskool sub with mid bite, not modern tearout. Create a MIDI track and load Sampler or Simpler. Either one works. Choose your source: a clean single-cycle wave if you want pure sub, or a reese-ish sample or bass hit if you want instant character, or even a note you recorded from a synth and resampled.

Inside Sampler, if it’s a sustained source, turn on looping. Turn on a low-pass filter, LP24 is perfect. Then set an amp envelope that behaves like a bass and doesn’t click. Attack basically zero to a few milliseconds. Release around 80 to 150 milliseconds. If you hear clicks, give the attack a touch more, or extend release slightly. The idea is: smooth enough to not crackle, but still tight enough for fast jungle rhythms.

Now make one simple MIDI clip, one bar long. Put a note like F1, G1, or A-sharp 1. Classic dark keys. And here’s the trick: hold the note for the whole bar. We’re not programming rhythm with notes. The wobble shapes will be the rhythm.

Now for the device chain. This is the wobble rack concept, but we’ll keep it stock and clean.

First, Saturator. Put it right after Sampler. Analog Clip mode is the vibe. Drive maybe 3 to 8 dB, Soft Clip on. Then adjust output so you’re not exploding the track. Think weight, not destruction.

Next, Auto Filter. This is your wobble engine. Choose a low-pass 24 dB slope. Start your frequency somewhere like 200 to 800 Hz depending on the sample. Set resonance around 0.3 to 0.6. If you crank resonance and it starts whistling, you’ve left “jungle” and entered “mosquito.” Keep it controlled.

Turn on the LFO in Auto Filter. Start with a sine wave for smooth movement. Turn Sync on. Set an LFO amount somewhere like 25 to 60 percent. We’ll refine per clip, but that range gives you motion without turning it into a comedy effect.

After that, you can add a Compressor. Not mandatory, but it helps keep wobble peaks from jumping out. Ratio 2:1 to 4:1, attack 10 to 30 milliseconds, release auto or around 80 to 150 milliseconds. You’re just shaping, not flattening.

Then EQ Eight. High-pass around 25 to 35 Hz to clear rumble you can’t hear but your limiter can. If it’s boxy, a tiny dip in the 250 to 400 Hz area. If it’s harsh, a little control around 2 to 4 kHz. Keep it subtle.

And finally a Limiter, just as a safety net. Ceiling around minus 0.8 dB. Do not crush it. This is just “catch the occasional spike.”

Cool. That’s the sound source and the engine. Now the real method begins: Session View wobble shape clips.

Go to Session View on your bass track and create a handful of MIDI clips. Four to eight is a sweet spot. Name them clearly so you can perform them fast. Stuff like: WOB 1/8, WOB 1/16, WOB TRIP, WOB DOT, WOB GATE, WOB RAMP, and WOB OFF.

And here’s what these clips really are: they’re identical notes, but different modulation envelopes inside the clip. Ableton lets each clip store automation for device parameters, and that’s the whole magic.

Open the first clip and go to Clip View. Find the Envelopes section. Select Auto Filter as the device, then choose LFO Rate as the control. You can also automate LFO Amount, and sometimes that’s the secret sauce, because changing the depth can feel more musical than changing the rate.

Let’s build a few core shapes.

For WOB 1/8, set the Auto Filter LFO Rate to 1/8. Set LFO Amount around 35 to 55 percent. Make the clip one bar long. This is your main roller. Under a break, it’s that classic wub-wub-wub-wub that just sits right.

For WOB 1/16, set rate to 1/16, amount maybe 25 to 45 percent. This is more urgent. Don’t live here for the whole track. Use it like spice: fills, lifts, moments where the drums are busy and you want tension.

For WOB TRIP, set rate to 1/8 triplet or 1/16 triplet. Amount around 30 to 50 percent. Triplets give you that skippy, break-led bounce. This is where jungle starts grinning.

For WOB DOT, set rate to 1/8 dotted. Amount 30 to 55. Dotted rhythms can sound like old tape rave energy, especially if the break is swinging.

For WOB GATE, switch the LFO waveform to square. Rate 1/8 is a good start. Amount 40 to 70 percent. Now it’s chopped. It’s like the bass is stepping, or being turned on and off by a gate. Perfect for call and response with the snare.

For WOB RAMP, instead of LFO settings, automate Auto Filter Frequency directly. In the Envelopes choose Auto Filter, then Frequency. Draw a ramp from around 200 Hz up to maybe 1.2 kHz over one bar. It’s a transition move. Not a whole section. A moment.

And for WOB OFF, automate LFO Amount down to 0 percent. This is your reset clip. Your “breathe” clip. A lot of people forget this, and then every bar is yelling.

Quick coaching tip: keep clip lengths tight, like one bar or two bars. Turn on linked envelopes if you want the modulation to loop perfectly with the clip. This makes the clips performance-friendly, like an actual kit.

Now let’s make these clips playable like you’re DJ-ing the bassline.

Set your Global Quantization to 1 bar. That means when you launch a clip, it switches on the bar line. Clean, DJ-safe. But here’s the upgrade: set a few fill clips, like TRIP or GATE, to a smaller launch quantization, like half a bar or a quarter bar. That way you can drop a quick variation without waiting a full bar. It feels way more alive.

Another massive upgrade: Legato. In a clip’s Launch settings, enable Legato when you want the note timing to continue, but the modulation to change. So you can hold a long note, swap wobble patterns, and it feels continuous instead of restarting the note. This is one of those “why didn’t I do this earlier” features.

Also, treat your wobble clips like a kit. Name them with feel and intensity, like WOB 1/8 mid, WOB 1/16 tense, WOB DOT shuffle, WOB GATE stab. Color-code them: mains, fills, transitions, reset. When you’re performing, you don’t want to think. You want to react.

Optional, but fun: Follow Actions. If you want subtle generative variety, give a few clips Follow Action “Next” or “Other” with a small chance, like 20 to 40 percent. Not chaos. Just little switch-ups so it feels performed.

Now we record the performance from Session into Arrangement.

Hit Global Record at the top. Start your break looping. Then launch your bass clips in real time. For a simple 16-bar plan: bars 1 to 4, stay on WOB 1/8. Bars 5 to 8, pepper in a bar of WOB TRIP here and there. Bars 9 to 12, use WOB GATE as call and response, like one bar steady, one bar chopped. Bars 13 to 16, bring in WOB DOT, and then hit WOB RAMP right at the end to push into the next section.

Then stop. Switch to Arrangement View. You’ll see the clip launches laid out as an arrangement lane. That’s your performed bass automation, captured.

Now we commit. This is the sampling mentality.

Method one: resampling track. Create a new audio track called BASS PRINT. Set its input to Resampling. Arm it. Solo the bass if you want a clean print. Record 16 bars.

Method two: Freeze and Flatten. Right-click the bass track, freeze it, then flatten. Now it’s audio with all modulation baked in.

Coach note here: commit in stages. Print two versions if you can. One clean print, minimal dirt, just wobble. One character print with extra saturation or a touch of Redux grit. Then in your arrangement, you can choose which one is better for each section without losing the resample vibe.

Now that it’s audio, this is where jungle becomes jungle: you chop it.

Take that printed bass audio and slice it at key rhythmic points. Cut on downbeats. Cut right before the snare to create push and pull. Make two-bar phrases. Phrase A: stable 1/8 wobble. Phrase B: triplet variation. Then arrange like A A B A. Predictable returns with one bar of mischief is basically the jungle tension formula.

Add micro-mutes. This is one of the most authentic tricks. Instead of a big obvious breakdown, mute the bass for one eighth or one quarter right before a snare every four bars. Or do a bigger stop: mute the last quarter of bar 8 or bar 16 before the next section hits. The crowd hears that gap like a hook.

If you want dubby spice, set up an Echo return. One-eighth or one-quarter, feedback 15 to 30 percent, and filter the highs down so it’s not shiny. Then just send little one-shot moments, not the whole bassline.

Now let’s cover common problems before they waste your time.

If the filter resonance is too high, it whistles and dominates the mix. Back it down. If the wobble is fighting the sub, it’s because you’re wobbling the whole bass. Classic fix: split sub and mid.

Do it with an Audio Effect Rack after Sampler. Two chains. SUB chain: EQ Eight low-pass around 90 to 120 Hz, and keep it steady, no wobble. MID chain: EQ Eight high-pass around 90 to 120 Hz, and put Auto Filter wobble only on that chain. Now the sub is solid like a system tune, and the mids do the talking.

And check that crossover in mono. Collapse the master to mono and listen. If the weight disappears, adjust crossover frequency or slope. Use similar filter types on both chains to avoid weird phase issues.

Another mistake: wobble with no rhythmic relationship to the break. If your bass feels like it’s pulling the groove backward, reduce LFO amount. Sometimes tiny frequency offset moves lock better with a snare than huge dramatic sweeps. Under a busy Amen, less depth than you think often works better.

And don’t over-record modulation. If every bar changes, you lose hypnosis. DnB loves repetition with smart variation.

If you want advanced movement without Max for Live, try a two-LFO feel using two Auto Filters. First Auto Filter does the rhythmic wobble. Second Auto Filter after it runs super slow, like a two-bar rate with a tiny amount. Now the tone breathes over phrases while the rhythm stays tight.

You can also do a ghost wobble feel with subtle sidechain. Put a compressor after the wobble and sidechain it from the break. Keep it gentle. You’re not doing modern pump. You’re making the bass nod with the break transients so everything glues like a record.

And for oldskool crunch, use Redux lightly on the MID chain only. Tiny bit reduction, tiny downsample. Just a sprinkle of “90s digital pain.”

Alright, let’s wrap it with a quick practice mission you can do in 20 minutes.

Build the chain: Sampler into Saturator into Auto Filter into EQ into Limiter. Make five wobble clips: 1/8, 1/16, 1/8 triplet, 1/8 dotted, and gate with square. Record eight bars of launching into Arrangement. Then resample it. Then build a 16-bar loop: bars 1 to 8 alternate two phrases, bars 9 to 16 do the same but add a one-beat bass mute right at bar 16 for tension.

Then do the real test: does the sub stay consistent in mono, and does the wobble rhythm lock with the snare without overpowering the break?

Recap: you built a wobble shape system where Session clips are rhythmic modulation presets. You performed them live, recorded into Arrangement for musical movement, and then printed to audio so you can edit like classic jungle sampling. That’s the workflow: build shapes, perform, commit, chop, and the track basically starts arranging itself.

If you tell me your tempo, key, and which break you’re using, I can suggest a tight set of eight wobble clip roles, three mains, three fills, a transition, and a reset, tailored to that groove.

mickeybeam

Go to drumbasscd.com for +100 drum and bass YouTube channels all in one place - tune in!

Generating PDF preview…