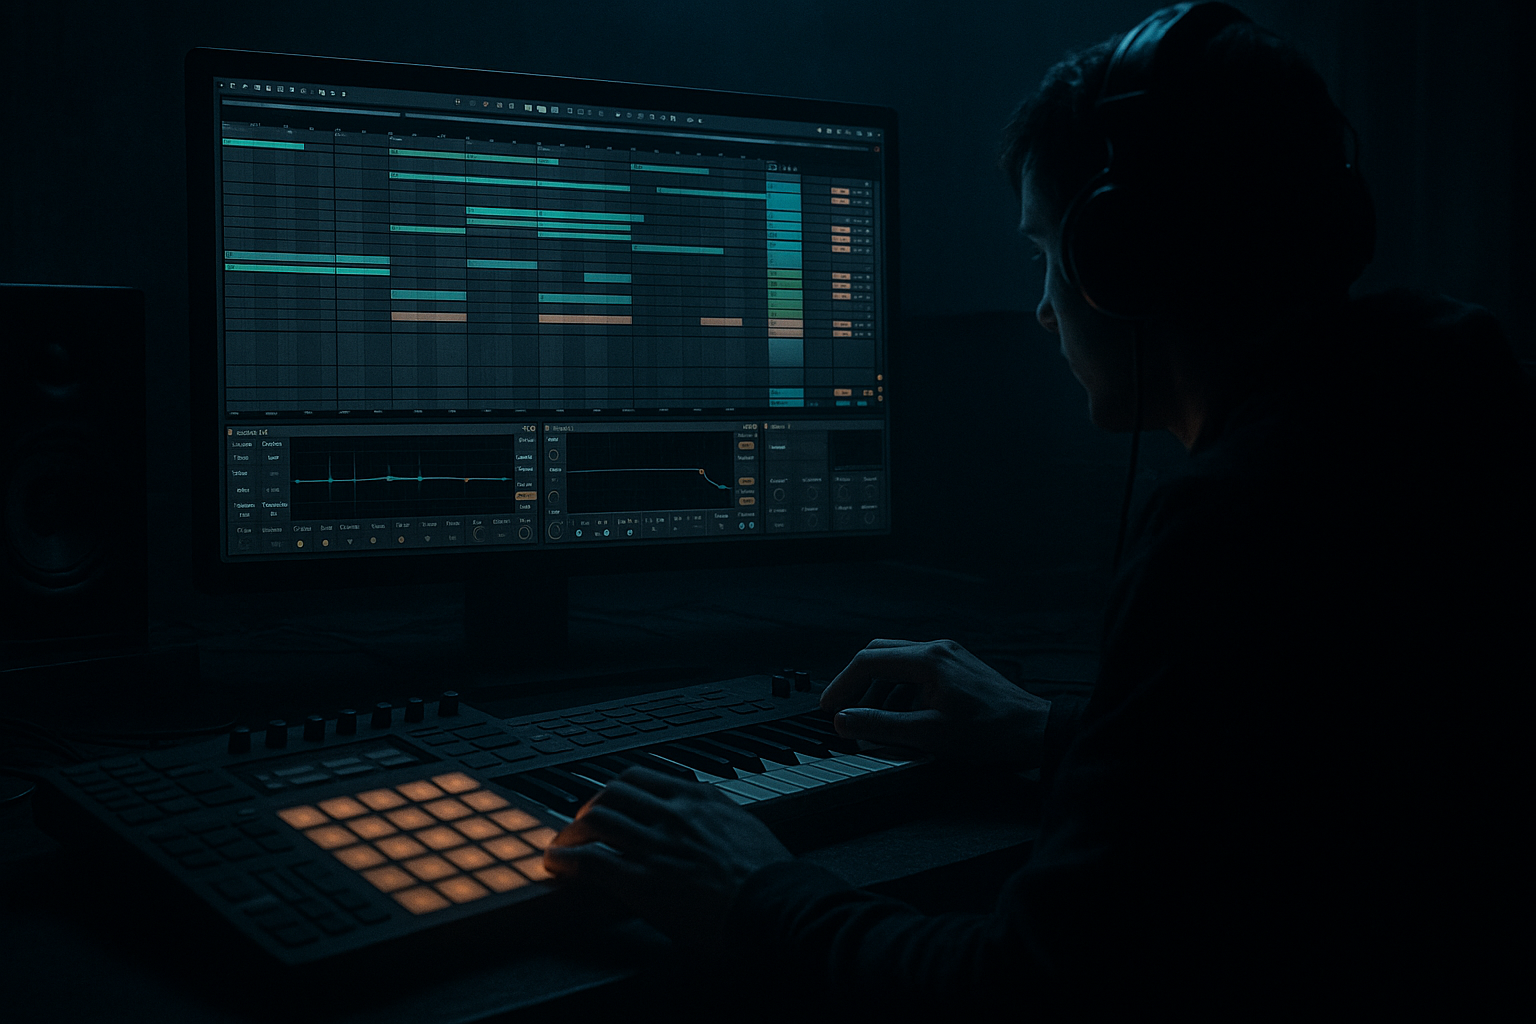
DNB COLLEGE

Drum & Bass Ableton Live 12 Tutorials

LESSON DETAIL

Bass wobble in Ableton Live 12: carve it using groove pool tricks for jungle oldskool DnB vibes (Advanced)

An AI-generated advanced Ableton lesson focused on Bass wobble in Ableton Live 12: carve it using groove pool tricks for jungle oldskool DnB vibes in the Basslines area of drum and bass production.

Back to lessons
Bass wobble in Ableton Live 12: carve it using groove pool tricks for jungle oldskool DnB vibes (Advanced) cover image

Narrated lesson audio

The voice track includes the tutorial plus extra teacher commentary.

Open audio file

Main tutorial

Bass Wobble in Ableton Live 12: Carve It with Groove Pool Tricks for Jungle / Oldskool DnB Vibes 🔥

1. Lesson overview

In this lesson, you’ll build a controlled, gritty bass wobble in Ableton Live 12 and shape its movement using Groove Pool tricks rather than relying only on LFO automation. This is a very useful approach for jungle, oldskool drum and bass, and rolling DnB, where the bass needs to feel human, syncopated, and rhythmically carved into the drums.

Instead of just drawing a predictable wobble pattern, we’ll use:

  • Ableton’s Groove Pool to give bass notes swing, push, and laid-back motion
  • MIDI note length and spacing to carve the movement
  • Stock devices to make the bass heavy, dark, and mix-ready
  • Arrangement thinking so the bass works with breakbeats rather than fighting them
  • This is an advanced workflow, so we’ll focus on musical control and tight low-end discipline rather than beginner sound-design basics.

    ---

    2. What you will build

    You’ll create a two-part bass system:

    1. Sub layer

    - clean sine/triangle-style foundation

    - mono and stable

    - locked to the kick and break

    2. Mid wobble layer

    - harmonically rich bass

    - groove-carved note rhythm

    - optional filter movement for that oldskool “talking” bass feel

    By the end, you’ll have a bassline that can sit under:

  • chopped Amen-style breaks
  • fast two-step DnB drums
  • rolling jungle percussion
  • darker half-time sections
  • Think: pressure, movement, and space — not just “wub-wub-wub.” 💣

    ---

    3. Step-by-step walkthrough

    Step 1: Set up the project for DnB timing

    For an oldskool / jungle-feeling bassline, start with:

  • Tempo: `160–172 BPM`
  • - classic jungle: `166–170 BPM`

    - rolling DnB: `172 BPM`

  • Time signature: `4/4`
  • Create a drum loop first
  • - use a chopped break or a basic kick/snare pattern

    - the bass groove must respond to the drums, not exist in isolation

    Tip: Loop 8 bars from the start. DnB basslines often feel best when they evolve over a longer phrase rather than one bar on repeat.

    ---

    Step 2: Build the bass instrument chain

    Create a new MIDI track called `BASS MID`.

    #### Option A: Wavetable-based mid bass

    Use:

    1. Wavetable

    - Osc 1: saw or square

    - Osc 2: square or a detuned saw

    - Unison: `1–2 voices` max for low-mid bass

    - Keep it controlled; too much unison muddies the low end

    2. Auto Filter

    - Low-pass 24 dB

    - Drive: `10–20%`

    - Cutoff around `120–400 Hz` depending on the note range

    3. Saturator

    - Soft Clip: `On`

    - Drive: `2–6 dB`

    - Keep an eye on gain staging

    4. Drum Buss (optional but useful for grit)

    - Drive low: `5–15%`

    - Boom: usually off for bass unless you really know the tuning

    - Transients slightly reduced if the bass is too clicky

    5. EQ Eight

    - Cut unnecessary low rumble below `25–30 Hz`

    - Tame harshness around `2–5 kHz` if needed

    - Keep room for snare crack and break top-end

    #### Option B: Operator for a purer oldskool sub-mid

    Use:

    1. Operator

    - Oscillator A: sine or triangle

    - Add a second oscillator very quietly if you want more edge

    2. Saturator

    3. Auto Filter

    4. EQ Eight

    This works well for a more authentic jungle sub/mid character.

    ---

    Step 3: Create the sub layer separately

    Make another MIDI track called `SUB`.

    Use Operator:

  • Oscillator A: sine
  • Volume: clean and direct
  • Mono: yes
  • Glide: optional, very subtle
  • Place MIDI notes that follow the bass rhythm exactly, or simplify them if the mid bass is too busy.

    #### Sub layer rules:

  • Keep it mono
  • Keep it dry
  • Avoid stereo widening
  • Avoid heavy distortion
  • Low-pass if needed, but usually a sine is already enough
  • Processing chain idea:

  • Operator
  • Utility → Width `0%`
  • EQ Eight → high-pass at `20–25 Hz`
  • Compressor or Glue Compressor only if needed for consistency
  • ---

    Step 4: Program a bass rhythm that can be “carved” by groove

    Now create a one- or two-bar bass MIDI clip.

    For jungle/oldskool vibes, avoid overcomplicated constant notes. Instead, think in phrases:

  • short notes on offbeats
  • gaps for the snare to breathe
  • call-and-response with the break
  • #### Example rhythmic idea:

  • Bar 1: bass hits on beat `1&`, `2a`, `3&`
  • Bar 2: bass hits on `1`, `1a`, `2&`, `4&`
  • The exact notes matter less than the rhythmic pockets.

    #### Key DnB principle:

    The bass should feel like it is ducking around the break rather than stomping through every subdivision.

    ---

    Step 5: Use Groove Pool to carve the bass feel

    This is the core lesson.

    Open Groove Pool in Live 12 and audition grooves from:

  • MPC-style swing
  • MPC 16 Swing
  • SP-style grooves
  • any groove extracted from a break loop
  • For jungle, grooves extracted from actual breakbeats often feel more authentic than generic swing.

    #### How to apply groove:

    1. Drag a groove into the Groove Pool

    2. Assign it to your bass MIDI clip

    3. Start with:

    - Timing: `20–40%`

    - Velocity: `10–30%`

    - Random: `0–5%`

    - Base: usually leave as default unless needed

    #### What this does:

  • Timing pushes notes slightly ahead/behind the grid
  • Velocity adds dynamic groove
  • Random can make the feel less robotic, but use lightly
  • ---

    Step 6: Carve the wobble using note lengths, not just LFOs

    Here’s the trick: instead of relying only on one moving filter, shape the wobble rhythm with MIDI note lengths.

    #### Practical method:

    1. Duplicate your bass clip

    2. Make one version with short notes and another with slightly longer notes

    3. Let Groove Pool shift the note feel between them

    Short notes create:

  • stabs
  • punctuation
  • space for drums
  • Longer notes create:

  • sustained pressure
  • wash and movement
  • more “wobble” perception when filtered
  • #### In the Clip View:

  • Use legato for connected phrases if you want glide
  • Use short staccato notes for choppy jungle bass
  • Experiment with note overlap if you’re using glide/portamento
  • ---

    Step 7: Add motion with Filter Envelope or LFO-style movement

    Now we make the wobble feel alive.

    #### In Wavetable:

  • Map Filter Cutoff to an Envelope
  • Set:
  • - Attack: `0–10 ms`

    - Decay: `150–450 ms`

    - Sustain: `0–30%`

    - Release: `50–120 ms`

    This gives you a punchy, talking bass shape.

    #### Alternative with stock devices:

    Use Auto Filter and automate the cutoff over 1- or 2-bar shapes.

    For oldskool jungle, a classic move is:

  • cutoff opens on the bass hit
  • closes before the next snare
  • slightly different behavior every 2 or 4 bars
  • This complements Groove Pool because the groove determines when the note speaks, and the filter determines how it speaks.

    ---

    Step 8: Make groove and wobble work together

    This is where the sound becomes intentional.

    #### Workflow:

  • Keep your bass clip looped over 4 or 8 bars
  • Apply Groove Pool to the clip
  • Automate filter cutoff or macro movement over the phrase
  • Let the groove create the “carved” rhythm
  • Let the filter create the “wobble” character
  • A good oldskool DnB bassline often feels like:

  • rhythm first
  • tone second
  • sound design third
  • If the bass groove is strong, even a simple patch sounds powerful.

    ---

    Step 9: Add Rack macros for fast control

    Group your mid bass chain into an Instrument Rack and map:

  • Macro 1: Cutoff
  • Macro 2: Resonance
  • Macro 3: Drive
  • Macro 4: Width (if used only on mids, not the sub)
  • Macro 5: Envelope Amount
  • Macro 6: Release
  • This lets you perform bass movement live or automate it across the arrangement.

    #### Great use in DnB arrangement:

  • Bars 1–8: tighter cutoff, drier bass
  • Bars 9–16: open filter, more drive
  • Drop: automated resonance peak for emphasis
  • Breakdown: filter closes down, leaving atmosphere and sub pressure
  • ---

    Step 10: Glue it with drum-and-bass-specific mixing choices

    Once the groove feels good, make sure the low end translates.

    #### Stock device chain suggestions:

    Mid Bass Track

  • Wavetable / Operator
  • Auto Filter
  • Saturator
  • EQ Eight
  • Utility
  • Sub Track

  • Operator
  • EQ Eight
  • Utility
  • Drum Bus / Group

  • Glue Compressor
  • Drum Buss
  • EQ Eight if needed
  • #### Mix targets:

  • Sub should dominate below `80–100 Hz`
  • Mid bass should live mostly above that
  • Avoid stereo widening on anything below `120 Hz`
  • Sidechain bass lightly to kick/snare if the break is dense
  • #### Sidechain suggestion:

    Use Compressor on the bass group keyed from the kick or drum bus:

  • Ratio: `2:1` to `4:1`
  • Attack: `1–10 ms`
  • Release: `50–150 ms`
  • Just enough to make space, not pump like EDM unless that’s the goal
  • ---

    Step 11: Arrange it like a DnB record

    A strong bassline feels bigger when arranged properly.

    #### Try this 16-bar idea:

  • Bars 1–4: stripped intro, filtered bass
  • Bars 5–8: groove introduced, fewer notes
  • Bars 9–12: full bass phrase, more filter movement
  • Bars 13–16: variation with rhythm carve, fills, and stutters
  • #### Jungle/oldskool variation ideas:

  • drop out the bass on the snare before a phrase restart
  • reverse one bass note into the next section
  • automate groove intensity indirectly by changing note lengths and velocities
  • use ghost notes at low velocity for movement
  • ---

    4. Common mistakes

    1. Over-swinging the bass

    If Groove Pool timing is too strong, the bass can feel lazy or late against the break.

    Fix: keep timing moderate, usually `20–40%`, and compare against the drum groove.

    2. Making the bass too wide

    Wide low end destroys club translation.

    Fix: keep the sub mono and only widen harmonics above the low end if necessary.

    3. Too much unison or detune

    This can smear the groove and blur the bass note identity.

    Fix: use minimal unison on low-mid bass, especially in DnB.

    4. Ignoring note length

    A great groove with bad note lengths still sounds messy.

    Fix: edit MIDI lengths carefully; let rests do the work.

    5. Overprocessing the sub

    Distortion, chorus, and stereo on the sub can wreck the foundation.

    Fix: keep the sub simple and clean.

    6. Not leaving room for the snare

    Oldskool DnB depends on the snare being clear and strong.

    Fix: carve bass around snare hits and avoid constant overlap in the same frequency zone.

    ---

    5. Pro tips for darker/heavier DnB

    Tip 1: Extract groove from your own break

    Drag a chopped break into Groove Pool and extract its swing/placement feel. This creates a bass groove that naturally “talks” to the drums.

    Tip 2: Use velocity as a tonal control

    Map velocity to:

  • filter cutoff
  • filter envelope amount
  • wavetable position
  • This makes the bass feel more alive with no extra MIDI clutter.

    Tip 3: Add controlled dirt before compression

    For darker bass:

  • Saturator before Compressor
  • Roar if you want more aggressive modern grime, but keep it controlled
  • subtle distortion helps the bass read on smaller systems
  • Tip 4: Layer a low-passed noise or texture

    A very quiet layer of noise filtered around `1–4 kHz` can add air and aggression, especially on a darker reese-ish mid bass.

    Tip 5: Automate groove intensity across sections

    Instead of changing the whole patch, change:

  • note density
  • note length
  • velocity variation
  • filter movement
  • That keeps the track evolving without losing identity.

    Tip 6: Use silence as part of the bassline

    One of the most powerful jungle techniques is leaving space. A gap before the snare hit can hit harder than another bass note. 🥁

    ---

    6. Mini practice exercise

    Exercise: Build a 4-bar carved wobble loop

    #### Goal

    Make a bassline that feels like it locks into a chopped break with groove-carved movement.

    #### Steps

    1. Set project tempo to `170 BPM`

    2. Create a drum loop with kick/snare and a chopped break

    3. Program a 4-bar bass MIDI clip using:

    - short notes in bars 1–2

    - longer notes in bars 3–4

    4. Apply a groove from the Groove Pool:

    - Timing `30%`

    - Velocity `15%`

    5. Add a filter automation curve:

    - open slightly on each bass entry

    - close before each snare

    6. Duplicate the clip

    - one version more sparse

    - one version more active

    7. Compare both versions and choose the one that leaves more space for the drum break

    #### Challenge

    Try making the same bassline work in:

  • a half-open filtered intro
  • a full drop
  • a breakdown with only sub and texture
  • If it works in all three, your groove design is solid.

    ---

    7. Recap

    You now have a practical method for building bass wobble in Ableton Live 12 using Groove Pool tricks to carve the rhythm in a way that suits jungle and oldskool DnB.

    Key takeaways:

  • Use Groove Pool to humanize bass timing and velocity
  • Shape movement with note length, not just modulation
  • Split sub and mid bass for clean low-end control
  • Use stock Ableton devices like Operator, Wavetable, Auto Filter, Saturator, EQ Eight, Compressor, Drum Buss, Utility
  • Arrange the bass to respond to the breakbeat, not fight it
  • If you get the rhythm right, the wobble doesn’t need to be huge — it just needs to be carved properly so the drums, sub, and movement all lock together. That’s the jungle magic ✨

    If you want, I can also turn this into:

  • a device-by-device Ableton rack recipe
  • a MIDI pattern example
  • or a follow-along 8-bar bassline exercise for Live 12.

Ask GPT about this lesson

Chat with the lesson tutor, get follow-up help, or use quick actions.

Bigup 👽 Ask me anything about this lesson and I’ll answer in context.

Narration script

Show spoken script
Welcome to this advanced Ableton Live 12 lesson on carving a bass wobble with Groove Pool tricks for jungle and oldskool DnB vibes.

Today we’re not just building a bass sound. We’re building a bass relationship with the drums. That’s the big difference. In jungle and oldskool drum and bass, the bass should feel like it’s dancing around the break, not fighting it. So instead of leaning only on an LFO or a predictable wobble pattern, we’re going to use groove, note length, spacing, and a little bit of controlled grit to make the bass feel alive.

The goal here is a bassline that sounds human, syncopated, and properly carved into the rhythm. Think pressure, movement, and space. Not endless wub-wub. We want something that sounds intentional, dark, and mix-ready.

First, set the project up for DnB timing. A tempo somewhere between 160 and 172 BPM is the sweet spot here. If you want that classic jungle feel, aim around 166 to 170. If you want a more rolling DnB push, 172 is a solid choice. Keep it in 4/4, and before you even obsess over the bass, build a drum loop first. Use a chopped break, or at least a kick and snare pattern that feels like a real drum foundation. The bass has to respond to that groove. Don’t design it in isolation.

It also helps to work with an 8-bar loop from the beginning. A lot of DnB basslines feel better when they evolve over a longer phrase instead of just repeating a one-bar idea over and over. You want the bass to breathe over time.

Now let’s build the instrument chain. We’re going to split this into two parts: a sub layer and a mid wobble layer. That separation is really important if you want clean low end and enough movement up top.

For the mid bass, create a new MIDI track and call it BASS MID. You can build this with Wavetable or Operator. If you use Wavetable, start with a saw or square wave on Oscillator 1, and maybe a square or slightly detuned saw on Oscillator 2. Keep unison low. One or two voices max. Too much unison in this range will smear the low end and make the bass lose focus.

After that, put Auto Filter after the instrument and use a low-pass 24 dB setting. Add a little drive, maybe 10 to 20 percent, and place the cutoff somewhere in the 120 to 400 Hz area depending on how bright the notes are and how much movement you want. Then add Saturator with soft clip turned on. A few dB of drive is usually enough to give you weight and bite without destroying the tone. If you want extra grit, Drum Buss can work too, but keep the drive conservative and be careful with the boom control. Usually, boom should stay off for bass unless you really know what you’re tuning. Finish with EQ Eight to cut sub-rumble below 25 to 30 Hz and tame any harshness around 2 to 5 kHz if needed.

If you want a more authentic oldskool sub-mid character, Operator is a great choice too. Use a sine or triangle as the base, keep it controlled, and add saturation, filtering, and EQ after that. That tends to sit nicely in jungle mixes.

Now create the sub layer on a separate track called SUB. This should be simple, stable, and boring in the best possible way. Use Operator with a sine wave, keep it mono, and if you want, add a very subtle glide. The sub’s job is not to show off. Its job is to hold the weight of the track together.

On the SUB track, keep the chain minimal. Operator, then Utility with width at zero percent, then EQ Eight with a gentle high-pass around 20 to 25 Hz if needed. You might add a compressor or Glue Compressor for consistency, but only if the sub is actually uneven. Otherwise, leave it clean. The sub should be dry, centered, and rock solid.

Now for the rhythm. This is where the groove gets carved. Program a one-bar or two-bar bass MIDI clip, but don’t make it too busy. Jungle and oldskool DnB usually work better when the bass phrases leave space. Think short notes on offbeats, gaps before snare hits, and little call-and-response moments with the break.

For example, you might place hits on the offbeats in one bar, then answer them differently in the next. The exact note pattern matters less than the feeling of the space around it. The best basslines in this style often seem to duck around the break rather than forcing themselves across every subdivision.

Now open the Groove Pool. This is the core trick in this lesson, and it’s the part that makes the bass feel carved instead of just programmed. Try grooves like MPC swing, SP-style grooves, or even better, extract a groove from one of your own break loops. That’s often the most authentic option because the bass will start speaking the same rhythmic language as the drums.

Assign the groove to your bass clip and start with moderate settings. Timing around 20 to 40 percent, velocity around 10 to 30 percent, and random near zero or just a tiny amount if you want a bit of looseness. Don’t overdo it. If the timing is too strong, the bass will feel lazy or late against the break. The groove should enhance the pocket, not drag the bass off the beat.

Here’s the big move: carve the wobble using note lengths, not just modulation. Duplicate the bass clip and make one version with short notes and another with slightly longer notes. Short notes create stabs and punctuation. Longer notes create pressure and sustained movement. When Groove Pool shifts those different note lengths around the grid, the line starts to feel alive in a much more musical way.

If you’re using glide or portamento, note overlap becomes important too. Short staccato notes are great for choppy jungle phrases, while slightly overlapping notes can give you that connected, slithering oldskool feel. So pay attention to where the note tails end. Great groove often comes from rests as much as from notes.

To make the wobble feel like it’s actually speaking, add filter movement. In Wavetable, you can map the filter cutoff to an envelope. A fast attack, medium decay, low sustain, and short release gives you a punchy talking bass shape. If you’re using Auto Filter, automate the cutoff over one- or two-bar shapes. A classic jungle move is to open the filter on the bass hit and close it again before the next snare. That creates tension and release in a very oldskool way.

And this is where the groove and the wobble work together. The groove decides when the bass says something. The filter decides how it says it. Rhythm first, tone second, sound design third. That’s a very useful order of thinking for this style. If the rhythm is strong, the patch doesn’t need to be overcomplicated.

For even more control, group the mid bass chain into an Instrument Rack and map some macros. Great choices are cutoff, resonance, drive, width, envelope amount, and release. That gives you fast hands-on control over the bass movement across the arrangement. For example, your intro can be tighter and darker, then the drop can open up with more drive and resonance. In the breakdown, you can close the filter down again and leave more room for atmosphere and sub pressure.

On the mix side, keep the sub dominating below about 80 to 100 Hz and let the mid bass live mostly above that. Avoid stereo widening on anything below 120 Hz. If the break is dense, a gentle sidechain from the kick or drum bus can help the bass tuck out of the way just enough. You’re not trying to create an EDM pump here unless that’s specifically the vibe. You just want the low end to breathe.

A useful DnB arrangement trick is to think in sections. For a 16-bar idea, you might start with a stripped intro and filtered bass, bring in the groove over the next section, open the filter more in the middle, then finish with a variation that uses more stutters, fills, or rhythmic changes. Jungle and oldskool DnB really come alive when the bass answers the drums. A fill, a bass reply, a snare accent, then a tiny hole before the next phrase can hit much harder than constant motion.

Now let’s talk about common mistakes, because they matter here.

First, don’t over-swing the bass. Too much groove timing can make it feel late and sloppy. Second, don’t make the bass too wide. Wide low end falls apart in clubs and on mono systems. Third, don’t overdo unison or detune. That can blur the identity of the note. Fourth, don’t ignore note lengths. A great groove with bad note lengths will still sound messy. Fifth, don’t destroy the sub with distortion, chorus, or stereo widening. Keep the foundation clean. And sixth, always leave room for the snare. That’s a huge part of the sound in oldskool DnB.

If you want to push things further, extract groove from your own break and use that as the timing reference for the bass. You can also map velocity to more than just volume. Let it control filter cutoff, envelope depth, wavetable position, or even drive if your instrument chain allows it. That turns velocity into a compositional tool, not just a dynamics tool.

Another powerful move is to add a parallel dirt layer. Duplicate the mid bass, band-limit it to the midrange, distort it harder than the main signal, and keep it quieter. That gives the bass more attitude without ruining the core tone. If you want to go further, split the bass in an Audio Effect Rack: keep the low band clean and mono, and let the high band take the character processing. That’s a very useful way to keep the foundation stable while still getting aggression and texture.

Also, don’t be afraid to resample. Once the groove feels good, bounce a few bars to audio, chop the best hits, reverse a tail here or there, and re-space the edits against the drums. That’s a very authentic jungle workflow and it can give your bassline a more lived-in, edited feel.

For a practice exercise, set the tempo to 170 BPM, build a drum loop with a chopped break, and program a four-bar bass clip. Make bars one and two more short and rhythmic, then bars three and four a little longer and more sustained. Apply Groove Pool with timing around 30 percent and velocity around 15 percent. Add a filter curve that opens slightly on each bass entry and closes before each snare. Then duplicate the clip, make one version sparser and one more active, and compare which one leaves more room for the drums. That’s the real test.

If you can make the same bassline work as a half-open filtered intro, a full drop, and a breakdown with only sub and texture, then your groove design is strong. That means the bass is not just a sound. It’s an arrangement tool.

So to wrap it up, the key idea in this lesson is simple: use Groove Pool to humanize the timing and velocity, use note length to carve the rhythm, split sub and mid for clean low-end control, and let the bass respond to the breakbeat instead of competing with it. If you get the rhythm right, the wobble doesn’t need to be huge. It just needs to be carved properly so the drums, sub, and movement all lock together.

That’s the jungle magic.

mickeybeam

Go to drumbasscd.com for +100 drum and bass YouTube channels all in one place - tune in!

Generating PDF preview…