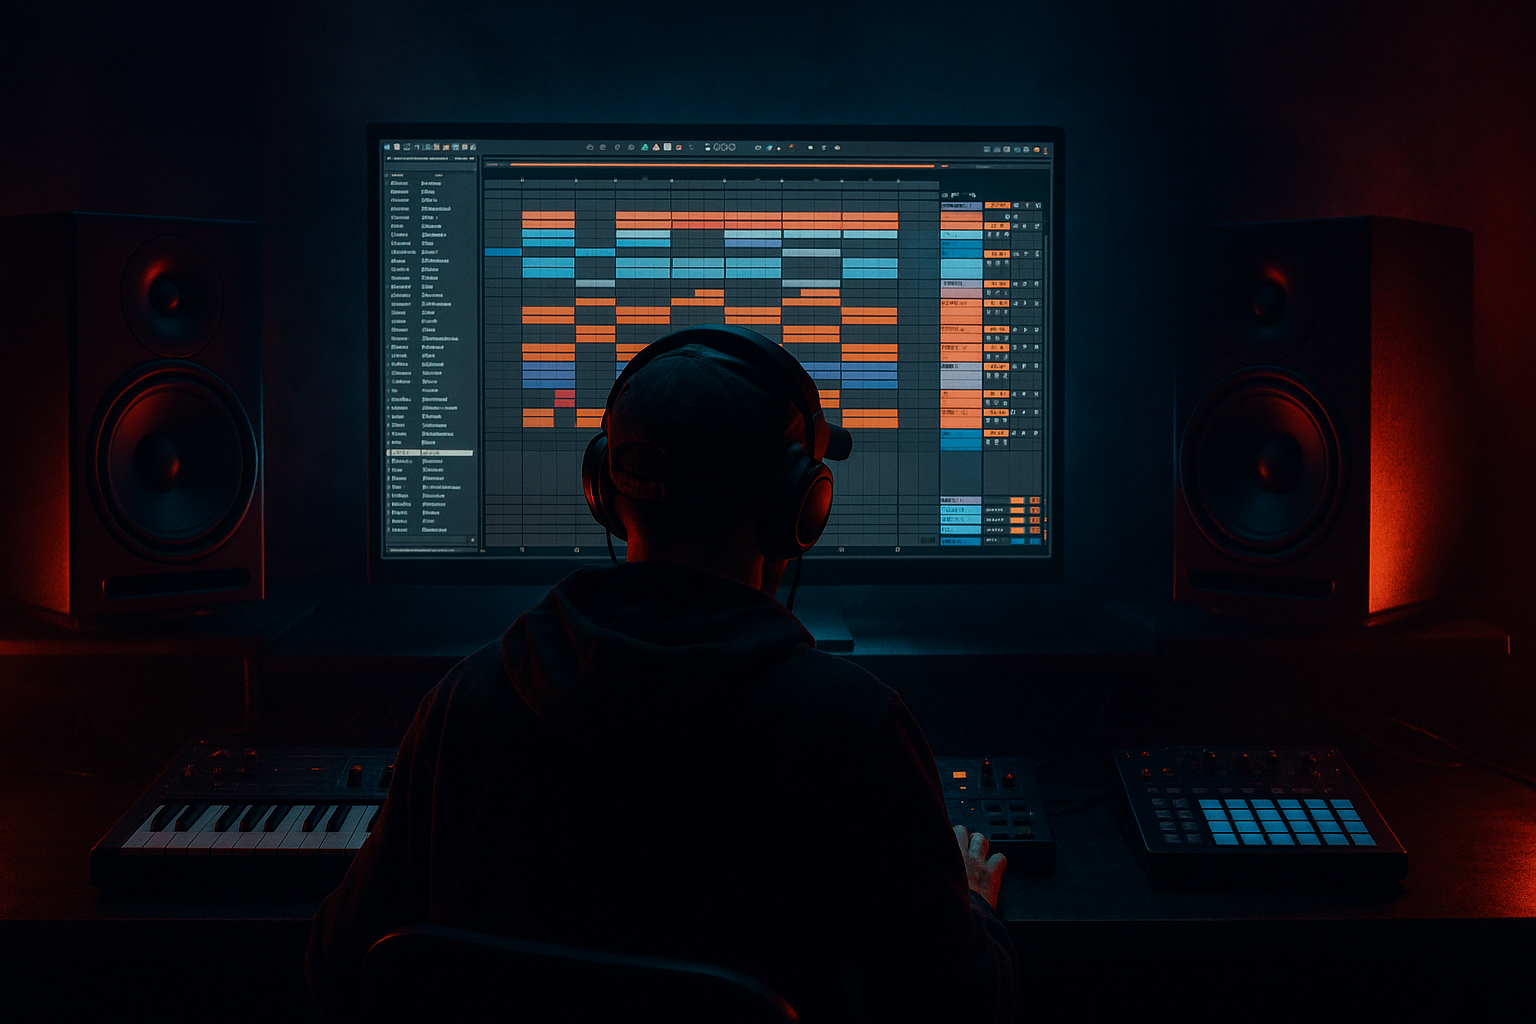
DNB COLLEGE

Drum & Bass Ableton Live 12 Tutorials

LESSON DETAIL

Bass modulation scenes: with Live 12 stock packs (Advanced)

An AI-generated advanced Ableton lesson focused on Bass modulation scenes: with Live 12 stock packs in the Automation area of drum and bass production.

Back to lessons
Bass modulation scenes: with Live 12 stock packs (Advanced) cover image

Narrated lesson audio

The voice track includes the tutorial plus extra teacher commentary.

Open audio file

Main tutorial

```markdown

Bass Modulation Scenes (Ableton Live 12 Stock Packs) — Advanced Automation for DnB 🎛️

1) Lesson overview

In modern drum & bass, the bassline isn’t just “a sound”—it’s a performance across the arrangement. This lesson shows you how to build modulation scenes: pre-designed “states” of your bass that you can recall and morph between using automation, macros, and Live 12 stock devices + stock packs.

We’ll focus on a rolling/techy DnB context (neuro-ish movement without going full brostep), using:

  • Instrument Rack + Macros
  • Auto Filter / Filter Delay / Grain Delay
  • Saturator / Roar (Live 12) / Overdrive
  • Corpus / Resonators (for metallic formant-y motion)
  • Amp / Cabinet
  • Shaper / LFO (Live 12 Modulators)
  • Utility (M/S tricks, mono sub discipline)
  • Hybrid Reverb (for controlled space scenes)
  • We’ll build a bass chain where one MIDI clip can drive multiple distinct bass “chapters” across the arrangement—purely by automation.

    ---

    2) What you will build

    A two-layer DnB bass instrument with:

  • Sub layer: stable, mono, punchy, clean
  • Mid layer: aggressive, modulated, scene-based movement
  • …and a Scene Macro system:

  • Macro 1: Scene (0–127) → “Chapter selector” (intro → roll → drop → fill)
  • Macro 2: Motion → overall wobble/rhythmic movement depth
  • Macro 3: Bite → saturation + upper harmonics
  • Macro 4: Air/Noise → texture layer send/level or filter opening
  • Macro 5: Width (Mids only) → stereo control with mono-safe sub
  • You’ll automate Macros in Arrangement View to create modulation scenes like:

  • Scene A: tight roller (16th pulse, subtle movement)
  • Scene B: open, talking mid (formant/resonant peaks)
  • Scene C: distorted reese growl (heavy drive + filtering)
  • Scene D: breakdown “hollow” (filtered, roomy, less bite)
  • Scene E: fill/stab (fast LFO, pitch movement, glitch)
  • ---

    3) Step-by-step walkthrough

    Step 0 — Project context (DnB-ready)

    1. Set tempo to 174 BPM.

    2. Create a basic DnB drum loop (kick/snare/hat) so you can hear what the bass is doing in context.

    3. Make two MIDI tracks:

    - BASS — SUB

    - BASS — MID

    Group them into a group track called BASS BUS.

    > Goal: sub stays consistent; all the “scene drama” lives in the mid layer.

    ---

    Step 1 — Build the SUB (stable, mono, no surprises) 🧱

    On BASS — SUB:

    1. Add Operator (stock).

    - Osc A: Sine

    - Level: around -12 dB (adjust later)

    - Glide: Off (unless your line needs slides)

    2. Add Saturator

    - Drive: 2–6 dB (taste)

    - Soft Clip: On

    3. Add EQ Eight

    - Low-pass around 120–160 Hz (gentle slope)

    - Tiny notch if needed around 40–60 Hz only if it’s booming

    4. Add Utility

    - Width = 0% (force mono)

    - Gain: adjust so sub is consistent

    Important DnB rule: Sub should feel like a foundation, not a changing character.

    ---

    Step 2 — Build the MID (the modulated “scene machine”) 🧪

    On BASS — MID, create an Instrument Rack (Cmd/Ctrl+G) and name it `MID SCENES`.

    #### 2A) Source synth (stock packs-friendly)

    Option A (classic): Wavetable

  • Osc 1: Basic Shapes → start on a saw-ish position
  • Osc 2: optional, detune slightly for reese weight
  • Unison: 2–4 voices, low amount (don’t smear too wide yet)
  • Filter: leave open for now (we’ll do filtering later)
  • Option B (more “neuro movement”): Operator (FM)

  • Osc A: Saw (or Square)
  • Osc B: Sine as modulator
  • Increase B level to add growl
  • Keep it subtle; the chain will do most of the talking
  • #### 2B) Core processing chain (inside the MID track, after the Rack)

    Put these devices after the Instrument Rack (so they affect all scenes uniformly):

    1. Auto Filter

    - Filter type: LP24

    - Drive: 3–8%

    - Envelope: small amount if you want note dynamics

    2. Roar (Live 12) (or Saturator if you prefer)

    - Mode: start with something musical (not max chaos)

    - Keep output trimmed; aim not to explode your headroom

    3. EQ Eight

    - High-pass around 90–120 Hz (to keep sub clean)

    - Consider a gentle dip around 250–400 Hz if it’s boxy

    4. Utility

    - Width: 80–140% (we’ll map this later)

    - Bass Mono: if available in your Utility version, use it; otherwise keep mids wide but the sub layer handles mono

    Why this works for DnB: You can smash and modulate the mid without ruining the sub’s translation in clubs.

    ---

    Step 3 — Create modulation “Scenes” using Rack Macros 🎚️

    We’ll use Macros as a scene control layer. The trick: one Macro can move many parameters in coordinated ways (filter cutoff, LFO rate, distortion mix, resonator tuning, width, etc.).

    Inside the MID SCENES Instrument Rack:

    #### 3A) Add performance Macros

    Map and rename Macros:

  • Macro 1: SCENE
  • Macro 2: MOTION
  • Macro 3: BITE
  • Macro 4: AIR
  • Macro 5: WIDTH
  • (Leave 3 macros spare for your own expansions.)

    #### 3B) Add Live 12 Modulators (advanced control)

    Add LFO (Modulator) inside the Rack so it can modulate mapped parameters.

  • LFO Shape: start with Sine or Saw Down
  • Rate: set to Sync
  • Amount: keep modest; we’ll scale it with MOTION
  • Add Shaper (Modulator) for rhythmic gating / stepping.

  • Mode: Sync
  • Use a 1-bar shape with 16th pulses for a roller feel
  • > You’re building “movement generators” that you can scale per scene.

    ---

    Step 4 — Build 4–5 DnB modulation scenes (practical parameter maps)

    We’ll define scenes by mapping multiple destinations and then automating only Macro 1 (SCENE) plus one or two “performance” macros.

    #### Scene 1: Tight Roller (verse/rolling drop) 🥁

    Map these:

  • Auto Filter Cutoff: lower-mid (e.g., ~200–800 Hz range)
  • LFO Rate: 1/8 or 1/16
  • LFO Amount (to filter cutoff): modest
  • Roar/Saturator Drive: low-medium
  • Utility Width: medium (not huge)
  • Suggested macro behavior:

  • SCENE low values (0–30): tight cutoff, low drive, subtle motion
  • MOTION: increases LFO amount + slightly increases cutoff for perceived energy
  • #### Scene 2: Talking Mid (call/response) 🗣️

    Add Corpus (after Auto Filter, before distortion) OR Resonators:

  • Corpus: choose Tube/Beam
  • Tune: around 150–400 Hz (taste)
  • Decay: short-medium
  • Dry/Wet: 10–35%
  • Map:

  • Corpus Tune (small range)
  • Corpus Dry/Wet
  • Auto Filter Resonance (careful)
  • LFO to Corpus Tune (tiny amount = “speech”)
  • Suggested:

  • SCENE mid values (30–65): bring in Corpus wet + increase resonance + slightly open cutoff
  • #### Scene 3: Heavy Reese/Growl (main drop impact) 🔥

    Add Amp + Cabinet (or Roar harder):

  • Amp: heavier character
  • Cabinet: choose a cab that adds mid bite
  • Keep lows filtered out anyway
  • Map:

  • Distortion/Drive up
  • Filter Cutoff slightly down (focus energy)
  • Add a touch of Overdrive or increase Roar mix
  • WIDTH slightly reduced (heavy scenes can be narrower for punch)
  • Suggested:

  • SCENE 65–95: max bite, controlled cutoff, reduced width, more harmonics
  • #### Scene 4: Hollow Breakdown / Space (bridge) 🌫️

    Add Hybrid Reverb on the MID only (or use a Return for better control):

  • Use short/medium, darker reverb
  • Filter reverb lows aggressively
  • Map:

  • Hybrid Reverb Dry/Wet (0–20%)
  • Auto Filter Cutoff lower + resonance lower
  • Reduce distortion drive
  • Suggested:

  • SCENE 95–110: less aggression, more space, smaller motion
  • #### Scene 5: Fill / Glitch Stab (end-of-phrase) ⚡

    Add Grain Delay or Filter Delay (sparingly):

  • Grain Delay:
  • - Spray: low

    - Pitch: subtle or ±12 for a quick “zap”

    - Dry/Wet: automate small bursts

    Map:

  • Grain Delay Dry/Wet
  • LFO Rate faster (1/32-ish)
  • Shaper amount to create fast gating
  • Suggested:

  • SCENE 110–127: quick, chaotic moment for fills—don’t live here too long
  • ---

    Step 5 — Macro mapping strategy (how to make SCENE feel like scenes)

    Open Macro Mapping and do this deliberately:

  • Give each parameter a range that makes sense per scene.
  • Not every parameter should move across the whole SCENE range.
  • Use overlapping “zones”:
  • - 0–30: roller

    - 30–65: talking

    - 65–95: heavy

    - 95–110: breakdown

    - 110–127: fills

    Workflow tip:

    Instead of mapping everything to SCENE, split responsibilities:

  • SCENE = selects overall “chapter”
  • MOTION = increases rhythmic movement depth
  • BITE = adds aggression/harmonics
  • AIR = noise/texture/reverb presence
  • WIDTH = stereo feel (MID only)
  • This keeps automation clean and musical.

    ---

    Step 6 — DnB arrangement automation (where scenes actually shine)

    In Arrangement View, draw automation for:

  • Macro 1 (SCENE): changes every 8 or 16 bars (big form)
  • Macro 2 (MOTION): ramps into drops, dips on snares or pre-drop
  • Macro 3 (BITE): push on drop 1, pull back slightly on drop 2 for contrast
  • Macro 5 (WIDTH): narrower for impact sections; wider in breakdowns/atmospheric passages
  • Classic rolling arrangement example (32 bars):

  • Bars 1–9: SCENE 1 (tight roller), low MOTION
  • Bars 9–17: gradually push MOTION + BITE
  • Bars 17–25 (Drop): SCENE 3 heavy, high BITE, controlled WIDTH
  • Bars 25–29: SCENE 2 talking call/response with drums
  • Bars 29–33: SCENE 5 fill automation bursts into next section
  • ---

    Step 7 — Glue the bass with sidechain + bus control 🎚️

    On BASS BUS:

    1. Glue Compressor

    - Attack: 3–10 ms (let transients through)

    - Release: Auto or timed to groove

    - Ratio: 2:1

    - Aim: 1–3 dB GR max (just glue)

    2. Compressor (sidechain from Kick) or use Auto Filter volume ducking via Shaper (if you prefer cleaner)

    - Sidechain input: Kick

    - Fast-ish attack, medium release

    - Don’t overduck—rolling DnB likes consistent low-end and punch

    3. Limiter (optional for safety during sound design)

    ---

    4) Common mistakes

  • Over-modulating the sub: if your sub is moving like your mid, the club mix gets messy fast.
  • Mapping everything to one Macro: SCENE becomes chaotic instead of “chapter-based.”
  • Too much resonance + distortion: cool for 2 seconds, then it’s ear fatigue and harshness.
  • Width on low frequencies: your drop will disappear in mono systems.
  • No gain staging between scenes: scene changes can jump 6–10 dB unless you trim outputs per stage (watch meters).
  • ---

    5) Pro tips for darker/heavier DnB 😈

  • Midrange “teeth” lives around 1–3 kHz: add bite there, but control it with EQ Eight and avoid constant harshness.
  • Use Roar as a scene driver: automate Roar’s mix/drive subtly per scene rather than changing synth patches.
  • Create “ghost movement”: keep MOTION lower than you think; let drums + reese phase create perceived motion.
  • Mono discipline: SUB track mono always; MID track can be wide but high-pass it and monitor mono often.
  • Formant tricks without third-party plugins: Corpus/Resonators + Auto Filter resonance + small LFO = instant “talk,” very jungle/techstep-friendly.
  • Contrast is the dark sauce: make one scene drier and tighter so the next scene feels twice as big.
  • ---

    6) Mini practice exercise (15–25 minutes) 🧩

    1. Use one 2-bar MIDI bass pattern (simple: root notes + a few syncopations).

    2. Build the SUB and MID setup as above.

    3. Create 3 scenes only:

    - Scene 1: tight roller

    - Scene 2: talking mid

    - Scene 3: heavy growl

    4. In Arrangement:

    - Automate SCENE to switch every 8 bars

    - Automate MOTION as a ramp into each switch

    - Add one 2-bar fill where SCENE jumps briefly toward a “fill zone”

    5. Bounce a quick export and listen on:

    - Headphones

    - Small speaker / phone (check mid presence)

    - Mono check (Utility on Master set Width 0% temporarily)

    Goal: you should hear clear “chapters” without rewriting the MIDI line.

    ---

    7) Recap ✅

  • You built a DnB bass system where SUB stays stable and MID provides character.
  • You created modulation scenes using Instrument Rack Macros and Live 12 Modulators (LFO/Shaper).
  • You learned a practical automation strategy:
  • - SCENE for big changes

    - MOTION/BITE/AIR/WIDTH for performance detail

  • You applied it like a real DnB arrangement: rolling sections, talking call/response, heavy drop moments, and fills.

If you want, tell me what sub style you’re aiming for (liquid roller, techstep, neuro, jungle 94 vibe) and I’ll suggest a specific Macro map + scene ranges tailored to that sound.

```

Ask GPT about this lesson

Chat with the lesson tutor, get follow-up help, or use quick actions.

Bigup 👽 Ask me anything about this lesson and I’ll answer in context.

Narration script

Show spoken script
Title: Bass modulation scenes: with Live 12 stock packs (Advanced)

Alright, let’s build a drum and bass bassline that behaves like a performance across the arrangement, without rewriting the MIDI every eight bars.

The core idea for this lesson is simple: your bass has chapters. And instead of changing patches or drawing a million automation lanes, you’re going to build modulation scenes inside an Instrument Rack, then recall and morph between those scenes with a small set of macros. Ableton Live 12 stock devices only, stock packs friendly, and we’re staying in that rolling, techy, neuro-adjacent zone where the bass is animated, but it still grooves.

Before we touch any devices, set your project to 174 BPM. Get a basic drum loop running. Nothing fancy is required, but you need kick, snare, and hats so you can judge what the bass is really doing. Bass design without drums is how you accidentally design a bass that fights the groove.

Now create two MIDI tracks. Name them BASS — SUB and BASS — MID. Select them both and group them into a group track called BASS BUS. This is a big discipline move: the sub stays consistent and mix-safe, and all the “scene drama” lives in the mid layer.

Let’s build the sub first.

On BASS — SUB, drop in Operator. Oscillator A is a sine wave. Keep the level conservative, around minus 12 dB for now. And unless your line really needs slides, keep glide off. For most rolling DnB, clean note starts are your friend.

After Operator, add Saturator. Drive somewhere between 2 and 6 dB, soft clip on. You’re not trying to distort the sub into a midrange sound. You’re adding a little density so it translates on systems that don’t reproduce deep lows perfectly.

Then add EQ Eight. Low-pass around 120 to 160 Hz with a gentle slope. If you’ve got a specific boom, maybe around 40 to 60 Hz, you can do a tiny notch, but only if you truly hear a problem. Don’t carve holes out of your fundamental just because you saw a bump.

Finally, add Utility. Set width to 0 percent. This is non-negotiable most of the time. Sub in mono. Then set the gain so it’s consistent and feels like a foundation.

Here’s the rule you’re living by: the sub is not supposed to be a character. It’s supposed to be gravity.

Now the fun part: the mid layer, the scene machine.

On BASS — MID, create an Instrument Rack and name it MID SCENES. You can use Wavetable or Operator as the source synth. I’ll suggest a direction, and you can pick your poison.

If you want classic, fast results, use Wavetable. Osc 1 on Basic Shapes, move it toward a saw-ish position. Osc 2 is optional; you can detune it slightly for reese weight, but don’t go wide and smeary yet. Unison two to four voices, low amount.

If you want a more neuro-ish growl foundation, use Operator with a subtle FM relationship: Osc A saw or square, Osc B sine as a modulator, and bring up B level until you hear some throatiness. Keep it subtle. The processing chain will do most of the “talking.”

Now, important architecture: put your core processing after the rack, so it affects all scenes consistently. The scenes will be created by macro mapping, modulators, and effect amounts, not by changing the whole channel’s identity every time.

After MID SCENES, add Auto Filter. Choose LP24. Add a bit of drive, like 3 to 8 percent. If you want note dynamics, a small envelope amount is nice, but keep it controlled. DnB bass wants consistency.

Next, add Roar if you have Live 12. If not, use Saturator or Overdrive, but Roar is amazing as a scene driver because you can automate mix and tone and get big perception changes without totally changing the patch. Pick a musical mode, not maximum chaos. And trim the output. Seriously. Gain staging is what makes these scene flips feel professional instead of jump-scare loud.

Then EQ Eight. High-pass around 90 to 120 Hz. This is how you protect the sub from mid distortion regrowth. If it’s boxy, consider a gentle dip around 250 to 400 Hz.

Then Utility for general stereo control. Set width somewhere like 80 to 140 percent for now, and we’ll map it later. The sub is mono on its own track, so the mid can breathe, but you still need to keep it mono-safe.

At this point, you should already hear the concept: sub holds the club together, mid is free to get abused.

Now we build the macro system, and this is where the “scenes” concept becomes real.

Go into the MID SCENES rack and set up your macros. Rename Macro 1 to SCENE. Macro 2 to MOTION. Macro 3 to BITE. Macro 4 to AIR. Macro 5 to WIDTH. Leave a couple unused for later, because you will want them once you get addicted to this workflow.

And here’s the big advanced move: you’re going to treat SCENE like a snapshot crossfader, not a knob you constantly wiggle. Most of the time, SCENE moves in deliberate gestures on phrase boundaries. If you want continuous movement, that’s MOTION’s job. This one decision will keep your automation lanes clean and your arrangement readable.

Now add Live 12 modulators inside the rack. Add an LFO modulator. Start with a sine or saw down shape. Set it to sync. Keep amount modest. We’re going to scale that LFO’s influence with the MOTION macro, so you can go from “barely alive” to “rolling machine” without changing the rate constantly.

Add Shaper as well. Shaper is where you can get that roller pulse feel. Set it to sync, draw a one-bar shape with 16th-note pulses. Think of it as rhythmic energy, not random chaos. You’re making movement generators that you can turn up and down per scene.

Now let’s define actual scenes. We’re going to create four or five scene zones across the SCENE macro range, like a chapter selector. The key is that not every parameter should move across the entire SCENE range. You want overlapping zones, dead zones, and areas where the macro does almost nothing. That makes it playable and automatable.

Here’s a reliable zone map:
From 0 to 30 is your tight roller.
30 to 65 is your talking mid.
65 to 95 is your heavy reese or growl.
95 to 110 is hollow breakdown space.
110 to 127 is your fill and glitch zone.

Let’s program Scene 1: Tight Roller.

This is your verse or rolling drop base. Map Auto Filter cutoff so SCENE low values keep it in a lower-mid range, something like 200 up to 800 Hz. Map the LFO rate to something like 1/8 or 1/16, but don’t make SCENE do too much rate changing; rate changes read as “new pattern,” and that can distract. Instead, let MOTION increase the LFO amount to the cutoff. Map Roar or Saturator drive low to medium here. Map WIDTH to a medium value. Not huge.

Then set the macro behavior so SCENE at 0 to 30 feels tight: lower cutoff, lower drive, subtle movement. And MOTION increases LFO depth and maybe opens the cutoff a touch so it feels like the same sound, just more energized.

Scene 2: Talking Mid.

For this, add Corpus or Resonators in the chain. A good placement is after Auto Filter but before heavy distortion, because resonant peaks into distortion give that vowel-like exaggeration. In Corpus, try Tube or Beam. Tune somewhere around 150 to 400 Hz. Keep decay short to medium. Dry/wet around 10 to 35 percent.

Now map SCENE in the 30 to 65 zone to bring up Corpus dry/wet, increase Auto Filter resonance carefully, and slightly open the cutoff. Add a tiny LFO amount to Corpus tune. Tiny. Like, almost “is it doing anything?” Tiny. Because once distortion is on, that becomes speech.

Teacher note: if it gets harsh, it will probably spike somewhere around 2 to 4 kHz. Don’t fight it emotionally; just put an EQ Eight after distortion later and plan to tame that node. Talking bass is awesome, but it’s also a fast route to ear fatigue if you let the resonances run wild.

Scene 3: Heavy Reese or Growl.

This is the main drop impact. Add Amp and Cabinet if you want extra character, or just push Roar harder. If you use Amp and Cabinet, remember: your lows are already handled by the sub, so you’re shaping mids, not rebuilding low-end.

Map SCENE in the 65 to 95 zone to increase drive, maybe pull the filter cutoff slightly down so the energy focuses and feels heavier, and slightly reduce WIDTH. This is a big one: heavier scenes often feel punchier when they’re a little narrower. Too wide can sound impressive solo, then disappear when summed to mono or when the drums get busy.

And here’s an advanced trick: map BITE not only to distortion drive, but also to a slight dip on an EQ band around your harsh frequency, like 2.5k or 3.2k. That way, when you push bite, you’re also automatically preventing the “ice pick” effect. This is how you get aggressive without needing to turn down the whole track later.

Scene 4: Hollow Breakdown or Space.

Add Hybrid Reverb on the mid only. Or better yet, put reverb on a return and send to it, but we’ll keep it direct for now. Make it short to medium, darker, and filter the lows aggressively.

Map SCENE in the 95 to 110 zone so distortion drive reduces, Auto Filter cutoff lowers, resonance lowers, and Hybrid Reverb dry/wet comes up just a little, like 0 to 20 percent. You’re not trying to wash the bass into a pad. You’re trying to create a controlled hollow space that sets up the next impact.

Scene 5: Fill or Glitch Stab.

Add Grain Delay or Filter Delay, sparingly. Grain Delay is great for quick “zap” moments. Keep spray low. Pitch can be subtle, or do a quick plus or minus 12 for that stabby teleport sound. Dry/wet should be automated as a burst, not left on.

Map SCENE in the 110 to 127 zone to allow faster LFO rates, higher Shaper amount for quick gating, and small Grain Delay wet bursts.

This is your interrupt zone. Don’t live here. You jump here for a half bar or a bar, then snap back.

Now let’s talk mapping strategy, because this is what separates “cool rack” from “actually usable in an arrangement.”

Open Macro Mapping and build musical ranges. SCENE should not slam every parameter all the time. Create dead zones and active zones. For example, in SCENE 0 to 20, maybe almost nothing changes. That makes your roller stable. Then from 20 to 40, you start introducing formants gradually. From 40 to 65, the talking is fully active. And so on.

Also, make scene transitions gain-neutral early. Switching scenes changes harmonic density, resonance, and stereo width, which the brain reads as louder. Put a Utility at the end of the MID chain and map its gain subtly across SCENE. Even plus or minus 2 dB can make your scene switching feel professional and intentional instead of like a volume automation mistake.

While you’re designing, use monitor macros. For a moment, keep Spectrum open and watch what each scene does to the 80 to 120 Hz area, where mud can creep in, the 200 to 400 Hz area for boxiness, and the 1 to 3 kHz area for teeth and harshness. You’re not mixing visually, you’re checking that your scenes aren’t secretly breaking the mix contract.

Also decide what’s control-rate movement and what’s “edgy” movement. LFO and Shaper are control-rate. If you want metallic bite and colder motion, insert Frequency Shifter on the mid. Set it to Ring Mod. Fine offset in a tiny range like 10 to 80 Hz. Map SCENE to a small dry/wet range, like 0 to 15 percent, and a tiny Fine movement. That’s a stock, underrated way to get neuro sheen without drowning in noise.

Now, arrangement automation. This is where the whole concept pays off.

Go to Arrangement View. Automate SCENE like big, held steps. Think eight or sixteen bars. Use ramps only when you want an intentional morph, like a bar before a new phrase.

Automate MOTION as ramps. Ramps into drops, dips during pre-drop tension, small pushes on call-and-response moments.

Automate BITE as accents. Short boosts, not constant max. Give your ears a break. Aggression is more powerful when it’s not always on.

Automate WIDTH with intention: narrower for impact, wider for breakdowns and atmosphere. And here’s a classic trick: one bar before the drop, do an air vacuum. Pull AIR down so it’s drier, pull WIDTH down so it’s more mono-ish, reduce MOTION so it tightens. Then on the downbeat, restore. It feels huge without you having to make it louder.

A practical 32-bar template could go like this:
Bars 1 to 9, Scene 1, low motion.
Bars 9 to 17, ramp motion and bite a bit.
Bars 17 to 25, Scene 3 heavy, high bite, controlled width.
Bars 25 to 29, Scene 2 talking, call and response with drums.
Bars 29 to 33, quick Scene 5 fill bursts, then snap back.

And don’t be afraid to align scene flips to drum moments, not just bar lines. In rolling DnB, a scene change that lands right on the snare, on beat 2 or 4, suddenly feels like it was composed, even if it’s subtle.

Now glue and sidechain.

On the BASS BUS, add Glue Compressor. Attack around 3 to 10 milliseconds, release on auto or timed to the groove, ratio 2 to 1. You’re aiming for one to three dB of gain reduction at most. Just glue.

Then add a Compressor with sidechain from the kick, or if you prefer a cleaner, more designed duck, you can do volume ducking with Shaper. Either way, don’t overduck. Rolling DnB likes consistent low end and punch. The kick needs space, but the bass should still feel like a continuous engine.

Optionally add a limiter for safety during sound design, especially while you’re mapping scenes. But don’t rely on it. Better to fix level jumps with your MID trim mapping.

Now let’s quickly cover common mistakes so you can dodge them.

Number one: over-modulating the sub. Don’t do it. If your sub is moving like your mid, the club mix gets messy fast.

Number two: mapping everything to one macro. If SCENE controls everything, it becomes chaos, not chapters. SCENE selects. MOTION performs. BITE accents. AIR textures. WIDTH stages.

Number three: too much resonance plus distortion. It’s cool for two seconds, then it’s ear fatigue. Keep resonance controlled, and always have an EQ plan.

Number four: stereo width on low frequencies. Your drop can literally disappear in mono. Keep sub mono, high-pass the mid, check mono often.

Number five: no gain staging between scenes. Watch your meters. Trim the mid. Gain-neutral scene switches are what make this approach workable for real tracks.

Now a quick practice exercise you can do in 20 minutes.

Make one simple two-bar MIDI pattern. Root notes with a little syncopation. Build the sub and mid as we did. Create only three scenes: tight roller, talking mid, heavy growl.

In arrangement, automate SCENE to switch every eight bars. Automate MOTION as a ramp into each switch. Add one two-bar fill where SCENE briefly jumps into the fill zone and returns.

Export a quick bounce. Then listen on headphones, a small speaker or phone, and do a mono check by putting Utility on the master and setting width to zero percent temporarily. Your sub should remain stable, and your mid scenes should still read clearly.

If you want to push this even further, add a second scene axis: Macro 6 called MOOD or TENSION. Let SCENE pick the character, and MOOD decides how extreme it gets: drive intensity, resonance ceiling, reverb presence, max LFO depth. That lets you revisit the same scene later in the track but with more threat, which is a pro-level arrangement move.

And one last challenge mindset: keep your automation readable. SCENE is stepped holds. MOTION is ramps. BITE is short spikes. WIDTH is intentional dips and lifts. When you look at your arrangement, it should look like a plan, not spaghetti.

That’s the whole system: stable mono sub, modulated mid with scene zones, Live 12 modulators for movement, and macro automation that creates chapters using one MIDI clip.

If you tell me whether you started with Wavetable or Operator, and what preset or waveform direction you chose, I can suggest tighter macro ranges so your SCENE zones land exactly on the sweet spots of that sound.

mickeybeam

Go to drumbasscd.com for +100 drum and bass YouTube channels all in one place - tune in!

Generating PDF preview…