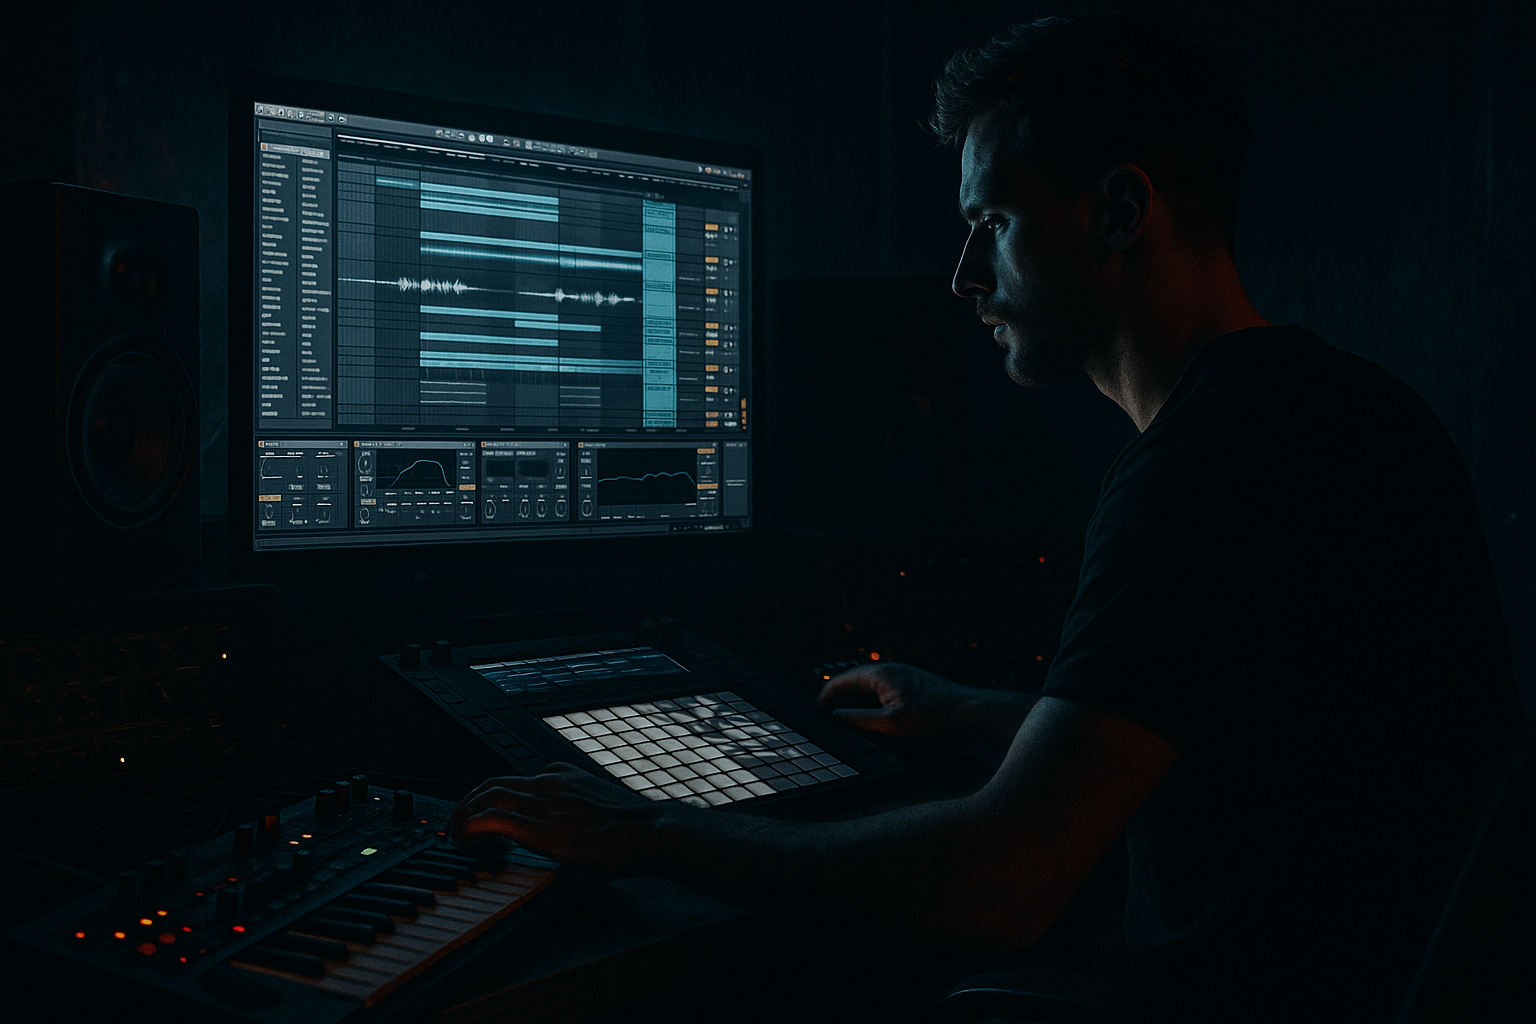
DNB COLLEGE

Drum & Bass Ableton Live 12 Tutorials

LESSON DETAIL

Balance oldskool DnB air horn hit with crunchy sampler texture in Ableton Live 12 (Intermediate)

An AI-generated intermediate Ableton lesson focused on Balance oldskool DnB air horn hit with crunchy sampler texture in Ableton Live 12 in the Resampling area of drum and bass production.

Back to lessons
Balance oldskool DnB air horn hit with crunchy sampler texture in Ableton Live 12 (Intermediate) cover image

Narrated lesson audio

The voice track includes the tutorial plus extra teacher commentary.

Open audio file

Main tutorial

Balance an Oldskool DnB Air Horn Hit with Crunchy Sampler Texture (Ableton Live 12) 🔊🧨

Category: Resampling

Skill level: Intermediate

Vibe: Jungle / oldskool rave / rolling DnB

---

1. Lesson overview

That classic rave air horn is pure DnB DNA—but it can also be way too loud, harsh, or “stuck on top” of the mix. In this lesson you’ll learn a repeatable Ableton Live 12 resampling workflow to:

  • Keep the horn’s impact and recognizability
  • Add crunchy sampler texture (think: SP/AKAI-style dirt) without wrecking the mix
  • Balance it in rolling drum & bass arrangements (drops, fills, call-and-response)
  • We’ll do it using stock Ableton devices, Audio Effects Racks, and resampling for maximum control. 🎛️

    ---

    2. What you will build

    A two-layer horn:

    1. Clean/Front layer (transient + clarity + stereo placement)

    2. Crunch layer (resampled → Simpler → pitched/filtered → distortion/bit reduction → tight envelope)

    Then we’ll bus them, glue them, and fit them around breaks + sub + reese like a proper rolling tune.

    ---

    3. Step-by-step walkthrough

    Step 0 — Prep your session like a DnB producer

    Tempo: 170–175 BPM (use 174 as a sweet spot)

    Project structure (recommended):

  • Group: `DRUMS` (break + tops)
  • Group: `BASS` (sub + mid/reese)
  • Group: `FX/VOCAL` (horn lives here)
  • Return tracks: `A - ShortVerb`, `B - LongVerb`, `C - Delay`
  • Routing tip: Keep the horn out of your drum bus compression unless you want it pumping.

    ---

    Step 1 — Choose and warp the air horn sample

    1. Drag your air horn into an Audio Track: `HORN - CLEAN`.

    2. In Clip View:

    - Warp: ON

    - Mode: Complex Pro (best if it’s a long-ish horn with movement)

    - If it’s super short and stabby: try Beats (Transient loop mode).

    3. Set Seg. BPM correctly and align the start to the grid.

    DnB arrangement move: Place the horn as:

  • A pickup into the drop (last 1/8 or 1/4 before bar 33)
  • A call on bar 5 or 13 (classic 16-bar phrase energy)
  • A fill after a snare flam or crash
  • ---

    Step 2 — Control the horn’s “front” (clean layer chain)

    On `HORN - CLEAN`, build this stock chain:

    Device chain (in order):

    1. EQ Eight

    - HP filter: 100–160 Hz, 24 dB/oct (remove low rumble)

    - Notch any painful peak: commonly 2.5–4.5 kHz (sweep with a narrow Q)

    - Gentle shelf: if harsh, dip 8–12 kHz slightly

    2. Saturator

    - Mode: Soft Sine or Analog Clip

    - Drive: 2–5 dB

    - Output: match level (avoid “louder = better” trap)

    3. Glue Compressor

    - Attack: 3 ms

    - Release: Auto

    - Ratio: 2:1

    - Aim: 1–2 dB gain reduction on peaks

    4. Utility

    - Width: 80–120% (depending on your mix)

    - Gain: set so it sits under the snare crack, not over it

    ✅ Goal: clean horn is present but not spiky, with controlled mids.

    ---

    Step 3 — Create a crunchy sampler texture layer via resampling 🎚️

    Now we’ll create the dirt layer with resample → Simpler so it behaves like an instrument and can be shaped tightly.

    #### A) Resample the clean horn (print it)

    1. Create a new Audio Track called `HORN - RESAMPLE PRINT`.

    2. Set track input:

    - Audio From: `HORN - CLEAN`

    - Monitor: In

    3. Arm `HORN - RESAMPLE PRINT` and record the horn hit(s).

    4. Consolidate the recorded audio (Cmd/Ctrl + J) for a clean clip.

    Why: this “bakes” your initial tone and makes the next stage faster, punchier, and consistent.

    #### B) Move it into Simpler (texture as an instrument)

    1. Drag the consolidated clip into Simpler on a new MIDI Track: `HORN - CRUNCH (SIMPLER)`.

    2. In Simpler:

    - Mode: One-Shot

    - Trigger (not Gate) for consistent hits

    - Voices: 1 (prevents overlapping chaos)

    - Warp: OFF (unless you need time-stretch)

    #### C) Shape the envelope like a DnB stab

    In Simpler:

  • Volume Envelope
  • - Attack: 0–3 ms

    - Decay: 150–400 ms

    - Sustain: -inf (off)

    - Release: 30–90 ms

    This turns a long horn into a tight stab that sits in rolling patterns.

    ---

    Step 4 — Make it crunchy (Sampler-style texture chain) 🪵

    On `HORN - CRUNCH (SIMPLER)`, build an Audio Effect Rack.

    Device chain:

    1. Auto Filter

    - Type: LP 24

    - Cutoff: start 2–6 kHz

    - Resonance: 0.7–1.2

    - Drive: 3–8% (adds grit)

    2. Redux

    - Downsample: 2–6

    - Bit Reduction: 10–14 bits

    Keep it audible but not “video game” unless that’s the vibe.

    3. Overdrive (or Roar if you want heavier control)

    - Overdrive:

    - Freq: 1–2 kHz

    - Drive: 15–35%

    - Tone: adjust to taste

    - If using Roar:

    - Mode: Tube or Warm

    - Drive: moderate

    - Use its filter to keep lows out

    4. EQ Eight (post dirt cleanup)

    - HP: 180–300 Hz

    - Reduce harsh fizz: dip 6–10 kHz if needed

    - If it lost bite, small boost around 1.5–3 kHz

    5. Compressor

    - Attack: 10–30 ms (let the transient click through)

    - Release: 60–120 ms

    - Ratio: 3:1–4:1

    - Aim: 2–5 dB GR for consistency

    ✅ Goal: crunch layer sounds like it came from a worn sampler + cheap mixer, but it’s band-limited and mix-ready.

    ---

    Step 5 — Balance the two layers (the key move) ⚖️

    Now group and blend like a pro.

    1. Select `HORN - CLEAN` + `HORN - CRUNCH (SIMPLER)` → Group → name it `HORN BUS`.

    2. On the HORN BUS, add:

    - EQ Eight

    - HP: 100–150 Hz

    - Optional: small dip where your snare lives (often 180–240 Hz body or 2–3 kHz crack—depends on your snare)

    - Glue Compressor

    - Attack: 10 ms

    - Release: Auto

    - Ratio: 2:1

    - 1–2 dB GR max (just “togetherness”)

    - Limiter (safety only)

    - Ceiling: -1.0 dB

    - Don’t smash—just catch spikes

    Blend method (fast + reliable):

  • Start with CLEAN at a good level.
  • Bring CRUNCH up from silence until you feel thickness and presence.
  • Then pull it back 5–15%. That’s usually the sweet spot.
  • DnB targeting tip:

  • If horn is fighting the snare: reduce 2–5 kHz on the horn bus.
  • If horn is fighting the bass/reese presence: carve a small dip around 200–500 Hz or 700–1.2 kHz depending on your bass tone.
  • ---

    Step 6 — Make it move in the groove (sidechain + timing) 🥁

    For rolling DnB, the horn should dance around the drums, not sit like a block.

    Option A: Sidechain to the snare (classic)

  • On `HORN BUS` add Compressor with Sidechain:
  • - Sidechain Input: Snare track (or Drum Group)

    - Attack: 1–3 ms

    - Release: 80–160 ms

    - Ratio: 2:1

    - Threshold: just enough to duck 1–3 dB on snare hits

    Option B: Gate the crunch layer from breaks (jungle vibe)

  • Put a Gate on `HORN - CRUNCH (SIMPLER)`:
  • - Sidechain from break/tops

    - This gives rhythmic “chatter” texture without extra programming

    Timing tip: Nudge the crunch layer +5 to +15 ms late for thickness, or -5 ms early for bite. Micro-timing is huge at 174. ⏱️

    ---

    Step 7 — Resample the final horn for arrangement + performance

    Once it’s balanced, print it so you can throw it around your track like a proper rave weapon.

    1. Create `HORN - FINAL PRINT` audio track.

    2. Audio From: `HORN BUS`

    3. Record a few variations:

    - Full stab

    - Shorter stab (trim)

    - Pitch down version (transpose Simpler -3 to -7 semitones before printing)

    4. Consolidate each to clean clips and build a mini library.

    Arrangement ideas (very DnB):

  • Bar 1–16: tease (filtered horn very quiet)
  • Drop: horn on bar 1 and bar 9 (call and response)
  • 2nd 16: introduce a pitched-down horn answering the first
  • End of phrase: use a tape-stop-ish horn tail (Freeze/Flatten or automation on filter cutoff)
  • ---

    4. Common mistakes

  • Leaving full low-end in the horn → mud + bass masking. HP it aggressively.
  • Overdoing Redux/bitcrush → turns to fizzy noise and steals cymbal space.
  • No envelope control in Simpler → horn tail fights reverb, bass, and snares.
  • Too wide in stereo → horn feels detached; keep some mono focus.
  • Not gain staging → distortion reacts differently when levels aren’t consistent.
  • ---

    5. Pro tips for darker/heavier DnB 🌑

  • Band-limit like an old rave record:
  • On CRUNCH layer, LP around 4–7 kHz + a bit of resonance for that gritty horn “nasal” focus.

  • Make it meaner with controlled saturation:
  • Use Roar in a subtle setting and keep lows filtered out—dirty mids, clean bottom.

  • Parallel “room slap” without washing out:
  • Send horn to a short reverb return:

    - Hybrid Reverb

    - Algorithmic

    - Decay: 0.4–0.8 s

    - Pre-delay: 10–25 ms

    - HP in reverb: 300–600 Hz

  • Clip it like a sampler:
  • Put Saturator (Analog Clip) on the horn bus with soft clip vibes, but keep it subtle—this is how you get loud without spiky pain.

    ---

    6. Mini practice exercise 🎯

    Goal: Build 3 horn versions that sit in a rolling drop.

    1. Create a 16-bar loop with:

    - Break (Amen-style or tight DnB break)

    - Kick + snare reinforcement

    - Sub (simple sine)

    - Reese or mid bass

    2. Program the horn as:

    - Version A: clean stab on bar 1

    - Version B: crunchy tight stab on bar 5

    - Version C: pitched-down stab on bar 13

    3. Print all 3 to audio and level-match them.

    4. A/B test with bass playing:

    - If horn disappears: add 1–3 kHz presence on CLEAN

    - If horn is harsh: dip 3–5 kHz on BUS and reduce CRUNCH

    Deliverable: a 16-bar drop that feels ravey but still mix-ready.

    ---

    7. Recap ✅

  • You split the horn into clean and crunch layers.
  • You resampled to print a controlled source, then used Simpler for tight envelope shaping.
  • You used Redux + distortion + filtering for sampler-like texture while keeping it mixable.
  • You balanced layers on a Horn Bus, added light glue, and used sidechain/micro-timing to make it roll with the drums.
  • You printed final versions for fast arrangement moves—classic DnB workflow.

If you want, tell me what style you’re aiming for (90s jungle, neuro-ish roll, jump-up, deep minimal) and what your horn sample sounds like (bright/harsh/long), and I’ll suggest exact EQ points and a rack preset-style chain.

Ask GPT about this lesson

Chat with the lesson tutor, get follow-up help, or use quick actions.

Bigup 👽 Ask me anything about this lesson and I’ll answer in context.

Narration script

Show spoken script
Welcome back. In this lesson we’re taking one of the most iconic jungle and oldskool DnB sounds ever, that rave air horn, and we’re making it hit hard without wrecking the mix.

Because let’s be real: the raw horn sample is usually either painfully bright, weirdly spiky, or it just sits on top of everything like it’s not part of the tune. The goal today is a repeatable workflow in Ableton Live 12 where you keep the identity of the horn, but you add that crunchy, worn-sampler attitude underneath, and you get it to move with a rolling 174 groove.

We’re going to build a two-layer horn:
First layer is clean and front-facing: transient, clarity, stereo placement.
Second layer is your crunch layer: resampled, moved into Simpler, shaped like a stab, then crushed in a controlled way.
Then we’ll bus them together, glue them lightly, and make sure they don’t fight your break, snare, hats, sub, or reese.

Alright, quick session prep so you’re not fighting routing later.
Set tempo around 170 to 175. I like 174 as a sweet spot.
If you’re organized, make groups like DRUMS, BASS, and FX or VOCAL. The horn lives in that FX area.
And a really important routing note: don’t automatically send the horn into your drum bus compressor. Unless you specifically want the horn to pump your whole drum bus, keep it out. We can make it groove in smarter ways.

Now Step 1: choose and warp the air horn.
Drag your air horn sample onto an audio track and name it HORN CLEAN.
Go into Clip View. Turn Warp on.
If the horn is longer and has some movement, set Warp Mode to Complex Pro. It tends to preserve the character better.
If it’s super short and stabby, try Beats mode, because it can keep that transient bite.
Make sure the start of the sample is aligned to the grid. If the horn starts late, you’ll always feel it as “lazy” even if it’s loud.

Arrangement wise, classic DnB placement ideas:
Use it as a pickup right before the drop, like the last eighth note or quarter note before your downbeat.
Or do call-and-response on bar 5 or bar 13 in a 16-bar phrase.
Or use it as a fill right after a snare flam or crash, where the drums leave a little window.

Now Step 2: control the front layer. This is where we make the horn present but not spiky.
On HORN CLEAN, add EQ Eight first.
High-pass it somewhere around 100 to 160 hertz, fairly steep. Get rid of rumble. Horn does not need sub.
Then find the painful area. A lot of these horns have a nasty glare around 2.5 to 4.5k. Use a narrow Q, sweep until it makes you wince, then pull it down a few dB.
If it’s still fizzy or piercing, do a gentle dip or shelf in the 8 to 12k area.

Next add Saturator.
Use Soft Sine or Analog Clip. Drive around 2 to 5 dB.
And here’s a big teacher tip: match the output level. Don’t let it get louder when you add saturation, because your brain will instantly go “oh that’s better” when it’s just louder.

Then add Glue Compressor.
Attack around 3 milliseconds, Release on Auto, Ratio 2 to 1.
You only want 1 to 2 dB of gain reduction on peaks. This is about control, not flattening.

Then add Utility.
Set width somewhere like 80 to 120 percent depending on your mix.
And set gain so the horn sits under the snare crack, not over it. In DnB, the snare is sacred. The horn is the hype, not the boss.

Optional trick if the horn “pokes” instead of “hits”:
Use Drum Buss very subtly on the clean layer. Keep Drive low, like 1 to 5, and bring Transients up a bit, maybe plus 5 to plus 15. Then trim the output back down. This can give you that little thwack at the start without boosting harsh mids.

Now Step 3: create the crunchy sampler texture layer via resampling.
This is the magic: we’re going to print the clean horn, then treat it like an instrument in Simpler so we can shape the envelope and the dirt really tightly.

First, resample the clean horn.
Create a new audio track called HORN RESAMPLE PRINT.
Set its input to Audio From HORN CLEAN. Set Monitor to In.
Arm the track and record the horn hit or hits.
Then consolidate the recorded audio so you’ve got a clean, tidy clip. Command or Control J.

Why are we doing this? Because it bakes in the initial tone-shaping so the next stage is consistent. Also, distortion and bit reduction behave way more predictably when the input is controlled.

Now drag that consolidated clip into Simpler on a new MIDI track. Name it HORN CRUNCH SIMPLER.
In Simpler, set it to One-Shot mode.
Set Trigger, not Gate, so every hit plays consistently.
Set Voices to 1 so you don’t get overlaps turning into chaos.
And keep Warp off inside Simpler unless you truly need time-stretch.

Now shape the envelope like a DnB stab.
In Simpler’s volume envelope, set Attack around 0 to 3 milliseconds.
Decay around 150 to 400 milliseconds.
Sustain all the way down, basically off.
Release around 30 to 90 milliseconds.
This is how you take a long air horn and turn it into something that can sit in a rolling pattern without washing over the whole bar.

Step 4: make it crunchy, sampler-style, but mix-ready. Dirt with discipline.
On the crunch Simpler track, build this chain.

First, Auto Filter.
Use a low-pass 24 dB slope.
Start the cutoff somewhere around 2 to 6k, depending on how bright your horn is.
Add a little resonance, around 0.7 to 1.2.
And add a bit of drive in the filter, like 3 to 8 percent, for grit.

Then Redux.
Downsample around 2 to 6.
Bit reduction around 10 to 14 bits.
The goal is “worn sampler and cheap mixer,” not “8-bit video game,” unless that’s what you want.

Then distortion.
Overdrive works great here. Set the frequency focus around 1 to 2k and drive 15 to 35 percent, then adjust tone.
If you want heavier control and you’ve got Roar ready, use Roar in a Tube or Warm style, moderate drive, and make sure you’re filtering lows out so you don’t turn it into low-mid mush.

After distortion, do cleanup EQ with EQ Eight.
High-pass it more aggressively than the clean layer, like 180 to 300 hertz.
If you get fizzy sandpaper, dip around 6 to 10k.
If you lost bite, a small boost around 1.5 to 3k can bring back the “horn speaks” region.

Then a Compressor to keep it consistent.
Attack 10 to 30 milliseconds so you keep a little transient click.
Release 60 to 120 milliseconds.
Ratio 3 to 1 or 4 to 1.
Aim for 2 to 5 dB of gain reduction.

At this point, your crunch layer should sound like it came off an SP or an old AKAI, but it should also be band-limited and not stealing cymbal space.

Quick coach note before we blend: level-match before you judge crunch.
Put a Utility at the end of each layer and use it as a trim. Toggle your crunch chain on and off while keeping loudness similar. Distortion almost always “wins” when it’s louder, even if it’s objectively worse.

Now Step 5: balance the two layers. This is the key move.
Select HORN CLEAN and HORN CRUNCH SIMPLER and group them. Name the group HORN BUS.

On the HORN BUS, add EQ Eight.
High-pass around 100 to 150 hertz, just to keep everything tidy.
And optionally do a small dip where your snare lives.
Sometimes that’s 180 to 240 hertz for snare body.
Sometimes it’s 2 to 3k for snare crack.
It depends on your snare, so don’t assume. Check.

Here’s another coach move: drop a Spectrum on the horn bus and actually watch where the energy piles up.
Snare bite often lives 2 to 4k.
Hat shimmer often lives 7 to 12k.
Reese definition can crowd anywhere from 300 hertz up to 1.2k depending on the patch.
Confirm what you’re hearing instead of guessing.

After the bus EQ, add Glue Compressor.
Attack around 10 milliseconds, Release Auto, Ratio 2 to 1.
Just 1 to 2 dB of gain reduction max. We’re gluing, not flattening.

Then add a Limiter as safety only.
Ceiling at minus 1 dB.
Don’t smash it. Just catch spikes.

Now the blend method that works fast:
Set the CLEAN layer to a solid level first.
Bring the CRUNCH layer up from silence until you feel the thickness and presence.
Then pull it back about 5 to 15 percent. That pull-back is usually the sweet spot where it feels exciting but not obviously “two layers.”

If the horn fights the snare, your first suspect is 2 to 5k on the horn bus. Reduce a bit there.
If it fights your bass or reese, try carving a small dip around 200 to 500 hertz, or sometimes 700 to 1.2k, depending on where your bass has its voice.

One more vibe tip: mono-anchor the horn so it feels like a sampled rave FX, not a modern wide synth.
On the horn bus, add Utility and try Bass Mono around 120 to 250 hertz.
And keep width more subtle, like 90 to 110 percent. A lot of old records feel centered with just a hint of spread.

Step 6: make it move in the groove. Rolling DnB is movement.
Option A is classic sidechain to the snare.
On the HORN BUS, add Compressor, enable sidechain, choose your snare track or the drum group.
Attack 1 to 3 milliseconds, release 80 to 160 milliseconds, ratio 2 to 1.
Set threshold so you’re ducking just 1 to 3 dB on snare hits. You want it to tuck, not disappear.

Option B is more jungle: gate the crunch layer from the break or tops.
Put a Gate on the crunch Simpler track, sidechain it from your break.
Now the texture chatters rhythmically without you programming extra notes. It’s like the break is “playing” the dirt.

And don’t sleep on micro-timing.
Try nudging the crunch layer 5 to 15 milliseconds late for thickness, like it’s a smeary sampled layer.
Or nudge it a few milliseconds early for extra bite.
At 174 BPM, tiny timing moves feel huge.

Step 7: resample the final horn for arrangement and performance.
Once it’s balanced, print it. This is a proper DnB workflow move: commit, print, and then arrange fast.

Create a new audio track called HORN FINAL PRINT.
Set input from HORN BUS.
Record a few variations:
A full stab.
A shorter trimmed stab.
And a pitched-down version. Before printing, transpose Simpler down maybe 3 to 7 semitones, then record it.

After printing, consolidate each clip and add tiny fades, like 1 to 3 milliseconds at the start and end. That stops clicks and keeps the sampler-stab feel tight.

Now you’ve got a mini horn library, and that makes arranging way more fun.
Try this: bars 1 to 16, tease it quietly, maybe filtered.
On the drop, put the horn on bar 1 and bar 9 as a call.
Second 16, answer it with the pitched-down horn.
And sometimes the best trick is absence: remove the horn for two bars, then bring it back. That space makes the next hit feel massive.

Before we wrap, let’s hit the common mistakes so you can dodge them.
Leaving low end in the horn creates mud and masks your bass. High-pass aggressively.
Overdoing Redux turns it into fizzy noise and steals space from hats.
Not shaping the Simpler envelope leaves tails that fight reverb, bass, and snares.
Making it too wide can detach it from the track. Keep some mono focus.
And not gain staging means your distortion reacts differently every time, which makes balancing miserable.

If you want a quick practice assignment:
Build a 16-bar loop with a break, kick and snare reinforcement, a sine sub, and a reese or mid bass.
Program three horn moments: clean on bar 1, crunchy tight on bar 5, pitched-down on bar 13.
Print all three, level-match them, and A/B with the bass playing.
If the horn disappears, add a bit of 1 to 3k presence on the clean layer.
If it’s harsh, dip 3 to 5k on the bus and reduce the crunch level.

And here’s a final quality control challenge for your mix brain:
Keep your horn bus peak under minus 6 dBFS before the master.
Then check mono quickly by setting Utility width to zero on the master. If the horn vanishes, your sides are doing too much. Bring the core back to center.

Recap:
You built a clean layer for identity and impact.
You resampled and used Simpler to shape a tight, controlled stab.
You added Redux and distortion for sampler crunch, but you band-limited it so it sits in a DnB mix.
You blended both on a horn bus with light glue, and you used sidechain or rhythmic gating plus micro-timing so it rolls with the drums.
Then you printed final versions so you can arrange like a rave surgeon.

If you tell me what style you’re aiming for, like 90s jungle, jump-up, deep minimal, or neuro-ish roll, and describe your horn sample and snare, I can suggest exact EQ targets and a quick rack-style chain to nail the balance even faster.

mickeybeam

Go to drumbasscd.com for +100 drum and bass YouTube channels all in one place - tune in!

Generating PDF preview…