DNB COLLEGE

AI Drum & Bass Ableton Tutorials

LESSON DETAIL

Atmospheric intro themes: with clean routing (Intermediate)

An AI-generated intermediate Ableton lesson focused on Atmospheric intro themes: with clean routing in the Composition area of drum and bass production.

Free plan: 0 of 1 lesson views left today. Premium unlocks unlimited access.

Atmospheric intro themes: with clean routing (Intermediate) cover image

Narrated lesson audio

The voice track includes the tutorial plus extra teacher commentary.

Open audio file

Main tutorial

```markdown

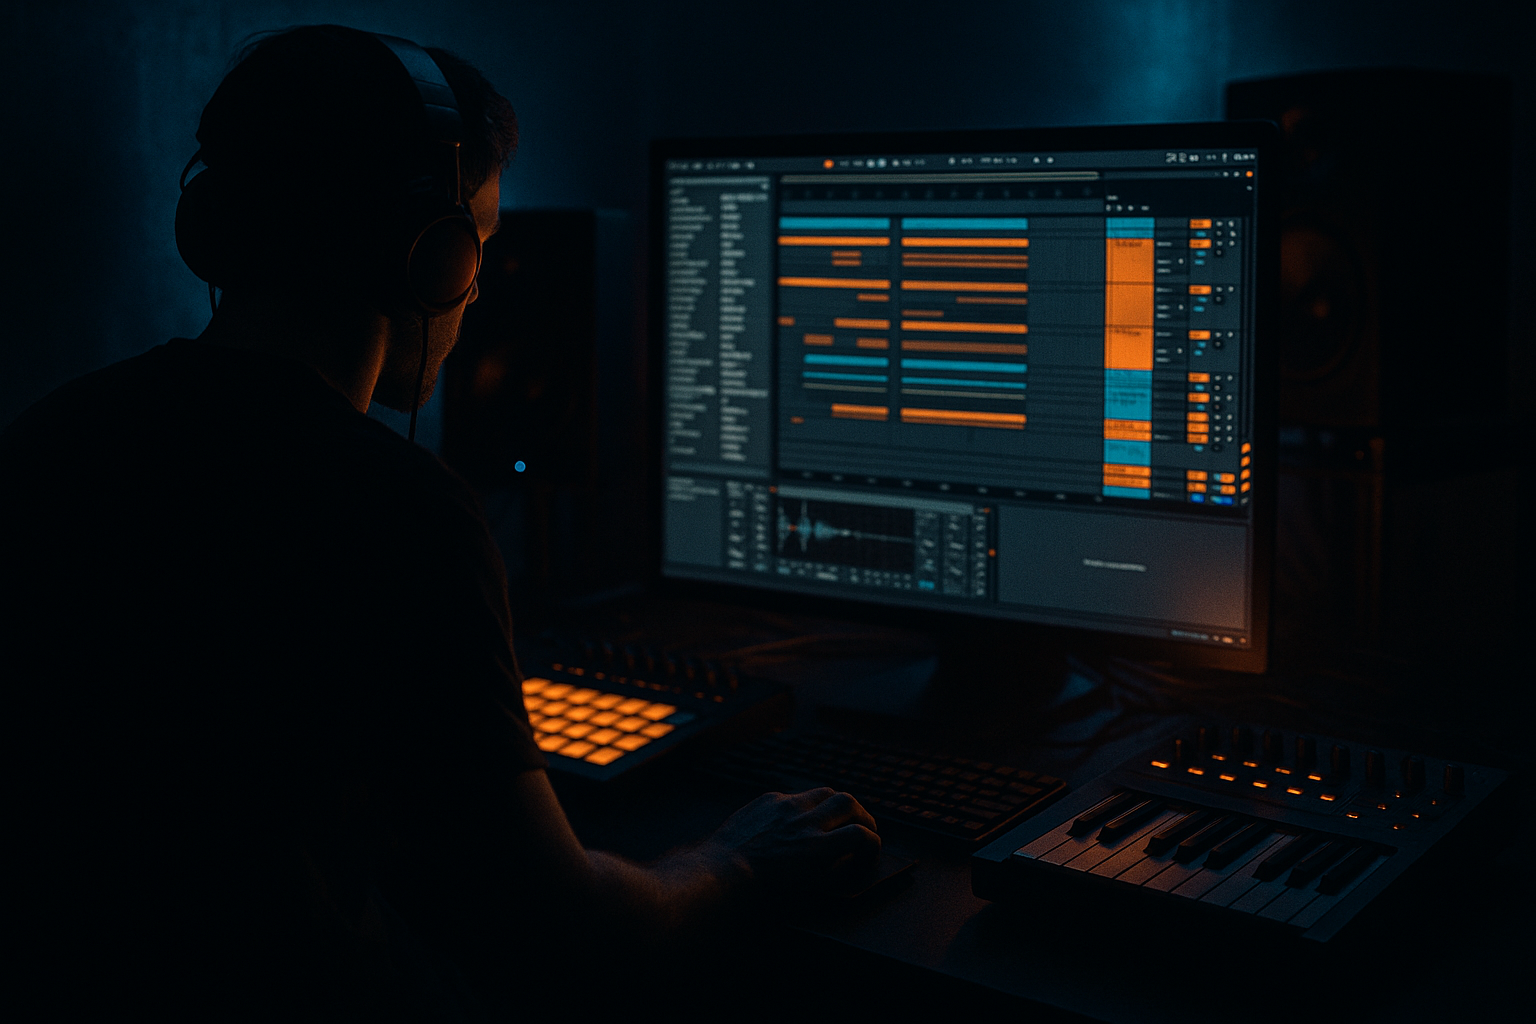
Atmospheric Intro Themes (DnB in Ableton Live) — with Clean Routing 🎛️🌫️

1. Lesson overview

Atmospheric intros are a huge part of drum & bass—setting mood, key, and energy runway before the drop. In this lesson you’ll build a pro-sounding intro theme and a clean, scalable routing template in Ableton Live so your session stays fast and mix-ready.

Skill level: Intermediate

Focus: Composition + workflow/routing (not just “sound design vibes”)

Goal: A 16–32 bar intro that feels cinematic/organic, with a seamless lift into your first drop.

---

2. What you will build

A DnB intro built from:

  • Atmospheric bed (noise + air + texture)
  • Musical motif (simple hook or chord movement)
  • Ear candy (one-shots, reverses, vocal chops)
  • Pre-drop riser + tension automation
  • Clean routing: group buses + return FX + master pre-drop control
  • Deliverable: A tidy Ableton Set with groups:

  • `ATMOS`
  • `MUSIC`
  • `DRUMS (Intro)`
  • `FX`
  • Returns: `A - ShortVerb`, `B - LongVerb`, `C - Delay`, `D - Space/Freeze`
  • Master utilities for quick A/B and pre-drop filtering
  • ---

    3. Step-by-step walkthrough

    Step 0 — Session setup (fast, DnB-friendly)

    1. Tempo: 172–176 BPM (pick 174 BPM)

    2. Time signature: 4/4

    3. Key (optional but recommended): pick something moody like F minor or G minor

    4. Arrangement markers:

    - `1–9`: Atmosphere only (establish mood)

    - `9–17`: Add motif + subtle rhythm

    - `17–25`: Build tension + ear candy

    - `25–33`: Pre-drop / impact into drop (or into bar 33 drop)

    > Use Locator markers (right-click the scrub area → Add Locator) to keep structure intentional.

    ---

    Step 1 — Create clean routing (your future self will thank you) ✅

    Create these Groups (Cmd/Ctrl + G):

  • ATMOS (pads, drones, field recordings, noise layers)
  • MUSIC (keys, chords, leads, bass if it appears in intro)
  • DRUMS (Intro) (shaker loops, ghost breaks, impacts)
  • FX (risers, reverses, transition sounds)
  • Create Return tracks:

  • A: ShortVerb (tight room)
  • B: LongVerb (lush hall)
  • C: Delay (ping-pong / dubby)
  • D: SpaceFreeze (big ambient sustain)
  • Routing rule of thumb:

  • Tracks send to returns (for shared space)
  • Groups handle tone shaping + glue
  • Master stays simple (no heavy limiting while composing)
  • ---

    Step 2 — Build your Return FX (Ableton stock devices)

    #### Return A — ShortVerb 🏠

    Audio Effect Rack (optional) or single chain:

  • Hybrid Reverb
  • - Algorithm: Room or Ambience

    - Decay: 0.6–1.2s

    - Pre-delay: 5–15ms

    - High Cut: 7–10 kHz

  • EQ Eight
  • - HPF at 150–250 Hz (steep 24dB/oct)

    Use this for subtle depth on foley, small hits, tight atmos.

    #### Return B — LongVerb 🌌

  • Hybrid Reverb
  • - Algorithm: Hall

    - Decay: 4–8s

    - Pre-delay: 25–45ms (keeps clarity)

    - Size: Large

    - Mod: small amount (if available)

  • EQ Eight
  • - HPF at 250–400 Hz

    - Gentle dip around 2–4 kHz if it gets spitty

    This is your “cinematic glue.”

    #### Return C — Delay 🔁

  • Echo
  • - Mode: Ping Pong

    - Time: 1/4 or 3/8

    - Feedback: 25–45%

    - Filter: HP around 250 Hz, LP around 6–8 kHz

    - Mod: subtle (0.1–0.3)

  • Optional: Saturator (Soft Clip on, Drive 1–3 dB)
  • #### Return D — SpaceFreeze ❄️

  • Hybrid Reverb
  • - Algorithm: Shimmer or big Hall (depending on Live version)

    - Decay: 10–20s

    - Mix: 100% wet (it’s a return)

  • Grain Delay (optional for crunchy jungle air)
  • - Dry/Wet: 10–25%

    - Freq: 1–2 kHz

    - Pitch: small (+1 to +3)

  • Auto Filter
  • - Gentle LP sweep for movement

    Use sparingly: automate sends for “moments.”

    ---

    Step 3 — Atmos bed: build depth in layers 🌫️

    In ATMOS group, create 3 tracks:

    #### Track 1: Drone (Wavetable or Operator)

  • Wavetable
  • - Osc 1: Sine or basic shapes

    - Unison: 2–4

    - Detune: low (for width without wobble)

  • Auto Filter
  • - LP around 2–6 kHz, automate slowly

  • Utility
  • - Width: 120–160% (careful—check mono later)

  • Send to LongVerb (B) around -18 to -10 dB (by taste)
  • Keep drone notes simple: root note or i–VI movement (e.g., Fm → Db).

    #### Track 2: Noise / Air (Operator noise or sample)

  • Drop a vinyl/noise/field recording sample (or synth noise)
  • EQ Eight
  • - HPF 300–600 Hz

    - Optional notch around 3–5 kHz if harsh

  • Auto Pan
  • - Rate: 0.05–0.15 Hz

    - Amount: 20–40%

  • Send lightly to ShortVerb (A) and LongVerb (B)
  • #### Track 3: Texture loop (granular-ish movement)

  • Use Simpler with an organic texture (rain, room tone, cassette)
  • Turn on Loop, short loop length (100–500 ms) for evolving textures
  • Filter in Simpler: LP around 3–8 kHz, automate cutoff
  • Send to SpaceFreeze (D) for one-off “bloom” moments
  • ATMOS Group processing (on the group):

  • EQ Eight
  • - HPF 30–60 Hz (clean sub rumble)

    - Dip 200–400 Hz if muddy

  • Glue Compressor
  • - Attack: 10 ms

    - Release: Auto

    - Ratio: 2:1

    - Aim for 1–2 dB GR max

    ---

    Step 4 — Musical motif: simple, memorable, DnB-appropriate 🎹

    In MUSIC group, create:

    #### Track 1: Chords (Electric / Wavetable / Analog)

  • Use Electric (great for moody minor chords)
  • - Add Chorus-Ensemble (subtle)

    - Add Hybrid Reverb (but prefer sends for cohesion)

  • Progression idea (minor, cinematic):
  • - i → VI → III → VII (classic)

    - Example in F minor: Fm → Db → Ab → Eb

  • Rhythm idea: play chords as long 2-bar holds first, then add syncopated stabs later.
  • #### Track 2: Motif/Hook (Analog or Operator)

  • Keep it 3–5 notes, with space.
  • Use Scale MIDI effect if you want to stay locked to key quickly.
  • Device chain example:
  • 1. Analog (saw + sine blend)

    2. Auto Filter (LP 12dB, automate cutoff)

    3. Saturator (Drive 2–6 dB, Soft Clip on)

    4. Utility (mono below ~150 Hz if needed)

  • Send to Delay (C) and LongVerb (B) to place it in the same world.
  • Arrangement tip:

    Introduce the motif late (bar 9 or bar 17) to create a “reveal.” 🎬

    ---

    Step 5 — Subtle intro rhythm (jungle DNA without stepping on the drop) 🥁

    In DRUMS (Intro) group:

    #### Track 1: Ghost break layer

  • Choose a break (Amen, Think, etc.) but high-pass it so it doesn’t feel like the drop.
  • Chain:
  • - EQ Eight: HPF 250–500 Hz

    - Drum Buss: Drive 5–15, Boom 0 (we don’t need sub here)

    - Redux (optional): very subtle for grit (Downsample small amount)

    Keep it low in level: it’s motion, not “the drums.”

    #### Track 2: Hat/shaker loop

  • Use Drum Rack or audio loop.
  • Auto Pan: small movement
  • Send to ShortVerb (A) lightly
  • #### Track 3: Impact hits (one per 4 or 8 bars)

  • Low-passed thud + airy tail
  • Put the tail into LongVerb (B) or SpaceFreeze (D)
  • DRUMS Group processing:

  • EQ Eight HPF around 30–40 Hz
  • Glue Compressor gentle (1 dB GR)
  • ---

    Step 6 — Transitions: risers, reverses, and tension automation 🚀

    In FX group:

    #### Riser (Operator noise or sample)

  • Use noise source + filter sweep
  • Auto Filter
  • - Map cutoff to an automation lane: slow rise over 8 bars

    - Increase resonance slightly near the end

  • Echo send (C) for width and movement
  • #### Reverse reverb trick (stock workflow)

    1. Take a vocal chop / motif note

    2. Freeze/Flatten or resample it

    3. Add Hybrid Reverb 100% wet, long decay (6–10s)

    4. Resample the reverb tail

    5. Reverse it and place it leading into the next phrase

    This is very DnB-intro-friendly and instantly cinematic.

    ---

    Step 7 — Pre-drop “lift”: one macro to rule them all 🎚️

    Create a “PRE-DROP” control track (MIDI track with no instrument) and put:

  • Utility (for gain automation if you want)
  • Or just use it as a place to keep automation lanes tidy.
  • Now automate these over the final 4–8 bars:

  • ATMOS Group Auto Filter cutoff (slowly closing OR opening depending on vibe)
  • LongVerb send on motif (increase slightly into the pre-drop)
  • Drums intro HPF (raise HPF a bit as you approach the drop for perceived lift)
  • Master subtle dip right before drop (classic “suck”)
  • - On Master: Utility

    - Automate Gain to -1 to -3 dB for the last 1/2 bar

    - Snap back to 0 dB at the drop

    Add a 1-beat silence (or near-silence) before drop sometimes—DnB crowds love that tension.

    ---

    Step 8 — Clean arrangement template (16 or 32 bars)

    Here’s a reliable 32-bar layout:

  • Bars 1–8: Atmos only (drone + noise + texture), no motif yet
  • Bars 9–16: Add chords (low energy), introduce tiny ear candy
  • Bars 17–24: Introduce motif + ghost break, increase movement
  • Bars 25–32: Riser, reverse reverb, automation lift, pre-drop dip → drop
  • Keep the intro’s low end tidy so the drop’s sub feels massive.

    ---

    4. Common mistakes (and quick fixes)

    1. Too much low end in atmos

    - Fix: HPF atmos layers at 30–80 Hz, sometimes even 120 Hz for noisy textures.

    2. Reverb washing out the motif

    - Fix: Increase pre-delay (25–45 ms), reduce send, roll off lows on reverb returns.

    3. Everything starts at bar 1

    - Fix: Stagger entries every 4–8 bars. Intros need “reveals.”

    4. Over-wide pads collapsing in mono

    - Fix: Check with Utility → Width 0% periodically. Mono the lows (below 120–150 Hz).

    5. Messy routing (random reverbs on every track)

    - Fix: Use Returns for shared space; reserve insert reverbs for special effects only.

    ---

    5. Pro tips for darker/heavier DnB 🖤

  • Make the intro “promise” the drop’s tone:
  • Use a texture derived from your drop bass (resample a bass note, stretch it, HPF it, drown it in verb).

  • Use dissonance tastefully:
  • Add a quiet note a minor 2nd above the root in a pad layer (very low level) for tension.

  • Controlled grit:
  • Put Roar (if available) or Saturator on atmos group very lightly (1–2 dB drive) to make it feel “expensive,” not distorted.

  • Jungle nod without full drums:
  • Use a break at -18 to -24 dB, HPF it, and automate its send to LongVerb—ghost energy, not a fake drop.

  • Pre-drop psychological trick:
  • Automate a subtle high-shelf reduction on the master (or Music group) right before drop, then restore at drop. The drop feels brighter/harder without even changing sounds.

    ---

    6. Mini practice exercise (15 minutes) ⏱️

    1. Create the routing: Groups + Returns A–D exactly as above.

    2. Make a 2-chord loop (i → VI) in a minor key.

    3. Add one drone (root note) + one noise layer.

    4. Add a ghost break with HPF at 350 Hz.

    5. Create one riser with Auto Filter cutoff automation over 8 bars.

    6. Arrange into 16 bars:

    - 1–8: atmos + chords

    - 9–16: motif + ghost break + riser

    7. Export a bounce and listen on headphones: does the intro feel wide and deep, but still leave room for the drop?

    ---

    7. Recap

  • You built a DnB atmospheric intro using layered atmos + simple motif + subtle rhythmic motion.
  • You set up clean routing: Groups for control, Returns for shared space, minimal master processing.
  • You used stock Ableton tools—Hybrid Reverb, Echo, EQ Eight, Auto Filter, Glue Compressor, Utility—to keep it portable and fast.
  • You arranged with intention: staggered reveals, tension automation, and a pre-drop moment to maximize impact.

If you want, tell me your subgenre (liquid, rollers, neuro, jungle) and the key/tempo, and I’ll suggest a tailored 32-bar intro blueprint + motif rhythm that matches it.

```

Ask GPT about this lesson

Chat with the lesson tutor, get follow-up help, or use quick actions.

Bigup 👽 Ask me anything about this lesson and I’ll answer in context.

Narration script

Show spoken script
Title: Atmospheric intro themes: with clean routing (Intermediate)

Alright, let’s build an atmospheric drum and bass intro in Ableton Live that actually feels like a record, not just a loop with too much reverb. The mission is twofold: we’re going to compose a 16 to 32 bar intro theme that’s cinematic and emotional, and we’re going to route it cleanly so the session stays fast, scalable, and mix-ready.

Set your tempo to something DnB-friendly, around 174 BPM. Four four. And if you like working with intention, pick a key up front. F minor or G minor are solid moody choices. Now before you place a single sound, set locator markers in the arrangement. Think of it like story beats.

Bars 1 through 8: atmosphere only, establish the world.
Bars 9 through 16: bring in chords, maybe the first hint of rhythm.
Bars 17 through 24: reveal the motif, add motion, build tension.
Bars 25 through 32: transitions, risers, and that pre-drop lift into the drop.

This structure is a cheat code. It prevents the classic problem where everything starts at bar 1 and nowhere feels special.

Now let’s do the part that makes everything easier later: routing.

Create four groups. One called ATMOS, one called MUSIC, one called DRUMS Intro, and one called FX. Keep it simple and obvious. Your future self will absolutely thank you.

Then create return tracks and name them clearly.
Return A is ShortVerb.
Return B is LongVerb.
Return C is Delay.
Return D is SpaceFreeze.

Here’s the core routing philosophy: individual tracks send to returns for shared space, groups handle tone shaping and glue, and the master stays simple while composing. No heavy limiting right now. We’re building the scene, not mastering the movie.

Cool. Let’s build those return effects with stock devices.

On Return A, ShortVerb: load Hybrid Reverb in a Room or Ambience style. Short decay, roughly 0.6 to 1.2 seconds, tiny pre-delay like 5 to 15 milliseconds. Roll off the top a bit if it’s fizzy, and then add EQ Eight after it with a steep high-pass somewhere around 150 to 250 Hz. This return is for subtle depth: foley, small hits, little textures that need to sit in a believable space.

On Return B, LongVerb: Hybrid Reverb again, this time a Hall. Decay 4 to 8 seconds, and definitely use pre-delay, something like 25 to 45 milliseconds. That pre-delay is the difference between “lush and cinematic” and “why is my motif buried.” After it, EQ Eight: high-pass around 250 to 400 Hz, and if it gets aggressive in the presence area, a gentle dip in the 2 to 4k region.

Return C, Delay: load Echo, ping-pong mode. Set the time to a quarter note or three-eighths if you want more of that rolling, dubby bounce. Feedback around 25 to 45 percent. Filter it: high-pass about 250 Hz, low-pass around 6 to 8k. Optional saturator after the echo, just a couple dB drive, soft clip on, so the repeats feel warm and controlled.

Return D, SpaceFreeze: this is your “moment” effect, not your “leave it on” effect. Hybrid Reverb with a huge decay, 10 to 20 seconds, 100 percent wet because it’s a return. If you want that crunchy jungle air, add Grain Delay very lightly, then an Auto Filter after, maybe a gentle low-pass sweep for motion.

Now quick coaching point: calibrate your sends. If your typical track fader is sitting around minus 12 dB, your send knobs should generally land somewhere like minus 18 to minus 10 dB for a normal amount of space. If you keep pushing sends close to zero just to hear the return, the return is too quiet. Turn up the return track, don’t break your send consistency. This is one of those tiny workflow things that keeps your mixes predictable.

Now we build the atmosphere bed. Go into the ATMOS group and make three tracks: Drone, Noise or Air, and Texture.

Drone first. Use Wavetable or Operator. Keep it simple. A sine-based or basic waveform drone works because it supports the key without distracting. Add Auto Filter with a low-pass somewhere in the 2 to 6k area, and automate it slowly so the drone feels alive. Add Utility for width, but don’t go crazy. Something like 120 to 160 percent can be nice, but you must check mono later. Send this drone to the LongVerb return, just enough that it feels like it’s in a large space.

Musically, don’t overthink it. Hold the root note, or do a slow two-chord movement like i to VI. In F minor, that could be F minor moving to D flat. Long notes. Let the texture do the work.

Second, Noise or Air. This can be vinyl noise, field recordings, synth noise, anything that adds “air.” Put EQ Eight on it and high-pass aggressively, somewhere between 300 and 600 Hz. If it’s harsh, notch a bit around 3 to 5k. Then Auto Pan, very slow rate, like 0.05 to 0.15 Hz, just enough to create movement without sounding like a gimmick. Send it lightly to ShortVerb and LongVerb.

Third, Texture loop. Grab an organic sample: rain, room tone, cassette hiss, anything. Put it into Simpler, turn on loop, and set a short loop length like 100 to 500 milliseconds. This creates evolving granular-ish motion without you doing complex sound design. Use Simpler’s filter, low-pass around 3 to 8k, automate the cutoff. And here’s where SpaceFreeze comes in: automate a send spike for a one-off bloom, like at the end of bar 8 or bar 16.

Now another coaching point: protect the drop by reserving the low end and low-mids. Atmospheres can feel “thin” and still eat headroom in the 120 to 300 Hz zone. A great discipline is to give each atmos track a role. One track is air only, high-pass it at 600 Hz to 1k. One track is mid texture, high-pass at 200 to 400. One track is your low drone, high-pass maybe 40 to 80. The main idea is: don’t let all three layers pile up in 200 to 400 at the same time.

On the ATMOS group itself, do gentle cleanup and glue. EQ Eight with a high-pass at 30 to 60 Hz to remove rumble. If it’s muddy, dip 200 to 400 a touch. Then Glue Compressor, light settings: attack around 10 ms, release auto, ratio 2:1, and only 1 to 2 dB of gain reduction at most. Just enough to make it feel like one world.

Next up, the MUSIC group: chords and motif.

For chords, Electric is perfect for moody minor vibes. Add a subtle Chorus-Ensemble if you want width, but try to rely on sends rather than inserting reverb on the track. For a progression, you can use i to VI to III to VII. In F minor, that’s F minor, D flat, A flat, E flat. Start with long two-bar holds. That’s your establishing shot.

Now the motif or hook. Keep it short: three to five notes, with space. This isn’t the drop lead, it’s the theme. Use Scale MIDI effect if you want to stay locked into the key and write faster. For sound, Analog or Operator works great. A saw plus sine blend, low-pass filter you can automate, then a saturator for a bit of thickness, soft clip on, and Utility if you need to control width or mono the low end.

Send the motif to Delay and LongVerb so it lives in the same universe as the atmos. And arrangement-wise, don’t reveal the motif at bar 1 unless you want to kill the suspense. A strong move is to introduce it at bar 9 or even bar 17. That delayed reveal feels cinematic because it creates a “now the story begins” moment.

Here’s a big pro-level concept: decide your camera distance early. Close versus far. Choose one or two foreground elements. Usually that’s the motif and maybe a single foley hit. Foreground means less reverb, more transient, more midrange clarity. Everything else is background: darker, wetter, less bite. If everything is equally wet and distant, the intro feels flat, like fog with no subject.

Now subtle intro rhythm. This is where you get jungle DNA without accidentally making a fake drop.

In DRUMS Intro, create a ghost break layer. Choose a classic break like Amen or Think. But high-pass it hard, around 250 to 500 Hz, so you keep the shuffle and texture without low-end weight. Add Drum Buss for grit, drive maybe 5 to 15, but keep Boom at zero because we’re not trying to generate sub. Optional Redux very lightly if you want that old-school texture. Level it low. Really low. This layer should feel like motion, not “drums are in.”

Add a hat or shaker loop as a second track. Small Auto Pan movement is nice. Send lightly to ShortVerb so it sits back.

Then add impact hits: one every four or eight bars. Think of them like punctuation. A low-passed thud plus an airy tail. Put the tail into LongVerb or SpaceFreeze for scale.

On the DRUMS group, high-pass around 30 to 40 just to remove nonsense, and a touch of glue compression, maybe 1 dB of reduction.

Now FX and transitions. This is where your intro starts sounding like a professional arrangement instead of a loop.

Create a riser track. Noise source or a sample, doesn’t matter. Auto Filter on it, automate the cutoff rising over eight bars, and add a little resonance near the end for intensity. Send it to the Delay return to create width and movement.

And do the reverse reverb trick, because it’s basically instant DnB cinema. Take a vocal chop or a motif note, resample it, put Hybrid Reverb on it 100 percent wet with a long decay like 6 to 10 seconds, resample just the reverb tail, reverse it, and place it leading into the next section. You get that suction, that pull-forward sensation that makes transitions feel inevitable.

Now we set up the pre-drop lift. Create a “PRE-DROP” control track. It can just be a blank MIDI track where you keep automation lanes tidy, so you’re not hunting across 40 tracks later.

In the final four to eight bars before the drop, automate three main concepts: brightness, density, and space size.

Brightness: filters opening gradually, or sometimes closing for a “telephone into drop” vibe.
Density: more note events, more ear candy frequency, a bit more rhythmic motion.
Space size: increase LongVerb and maybe a touch of SpaceFreeze right before the drop.

Then do the classic pre-drop dip. Put Utility on the master and automate the gain down by 1 to 3 dB in the last half bar, then snap it back to zero at the drop. It’s a psychological trick: the drop feels louder and harder without you actually changing the drop.

And consider a one-beat silence or near-silence right before the drop. Even in liquid, even in rollers, that moment of absence makes the crowd lean in.

Here are a few arrangement upgrades that immediately make your intro feel composed.

At the end of every eight bars, do one small clarity move: a tiny drum fill, a reverb swell, a quick eighth-note mute, or a little pitch lift. Just one. That’s enough to make it feel like a journey.

Try micro-contrast: every four bars, slightly change how wet things are. For example, bars 1 to 4 a bit wetter, bars 5 to 8 pull sends down 10 to 20 percent. Repeat that idea with increasing intensity. It prevents reverb fatigue and keeps momentum.

And one more trick: the false floor. In the last two bars, remove something foundational like the drone root or the ghost break. Let the listener feel the floor disappear. Then bring it back only at the drop. The drop feels heavier even if you didn’t touch it.

One more advanced clarity move if your LongVerb is washing out your motif: sidechain-duck the LongVerb return. Put a compressor after the reverb on Return B, sidechain input from the motif track or the MUSIC group, fast-ish attack, medium release, just two to four dB of reduction. Now the verb blooms in the gaps, but the motif stays readable. That’s modern, clean, and very usable in DnB.

Let’s lock in a clean 32-bar template so you can finish fast.

Bars 1 to 8: drone, noise, texture. No motif yet.
Bars 9 to 16: add chords, introduce tiny ear candy.
Bars 17 to 24: bring in the motif, add ghost break movement, increase automation.
Bars 25 to 32: riser layers, reverse reverb into key moments, bigger space, pre-drop dip, then drop.

Final quality checks before you call it done.

Check your low end. Atmos should not compete with the drop. High-pass where needed.
Check mono compatibility. Throw Utility on your master temporarily and set width to zero for a moment. If your pad disappears completely, it’s too phasey. Adjust width or simplify your stereo tricks.
Check that not everything is far away. You want a subject in the foreground.
And check that your routing is still clean. If you’ve inserted random reverbs everywhere, pull them off and use the returns. Inserts are for special moments, returns are for the shared world.

Now a quick 15-minute practice version you can do anytime.

Set up the groups and returns exactly as we did.
Make a two-chord loop, i to VI in a minor key.
Add one drone and one noise layer.
Add a ghost break high-passed around 350 Hz.
Make one riser with an eight-bar filter automation.
Arrange into 16 bars: first half atmos and chords, second half motif, ghost break, and riser.
Export it, listen on headphones, and ask one question: does it feel wide and deep, but still leave room for the drop?

To wrap it up: you’ve built an atmospheric DnB intro using layered atmos, a simple motif, subtle rhythm, and pro transitions. You’ve also built a clean routing template: groups for control, returns for shared space, and minimal master processing so you can stay creative without making a mess.

If you tell me your subgenre—liquid, rollers, neuro, jungle—and your key and tempo, I can suggest a tailored 32-bar intro blueprint and a motif rhythm that matches the vibe.

Mickeybeam

Go to drumbasscd.com for +100 drum and bass YouTube channels all in one place - tune in!

Any 1 Tutorial FREE Everyday
Tutorial Explain
Generating PDF preview…