DNB COLLEGE

Drum & Bass Ableton Live 12 Tutorials

LESSON DETAIL

A Little Sound oldskool DnB jungle arp in Ableton Live 12 using Session View to Arrangement View (Intermediate · Arrangement · tutorial)

An AI-generated intermediate Ableton lesson focused on A Little Sound oldskool DnB jungle arp in Ableton Live 12 using Session View to Arrangement View in the Arrangement area of drum and bass production.

Back to lessons
A Little Sound oldskool DnB jungle arp in Ableton Live 12 using Session View to Arrangement View (Intermediate · Arrangement · tutorial) cover image

Narrated lesson audio

The voice track includes the tutorial plus extra teacher commentary.

Open audio file

Main tutorial

1. Lesson Overview

This lesson teaches you how to make "A Little Sound oldskool DnB jungle arp in Ableton Live 12 using Session View to Arrangement View". It’s an intermediate Arrangement exercise: you’ll design a classic chopped, rolling jungle-style arp using only Ableton stock devices (Wavetable, Arpeggiator, Note Length, Velocity, Filter, Saturator, etc.), create multiple Session clips and variations, perform/automate them in Session View, then record that performance into Arrangement View and tidy it up into a usable section of a Drum & Bass arrangement at ~170 BPM.

2. What You Will Build

  • A short, repeatable oldskool DnB/jungle arp patch (Wavetable) with rhythmic movement (Arpeggiator + Note Length + LFO-filter movement).
  • Several Session clip variations (full arp, filtered arp, pitched arp, chopped arp).
  • A live Session-to-Arrangement performance: launch scenes, tweak mapped macros and effects, and record the performance into Arrangement View for use in a track.
  • 3. Step-by-Step Walkthrough

    Preparation

  • Set Live’s BPM to 170 (typical for oldskool DnB/jungle).
  • Create a new Live Set. Create a MIDI track and name it “Jungle Arp”.
  • Load a Wavetable instrument (Ableton stock).
  • Design the arp sound (Wavetable)

    1. Oscillators:

    - Osc 1: choose a saw wave (Use a bright wavetable position). Set Unison to 3–6 voices and slightly detune (0.10–0.25). This gives the thick, vintage stab sound.

    - Osc 2: set to a square or a sub sine (lower octave) and mix low, just to give body.

    2. Filter and envelope:

    - Use the main filter (MG Low or State-Variable) set to Low Pass; cutoff around 1–2 o’clock (listen and adjust).

    - Increase Filter Envelope amount moderately so the filter opens on each note (Env amount ~5–8).

    - Set Envelope Attack fast (0–10 ms), Decay medium-short (300–600 ms), Sustain low to medium, Release short.

    3. Add movement:

    - Set LFO 1 to modulate Filter Cutoff gently with a synced Rate of 1/8 or 1/4 and low depth — this breathes the arp.

    - Turn on Portamento/Glide (mono mode not required if using arpeggiator in poly) or add a tiny glide if you want slewing between notes.

    MIDI effect chain (make it rhythmic and jungle)

    4. Create a MIDI Effect Rack above Wavetable:

    - Insert “Arpeggiator” first. Settings:

    - Rate: 1/16 (enable Triplet if you want swung jungle flavor, or keep straight for rolling DnB).

    - Style: Up (or Up/Down for variation).

    - Gate: ~65–80% (shorter for choppy stabs).

    - Octave Range: 1–2 (try 2 for classic oldskool jumps).

    - Retrig: on (so envelopes retrigger).

    - Add “Note Length” after Arpeggiator: set to shorten notes to ~50–70% for percussive pluck feel.

    - Add “Velocity” MIDI effect: set Range and Random to introduce dynamic variation; also use Drive to raise velocities for saturation later.

    - Optional: Add “Random” with small Amount or “Pitch” with small shift to get slight key variation on some clips.

    Add basic effects (audio)

    5. On the Jungle Arp track, after Wavetable chain:

    - EQ Eight: roll off sub under ~80 Hz so the arp doesn’t clash with bass.

    - Saturator: Soft Clip, Drive ~3–5 dB for grit.

    - Auto Filter (or Filter Delay): map cutoff to a Macro for live filtering.

    - Ping Pong Delay (mix low ~8–15%) with sync to 1/8 or 1/16 dotted/triplet for space.

    - Redux (bit-reduction) lightly for lo-fi jungle texture — keep subtle.

    Prepare Session clips

    6. Create your base MIDI clip:

    - In Session slot, create a 1-bar MIDI clip (or 2-bar) and input a short two- or three-note chord/interval (e.g., root + fifth + octave) that the Arpeggiator will turn into a rolling pattern. For jungle arp, a simple 2-note pattern with octaves works well.

    - Set Clip Launch Quantization to 1 Bar (in the lower left or global quantize).

    - Duplicate this clip into 4–6 slots in the same track to create variations.

    7. Make variations:

    - Clip A: Base arp (no extra processing).

    - Clip B: Filtered arp — use clip automation or map Macro 1 (filter cutoff) and set Macro low for this clip. Alternatively, open the clip’s Envelope view and draw an automated filter cutoff if the device macro is mapped to a device parameter.

    - Clip C: Pitched arp — transpose the MIDI notes up 5–7 semitones or transpose the track up in the Clip Transpose box.

    - Clip D: Chopped arp — reduce Note Length to very short, or use clip-level repeat (legato notes on grid) to create staccato.

    - Clip E: Dropout/half speed — set clip to half rate (play 1/2 speed) or change Arpeggiator rate to 1/8 for a breathing moment.

    8. Use Follow Actions (advanced, useful for Arrangement performance):

    - For a clip you want cycling automatically, set Follow Action to “Next” after 2 or 4 bars, and set Probability to 100%. This makes a Session scene evolve without manual triggering. Make one clip with Follow Actions that cycles through two variations to create unpredictability.

    Map macros for performance

    9. Macro assignments:

    - Map Wavetable Filter Cutoff to Macro 1.

    - Map Saturator Drive to Macro 2.

    - Map Arpeggiator Rate (or Gate) to Macro 3 for instant rhythmic changes.

    - Optionally map LFO amount to Macro 4.

    - Name macros (Cutoff, Drive, Rate, LFO) and color them so you can perform them in Session.

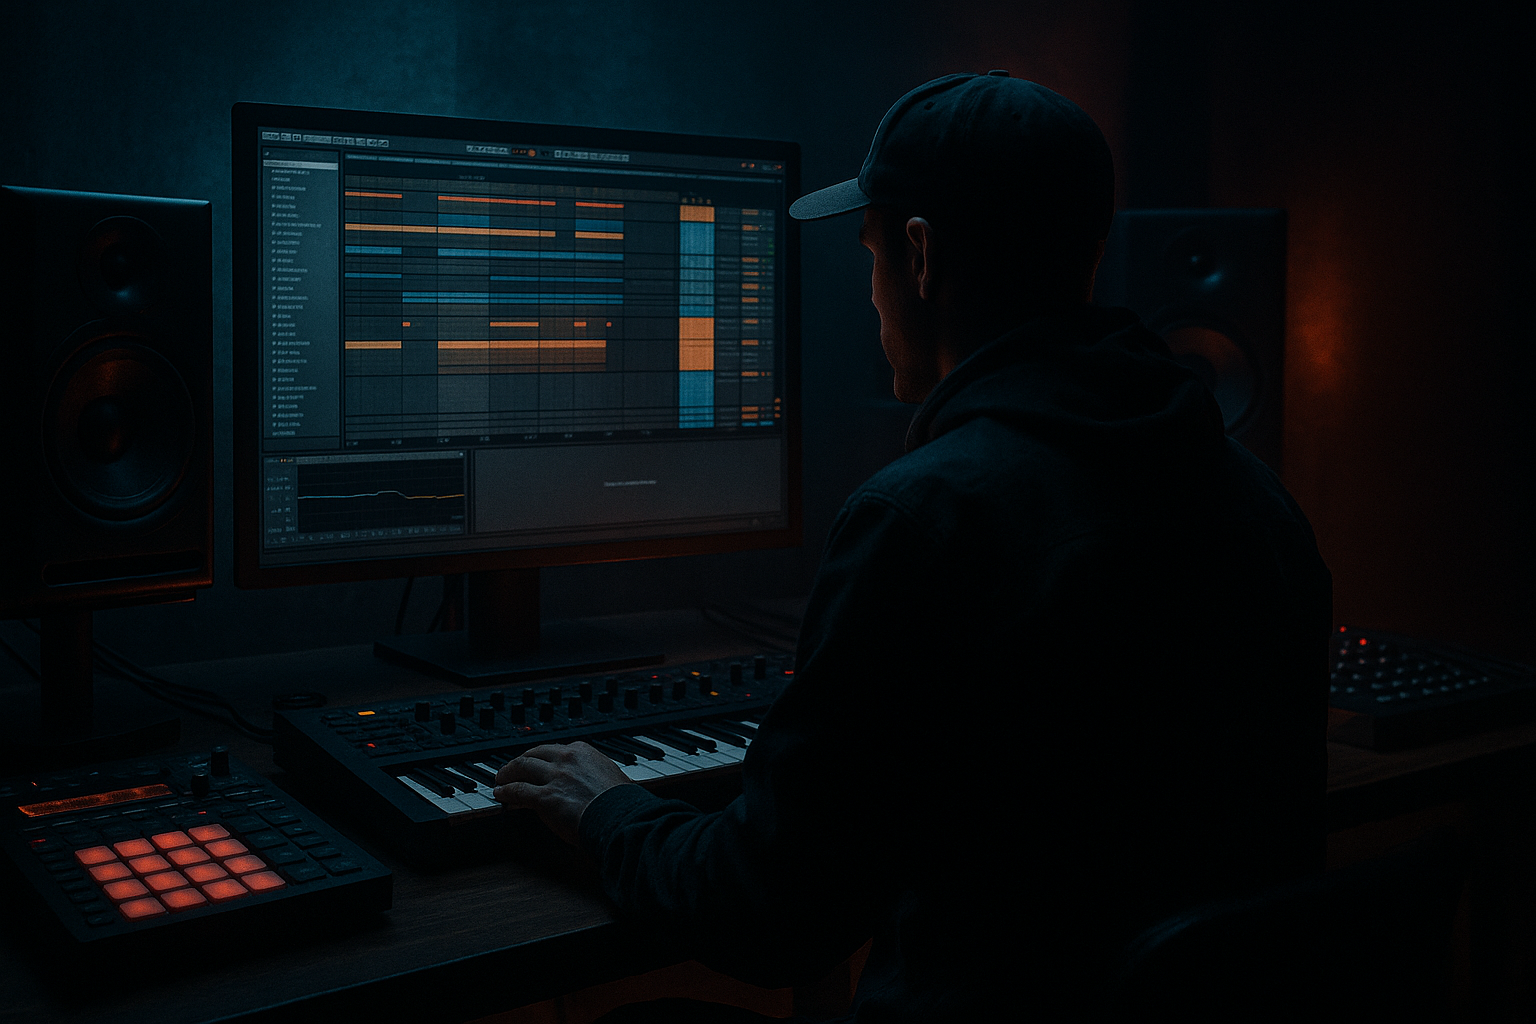
    Perform in Session and record into Arrangement

    10. Create a Scene in Session View for your arp section: place your Jungle Arp clips across one Scene row (or launch the clips individually).

    11. Start the main Arrangement record:

    - Option A (recommended for full control): press Arrangement Record (top transport) then start launching Scene/Clips. Your clip launches and any automated parameter movements you make on mapped macros will be recorded into Arrangement as automation.

    - Option B (Clip to Arrangement): you can also press the Session Record button to capture into the Clip Recorder, but Arrangement Record is simpler for recording macros into Arrangement View.

    12. Performance tips during recording:

    - Launch a base clip, then after a couple bars bring in filtered variation (lower Macro 1).

    - Use Macro 3 to switch Arp rate briefly (e.g., triplet feel for 2 bars).

    - Bring Saturator macro in for a build to add grit on the drop.

    - Stop recording when you’ve captured the full section (8–32 bars depending on the arrangement you want).

    13. Edit in Arrangement:

    - Go to Arrangement View and locate your recorded arp lanes.

    - Consolidate (Cmd/Ctrl-J) and trim clips into arrangement sections (intro, build, drop).

    - Tidy automation lanes: smooth breakpoints, extend automation where needed.

    - Split and duplicate for structure: copy the 8-bar arp phrase to create a 16-bar loop and add variation by disabling or duplicating clips with different macro states.

    Mix considerations (quick)

    14. Sidechain: add Compressor after Saturator, enable sidechain to a Kick or a dedicated sidechain bus; set ratio ~4:1 and quick attack/release so the arp pumps subtly on kicks.

    15. Sends: send some to Return tracks — a longer reverb send (low mix) and a timed delay send — to keep main arp tight and give depth on send.

    4. Common Mistakes

  • Recording without global quantize or wrong clip quantization: launches can be late/early. Set Clip Launch Quantization to 1 Bar for scene-based recording.
  • Not mapping macros: trying to automate device parameters directly during performance is clumsy — map to Macros to capture tidy automation.
  • Too much low end in the arp: failing to high-pass or EQ sub-bass out will clash with bassline. Use EQ Eight to cut below ~80 Hz.
  • Overusing saturation/Redux: too much lo-fi can blur the arp. Use subtle settings and automate increases only at transitions.
  • Forgetting Retrig in Arpeggiator: if envelopes don’t retrig when you expect, turn on Retrig so the envelope restarts each note.
  • Recording into Arrangement but not arming automation recording: ensure the Arrangement Record button is active when performing macros, otherwise only clip content is recorded.
  • 5. Pro Tips

  • Use tiny pitch variations: place an instance of “Pitch” MIDI effect set to +0.5 or -0.5 semitones with low chance in a chain to emulate detuned old hardware.
  • Create a second track with the same arp patch but different processing (heavy bitcrush + gated tremolo) and alternate between them in Session; this gives arrangement contrast when you record to Arrangement.
  • For rapid “jungle” chop feel, automate Note Length in clip envelopes to go from long to very short over a couple bars.
  • Use a Return track with Redux and heavy delay and send the arp briefly for a “ragga” or “skank” moment — automate the send in Arrangement for dramatic effect.
  • Bounce CPU-heavy Wavetable to audio after you’re happy, then edit audio with transient chopping and manual stutters to get authentic jungle stabs.
  • Use the Follow Actions to make an unattended background arp evolve during arrangement playback, then record a live performance of only the macro changes to capture human feeling.
  • 6. Mini Practice Exercise

    Goal: Create an 8-bar arp phrase that evolves into a drop

  • Tempo: 170 BPM.
  • Build: In Session, create 4 clips for the Jungle Arp track: Base (1 bar), Filtered (1 bar), Pitched (1 bar up a 5th), Chopped (1 bar short notes). Put them into a Scene and set Clip Launch Quantize to 1 Bar.
  • Map Cutoff to Macro 1, Arp Rate to Macro 2.
  • Arm Arrangement Record, launch the Scene and perform: start with Base (2 bars), move to Filtered (2 bars with cutoff down), then introduce Pitched for 1 bar while increasing Saturator via Macro, then finish with Chopped into the drop. Stop recording.
  • Edit the recorded clip in Arrangement to make a tight 8-bar section; add sidechain compression and a subtle delay send on the last bar to lead into the drop.
  • 7. Recap

    You just completed a focused, intermediate Arrangement lesson on "A Little Sound oldskool DnB jungle arp in Ableton Live 12 using Session View to Arrangement View". Key points:

  • Design a punchy Wavetable arp and make it rhythmic with Arpeggiator + Note Length + Velocity.
  • Build multiple clip variations in Session View and map macros for expressive control.
  • Record your Session performance into Arrangement (enable Arrangement Record) so your macro moves and clip launches become automation lanes you can refine.
  • Use EQ, Saturator, delays, and subtle Redux for that oldskool jungle character, and apply sidechain so the arp sits with the drums and bass.

Now try the Mini Practice Exercise and then expand it into a full intro-to-drop section by duplicating, automating sends, and adding drum fills in Arrangement.

Ask GPT about this lesson

Chat with the lesson tutor, get follow-up help, or use quick actions.

Bigup 👽 Ask me anything about this lesson and I’ll answer in context.

Narration script

Show spoken script
Welcome. In this lesson you’ll build a little old‑skool DnB jungle arp in Ableton Live 12, and you’ll perform it in Session View before recording that performance into Arrangement View. This is an intermediate arrangement exercise. We’ll use only Ableton stock devices — Wavetable, Arpeggiator, Note Length, Velocity, EQ Eight, Saturator, Auto Filter and so on — to create a chopped, rolling jungle‑style arp at about 170 BPM.

What you’ll end up with:
- A short, repeatable Wavetable arp patch with rhythmic movement from an arpeggiator, note length control and subtle filter LFO.
- Several Session clip variations: a full arp, a filtered version, a pitched variation and a chopped version.
- A live Session‑to‑Arrangement performance: launching scenes, tweaking mapped macros and recording the whole performance into Arrangement View so you can edit it into a usable drum and bass section.

Let’s get started.

Preparation
Set Live’s tempo to 170 BPM and create a new Live Set. Add a MIDI track and name it “Jungle Arp.” Load Ableton’s Wavetable instrument on that track.

Designing the arp patch in Wavetable
Start with the oscillators. Set Oscillator One to a bright saw wave and move the wavetable position toward a brighter area. Add unison between three and six voices and detune slightly — around 0.10 to 0.25 — to get that thick, vintage stab. For Oscillator Two, choose a square or a sub sine an octave down, and mix it in low just to give body.

Next, the filter and envelope. Use the main filter — MG Low or State‑Variable — in a low‑pass setup. Set the cutoff roughly around one to two o’clock as a starting point and listen. Raise the Filter Envelope amount so the filter opens on each note; something around five to eight is a good range. Keep the amp envelope attack very fast, zero to ten milliseconds, decay in the 300 to 600 millisecond range, sustain low to medium and release short for that plucky stab.

Add movement. Use LFO 1 to modulate the filter cutoff gently. Sync the LFO to 1/8 or 1/4 and keep the depth low so the arp breathes rather than wobbles. If you want tiny slewing between notes, enable a small amount of portamento or glide.

Creating the MIDI effect chain
Above Wavetable create a MIDI Effect Rack and insert these devices in order.

First, Arpeggiator. Set the rate to 1/16. If you want a swung jungle feel, try the triplet option; leave it off for straight rolling DnB. Choose style Up or Up/Down for variation. Set Gate to around 65 to 80 percent for choppy stabs. Try an octave range of one to two — two gives classic old‑skool jumps. Turn Retrig on so envelopes restart every note.

Next, add Note Length after the Arpeggiator and shorten notes to between 50 and 70 percent to make them percussive.

Then add Velocity. Use Range and a little Random for dynamic variation; add Drive if you want higher velocities feeding the Saturator later.

Optionally, add a small Random or Pitch device with low amounts for subtle variation across some clips.

Audio effects on the Jungle Arp track
After Wavetable, add an EQ Eight and roll off sub frequencies under about 80 Hz so the arp won’t clash with your bass. Add a Saturator set to Soft Clip with roughly 3 to 5 dB of Drive for grit. Put an Auto Filter on the chain and map its cutoff to a Macro so you can perform live filter moves. Add Ping Pong Delay with a low mix, around eight to fifteen percent, synced to 1/8 or 1/16 dotted or triplet for a stereo feel. For a little lo‑fi texture, add Redux lightly — keep it subtle so the sound stays clear.

Preparing Session clips
Create a base MIDI clip in a Session slot. Make it one or two bars and enter a short two‑ or three‑note chord or a simple interval like root plus octave or root plus fifth. For jungle arps, a two‑note pattern with octaves often works best — the arpeggiator will turn that into a rolling pattern. Make sure the Clip Launch Quantization is set to One Bar.

Duplicate this base clip into four to six slots to make variations:
- Clip A: Base arp, no extra changes.
- Clip B: Filtered arp — either map a Macro to filter cutoff and set it lower for this clip, or draw automation in the clip’s Envelope for the mapped Macro.
- Clip C: Pitched arp — transpose the clip or use Clip Transpose up five to seven semitones for a brighter variation.
- Clip D: Chopped arp — reduce Note Length to very short or use repeated short notes in the clip to make it staccato.
- Clip E: Half‑speed or breathing moment — set the clip to play at half rate or change the Arp rate to 1/8 for a different rhythmic feel.

Advanced option: Follow Actions
For clips you want to evolve automatically, set Follow Actions to Next after two or four bars, with probability at 100 percent. You can create an evolving sequence that doesn’t need constant triggering.

Macro mapping for live control
Map key parameters to Macros for performance:
- Macro 1: Wavetable filter cutoff.
- Macro 2: Saturator drive.
- Macro 3: Arpeggiator rate or Gate for instant rhythmic changes.
- Macro 4: LFO amount, if needed.

Name and color your macros — Cutoff, Drive, Rate, LFO — so you can find them quickly while performing.

Performing in Session and recording to Arrangement
Create a Scene in Session View containing the Jungle Arp clips across one row, or be prepared to launch clips individually.

To record your performance into Arrangement, press the Arrangement Record button in the transport, then start launching clips and moving your mapped Macros. Arrangement Record will capture your clip launches and the macro moves as automation lanes in Arrangement View. If you prefer, you can use the Session Record Clip Launcher, but Arrangement Record is the most straightforward way to get automation into the Arrangement.

Performance tips while recording:
- Start with the base clip for a couple of bars, then bring in the filtered clip by lowering Macro 1 for the next section.
- Flip Macro 3 briefly to change the arp rate, for example to a triplet feel for two bars.
- Push Macro 2 to add Saturator for a build.
- Stop recording after you’ve captured an 8 to 32 bar section, depending on how long you want the piece to be.

Editing in Arrangement
Switch to Arrangement View and find your recorded arp parts. Consolidate useful regions with Cmd or Ctrl‑J and trim them into sections: intro, build, drop. Clean up automation lanes by smoothing breakpoints and removing accidental jumps. Duplicate and split regions to create structure — for example, copy an 8‑bar phrase to make a 16‑bar loop and then add variation by changing macro states or disabling sections.

Quick mix considerations
Add a Compressor after Saturator and enable sidechain to a Kick or a sidechain bus. Use a ratio around 4:1 with a quick attack and short release so the arp pumps subtly with the kick. Send some of the arp to a reverb and delay on Return tracks rather than loading the main chain with wet effects. Use subtle Redux for lo‑fi texture and automate it for transitions.

Common mistakes to avoid
- Recording with the wrong quantize settings can cause late or early launches. Set Clip Launch Quantize to One Bar for scene‑based recording.
- Not mapping macros makes live parameter moves clumsy. Map device parameters to Macros to record tidy automation.
- Leaving too much low end in the arp will clash with the bass. High‑pass or roll off sub frequencies below about 80 Hz with EQ Eight.
- Overdoing Saturator or Redux can blur the arp; keep those effects subtle and automate increases only at transitions.
- If envelopes won’t retrig as expected, make sure Retrig is enabled in the Arpeggiator.
- If you record macros without Arrangement Record enabled, they won’t be written into Arrangement automation.

Pro tips
- Add tiny pitch variations using a Pitch MIDI device with small semitone shifts and low chance to emulate detuned hardware.
- Create a second track with a differently processed copy of the arp — for example, heavy bitcrush and gated tremolo — and alternate between them in Session to give contrast when you record into Arrangement.
- For rapid chops, automate Note Length in clip envelopes to move from long to very short over a couple bars.
- Use a Return track with heavy Redux and delay for a “ragga” effect; automate the send for dramatic moments.
- Once the part is locked, bounce the track to audio to save CPU and then edit the audio aggressively for authentic jungle chops.
- Let Follow Actions run for generative results, then record only the macro changes so you capture human variations.

Mini practice exercise
Your goal is an 8‑bar arp phrase that evolves into a drop.

- Tempo: 170 BPM.
- Create four one‑bar clips in Session: Base, Filtered, Pitched (transpose up a fifth), Chopped (very short notes). Put them in one Scene and set Clip Launch Quantize to One Bar.
- Map Cutoff to Macro 1 and Arp Rate to Macro 2.
- Arm Arrangement Record, launch the Scene and perform: start with Base for two bars, switch to Filtered for two bars while lowering the cutoff, bring in Pitched for one bar while increasing Saturator via Macro, and finish with Chopped into the drop. Stop recording.
- Edit in Arrangement to tighten the 8‑bar section, add sidechain compression and a subtle delay send on the last bar leading into the drop.

Recap
You designed a punchy Wavetable arp and made it rhythmic with an Arpeggiator plus Note Length and Velocity. You built multiple Session clip variations, mapped macros for expressive control, and recorded your Session performance into Arrangement so your clip launches and macro moves became editable automation. You also learned quick mix tricks — EQ, Saturator, delay, subtle Redux and sidechain — and how to tidy up the Arrangement for structural use.

Final workflow reminders
Save iterative versions of your Live Set as you work. When your arrangement is stable, resample or freeze the arp to audio and store that audio in an archive track to save CPU and preserve the exact texture you created. Keep the arp musical and supportive: use arrangement dynamics to make moments special rather than the arp being constant.

Now try the mini exercise and expand it into a full intro‑to‑drop section by duplicating, automating sends and adding drum fills in Arrangement. That’s it — have fun building your little old‑skool jungle arp.

mickeybeam

Go to drumbasscd.com for +100 drum and bass YouTube channels all in one place - tune in!

Generating PDF preview…